Some tips for caring for indoor ferns
- Humidity. Water your fern only when the top of the soil is slightly dry. You can also place your pot on a tray or saucer filled with pebbles, filling the tray with water. The water will evaporate and increase the humidity in the air around the fern. Spray the fern with a spray bottle filled with warm water. Try to mist the air over the fern and let the mist settle on the leaves rather than spraying the leaves directly.
- Temperature. Most indoor fern species are tropical species, although not all require tropical conditions. Make sure the temperature in your room where the ferns are kept is around 21°C. They will not thrive in cold temperatures.
- Light. Ferns generally prefer indirect light; direct sunlight will burn their leaves. Adjust the blinds to reduce the amount of light, or move the ferns away from the window. The ideal option would be to place the plant near a window facing north. East and west windows let in too much direct sunlight.
- Pests. If you find pests such as whiteflies or aphids indoors, gently rinse the branches with water or spray them with a natural insecticide for indoor plants.
- Removing diseased fern leaves. If your plant is infected with a disease, cut off the affected areas. If your fern begins to die as a result of neglect, do the same by removing the damaged or dead part using scissors.
Reproduction methods
Fern propagation is possible in 3 main ways:
- The easiest way is to divide the bush . It is based on dividing the bulbs and then planting them on a marked area. It is preferable to carry out such work in the spring. When storing a divided bush over the winter, not all specimens can survive it.
- Reproduction by rhizomatous tendrils . In this way, species of ferns that grow tendrils are planted. Thus, cordifolia nephrolepis has the appearance of above-ground shoots that spread along the ground. They are buried 8-12 cm into the ground, watered intensively and soon a new plant appears.
- Reproduction by brood buds . This is the most time-consuming and least productive method. For planting, separate the buds (these are small tubercles on the bottom of the leaf), place them on peat soil or moss, moistening them daily. Then each spore is covered with a jar and put in a warm place. Within a short period of time, the “babies” take root, and after a month they are planted in the soil as a full-fledged plant.
Fern propagation by brood buds
The video explains how to plant ferns correctly:
plant seedlings
It is better to plant seeds in open soil that have previously been grown to the desired size. A peat-earth mixture is most suitable for fern growth, because from it it will receive the necessary components in order to grow and develop the root system.
Different varieties are planted in each box and additional nutrients are added. Different types of plants need appropriate fertilizers - compost, nitrogen, chalk and other substances.
Each package with a certain variety has an inscription indicating suitable minerals and can be purchased at a garden store. If the gardener collected spores himself, you should not apply any fertilizer.
If the plant species is unknown, it may react unpredictably.
The soil is heated; for this purpose, the vessel with it is placed on water vapor and heated repeatedly. It is recommended not to deepen the seeds, but only sprinkle them with soil on top.
How to replant an indoor fern
Don't forget to replant your ferns. Any fern will outgrow the pot in which it was originally planted. The time between repottings will depend on the condition of your fern, but you may need to repot it into a larger pot as early as 6 months after the initial planting.
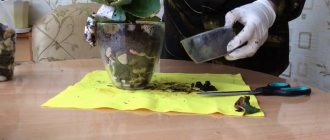
Young specimens need annual replanting. The best period for this procedure is spring. Transplantation is carried out using the transshipment method to prevent injury to the roots and reduce stress. Usually, before planting, the crop is watered abundantly or the container with the plant is placed in a basin of water. Then the container is turned over and the flower is taken out along with the soil. If the roots look healthy, then there is no point in shaking off the soil, but if there is rot, you will need to free the rhizomes from the soil.
The soil for indoor ferns is fine-grained and nutritious. You can buy special soil at a florist shop. If desired, the composition can easily be prepared independently. To do this, take turf, leaf soil, as well as peat, a little sand and humus. The ingredients are thoroughly mixed and then heated in a hot oven for 60 minutes.
Each time the pot for indoor fern is taken 3-4 cm wider than the previous one. Clay containers are an excellent solution, since clay perfectly absorbs excess moisture.
The transplant is performed according to the following scheme:
- laying a drainage layer (thickness up to 2 cm), it consists of stones, expanded clay and foam;
- half of the prepared soil is placed on top;
- then the lump of soil together with the plant is placed in a container, the roots are carefully straightened;
- The top of the pot is filled with soil and watered generously with water at room temperature.
After the procedure, the flower is placed in a permanent place where scattered sunlight will fall. Feeding is allowed only after 14-21 days.
The influence of moon phases on plants
- The new moon is the worst time for gardening work. Do not plant or replant anything. This unfavorable period lasts three days, the day before the new moon, the new moon and the day after.
- Growing Moon - The Moon grows itself and pulls up the energy and juices of plants. This is the best time to work with plants whose fruits ripen above the ground (greens, herbs, fruits, vegetables, flowers). You can plant, replant, graft, and so on.
- Full moon - during this period it is also not recommended for planting and replanting plants, but it lasts one day. You can do weeding, fertilizing, and treating the garden from pests.
- Waning Moon - juices and energy are directed down to the roots, so try to work with root vegetables, bulbous ones.
What does “first quarter” and “third quarter” mean in the Lunar calendar
After the new moon, the Moon begins to grow, its crescent appears in the sky and gradually increases in size. At some point in the lunar month, it turns out that exactly half of the lunar disk appears illuminated to us, and the other half is not visible. This phase of the synodic lunar month is called the first quarter.
See also: Planting ginger in 2021 according to the lunar calendar: favorable days
In the third quarter or last quarter, we again see exactly half of the Moon, but this is already a waning, aging Moon. It's like a mirror image of the first quarter.
Is it possible to visually determine what phase the Moon is in, whether it is waxing or waning?
Yes, you can. It's very easy to do.
Look at the Moon and mentally place a pencil near its “horns”. If you get the correct letter “P”, it means the Moon is waxing, but if you get “P” on the contrary, something similar to the letter “U”, it means waning.
There are some more rules and recommendations that should be followed:
- It is best to plant plants at dawn or before lunch.
- When the Moon is waxing, use mineral supplements.
- When decreasing - organic.
What plants can be planted on the waxing Moon?
The waxing moon is a favorable phase for the growth and reproduction of plants, the period of their most intensive growth.
During the waxing Moon phase, it is favorable to plant ground fruits, flowers, as well as medicinal and lawn herbs, fast-growing shrubs, vegetables, leaf crops, including roses.
During this period, it is good to sow the lawn and replant indoor flowers, plant garden flowers, and harvest.
What plants can be planted on the waning moon
During the waning Moon phase, it is recommended to care for plants, fight pests, sow and plant plants whose fruits ripen underground, various fruit bushes and trees.
Good for the waning moon:
- Plant trees and seedlings
- Cuttings from plants
- Divide perennials
- Trim and shape trees and shrubs
- Collect seeds
What can be planted during the new and full moon?
These days the earth freezes and does not give its energy to plants, so it is better not to plant anything these days.
On full moon days it is good to collect fruits (except for root vegetables)
You can care for plants during a Lunar Eclipse
On the days of lunar eclipses, it is better NOT to carry out any work with plants!!!
Why does indoor fern dry out?
All varieties of indoor ferns can suffer from the problem of leaf drying out. This can happen for several reasons:
- Failure to comply with crop care rules. Most often this happens in the autumn and spring, when the heating season in the house begins or ends. Due to excessive heat and dry air, the tips of the leaves begin to dry out.
- Incorrect watering. It is very important that the soil is constantly moistened, but there is no excess moisture.
- The appearance of pests. For example, scale insects lead to the death and shedding of leaves, so it is necessary to promptly inspect the flowerpot for the presence of parasites.
If insects are the cause of drying of the leaves, then use toxic insecticides. In case of increased dryness, you need to spray the air with a spray bottle. You can also move the flowerpot away from heating appliances if they are too close to them. If there is a shortage of water, the crop will have to be revived. To do this, the flowerpot is immersed in a pot of water and left there until completely saturated with water. Thanks to this “bathing” you can significantly improve the condition of your indoor fern.
Watering and fertilizing after transplanting
After transplanting, you need to monitor watering. Prolonged drying of the earthen coma has a bad effect on the plant. Irrigation is carried out immediately after the top layer of soil dries. At the same time, the plant should not be over-watered; the roots may rot and die. Watering can only be done with settled water, or preferably melted water. Additionally, you need to monitor the humidity in the room. Dry air can cause pests and diseases. It is advisable to spray the above-ground part with a spray bottle at least once a week.
See also: Lunar calendar for planting seedlings in February 2020: favorable days
Feeding should be done once every 2-3 weeks. To do this, you can use complex mineral fertilizer. You need to take half the portion recommended in the instructions. The best option would be fertilizers with a high potassium content, while organic ones will even accelerate the growth of leaves and make the plant stronger.
How does indoor fern reproduce?
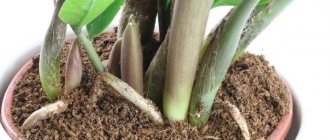
The simplest method of propagating an indoor fern in a pot is to divide the bush. Typically, this procedure is performed in parallel with culture transplantation. Taking the fern out of the pot, you can immediately see the small basal rosettes. These specimens are carefully separated from the mother bush and then planted in separate containers or miniature greenhouses.
A prerequisite is the presence of a cover on the seated containers. Clear or glass caps are perfect for this. When growing such units, it is very important that the optimum temperature is constantly maintained and that there are no drafts.
Whatever indoor fern in a pot you choose, if you provide it with proper care, you can enjoy an exotic plant right at home. Such crops guarantee a beautiful appearance and effective purification of indoor air.
What types of ferns are suitable for growing in the garden?
Today, fern is very popular with many gardeners who have thoroughly studied its planting and care in the open ground.
They decorate gardens, ponds, and create wonderful landscape compositions.
We list several types of winter-hardy ferns that will feel good in the garden in our climate and are excellent for growing:
- Common bracken. The most beautiful view. Its roots are used in folk medicine. The height of this fern is 80 cm.
- Female Kochedyzhnik. Reaches a meter in height. Lives in one place for up to 10 years.
- Male shieldweed. A very tall fern that can shoot up to 1.5 m, but grows slowly. Propagated by cuttings of rhizomes. An excellent garden fern, growing and caring for this plant is not difficult.
- Bush's shieldweed. Evergreen large fern.
- Common ostrich. This type of fern very quickly creates spectacular lush thickets. Feels great both in the shade and in the sun.
- Asplenium. People call it Kostenets. Many aspleniums love warmth, but some are frost-resistant and can survive cold temperatures down to -18 ° C. Growing this type of fern in the garden is very popular today.
- Nest-like asplenium grows even without soil, since in nature it is accustomed to rooting on heaps of leaves, snags and trunks. Grows up to 1 m in length. In specialized stores you can purchase dwarf varieties of this fern.
- Bulbous asplenium is a deciduous fern. Its historical homeland is New Zealand. This species can be grown in the garden if the roots are covered with a layer of dry leaves for the winter or dug up and stored in the cellar until spring along with a lump of earth. Plant length is approximately 60 cm.
- Viviparous asplenium. Buds grow on the upper side of the curved, dissected leaves and fall to the ground, turning into new specimens.
Features of reproduction
The fern reproduces by dividing the bush and spores that form on the back side of the frond.
Dividing the bush
When transplanting, the bush is divided, in which:
- The day before the procedure, the area around the fern is moistened.
- An adult plant is removed from the soil and divided into several parts, each of which must have at least one apical shoot.
- The cuttings are planted in prepared holes and covered with substrate, after which they are watered abundantly.
Reproduction by spores
You can get new plants by sowing spores in early January as follows:
- A plastic box with drainage holes at the bottom is filled with a calcined substrate with a 4 cm layer of sand, peat and leaf soil in a ratio of 1:1:2.
- Spores are distributed over the soil surface.
- The container is covered with cellophane and moved to a warm, bright place, where bottom watering is provided to the crops.
- After the shoots emerge, the cellophane is removed.
- At the end of winter, the plants are transferred to a greenhouse, from which they are transplanted into open ground after the onset of stable warmth and the disappearance of the threat of return frosts.


