What is the ideal soil for “female happiness”?
To keep your indoor plant healthy, you need to select the soil.
The soil nourishes the flower, so it is important to maintain the proportions of the constituent substances. Too wet soil is not suitable for it. Although in nature he loves swampy places, indoor conditions are slightly different. The ideal soil for the plant will be breathable, loose and moist. To supply oxygen, drainage in the form of sand or pebbles is added. So it becomes easy. The soil must allow water to pass through well. Acidity is weak or neutral, no more than 5 - 5.5.
Soil composition:
- charcoal;
- rotted leaves, compost;
- expanded clay, pebbles or other drainage;
- peat;
- sphagnum moss, the flower loves it;
- sand;
- fern roots;
- minerals.
Soil requirements and composition
Knowledge of natural growing conditions allows, if necessary, to correctly select soil for spathiphyllum, the composition of which is multicomponent. It includes plant and leaf humus, peat, and the remains of twigs.
the “female happiness” flower, which perfectly decorates any interior, is suitable for growing at home on a loose, air-filled, light and sufficiently moist substrate with a neutral reaction. Weak acidity of the soil (pH ≈ 5.5).
To ensure optimal breathability, coarse sand is used as a component of the soil mixture. The drainage pad serves the same purpose.
If it is necessary to reduce acidity, use fluffed lime, dolomite flour, and powdered chalk. When the soil is alkaline, the proportion of leaf compost or peat is increased to increase acidity.
What is better - a self-made or purchased substrate?
You can buy ready-made soil in a store and plant the plant right away. If time allows and there is a desire, then cook it yourself. Which is better is everyone's choice.
Advantages of the finished substrate:
- Accurate acidity.
- Save time.
- The composition is indicated.
- Available in winter.
- No pests.
Advantages of homemade:
- Low cost or free.
- The components are precisely known.
- Confidence in safety.
- Pleasure from the process.
What soil to plant in: pros and cons of purchased soil
Whether to buy ready-made soil or make it yourself is up to everyone to decide for themselves. But for any chosen option there are positive/negative sides. The positive aspects of the finished substrate include:
- Saving time for preparing the substrate. Especially if you still need to get the ingredients for home cooking, this takes even more time. It is enough to add sand or perlite to the purchased one, then mix.
- The components and the level of acidity are written on the packaging of the purchased product. When preparing it yourself, you can only guess about the real acidity.
- The season of the year is not always suitable for preparing homemade soil, but purchased soil is always available.
- Lower percentage of pests with purchased substrate. When performed at home, this probability increases.
Negative aspects of soil “from the store”:
- The high cost of purchased substrate, especially if you need to replant more than three plants at once.
- Inconsistency with the declared composition and characteristics on the packaging. After transplanting into such soil, the plant may die or become sick. When preparing it yourself, you always know what composition the flower is being transplanted into.
- It is not always possible to buy exactly the composition that is required. Therefore, what is available is acquired. Therefore, the plant requires regular monitoring and systematic additional feeding.
Important! You can use a universal primer if the store does not have any other primer that is more suitable in composition.
How to make your own substrate?
If you want to prepare the soil yourself, you need to stock up on ingredients. This is especially convenient for those who have their own plot. Beginning flower growers will also cope with the task. The main thing is to disinfect all components. Warm it up, treat it with an ultraviolet lamp, and pour boiling water over it.
What components do you need to take:
- compost or humus 1 part;
- turf soil from the garden, 2 parts;
- sand 1 part;
- peat 1 part;
- charcoal 0.5 parts;
- brick chips or pebbles 0.5 parts;
- sphagnum 0.25 parts.
Pebbles are needed for drainage so that there is breathable soil. Moss will retain moisture and also has bactericidal properties. Sand as a leavening agent.
Step-by-step instructions for preparing the mixture:
- Prepare a pot with holes in the bottom. The diameter depends on the size of the plant. Select in such a way that the roots fit freely. And from them there was another 2-3 cm to the walls of the pot.
- Place pebbles or other drainage on the bottom. Layer about 2 cm.
- Mix the remaining ingredients and set aside in another bowl.
- First place the plant in the pot, on the bottom layer. Then take soil from another container and fill the free space.
- The topmost layer will again be drainage.
Do-it-yourself soil preparation
Spathiphyllum's soil requirements are not too stringent. It is easier to plant them in a ready-made substrate or improve it than to make them from different components.
If desired, gardeners, in addition to those mentioned above, can use one of the recipes:
- leaf and turf soil, acidic peat, humus, coarse sand – 1:1:1:1:1;
- high peat, dry mullein, sphagnum, leaf soil, sand – 1:1:1:1:1;
- garden soil, perlite, orchid substrate, acidic peat – 2:2:3:3.
How to choose a purchased mixture?
Ready-made mixtures are sold in flower shops, gardening departments, and on the market. There is a special soil for spathiphyllum. But it is also suitable for araceae, the family of which the flower belongs to.
However, it is worth considering that the mixture is not suitable for anthurium. It is also of the aroid family, but prefers low-lying peat. And all other related flowers love the mount. Such peat becomes compacted over time, which is detrimental to the root system of spathiphyllum.
Ready-made soils from different manufacturers vary in price and composition:
- There are completely natural soils, using natural components, for example, Russian-made “Biomaster” for aroids. Price per package of 2 kg from 50 rubles. It contains sphagnum moss.
- From cheap mixtures "Agrosver" for spathiphyllum. It is completely ready for planting and transplanting. The components are sterilized. For a package of 2 kg from 30 rubles.
- More expensive "Vermion" for aroids. It contains a lot of nitrogen, organic matter, potassium and phosphorus. Price per package of 2.5 kg from 40 rubles.
When choosing soil you need to focus on:
- to customer reviews;
- description of the composition (a bona fide manufacturer indicates all the components of the soil);
- what plants is it intended for?
- tips for use.
When should spathiphyllum be replanted?
If you properly care for spathiphyllum (water it in a timely manner, provide the necessary temperature and light conditions), then its growth will be rapid. In this case, the bush occupies the entire pot, and the root system develops into a thick lump, entwining the entire soil inside the container. Spathiphyllum loves tight spaces, but needs to be replanted into a larger pot every 3-5 years. There may be 2 reasons for this:
- the plant does not bloom for a long time;
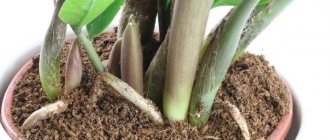
- Old roots stick out from the soil in the pot, and the rosettes sway.
Pull apart the curtain and take a closer look at the lower leaves. If they dry out, the plant also needs to be replanted. But if the leaves wither and turn yellow only at the tips, the plant does not have enough moisture. It's not a matter of watering, but of too dry air. Perhaps the spathiphyllum is too close to the radiator. Move it to another place or install a humidifier in the room.
Excessively protruding roots are a sign of the need for replanting
Experts recommend replanting spathiphyllum in the spring and not in the fall (for example, in November). But for tropical plants living indoors, this is not important. The main thing is that the temperature in the room where you will replant the flower is not lower than 20 degrees.
Note! You cannot replant the plant during its flowering period. It’s better to wait a little until the inflorescences fade.
If you bought spathiphyllum in a store, wait 3 weeks before the first transplant. The flower needs to get used to the new room and regime, acclimatize; replanting may be too stressful immediately after purchase. And the root system needs to grow a little.
Prepare for the transfer in advance. You will need:
- the pot is one size larger than the previous one;
- film to cover the work surface;
- pruner;
- scoop;
- latex gloves;
- priming.
Wash the transplant pot thoroughly and pour boiling water over it. We will talk about soil for spathiphyllum separately.
How to improve the finished mixture?
Sometimes it is not possible to purchase soil specifically for spathiphyllum, then it is better to add the necessary components for improvement to the finished mixture:
- if the soil is dense, you need to add sand and vermiculite for looseness;
- to better penetrate air to the roots, add perlite and brick chips;
- if not included, add sphagnum moss, it protects the roots from rotting.
You cannot add a lot of such additives, no more than 10% of the total mass of the soil. Of course, you can plant the plant directly in prepared soil. But for the sake of the health of the flower, it is better to use supplements.
Does the flower need fertilizing?
Ready-made soil is often poor in mineral content. Therefore, spathiphyllum needs to be fed:
- The most frequent fertilizing is done during flowering. Then you need to apply potassium and phosphorus fertilizers about three times a month.
- When the flower grows, nitrogen fertilizers are applied 2 times a month.
- During dormancy, usually in winter, fertilizing is done once a month with complex fertilizer. Fertilizers are always used after watering.
How to prepare soil at home
The ingredients must be mixed in a clean, treated container. First, the base for the mixture is poured, and only then the additional ingredients. Lastly, disintegrants (sand, agroperlite) are added. Mix everything thoroughly so that the mass is homogeneous.
In what soil to plant spathiphyllum:
- All ingredients must be fresh.
- You can open additional ingredients only immediately before mixing.
- Dosages must be correct.
- Before planting, be sure to measure the acidity level. If necessary, you will have to adjust it.
As soon as the substrate is ready and all the characteristics are suitable for the flower, you can begin planting.
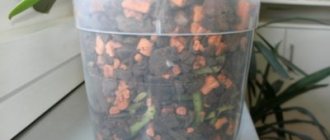
Selection of drainage
The presence of drainage ensures proper growth and development of spathiphyllum. Thanks to it, excess water leaves and air penetrates to the roots. The pot should also have holes in the bottom. It is placed on a pallet. Excess liquid flows there and needs to be drained.
The following is used as drainage:
- pebbles;
- perlite (small rock pebbles);
- expanded clay (porous safe material);
- brick chips;
- any small stones.
It is important to arrange these materials correctly in the pot. Place a layer of about 2 cm on the bottom. Too little drainage will not provide adequate ventilation to the roots.
After purchasing the material, you need to hold it in boiling water for 5 minutes or simply pour it over it. This will protect the flower from possible pests. When choosing, avoid sharp edges to avoid damaging the roots.
Disinfecting the land before planting or transplanting spathiphyllum
Disinfection of self-prepared soil is an important stage in planting a flower. Quite often, when using soil from a site, insects appear some time after planting the house. The thing is that pests lay eggs in the ground, and when the larvae hatch, they begin to eat the first plants they come across. This creates problems not only for spathiphyllum, but also for all other indoor plants.
Planting a plant
Methods for soil disinfection:
- Double freezing of the soil. This method means that the soil will need to be frozen in the freezer. But freezing alone will not be enough. Most microorganisms calmly survive the drop in temperature. After the first frost, you need to put the soil in a warm place and water it. This will be a signal to the larvae that winter is over and warmer weather has arrived. Then the soil is re-placed in the freezer after a few days (4-6 days). After the second frost, all larvae and insects will die.
- Using boiling water. To do this, you need to bring the water to a boil and pour plenty of boiling water over the soil. Then you need to cover the container with polyethylene and wait until the soil cools to room temperature. This is the easiest and fastest way.
- The third method is to use a solution of potassium permanganate. To do this, you need to prepare a strong solution of potassium permanganate and pour it on the ground. After a few days, you can start transplanting.
Important! It is advisable to process not only homemade, but also purchased mixtures. Experience shows that not every substrate is treated against pests.
Possible problems with illiterate care and ways to solve them
The wrong soil can lead to problems. From lack of flowering to death. This can be solved by transplanting the plant into the desired soil.
Main consequences:
- Does not bloom - the reason may be in the pot or soil. For spathiphyllum to bloom, it is planted in a small flowerpot (what pot is suitable for spathiphyllum?). If this measure does not help, then the soil is not selected correctly. Perhaps there is not enough potassium or phosphorus with excess nitrogen. Then the leaves grow actively. This means you need to add the missing fertilizers.
- Root rotting - if action is not taken in time, the flower will die. The reason is excess humidity. Possibly little added drainage. The only thing that will help is replanting it in new soil, where you add activated carbon and moss. Trim rotten roots and dry them. After transplanting, do not water for 2-3 days.
- The plant is withering - perhaps the soil is too dense. This may be due to a lack of natural raising agents. Either the soil has become outdated and has become lumpy over time. A transplant will help.
- Black spots appear - this indicates high acidity in the soil or an excess of fertilizers. Need an urgent transplant.
- The appearance of yellow spots - the leaves turn yellow, while the veins remain green. Possible iron deficiency. Spraying with iron chelate will help. It is better to replant in new soil.
- Parasites on the plant - most likely insects lived in the soil. Or it was poorly processed. It is necessary to replant and treat the soil and drainage.
Spathiphyllum is a beautiful and unpretentious flower. But it has special care features. It is not difficult to follow the rules and know the preferences of the plant. But it will protect you from problems and diseases. Moreover, the flower is picky mainly about the soil.
If you find an error, please select a piece of text and press Ctrl+Enter.
Transplantation process
Young plants up to three years old require annual replanting; starting from the age of three, spathiphyllum needs to be replanted every two to four years. The procedure itself is not complicated and takes little time.
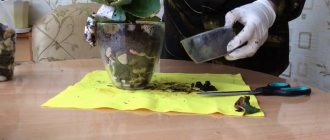
We place drainage at the bottom of the pot: pebbles, polystyrene foam, expanded clay or walnut shells. The layer should be two to three centimeters or one third of the container. Next, fill two-thirds of the volume with soil. We take out the spathiphyllum using the transshipment method and inspect the roots for damaged ones. The normal color of the roots is white. If there is no rot and there is no need to separate the “babies”, then in the same form we place it in the prepared container. If there are rotten roots, they need to be cut off, treated with activated carbon and allowed to dry for an hour or two. Then continue replanting by adding a little coal to the soil.
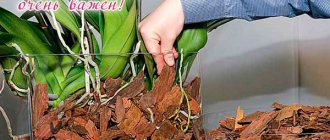
Important! It is convenient and safe for the root system to dip the pot in water before replanting and let the old soil liquefy until it becomes muddy. After this, rinse the roots and let them drain for a couple of minutes. Not a single root will be harmed.
We place the pet exactly in the center of the new house, straightening the roots, and add soil to strengthen it. Leave about a centimeter to the edge of the pot. The root collar should not be completely covered! This significantly affects further flowering. We water it thoroughly so that the water reaches the bottom of the pot and ends up in the pan. Add more and compact the soil a little on top. We pour out the excess moisture and place the flower in its place. For irrigation, only settled, room temperature water is used.
To provide him with maximum comfort, it is recommended to set up a mini-greenhouse: put a bag on the potty for a month. A humid environment that is comfortable for him will help him adapt and settle in faster. With this method, it is important to periodically open it and ventilate it, otherwise there will be no benefit from the procedure. You can spray it daily and place it on damp stones. The pot should be placed in a dark place.
You can move it to its usual place after a month or a month and a half, ensuring that the light is diffused and returning to the standard humidity level. Spathiphyllum does not like constant rearrangements and reacts to them sharply: with scant flowering, pale leaves, and shredding of leaves. It should not be placed near electrical appliances or in drafty areas. The chosen place for it should be one, seriously and for a long time.
Important! If it is necessary to replant a flower during flowering, it is recommended to cut off the peduncles at the base. This procedure will allow it to recover faster after replanting without wasting energy on flowering.
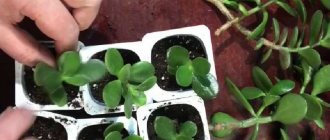
If during replanting it is necessary to separate the young growth from the main root, this must be done as carefully as possible, without damaging the roots. It is advisable to transplant the babies into a transparent container to observe the growth of the root system. Plastic cups will also work. We carry out replanting as standard: drainage - one third, soil - two thirds. Be sure to drill holes in the bottom of the containers so that excess water can drain out! When the kids fill the cups as much as possible with the root system, we transplant them into full-sized pots.
Consequences of incorrect substrate selection
Sometimes the plant does not look good, the foliage begins to turn yellow and dry out, damage is noticeable on the roots, the flowering period is delayed, and if it blooms, the inflorescences are small and not bright. Even proper and regular watering cannot solve the problem.
The reasons for such phenomena are the incorrect composition of the soil or its old age. Over time, the substrate clumps into a lump, becomes dense, saline, and depleted. It is recommended to change and renew the soil every 3-4 years.
Gardening tips for rooting
The procedure for transplanting a plant is simple and does not require special knowledge or labor-intensive preparation.
Gardeners' advice on the procedure:
- During the formation of buds and flowering, the bush is not replanted (growth and development slows down).
- The mixed prepared soil is disinfected (calcined in the oven, rolled in the microwave or placed in the freezer for 5 minutes).
- Pots and flowerpots are cleaned, soaked and washed thoroughly (when reused).
- Pruning is mandatory - the seedling is cleaned of dry root shoots and faded stems.
- Before the procedure, the plant is watered abundantly (to safely remove the earthen clod and divide the bush).
- Planting containers and tools are treated with any fungicide or vinegar solution.
- Pour a layer of drainage (expanded clay, pebbles, clay fragments, bark) into a dry, clean pot - up to 2-3 cm.
- Fill 1/2 of the container with soil, place the planting bush strictly in the center, and cover with the remaining substrate.
- Aerial roots are not buried (they subsequently take root and become additional support for the plant).
- The substrate is lightly compacted, after settling (during watering) a small amount of soil is added.
- For the first 4 days, the seedling is kept under a glass or cellophane cap.
- Regular abundant watering and irrigation of the bush is necessary.
In conclusion, it should be recalled that spathiphyllum is an exotic flower, with thin delicate roots and brittle stems, it must be planted carefully and carefully. Ordinary garden soil is not suitable for tropical inhabitants. A little knowledge and effort - and lush, abundant greenery, spectacular regular flowering is guaranteed.
Purchased or “homemade” soil?
Specialized garden stores sell soil designed specifically for growing spathiphyllum. This option is preferable when the gardener does not plan to prepare the soil himself. A universal substrate for the Araceae family could be a good solution. It is acceptable to use soil for any flowering indoor plants. It is not recommended to use purchased mixtures in the form in which they are purchased. Loosening material should be added to the soil. It can be vermiculite, brick chips, perlite, sand. Its amount should be approximately ten percent of the total soil composition. Otherwise, the earth may turn out to be too “heavy”. The store-bought mixture needs some modification. This is the reason that many amateur gardeners prefer to prepare the soil themselves. There are several options for preparing a nutrient substrate for growing spathiphyllum. They differ slightly from each other, which allows you to select a composition whose components are available to the grower.
Description and features
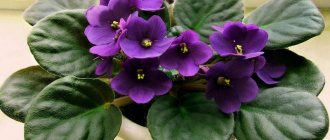
Spathiphyllum is a perennial houseplant that is considered stemless. It has leaves growing from the very root. They can be oval or lanceolate in shape. Flowering begins in spring. Flowers can be different - white, red.
The culture is very popular among flower growers because it is undemanding in care. The undoubted advantage of the plant is the decorativeness of the leaf plates. In order for a flower to develop well, it needs to be properly cared for.
Natural conditions
To understand how to successfully grow “female happiness,” you should familiarize yourself with the conditions in which this plant grows in nature. Spathiphyllum is native to South American and Malaysian tropical forests. Favorite places of growth are flooded or marshy areas, the banks of reservoirs.
That is, in the usual habitat - high air humidity, loose and damp slightly acidic soil. In such conditions, “female happiness” successfully grows and blooms. And what conclusion follows from this? What soil is suitable for spathiphyllum? In the natural environment, soil includes fallen leaves, rotten branches, charcoal and compost. Based on this knowledge, you can create your own nutritional mixture.