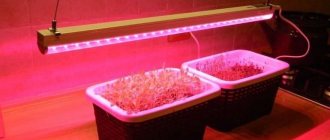
11773
Cuttings are a method of propagating plants using cut woody or non-woody shoots. Dried, deformed, infected branches are not suitable for rooting. This method is ideal for propagating many flowers and garden shrubs, since it does not cause much trouble, and the result exceeds all expectations. The gardener gets enough seedlings to decorate the local area, window sills and a nice present for friends.
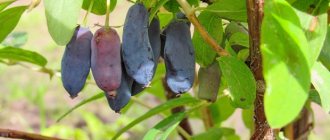
Hydrangea bush near the fence
Flower growers give many practical recommendations about propagating hydrangea by cuttings in spring and autumn. Each of them contains information on the selection and timing of procurement of planting material, rules for cuttings of various types of hydrangeas.
Peculiarities of propagation of different varieties of hydrangea
Despite the fact that there are several dozen varieties of this amazing flower, only two are most often cultivated in gardens - paniculate and large-leaved. Both hydrangeas have their own characteristics of propagation by cuttings:
- Paniculate hydrangeas are usually propagated in the summer. Experts advise how to propagate paniculata hydrangea from cuttings in the fall, although this is not at all easy to do in open ground conditions. That is why cuttings should be planted in pots with nutritious soil and grown in a room for 2-3 years. Also, when rooting a variety, you should create optimal conditions: provide the plant with a sufficient amount of moisture. To do this, dig a trench around the flowerbed and fill it with water. Water is topped up daily. Cuttings of the paniculate beauty are taken at the end of June; the leaves should not be cut or shortened. A mixture of peat and sand is used as soil, which is kept constantly moist.
Propagating hydrangea by cuttings is a long and troublesome task. But this is perhaps the only way to obtain a large amount of inexpensive planting material. Using cuttings, you can create beautiful borders, mixborders, and flowering areas in the garden. Once you plant a hydrangea in your garden, it will later be very difficult to refuse to propagate it, because it is beautiful in everything. Also read our article “How to feed hydrangea during flowering.”
Propagation of hydrangeas by cuttings in spring, garden and indoor
Many people pay great attention to decorating their garden plot. To do this, they plant ornamental shrubs that bloom beautifully, create flower beds and flower beds, planting perennial and annual flowers, arrange alpine slides, and arches of climbing plants. And, perhaps, all flower growers value hydrangea for its attractive appearance and lush flowering.
Hydrangea seedlings can be purchased at a nursery, but not everyone can afford this expensive purchase. But many gardeners who grow this amazing flower can exchange varieties with each other and share a pleasant shoot with neighbors and friends. And for this you need to propagate the plant yourself. How to propagate hydrangeas from cuttings in the spring ? This is what we will talk about next.
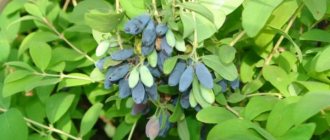
propagation of hydrangeas by cuttings in spring
Experienced gardeners advise
I recently read about this method of propagating hydrangeas, which Victoria Barabash shared with us, in a gardening magazine. Very affordable and original!
If you bought a hydrangea seedling in the fall, then it is just for you.
So, we tear off all the leaves on the seedling, cut off the immature green shoots and take it out of the container.
Now it needs to be buried in the prepared trench. We make a trench of such a size that the seedling can be laid in it obliquely, with the condition that the root ball will be lower and the branches higher.
First of all, cover the roots with soil and compact them well. Then we fan out all the branches of the seedling and cover them with soil too.
To prevent our seedling from freezing in winter, we cover it with another layer of peat or humus on top.
As soon as the bright spring sun warms the ground, the buds on the branches of our buried hydrangea will begin to grow.
At first, new shoots will receive nutrition from the common root system, and later they will form their own roots.
At the end of summer, we dig up a hydrangea bush that has been dug in this way and separate the newly formed shoots with their own root system.
This is how, by burying one plant, we can get ten new seedlings with well-developed roots of their own.
Now, dear readers, you have learned how hydrangea propagates and you can successfully plant several more of your favorite varieties of this magnificent plant on your plot, or even supplement your budget by growing seedlings for sale.
I also suggest watching a very good video about propagating hydrangea by cuttings in order to visually consolidate the information received.
See you soon, dear readers!
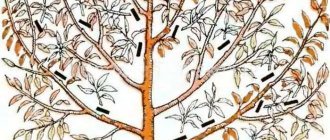
Methods of culture propagation
Hydrangea can be propagated in several ways:
- seeds;
- layering;
- cuttings;
- offspring;
- dividing the bush.
The process depends on the time of year: spring or autumn.
Seed propagation is more difficult. The seeds do not require preparation; they are sown on moist soil directly on the surface, covered with glass until seedlings appear. Shoots will appear in 18-20 days. The seedlings are grown for 2 years to a height of 30-40 cm and only then planted in a permanent place. Moreover, natural hydrangea is propagated by seeds. And varietal plants, when propagated by seed, often lose their best decorative qualities.
hydrangea propagation
Propagation by cuttings
With rocky blanks . They depend on the condition of the mother plant.
In late spring (May-June), young tops 10-15 cm long are used for cuttings. This is the best period when sap flows along the shoots. The branches receive a lot of nutrition, quickly produce roots and take root well.
But from the last ten days of June to the beginning of July, lignified branches are selected for cuttings.
In the fall, shoots with buds are used, which take root well in the soil and form a good root system.
Selection of the mother plant . To cut high-quality cuttings, you need to consider:
- the state of the bark, on which the speed of rooting depends. Well-wooded shoots have difficulty producing roots, and young branches quickly produce roots;
- location of future cuttings. Basal branches take root 3 times faster and suffer less pain than
- lateral. Preparations on the sunny side are less likely to root shoots growing in the shade;
- a month before cutting, in order to ensure successful rooting of the workpieces, the mother plant is no longer fertilized with nitrogen fertilizers;
- condition of foliage. Shoots with small foliage take root better. Therefore, large leaves of cuttings are cut in half;
- age of the mother plant. The bush must be healthy and no older than 10-12 years;
- cutting time. It is better to cut the workpieces in the morning, when the bush is most saturated with moisture. The success of rooting depends on this. And then you need to make sure that they don’t dry out, so they are immediately placed in water;
- The cut branch should be no more than a year old.
The best characteristics of the cuttings: length 15-20 cm, thickness up to 7 mm, good growth buds (at least 4 buds), short internodes. These rules apply to garden and home flowers.
Propagation of hydrangeas by cuttings in autumn
Rooting methods
Any type of hydrangea can be propagated by cuttings: paniculate, large-leaved, petiolate, tree-like. The main thing is to properly cut and prepare the planting material for rooting.
- To do this, in 2-3 days you need to move the home hydrangea into the shade, and cover the garden bush with a covering cloth.
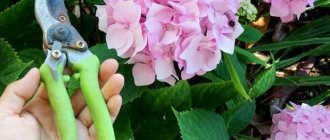
- Before cutting, a sharp knife (secateurs) should be disinfected in a solution of potassium permanganate, alcohol, and vodka.
- A shoot is selected with several pairs of nodes and cut obliquely (at an angle of 45 degrees). Large upper leaves are cut in half to reduce the outflow of nutrition to them, and the lower leaves are removed completely.
- Cut shoots are placed for 2 hours in a biostimulant solution (Zircon, Epin) so that the leaves are above the solution. Or powder the cut with any root-forming agent Heteroduxin, Kornevin. If these drugs are not available, honey will do (1 tsp per glass of water). These techniques speed up the process of root emergence.
- The stems are sprayed with a weak solution of potassium permanganate to disinfect and give flexibility.
Rooting can be done in a substrate or in water.
Rooting in water
This is the easy way. Water promotes the development of roots in cut shoots. It is interesting that you can observe the process of root regrowth. There are practically no nutrients in the water and you need to add growth stimulants and fungicides in liquid form.
- To prepare a nutrient solution for cuttings, add 1 tbsp to 200 ml of water. l. cinnamon;
- it is better to use containers with dark walls (it has been proven that roots appear faster in such containers);
- for every 200 ml there should be 2-3 cuttings, which are immersed in the solution to 1/6 of the length;
- the nutrient solution is not changed until the end of the process, and when the liquid evaporates, a warm solution is added;
- autumn preparations are germinated in partial shade, and spring preparations with a lot of foliage in a sunny area;
- To protect the nutrient solution from rotting, it is necessary to regularly aerate it.
- When the shoots grow roots up to 2-5 cm, they can be planted in slightly acidic soil.
Landing in the ground
Typically, a mixture of river sand and vermiculite is used in a 1:1 ratio, or garden soil, perlite, river sand, and peat in equal proportions.
Wool ropes are laid at the bottom of the planting container in increments of 5 cm, the ends of which are lowered into any container filled with water. The substrate is poured into the container. This system helps the soil to always be moist, the rhizomes will not rot. The planting container should be wrapped so that the root buds are warm, which will allow roots to appear as quickly as possible. The blanks in the box are placed at an angle of 45 degrees at a distance of 10-15 cm. The cut is immersed in the ground by 2-3 cm, the box is covered with film or covering cloth and placed in a lighted place. It is necessary to monitor the presence of water in the container, and when the buds swell, fertilize.
If everything is done correctly, the cuttings will take root in about a month. Now they should be planted in individual cups made of peat or plastic. After 3 months, replace the cups with large containers for home growing or plant them in the ground, covering them for the winter. To do this, cover the seedlings with fallen leaves, build a shelter over them and cover them for the winter, like roses.
Differences between cuttings and hydrangea species
Effective reproduction can be achieved by taking into account the characteristics of each species.
Paniculate hydrangeas need to be propagated in the spring, while tree hydrangeas are more often propagated by cuttings in the fall.
For a large-leaved species, when propagating, the leaves are cut in half, and when planting in the ground, the top is cut to 10 cm from the surface of the ground, so that the seedling will quickly take root and bush well.
Propagating hydrangeas by cuttings in the spring is a popular method. It gives a high percentage of rooting and does not require much effort and time from the grower. During the formation of the bush in the spring, the preparations are cut, and over the summer they take root and are ready for planting by autumn.
If you find an error, please select a piece of text and press Ctrl+Enter.
Preparing hydrangea cuttings for wintering
To cut hydrangea in spring and summer, it is necessary to cut off the top of a young side shoot with 2-3 pairs of leaves. In this case, the two lower leaves should be removed and an oblique cut (at an angle of 45 degrees) should be made on the cutting just below the node. The upper cut is made straight and all remaining leaves are shortened by half.
For rooting to be successful, it is recommended to soak the cuttings in a solution of a growth stimulator (Epina Extra or HB101) - according to the instructions.
Then dust the lower cut with a root formation stimulator in the form of powder or granules (for example, Kornevin).
In addition to the cuttings themselves, prepare the container, substrate and water (in a watering can and spray bottle) in advance.
For rooting hydrangea, a mixture of coarse sand and peat in a 1:2 ratio is suitable.
Then the surface of the soil is sprinkled with wet sand (2 cm layer).
Hydrangea cuttings are planted to a depth of 2-3 cm.
The distance between them should be such that the leaves of the cuttings do not touch each other. Usually this is at least 5 cm.
The cuttings are sprayed with clean water using a spray bottle.
Then cover with a plastic bag or a glass or plastic cap (you can use a cut bottle).
The container is placed in a warm and shaded place. The cuttings are watered regularly: at least once a week, and in hot weather - every day. The optimal air temperature is 18-25°C. In such conditions, hydrangea cuttings take root after 3-4 weeks. The signal for this will be the appearance of new leaves on them.
- It is better to take cuttings for seedlings from the root shoots; they take root more easily and quickly.
- The age of the bush from which cuttings are cut should be no more than 8-10 years.
- One strong shoot is divided into 2-3 parts, each of which should have 2-3 pairs of healthy eyes.
- The optimal length of each cutting is 16-20 cm, diameter no more than 5-6 mm.
- The cut is made obliquely, at a distance of 1-2 cm from the bud.
- Leaves that are present on the shoot are removed or cut in half to reduce the loss of nutrients.
- Before planting, the cuttings are immersed in a light solution of potassium permanganate for 15-30 minutes, after which they are treated with stimulants of biological origin.
Cut the shoots into cuttings with 2-3 internodes. But if necessary, you can root with one. Under the base of the lower pair of leaves, make a lower cut obliquely, and an upper one above the upper pair of leaves.
Remove the lower leaves and shorten the rest by half. Immediately place the cuttings in a container with a solution of a root formation stimulator (for a day) or with plain water. w The rooting substrate can be prepared from leaf soil, coarse sand and peat (1:1:1). Pour it into a container, carefully level the surface, lightly compact and moisten.
Keep the soil moist. As soon as young leaves appear, gradually lift the film, accustoming the plants to open air, and then remove it completely.
After 20-30 days, roots appear
Now it is important, without destroying the root ball, to transplant the seedlings into a larger container or immediately to a permanent place. f Hydrangea is not averse to eating, especially since the seedlings develop quickly
Therefore, you need to put compost, peat, turf soil, coarse sand (1: 0.5: 1: 0.5) and a small handful of mineral fertilizers in the planting hole or container.
In the first year, feed with mullein or bird droppings infusion, diluted with water (1:20; 1:30, respectively)
The first winter is a very difficult time for cuttings.
If the seedlings are in containers, you can bring them into a cold greenhouse and dig them in. Or put it in the basement and monitor the humidity.
You can bury the container in the ground in the garden or cover it with spunbond.
Seedlings planted in open ground should be mulched for the winter and covered tightly.
And in the second year, you should cover the plants with dry leaves before wintering. But thirdly, these are fully mature plants, and they can be left to overwinter in the garden without fear.
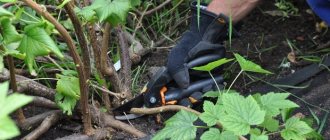
Propagation of hydrangea paniculata by woody cuttings in autumn
Cuttings of Hydrangea paniculata
Hydrangea paniculata is propagated in different ways. For this, young shoots (babies), air layering, and seeds are used; when transplanting and rejuvenating a bush, it can be divided to get several new plants. Why are cut cuttings most often used? It is worth finding out in more detail what this is connected with and how to properly prune and root cuttings.
Peculiarities
The most common method of propagating paniculata hydrangea is propagation by cuttings, and it is ideal for its other varieties, including petiolate (climbing) and tree-like varieties. A definite advantage of the method is the preservation of all varietal characteristics of the original plant, this is especially important in relation to rare and valuable varieties , since their propagation involves obtaining unique specimens.
But this is not the only reason why the method is considered preferable - cuttings take root, develop and grow best, and this is a definite plus when growing.
However, compared to the adaptation of layering in the soil, it is more difficult to carry out cuttings, and you need to know some of the nuances of the procedure, as well as the rules of agricultural technology that guarantee a positive result.
Regarding the features of cuttings of paniculate crop species, you should know:
- it is wiser to carry it out in the summer, since often spring and autumn procedures do not give the desired result - seedlings may take root and develop poorly;
- special attention should be paid to the choice of location - it is better to choose a well-lit area near fences or buildings that protect the plant from drafts and strong gusts of wind;
- when planting, in order to avoid slow growth and diseases, you should be picky about the soil - alkaline soils are contraindicated for hydrangea;
- Before the onset of the first winter, it is necessary to seriously consider how to reliably protect young rooted cuttings - this applies to a greater extent to cold regions.
Otherwise, cuttings of paniculate varieties differs little from this procedure for other hydrangeas, but all agrotechnical work must be carried out in a timely manner.
Deadlines
Cuttings of paniculata hydrangea can be carried out both in spring and summer, and in autumn, and each procedure has its own subtleties.
in spring
Early spring is suitable for cutting cuttings, when the natural process of sap flow has not yet begun in the bush. For planting material, lignified last year's branches are selected, which, after cutting, are kept in water for up to 5 days, and only then they begin to divide.
As a rule, after this they are planted in containers with loose, well-moistened soil.
In summer
Breeding hydrangea in the summer is carried out in June; it is optimal to do this from June 10 to mid-July. For rooting, choose green shoots that have not yet become lignified, with large buds. It is important to divide them immediately after pruning. If planting is delayed, you can root the plants in water. Roots appear in about 30 days.
in autumn
Cuttings in the fall begin in the second half of September, and for the formation of the root system, cultivation in a nutrient substrate is chosen. It consists of peat and coarse river sand. Planted plants must be created in greenhouse conditions, watered up to 2 times every 7 days, and the film should not be removed.
After October 15, the cuttings are planted in separate containers and placed in a cool place with a temperature of 0 to +5 degrees Celsius. When the leaves fall off, the plant needs a dark room; when the leaves are preserved, the pots are left in the light.
Preparation of material
Experienced gardeners carry out the procedure in the summer, in June-July, and only the green tops of branches are suitable for this.
The lower part of the cuttings should have time to become lignified; the ideal moment is the beginning of the formation of buds.
You can ensure 100% rooting of shoots by adhering to certain rules.
- An adult, strong and healthy plant is selected, from which it is necessary to cut off a branch with sprouts at an angle of 45 degrees. The tops are not needed for planting material - they are carefully trimmed.
- It is allowed to cut hydrangea on a cloudy day in the absence of sun, so that ultraviolet rays do not leave burns on the cut areas of the shoots and the mother bush.
- The branches need to be divided into segments of 10-12 cm, leaving a pair of leaves on each. The lower part is cut off under the kidney.
- The leaves located at the bottom of the cutting should be removed, and the top ones should be cut in half.
- When the required number of cuttings has been collected, their lower lignified part is placed in a rooting agent solution for 2 hours. If such a preparation is not at hand, use natural honey diluted in water (1 tsp per 200 ml). If the nutritional composition HB101, made from plant extracts, is used, then the future seedling needs to be kept in it for 30 minutes.
- Another option for stimulating the rapid formation of the root system is to dip the cutting in water and then in a dry mixture of growth stimulator.
The best biostimulants that are suitable for paniculate hydrangeas are the natural organic product “Heteroauxin” based on beta-indoleacetic acid (phytohormone), “Zircon”, in addition to accelerating growth, which prevents the development of fungal and bacterial diseases of the plant, and “Kornevin”, which is well known to many gardeners.
As an alternative, cuttings can be taken from side branches at the bottom of the bush, but they need to be grown in good light.
It is important to use the middle part of the shoot of the current or last year - this way the seedlings take root faster and easier. In addition, experts advise choosing branches with developed and large buds.
It is recommended to take planting material early in the morning, since at this time the plant contains the most moisture and takes root better in the future. If the procedure is carried out in spring days, then the branches are kept in water for about 3-5 days.
When carrying out such work at home, we must not forget that the pruning shears are pre-sterilized - very often the plant is affected by viral diseases if the equipment is not disinfected.
The best way is with green cuttings
This method of propagating hydrangeas is the most common among summer residents.
The best time to take green cuttings is when the buds appear - this is approximately mid-July.
Let's decide what a green stalk is. This is the leafy part of the stem with one or more buds.
I advise you to take cuttings only from young plants. If you already have old bushes, then you must first carry out anti-aging pruning.
Also, please note that cuttings cut from lateral shoots (grown on last year’s growth) root better in the lower part of the crown, but it must be well lit. Such cuttings have fairly developed large buds and no signs of any diseases.
Another very important point is the preservation of tissue moisture in the cut cuttings, since the success of rooting largely depends on this. To do this, we cut off the shoots early in the morning, at which time all the tissues of the plant are still filled with moisture, and then, in the process of further work with the cuttings, we carefully monitor that they do not dry out.
We immediately place the cut shoots in water in the shade and begin cutting the cuttings as quickly as possible. We cut off the green top with the bud from the shoot, since it is not suitable for cuttings.
We divide the remaining green part of the shoot into several parts with 2-3 pairs of leaves
After this, remove the lower leaves from the cuttings, shorten the upper ones by half and carefully place the cuttings in a solution of some root growth stimulator so that the leaves do not fall into the solution
This could be, for example, rootin, heteroauxin or zircon. We make the solution strictly according to the instructions and keep the cuttings in it for 2 hours, preferably in a dark place.
If you don’t have any root former on hand, I advise you to prepare the following solution: dissolve 1 teaspoon of honey in one glass of water. Honey promotes the rapid formation of callus - a thickening at the end of the cutting, from which roots grow.
Now you can start planting the prepared cuttings. We plant them with a mixture of peat and sand (2:1), prepared in advance, after moistening it. For better rooting, you can cover the cuttings with jars and water them directly into the jars a couple of times a week (in the absence of rain).
If the weather is very hot and dry, it is advisable to water the cuttings every day. It is advisable to spray the cuttings that you have not covered twice a day.
Usually after 25-30 days (approximately the second half of August), the cuttings take root and new leaves appear on them.
The jars can already be removed from them, but it would be better to cover the seedlings with several layers of any covering material so that early autumn frosts do not damage our still very young plants.
They also need to be well covered for the winter. We cover the seedlings with fallen leaves, then install a low frame over them and cover it with covering material.
For better snow retention, you can also add spruce branches on top.
In the spring, we plant the already rooted cuttings in the garden bed for further growing. We plant the seedlings in a permanent place when they are old enough.
Planting and maintenance
Hydrangea shoots can be rooted in water and in prepared soil mixture - both methods are acceptable for paniculate varieties.
If water is selected, the rooting scheme will look like this:
- add a spoonful of cinnamon to a dark container with a volume of 250 ml;
- 2-3 cuttings are placed in it so that their lower part is 1/6 of the length in water;
- when water evaporates, it must be topped up with settled, filtered water; there is no need to completely change the solution;
- during spring cuttings, keep the plants on the south side in diffused light; when autumn branches need to be rooted, the container with them is placed in partial shade;
- When forcing, it is recommended to regularly saturate the solution with oxygen, which will prevent rotting of the roots.
When root shoots 2-4 cm long appear, the plant can be transplanted into soil with a low acidity level for further rooting.
It is also permissible to immediately plant hydrangeas in the ground. Before planting petioles, it is necessary to prepare a nutrient substrate for the plant, taking into account the established requirements.
- The soil should be fairly loose, so a mixture of vermiculite and coarse sand is used. Another option is sand, peat, perlite and fertile soil. You can use any composition by adding citric acid (1 g), all components are taken in equal parts.
- Plants are planted in wooden boxes, the outer part of the bottom of which is covered with rags for the purpose of insulation, and wool strings are laid out inside at intervals of 5 cm, their ends are immersed in vessels with water - thanks to this, the soil will be moderately moistened and will not dry out. The prepared cuttings must be correctly positioned in the ground - at an angle of 45 degrees and at a distance of 12-15 cm from each other, they must be buried by 2-3 cm.
- After planting, the soil under the plants must be moistened by spraying.
Further care for young hydrangeas consists of covering them with plastic film in order to create greenhouse conditions.
You can protect the soil from drying out and the seedlings from overheating by placing the boxes in a dark place at a temperature of +20... 25 degrees during the day, and +15... 18 degrees at night.
Hydrangeas are transplanted after a month, when they form roots 2-3 cm long, into separate containers with a volume and height of 10 cm. A nutrient substrate is selected special for this type of crop, or prepared independently from sand, peat and garden soil. Then the pots are placed in a shaded room, continuing to water and ventilate regularly. If buds form on the branches, you can feed the plant.
How to grow hydrangea from cuttings
Many people are interested in how to properly cut hydrangea. To carry out this procedure, you need to select healthy shoots and root them.
Important! To achieve good results, it is recommended to take the upper fragments of the shoots. However, they should not be too thin, as there is a high risk of rotting
When preparing cuttings, a sufficient amount of moisture must be retained in them to avoid irreversible changes. Therefore, experienced gardeners recommend adhering to the following recommendations:
- Shoots that are planned to be rooted should be cut on a sunny morning or in cloudy weather. After which they must be immediately divided into cuttings.
- Remove the upper fragments with buds.
- Divide the remaining part of the shoot into fragments with 2-3 pairs of leaves.
- Remove the lower leaves and shorten the remaining leaves by half or a third.
- Soak the cuttings in a growth stimulator. They should stand in it for 2 hours.
- Before planting, disinfect the top part with brilliant green or garden varnish. You can also use charcoal.
Hydrangea reproduces well by cuttings
At the initial stage of root formation, gardeners often soak cuttings in water. The liquid should be soft with a minimum content of calcium salts. You can add a little growth stimulant to it. The length of the cuttings should be at least 10 cm. Moreover, they should contain 2-3 internodes.
When cutting hydrangeas, foliage must be removed from the cuttings to stimulate the process of root formation. To root the plant, you need to use a transparent container, since light promotes the formation of the root system.
Important! In most cases, up to 3 cm of roots appear on the cuttings within 2-3 weeks. After this they can be planted in the ground.
Propagation of hydrangea by cuttings is simple and accessible, but has certain disadvantages. When cuttings remain in water for a long time, rotting processes begin. Therefore, the water should be changed systematically, avoiding the appearance of a musty smell. To protect the cuttings from rotting, it is worth placing activated carbon in water.
The cuttings should be planted obliquely into the resulting substrate, deepening them 2-3 cm. Plants should be planted at intervals of 5-7 cm. Then cover the substrate with a layer of sand 2 cm thick.
The cuttings can be rooted in a special substrate