Features of the plant
This indoor plant received two names at once, both in honor of botanists: B. Gloksin, who discovered the flower (gloxinia), and V. Zinning, who was involved in its selection (sinningia). All currently known plant species originate from just two species of gloxinia - beautiful and royal.
The flower has a tuberous root, a short thick stem and round leaves on long petioles. The plates are streaked with veins and the edges are jagged. Bell-shaped inflorescences. It is noteworthy that the surname Gloksin is derived from the German word “glocke”, which means “bell”.
Did you know? According to the art of Feng Shui, purple gloxinia in the house smooths out conflicts and transforms negative emotions into positive energy.
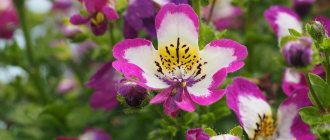
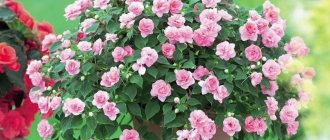
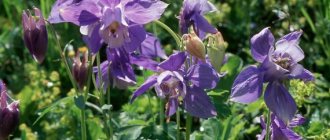
The variety of colors of inflorescences is amazing:
- all shades of blue, red, pink;
- ink, white;
- mottled;
- two-color;
- with edging along the edge of the petals;
- with a bell pattern in the middle.
The petals of the buds may differ in shape:
- simple;
- semi-double;
- terry.
The species also differ in bush height: from 15 to 70 cm.
Seeds
If you buy seeds in a store, be sure to look at the expiration date. Typically, manufacturers coat raw materials in a nutrient coating and it is easier to work with when sowing.
Fans of experiments prefer to pollinate and collect seeds themselves. To create gloxinia with a new color, plants of different shades are used. To do this, they carry out pollination and wait for the planting materials to ripen:
- on one flower they take pollen on a cotton swab and transfer it to the pistil of another;
- They wait for the capsule to ripen in place of the corolla, for which 50-56 days pass from the moment of fertilization to ripening.
Related article:
My secrets of caring for Anthurium. Anthurium blooms 12 months a year
As soon as the box begins to open, it is cut off and placed in a container to dry. After it dries completely, it will burst, and the brown seeds, ready for planting, are released using a toothpick.
Preparing for sowing at home
You can collect the seeds yourself or purchase them at the store. When collecting independently, the peduncle is carefully cut off along with the dried boll. It is important to remove the boxes before opening, since the seeds are very small. Store-bought seeds are sold in the form of pills or granules.
Important! It is recommended to place the container with seeds under a diffused light source, for example, under a lamp, maintaining a distance of 40
–
45 cm. Without proper lighting, the seeds may not hatch.
Selection of capacity
The most convenient container for sowing is a plastic container with a lid. It should be washed with baking soda and holes should be made at the bottom to drain moisture.
Soil preparation
Gloxinia needs nutritious and loose soil. Of the ready-made substrates, soil for violets or begonias is suitable.
You can prepare the soil yourself using the following ingredients:
- turf soil - 1 part;
- sand - 1 part;
- peat - 2 parts.
The soil is disinfected by steaming over a water bath for about an hour.
Seed treatment
Due to the very small size, additional processing of the planting material is not carried out. There is an opinion that you should put the seeds in the refrigerator for stratification. Although, if all sowing rules are followed, they sprout perfectly without this manipulation.
Did you know? In the language of flowers (floriography) gloxinia means
«
love at first sight
»
.
Step-by-step sowing guide
If you use a food container with a lid as a container for sowing, then you do not need film.
Sequencing:
- Place a 1 cm layer of drainage, for example, expanded clay, at the bottom of the container.
- Spread the soil on top in a layer of no more than 3 cm.
- Moisten the soil with a spray bottle.
- Scatter the seeds evenly over the surface and gently moisten, moving the sprayer away so as not to wash away the seeds.
- Cover with a lid or film.
Video: growing gloxinia from seeds
Optimal conditions
For germination, the room temperature should be about +25 °C; after sprouts appear, it is gradually lowered to +22 °C. Humidity provides a film cover that inhibits evaporation. From time to time, the soil in the container is sprayed. To avoid heavy condensation on the shelter, the crops are ventilated twice a day, opening for 7–10 minutes.
Storing tubers in winter
After trimming the bush, the pots with tubers are placed in a cool, dark place with an air temperature of 10-12°C. The main thing is to prevent the tubers from drying out completely, but to protect them from rotting. Water once every 2-4 weeks.
Another method of storing root vegetables is also common. For this:
- in the fall they are removed from the ground;
- shake off the substrate;
- put in a plastic bag filled with soil mixture combined with vermiculite in a 1:1 ratio or wet peat, sawdust;
- close the bag tightly and put it in the refrigerator on a shelf for storing vegetables or in a dark, cool place;
- inspect the contents of the package once a month so as not to miss the appearance of rot or mold.
Growing and caring for indoor plants
The ideal place to place a flowerpot in the house is a southwest or southeast window sill. The flower loves bright light, but it should be shaded from direct sunlight. Daylight should last 12–14 hours; if necessary, the plant is illuminated with artificial lamps. Gloxinia loves fresh air, but does not tolerate drafts. The optimal temperature for keeping adult bushes is +20–22 °C.
Important! The procedure cannot be carried out during flowering, an exception may be illness. In this case, all the buds and greenery above the pair of lower leaves are first cut off.
Feeding and watering
When watering a flower, try not to wet the foliage while watering the soil ball. The best option for watering is considered to be the bottom one: the pot is lowered into a basin of water. The plant draws as much moisture as it needs. Warm water is used - +25–28 °C. The frequency of watering depends on the rate of drying of the top layer of soil. Typically, such a plant is watered 2 times a week.
From August, the procedure is reduced to a minimum, preparing the plant for the dormant period. If the air in the room is not humid enough, the flower itself cannot be sprayed, but the air around it is advisable. Once every 10–12 days, gloxinia is fed with complex fertilizers for flowering ornamental crops. During the period of active growth, complexes with a high nitrogen content are selected; during the period of formation of flower ovaries and flowering, phosphorus-potassium compounds are used.
Picking
After about a week, the first shoots appear, they are still too weak and do not have strong leaves. The first picking is carried out about a month after sowing, when the seedlings begin to crowd each other. Their roots are still weak, so picking is done with a spoon. Pry up the plant along with a lump of soil and transplant it into similar conditions under cover.
It is better to remove weak seedlings; they are unlikely to be of any use. The second procedure is carried out exactly repeating the first picking. The third time, at about the age of 2.5 months, the bushes are planted in separate pots. Stronger plants no longer need shelter.
Pruning and replanting
Sinningia has a long flowering period, which is stimulated by pruning. As soon as the first buds have faded, the upper foliage and pedicels are cut off. Stimulate the development of new flower axils using Epin fertilizer, according to the instructions. Water moderately without flooding the soil. Of the newly formed stepsons, a few of the strongest ones are left, the rest are removed. The plant needs annual replanting, since it manages to deplete the soil within a year.
Find out how and when to replant indoor plants.
In addition, transplantation is carried out if necessary, for example, due to illness or pest infestation. Sinningia is transplanted after a dormant period into clean, disinfected soil and a sterile pot. Before planting, the roots are washed and rotten or broken parts are removed. If there were a lot of rotten areas, the tuber is soaked in a slightly pink solution of potassium permanganate. After manipulation, leave overnight to dry. More detailed description in the video below.
Major pests
The appearance of dashes, dots, and small light spots on the leaves indicates the presence of thrips. These harmful insects attack stems, buds, and flowers. The upper part of the leaf has a silvery sheen with a grayish-brown tint. It's difficult to fight them. It is advisable to transplant the plant to another soil, disinfect the tuber and root. Spray with insecticides: Aktara, Aktelik, Fitoverm and others.
Leaves affected by thrips
Spider mites are the smallest insects. It settles on the bottom of the leaf. The first signs are the formation of white dots, gradually turning into yellow-brown spots. The appearance of a web means a large number of insects. They quickly attack nearby plants.
Spider mites on plants
On the lower part of the leaves there is another pest - the cyclamen mite. The plant's growth slows down. The leaves are deformed and curled. The buds fade and fall off. The tops of the shoots turn brown. It looks like dust has accumulated.
Methods of combating spider mites and cyclamen mites:
- remove damaged leaves;
- carry out 3 treatments with insecticides at intervals of one week.
From all that has been said, the conclusion suggests itself: growing gloxinia from seeds at home is quite possible. The main thing is to adhere to several rules: choose the right soil for planting, create conditions with good lighting, moderate watering, timely replanting, and lowering the temperature during dormancy.
marked
Your opinion is very important to us. Please rate the article: rated 1 , rating: 5.00 out of 5
See also related articles
Indoor balsam: planting and care, photo
Decembrist flower: care at home, how to water correctly
Hoya Bella: home care, photo
Fuchsia growing and care at home: propagation, pruning
Spathiphyllum: transplantation at home and care
Clivia: care and cultivation at home
Fuchsia: home care for beginners
Cyclamen: how to grow from seeds at home
Roses: types and varieties, photos with names and descriptions
How to grow a rose from a cut flower at home
Add a comment Cancel reply
You must be logged in to post a comment.
✿ Alphabetical index
✿ Categories
- Houseplants
- Bromeliads
- Decorative foliage
- Trees and shrubs
- Orchids
- Succulents
- Blooming
- Perennial
✿ Popular articles
- How to grow chestnut from a nut at home in a pot
- Clematis: care and cultivation in the garden
- How to grow pomegranate from seeds at home to produce fruits
- How to grow lemon from a seed at home with fruits: step by step
- Decembrist flower: care at home, how to water correctly
- Hedera "Helix mix": home care
✿ Latest comments
- Lyudmila on How to grow a lemon from a seed at home with fruits: step by step
- Tatyana on Tillandsia Anita: care at home
- LOVE for the entry Tulips: care and cultivation in the garden
Copyright © 2018-2021 GARDENER'S BOOK.
0+ By using bookgardener.ru you accept the terms of the USER AGREEMENT. Copyright for the posted materials belongs to the editors of the online magazine. When reprinting and using materials, an active hyperlink to BookGardener.ru is required
Other planting methods
Flowers can also be grown and propagated vegetatively.
Leaf
On the leaf plate selected for propagation, cuts are made along the veins. The sheet is pressed into moist soil. Until the sprouts appear, the seedling is kept under a transparent cap.
tuber
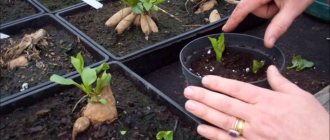
In order to propagate a flower with a tuber, you first need to wake it up. If the plant does not come out of hibernation on its own in May, it needs help. The simplest method is to spill the soil in the pot without touching the tuber and wrap it in a plastic bag. After this, the pot is placed in a well-lit, warm place for about 2 weeks. After new sprouts appear, the newly formed shoot with sprout is separated from the old tuber with a sharp knife. All sections are treated with crushed coal. The shoot is planted in the ground.
Cuttings
Young leaves with a long petiole are chosen as planting material. They germinate either in water or directly in the soil. Cover with a cap during germination.
Gloxinia reproduction
Sinningia beautiful propagates in several ways - by seeds, dividing the bush or leaf cuttings.
The last method is used most often. To do this, cut off a leaf with a small piece of petiole, place it in water until roots form, or dig it in with soil and cover it with a jar. Rooting occurs after about three weeks, after which the jar can be removed. We recommend watching: Propagation of gloxinia by cuttings
Growing a plant from seeds is somewhat more difficult. To do this, they must be sown between November and February on top of the soil and covered with glass. Germination will require sunlight and high temperature. It is worth moistening the soil periodically to prevent it from drying out. If the outcome is successful, seedlings appear in 3-4 months. Picking is done when there are 2 leaves. As soon as 3 pairs of leaves are formed, you can plant them in pots.
When propagating by dividing a tuber, you should be extremely careful. Each separated part must have at least two sprouts. The division of the tuber is carried out with a sharp knife. All cuts should be thoroughly treated with crushed coal for disinfection. The seedlings are not watered for several days. Otherwise, the tangles will simply rot and your plant will simply die.
