2
14324
Cuttings are a practical and cheap way to obtain young coniferous plants for landscaping. It takes 2-3 years to grow seedlings, but in this way it is possible to purchase several dozen new specimens for creating a hedge or subsequent sale. To achieve the desired result when propagating thuja by cuttings in winter, spring and autumn, you will have to adhere to certain harvesting and planting dates.
Aurea with hydrangea
Reproduction of Thuja by cuttings in summer
Most experts call the most favorable period for cuttings the end of May - mid-June. But, the main criterion for a suitable period is the cessation of shoot growth.
To do this, use a plant of the required shape and color. There are columnar, spreading, ornate trees and bushes, but you should definitely check the plant for parasites and diseases in order to prevent possible problems with conifers from spreading to other inhabitants of the garden and eliminating all efforts due to the death of the cutting.
Preparation of Thuja cuttings
Thuja cuttings must have a heel.
The material from the mother plant is extracted in the same way, regardless of the season:
- We select the future cutting from the top of the bush. This is where the skeletal branches are located, among which they make a choice for optimal development and appearance. Ideal would be 2-3 year old and already lignified growths of 10-15 cm.
- We tear it off from top to bottom with a sharp movement, grabbing the “heel” - the wood with the bark. The size of the heel is not so important, but if the bark peels off from it, then this part is trimmed a little, since it will only rot and will not allow activation of root formation. A normal “heel” contains substances accumulated by the mother plant that are useful for the sprout.
- It is recommended to trim the branches along the edges of the cuttings, but more important is to remove the branches from the lower part so that they do not rot when they get into the ground or water.
- Before planting in a container, the cuttings are dipped in a root system growth stimulator (for example, Kornevin) for several hours.
The advantage of summer cuttings is the ability to provide optimal (22-25°C) temperature conditions due to warm weather. It is not recommended to save cuttings without planting them in a suitable substrate. But if it is not possible to plant immediately (for example, when collecting cuttings far from your home), their lower part is wrapped in a cloth previously moistened with water.
Preparing containers for Thuja cuttings
Next, select a container for the stalk. It can be standard containers for seedlings, a cut-off plastic bottle (the bottom is filled with soil and the top is covered), and a plastic cup (the second one is used as a shelter).
Those who perceive the cultivation of Thuja as a business idea install special greenhouses with a metal or wooden frame and two-layer film. But stationary nurseries should be placed with caution. The fact is that accumulated evaporation is detrimental to sprouts, as are direct sunlight. The best location is in partial shade.
But to accommodate 4-6 cuttings, a trimmed 5 liter water bottle is also suitable, since sprouts can be planted after 5 cm. It is convenient to water and ventilate in such a container by simply unscrewing the lid.
Soil preparation
It is important to select the required composition of the mixture for growing. Don’t forget that conifers need acidic, loose soil.
It can be either river sand or a composition of 3 components in equal quantities - sand, high-moor peat and forest soil. The latter is collected not from the dried top layer, but deeper. It contains mushrooms that help conifers grow. You can also add perlite.
Within a month, with proper care, you can observe the appearance of new branches, which indicates successful rooting. Picking is carried out only during group planting (if all the cuttings have taken root and their rhizomes can intertwine). Further care consists of permanent watering when the top layer dries for about 2 years.
An important point when planting cuttings in a container for rooting is correct planting depending on the direction of the world. The needles, like an ordinary leaf, have a front side (facing the sun) and a back side. If the sun exposes the back side of the needles of a cutting and not the front, then the cutting will simply burn. Remember that cuttings must be planted so that the front side always faces south.
You can learn more about propagating Thuja by cuttings from this video
How to grow thuja from seeds. How to care for thuja crops
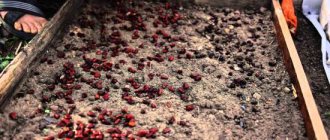
Place the box with the seeds outside, preferably under the canopy of trees: then the seedlings will not be exposed to direct sunlight in the spring - this is dangerous for coniferous plants, including thuja.
In the photo: Planting box with thuja seeds
If there are animals on your site, then the crops must be covered with film or non-woven covering material. After the snow melts, make sure that the shelter does not touch the soil surface. 2-3 weeks after the soil warms up to +10...+15°C, the thuja gives its first shoots. Thuja seedlings do not look like adult plants: their needles are needle-shaped, and not scaly, like those of adult plants.
In the photo: Thuja seedling
It may seem that instead of the thuja, another plant grew from the seeds - for example, spruce or juniper. But don’t be alarmed: after 2-3 months, the seedlings will have their first branches with real scaly needles.
Every two weeks, feed the plants with a solution of complete mineral fertilizer (nitrogen, phosphorus, potassium). You can use fertilizers “Solution”, “Agricola” - they include microelements (manganese, zinc, molybdenum, copper, boron). During the season, the seedlings grow up to 7-8 cm and remain overwintering in the box.
In the photo: Planting box with thuja seedlings
If the crops are not very thickened, and the box is deep enough (or you sowed directly into the ground), then the crops can be left in the same place for another year.
But more developed thuja seedlings are obtained if you plant them in a shkolka (bed for growing) after the first wintering.
In the photo: Seating of thuja seedlings for school
It is best to choose a place for the school in light partial shade. Apply the following to the soil per 1 m2: humus (1 bucket), nitroammophoska (40 g) and wood ash (250-300 g), dig well with a shovel. Thuja tolerates transplantation well at any age. It is planted in a school for growing according to a 30x30 cm pattern.
In the photo: Thuja seedlings in school
When planting, make sure that the root collar remains in the soil; deepening leads to damping off. As a result, the thuja turns yellow and usually dies.
After planting, water and mulch with peat. Feed once every 2-3 weeks in the same way as in the previous season, water in dry weather, loosen the soil after watering and remove weeds at the same time as loosening. In the third year of cultivation, when the thuja grown from seeds reaches a height of 50 cm, it can be planted in a permanent place.
Thuja cuttings in winter
Proponents of this season for cuttings give their reasons:
- By analogy with seeds, cuttings undergo a certain stratification and are more resistant to climate change;
- You don’t have to worry that the sprouts will get sunburned or overheated.
But there is also a more pragmatic approach - in winter there is much less work to do in the garden and you can start propagating interesting conifers.
You should carefully consider the location of the cuttings to ensure an influx of fresh, but not cold air, as well as a temperature of at least 22 degrees C, otherwise rooting will not occur.
The disadvantage of this method is that new branches are obtained no earlier than after 3 months. But even here, supporters of winter plantings have their own argument - after all, a young plant can be transplanted into special beds so that it acclimatizes and hardens before the cold weather.
Preparing cuttings for planting
Reproduction by cuttings allows you to preserve the properties of the mother plant and speed up the growth process. When grown from cuttings, a young tree can be obtained after 3 years. If you grow thuja from seeds, it will take at least 5 years.
Branches are broken off from healthy plants. Select lignified shoots with straight stems. The age of the shoot should be 2-3 years, length – 15-20 cm.
If you take an older shoot, it will be more difficult to achieve root formation, and this year's growth does not produce root shoots.
The branches can be cut off or broken off from the stem with a heel - this is the name given to the part of the trunk with a piece of last year’s bark. This procedure does not harm an adult healthy tree.
Broken off branches are wrapped in damp cloth, in which the branches are stored, waiting to be planted for rooting. You can simply cut off a branch that is 4-5 years old, and break off cuttings for planting from it at home.
Rules for preparing cuttings
To prepare cuttings for rooting:
- From the heel side, 4 cm of needles are removed to prevent rotting.
- On the heel, use pruning shears to remove areas where the bark comes away from the wood.
- The green branches and crown are slightly trimmed.
- The cuttings are placed in a solution of Epin, Kornevin or any other root growth stimulator for 12 hours.
Instead of a solution, you can use dry powder of a root formation stimulator, dusting the heels of the cuttings well with it.
But when growing thuja from cuttings at home, it is not at all difficult to prepare Epin’s solution in the evening, leave the cuttings in it overnight, and start planting in the morning.
When is the best time to take cuttings?
Autumn is considered the best time of year for thuja cuttings. Survival during autumn cuttings is higher, since at this time sap flow slows down and the plant suffers less from lack of moisture.
But at home it is more convenient to do cuttings in the spring. Cuttings form roots more actively, produce young growth faster and have time to take root well on a loggia or windowsill before winter.
Reproduction of Thuja in autumn
This method is usually chosen for potted cuttings for sale. Before the spring planting season, the sprout will take root, but it will still be too early to plant it in open ground. Therefore, moving the plant into a larger pot, the plant is brought indoors for the winter, providing the same optimal care package:
- temperature;
- humidity;
- influx of fresh air.
Usually by spring it is already clear which autumn cuttings have taken root and can be planted in the garden. But for the next cold weather, such an area is also covered and mulched. In spring, the shelter is removed. Experts recommend not limiting yourself to 2-3 cuttings, but planting at least 5-10 at a time due to the not so high percentage of rooting, possible technological violations and the weakness of the cuttings themselves.
Selection of mother plant and cutting time
Before growing a thuja from a twig, you must carefully select a donor tree. The bush must be completely healthy and strong. From a weak and diseased tree, it is more difficult for shoots to take root; in addition, there is a high risk of getting the same diseased seedling.
Transplanting rhododendron from one place to another
No less requirements are placed on the branch from which the shoot will be separated. The one located at the top of the bush is best suited for this purpose. Gnarled shrubs often grow from the lateral shoots.
Note! The best way to cut thuja is to separate shoots 10-15 cm long and 2-3 years old. The foundations of such growth have already become woody.
Thuja shoots need to be correctly selected and prepared
Propagation of Thuja by cuttings in water
There are several methods of reproduction. In addition to growing in river exclusively clean sand and a mixture (sand-chernozem-forest soil), there is a method with water and a glass jar.
In this case, very little water is required - less than a quarter, so that it does not touch the branches and cause rotting.
By cutting (or sharply tearing off) the lower green sprouts, you can eliminate the issue.
It is advisable to grow no more than 2-4 cuttings in a container. Dense bunches promote the proliferation of pests and diseases. And due to the peculiarities of sap flow of conifers, water quickly acquires resinous viscosity within a few days. This determines the need for frequent changes of water in the jar. But even when growing a cutting alone, you cannot refuse to change the liquid every day.
H2O itself can contain a whole range of bacteria that have a detrimental effect on the cutting. It is not advisable to take it from a tap or well, even if it settles. It is advisable to change boiled water cooled to room temperature or purified purchased water daily.
Rooting occurs worse in water than in soil and sand. And the process is quite labor-intensive. But still, it has a place due to its simplicity and economy.
Reproduction of Thuja by branches at home
Collecting cuttings for growing at home can be done at any time of the year. But it is advisable to plant as soon as possible in order to improve the plant’s potential.
Landing technique:
- pour the mixture or sand into a container;
- lightly press down the composition and make a 3 cm hole;
- plant the cutting at an angle of 45 degrees (not vertically), compact it with a dugout around the cutting;
- water from a spray bottle without blurring the stem;
- cover with film or other covering.
More about propagating Thuja at home - in this video
Every day you need to ventilate the plant, spray it and monitor the air temperature.
Thuja in potatoes
Non-standard methods include using nutrients from vegetables such as potatoes. Starch has a beneficial effect on the root system of conifers.
The cutting procedure is quite simple:
- choose unrotten potatoes and wash them;
- Be sure to cut out the eyes and make 4 cm thin holes in the resulting holes with a nail;
- carefully insert the stalk;
- potatoes are planted in a box with fertile soil;
- cover with a plastic bottle with the bottom cut off;
- To water, remove the lid.
It is very important that the humidity in the substrate is maintained at 90%. This will not cause rotting due to the cover of the stalk inside the potato.
Preparing the substrate for rooting
For rooting thuja, a light type of soil, which is characterized by good drainage properties, is best suited. You can choose one of two options:
- clean river sand (it is important that there is no contamination in it);
- substrate.
To prepare the substrate at home, you will need several components:
- leaf soil;
- peat;
- sand.
These components must be mixed in equal proportions. It is recommended to add a solution of potassium permanganate (3%) to the resulting soil, after which the soil is mixed and used for its intended purpose.
If sand is used for rooting, it is first boiled for 5 minutes, after which it is treated with a solution of potassium permanganate.
You can use special boxes, cassettes or jars for seedlings as containers for planting seedlings. The presence of holes (drainage and aeration) should be checked. Expanded clay is placed at the bottom of the container as a drainage layer and the container is filled with soil.
Rules for preparing cuttings for home rooting
To quickly germinate seedlings, cuttings must be prepared taking into account several conditions. The planned shoots must be torn off from the mother tree. This must be done with your hands, with a confident, sharp movement from top to bottom.
As a result of this action, the shoot should come off with a small piece of last year's tree bark. This part of the handle is called the heel. It contains nutrients that the tree has managed to accumulate. As practice shows, branches with heels give roots faster and take root better.
Important! The leaves located near the heel are removed so that at the bottom there is a bare trunk measuring 2-3 cm. The upper green leaves of the thuja are trimmed.
Rooting cuttings with moss
There is an alternative way to propagate thuja. For this you will need moss (sphagnum). The advantage of this option is the rare decay and rapid appearance of roots.
To perform this work you need to stock up on the following materials:
- plastic bag;
- a piece of fabric;
- growth stimulator (any can be diluted);
- a piece of moss.
First of all, the moss is soaked in cool boiled water. It should remain in this form for about 2-3 hours. After this, the sphagnum is placed in the center of a piece of fabric and several cuttings are placed on it. They should all be at some distance from each other.
The fabric is folded, and then tied with an elastic band or rope and placed in a bag. In this form, the cuttings must spend some time before roots appear.
