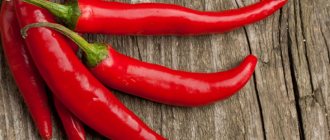
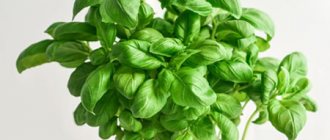
Rules for planting Chili on the windowsill
This vegetable can be grown from young seedlings or seeds. In the second case, there is a greater chance of getting a rich harvest, the taste that was originally planned. It is important to choose the right soil and container for planting Chili, follow the rules of care, and provide the plant with a suitable microclimate.
Landing dates
You can sow pepper seeds all year round. Experienced gardeners claim that the most fruitful is spring sowing (early or mid-March). The harvest is rich, and the pepper is uniformly hot and fiery. The planting time is determined individually, taking into account the characteristics of a particular variety.
The following varieties are distinguished:
- Early ripening varieties are planted in mid-February and bear fruit in late May - June. Early varieties include Ogonyok, Medusa, Aladdin, Tabasco.
- Mid-season ones are planted in early to mid-March. These include the Holly Fish and the Queen of Spades.
- Late varieties are sown in the second half of March. This is Confetti, Bell, Salute, Variegated Troll.
Traditionally, Ogonyok, Tabasco and Bell are grown on the windowsill. Other varieties are less in demand at home.
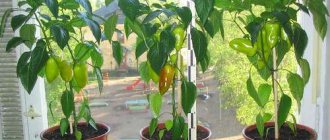
Selecting a location
The vegetable bears fruit well in greenhouse conditions and in open ground. Under favorable conditions, the harvest is rich, the pods are one to one, attractive in appearance. Valuable recommendations:
- Maintain the optimal temperature in winter – 18 degrees, in summer – 20-25 degrees.
- Grow the shrub in the light, but avoid exposure to ultraviolet radiation, otherwise its yield will decrease.
- Avoid drafts; when ventilating, temporarily move the pot to a quiet, windless place.
Preparing the container and soil
An excellent option for planting Chile is cells made of pressed peat. A separate container is provided for each seedling, since the plant needs space. As an alternative, boxes made of wood, plastic containers, disposable tableware, and medium-sized flower pots are used.
A prerequisite is the presence at the bottom of the container of drainage with a layer of 3-4 cm. Alternatively, river sand, expanded clay, charcoal or crushed slate are selected. The root system must breathe, and stagnation of moisture contributes to its further rotting.
The yield depends on the quality of the soil. To prepare a nutrient mixture, mix 2 parts each of peat, compost, turf soil, 1 part each of vermiculite and sand. Stir, place on top of the drainage, do not compact.
The soil must be disinfected before planting. How to do this - read here.
Selection, preparatory activities and planting of seeds
Before purchasing, make sure the seeds are suitable for home growing. Industrial varieties are more often used for open areas and greenhouses. They definitely don’t bear fruit on the windowsill.
Buy seeds from well-known manufacturers, do not skimp on your purchase. After opening the package, carefully examine each grain. They should be large, light, without suspicious spots, plaque, or deformation. Do not use doubtful seeds for sowing; they will still not give a good harvest.
Disinfect seeds before planting. To do this, dip them in a weak solution of potassium permanganate for 15 minutes. Remove and dry naturally. To increase the viability of each grain and the chances of germination, place it in gauze pre-moistened with water until young shoots appear.
When healthy seedlings grow from the seeds to 10-15 cm in height, transplant each into a separate pot. Follow these landing rules:
- Place drainage at the bottom with a layer of 3 cm.
- Place a small amount of soil on top.
- Make holes 5-7 cm deep.
- Place the plant with its roots in the ground in the center.
- Fill in and secure the stem.
- Water thoroughly with water at room temperature.
- Cover the container with cling film until the first shoots appear.
- The next watering is after 7 days, when the roots have expanded.
If the seedlings are over-watered in the first week, the root system begins to rot and the growth of the chili pepper stops. Severe drought is also harmful - it slows down growth and reduces yields.
Picking
When the seedlings get stronger and a young plant with 2-3 leaves is formed, transplant it into a separate pot. This process is called picking. Immediately after transplantation, the plant temporarily slows down its growth. Then why is this necessary? Picking strengthens and branches the root system, which in the future has a positive effect on productivity.
Valuable recommendations before and after picking:
- water the seedlings with water to plant the plants with their root system in a coma of earth;
- plant the seedlings with their roots in the central part of the permanent pot;
- after transplanting, water generously and do not touch for a week;
- Make sure that after picking the soil above the root system does not dry out.
Growing peppers by cuttings
To preserve all the properties of the chili pepper variety chosen for planting, replace sowing seeds with cuttings. Sequencing:
- Cut cuttings up to 10 cm from young shoots without fruit.
- Before planting, soak the branches for a day in a zircon solution (3 drops per 0.5 cup of water).
- Plant in the ground to a hole depth of 5-7 cm.
- Cover with soil and compact lightly.
- Water the plant generously.
- Replant as you grow (each time choose containers larger than the previous ones).
Landing time
Winter is not the best time to grow hot peppers on a balcony or windowsill. Since there is a risk of frost, so that the seedlings do not disappear, it will be necessary to maintain a certain temperature. Also, due to the short daylight hours, additional lighting will be required.
Attention!
Seeds germinate well if planted in late July or early September. Pepper is one of the crops that takes a long time to germinate. Therefore, it is desirable that the weather be relatively stable during this period.
The best time to grow hot peppers at home from seeds is considered to be the end of February or the beginning of March. It is better to focus on the forecasted weather. If warming is expected, then the seedlings should be left on the north window. Otherwise, the hatched seedlings will slow down their growth, and this will delay the appearance of the harvest.
Maintenance and care
Chili peppers do not like sudden changes in temperature and drafts; they ripen faster under conditions of moderate humidity, light and heat. Mandatory conditions for its content:
- temperature during the day – 23-25 degrees, at night – at least 18 degrees;
- daylight hours - from 15 to 18 hours;
- the soil is moist, loose, but without excess moisture.
To make caring for peppers easy, use only healthy seeds or strong seedlings. Otherwise, even if you follow the planting rules, you can’t count on a rich harvest.
Temperature and lighting
The vegetable is best grown in spring and summer, since the days last longer and the plant needs light. Without light, the ovary is not accepted; the plant is small and rarely bears fruit. If you plant peppers in autumn or winter, create additional lighting - 1 hour in the morning and evening using special lamps (fluorescent, infrared or LED).
The plant is heat-loving, so maintain the indoor temperature at 22-25 degrees. You can harden seedlings at the stage of formation of 6 leaves - take the seedlings out to the balcony for 15-20 minutes, gradually increase this time interval. In this case, the chili pepper tolerates seasonal cooling better.
Watering and humidity
Water the soil as the top layer dries. Don't overdo it, or the roots will rot. After watering, allow time for excess liquid to drain into the tray, then remove it immediately.
When air humidity is low, the plant suffers. To maintain its vital activity and fertility, regularly spray the leaves with a spray bottle. Use water at room temperature. In summer, water the bushes daily, in winter 3-4 times a week.
Top dressing
With regular feeding of seedlings, the bush bears fruit better. The composition of fertilizers depends on the stage of the growing season of chili pepper:
- with intensive growth of green mass, choose organic or mineral fertilizers with nitrogen;
- During the formation of buds and fruits, give preference to fertilizers with a high concentration of potassium and complex fertilizers with fluorine.
Feed the plant once a week. Be sure to dilute concentrated fertilizers with water at the rate of 3-4 g per 1 liter of water.
Shaping and pinching
In the fall, after harvesting, shorten the crown by a third. This rejuvenation stimulates the future growth of pepper and its fruiting. During the winter period, the root system and branches are strengthened, the pepper regains its strength after the harvest season.
Flowering and pollination
There are 2 types of chili - the inflorescences of which are self-pollinated or require forced irrigation with pollen. For balcony maintenance, it is advisable to choose the first option. Self-pollinating varieties include Medusa, Indian Summer, Ogonyok, and Ryabinushka.
Exotic varieties such as Filius blue, Variegated fish, Tabasco, etc. need additional pollination. In this case, shake each flowering so that the pollen falls on the uterus and the ovary of future fruits is formed.
Shake the pot periodically as the chili peppers bloom. In this way, the fruiting of the bush increases.
Common diseases
At home, pests quickly multiply on bushes, especially those that eat leaves. Low humidity, stable temperatures, lack of wind and natural competitors contribute to the spread of such diseases. Another danger is fungi and mold that appear on the surface of the soil and in unused volumes of soil.
On a note!
For this reason, containers that are too large should not be used. The excess volume will sour and become an “incubator” for diseases.
The spider mite appears first. It feeds on young leaves and flowers, so it is especially dangerous in the first stages of growth. The first sign is curling of the greens. Then a thin and transparent web becomes noticeable. To destroy the pest, you can sprinkle the soil with tobacco from a regular cigarette or spray the entire bush with phytoverm.
When young shoots appear, aphids become active. It can destroy established peppers in just a couple of days, so even at the beginning of flowering you need to carefully inspect the plantings. The main accumulation of the parasite will be localized on the inside of the leaf. A white coating and yellow dots may be noticeable here. During active reproduction, aphids form into clumps, and when observed, they move noticeably. Treating the bush itself will not produce results, since the insect lives in the soil. Watering with a weak solution of ammonia will be useful: 5 ml per 1 liter of warm water. The procedure is repeated twice with a break of a week.
Bacteria that cause a disease called “blackleg” are especially dangerous for hot peppers. One of the signs is blackening of the trunk at the base and slower growth. Gradually, a black coating will become noticeable and will actively spread. As a result, the bush stops receiving food and dies. The disease cannot be treated, but it is important to isolate infected plantings in a timely manner. The best prevention is the correct watering regime. If the soil does not have time to dry, it is better to refuse moisturizing.
Reproduction
Chili peppers of any variety reproduce in 2 ways:
- By cuttings . To do this, young shoots are cut off and kept in water until the root system is formed. Then they are planted separately, like a young plant.
- Seeds . They are bought in gardening stores, after processing they are buried in the ground and watered. All that remains is to wait for the first shoots. The seedlings are transferred to a new, larger pot.
It is recommended to replant the chili pepper annually in a large container, otherwise the bush will stop bearing fruit. Not immediately, but harvest volumes are noticeably decreasing with each season.
Harvesting
Productivity depends on the variety; for example, small-fruited pepper produces 100 pods per season. The plant does not bear fruit immediately. The first harvest can be harvested only after 2-3 years (with proper and regular care). On average, fruiting lasts for 5 years. Later, the number of pods per season decreases significantly.
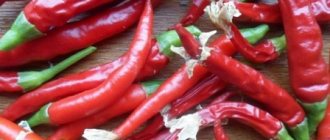
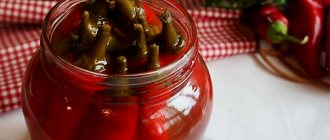
There are several periods of ripeness, which differ in the color of the Chili pods - at first it is green, but then turns red. In a cold place, the fruits are stored for several months without losing their beneficial properties. If desired, the pods can be frozen, pickled, or consumed fresh.
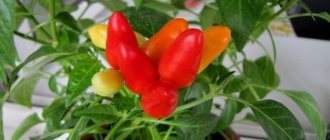
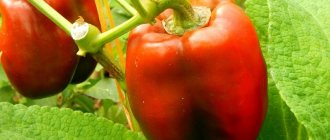
Variety Aladdin
Photo from repka.online
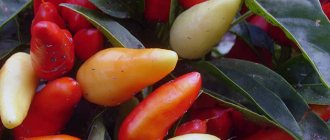
The Aladdin variety of hot pepper is early ripening: the fruits ripen 95-100 days after germination. The plant is a perennial, but many gardeners grow it as an annual. Pepper is not tall, so it is perfect for growing in an apartment and on the balcony: in open ground the height of the bush reaches 50-60 cm, in an apartment it usually does not exceed 35 cm. The plant is bushy and compact.
Fruiting is abundant and lasts several months. Thanks to the varied colors of the fruit, Aladdin pepper can be used not only as an edible plant, but also as an ornamental plant. The color of the fruit depends on the degree of ripening. At first they are pale green, then the color changes to purple and cream, and finally, when fully ripe, turns red. The shape of the peppers is elongated and cone-shaped, their weight is 15-20 g. The taste and aroma are pronounced. The fruits are added to other dishes to add spice and used for canning.
Diseases and pests of chili pepper
Pepper has a strong immune system. Due to the specific aroma, the risk of interference from harmful insects is also minimal. And yet, under certain conditions, the plant can get sick and die. Among the provoking factors:
- Black leg . The reason is excessive watering of the bush. Saving peppers is problematic, so it is better to immediately determine the time and frequency of watering.
- Spider mite . The reason is the activity of the parasite in dry air. Due to lack of oxygen, the leaves turn yellow, dry out and fall off. Treatment is effective if fungicidal drugs are used.
- Midges . The reason is that insects appear from neighboring crops. The plant must be thoroughly treated with soapy water.
- Plant aphids. The reason is a violation of the care regimen. Parasites feed on young shoots and can cause the death of the entire bush.
Black leg of pepper
Spider mite on pepper
Black midge is the enemy of many plants, and pepper is no exception.
Aphids on a pepper leaf
To minimize the risk of disease, carry out preventive spraying of bushes with low concentration fungicidal preparations.
Secrets for growing chili peppers
For beginning gardeners, the plant does not begin to bear fruit even after 3 years. To avoid mistakes, follow the recommendations of professionals:
- In winter, place the pepper on the windowsill on the south side, and if there is not enough light, use artificial lighting.
- When flowers appear, keep chili pepper bushes at a distance. For better ovaries, shake the crowns regularly.
- To ensure seedlings germinate quickly, place them on a well-lit surface and increase daylight hours.
- To speed up fruiting, control watering. The soil should not be dry, but excess moisture is also harmful.
How to plant hot pepper seeds at home
Growing hot peppers on the windowsill begins with sowing seeds for seedlings. Read the detailed instructions and watch the video below, from which you will learn how to sow hot pepper seeds correctly.
You will be interested to know: Tomatoes on the balcony: growing step by step with photos, choosing a variety
Selection of capacity
At the initial stage, it is necessary to grow pepper seedlings, for which low containers are selected. You can use peat tablets. When the plants grow up, they are first transplanted into disposable cups or small pots, and after some time into permanent pots.
The volume of the pot should be 2-3 cm larger than the volume of the root system of the peppers. For compact plants, pots that are too large are not suitable.
Choosing the soil
To grow Ogonyok peppers or any other variety on a windowsill, the store chooses soil that is suitable for vegetable crops. You can prepare your own soil from sand and peat (1:2). Instead of sand, you can use fine vermiculite or perlite.
Before use, it is recommended to disinfect the soil in the oven or spill it with a solution of potassium permanganate. Disinfection is the prevention of fungal diseases. A suitable fungicide can also be used.
Sowing seeds: video and step-by-step instructions
Planting material can be sown dry, pre-soaked in growth stimulants, or germinated by soaking in a damp cloth. Find out how to properly soak pepper seeds in growth stimulants by clicking on the link.
Step-by-step process for sowing hot pepper seeds for seedlings:
- Seedling containers are filled with a moist substrate, in which grooves are made about one centimeter deep.
- The seeds are distributed in furrows at a distance of 1 cm and sprinkled with soil.
- The crops are sprayed with warm water from a spray bottle.
- The containers are covered with film on top and placed in a warm place with a temperature of +23 to +26 degrees.
Before emergence, the cover is removed every day to ventilate the soil, remove condensation and check soil moisture. If the soil surface has dried out, moisten it with warm water using a spray bottle.
WATCH THE VIDEO - HOW TO PROPERLY SOW HOT PEPPER SEEDS
Seedling care
As soon as the shoots appear, the hot pepper seedlings are moved to a well-lit windowsill. The air temperature should no longer be so high. Pepper seedlings are grown at temperatures within +20..+22 degrees.
You will be interested to know: 10 best varieties of cucumbers for growing on a windowsill in winter
In winter, fluorescent or phytolamps are installed above the seedlings. Incandescent lamps are not suitable because they dry out the air.
If batteries are working, the air around the plants needs to be sprayed, and it is recommended to cover the batteries with damp rags. You can place it around a container of water.
Picking
Hot peppers with two to three true leaves spring up. They are transplanted into separate small pots or disposable cups up to ten centimeters high with a diameter of no more than five centimeters. Be sure to add drainage to the bottom of the pots.
Using a fork or a special spatula, each sprout is dug out along with a lump of earth and placed in containers already filled with earth. Plantings must be watered. The first two to three days they need to be kept in partial shade.
As soon as the bushes grow, they are transplanted into pots 2-3 cm larger than the previous one.
For adult peppers, choose pots with a diameter of 20-30 cm, a height of 10 to 15 cm. But before transplanting the plants into such pots, you may need several intermediate transplants, during which each time you choose a new container of only 2-3 cm bigger than the old one.
Advantages and disadvantages of home growing
Before you decide to have your own vegetable garden on the windowsill, study the advantages and disadvantages of such an idea. Start with the positives:
- good harvest without nitrates;
- excellent taste of homemade pepper;
- fruiting for 5 years;
- ease of care;
- strong plant immunity;
- aesthetic appearance of the bush;
- prevention of viruses, influenza, ARVI.
There are some disadvantages that it is also better not to forget about before buying chili pepper:
- small fruits;
- fruiting once a year;
- the need for space on the windowsill;
- additional lighting;
- not always the desired taste.
Reviews
★★★★★
Victor, psychologist, 45 years old, Tyumen. I have had Ogonyok growing on my windowsill for many years.
It bears fruit only at the end of summer, but the dried pods then last for the whole year. The plant itself is unpretentious, with the exception of watering. As soon as the ground under the bush dries out a little, the leaves immediately begin to turn yellow. It tastes like hot pepper, but you still can’t buy it in the store. ★★★★★
Marina, saleswoman, 38 years old, Samara. My husband gave me Salyut seedlings for my birthday.
I have long dreamed of having a vegetable garden on my own windowsill. There were no problems with cultivation; the first fruits appeared at the end of the summer of the same year. The pepper is small, but hot, you can’t eat too much of it. But the product is natural. ★★★★★
Oleg, teacher, 47 years old, Astrakhan. I have had chili peppers growing on my windowsill for beauty for several years now.
The pods are one to one, small, like toy ones. But I noticed that flies and other insects do not fly into the apartment. Apparently, the smell of pepper really scares them away. I rarely add it to food, it’s too spicy. ★★★★☆
Mikhail, Chelyabinsk
We have 3 bushes growing on the windowsill at home. I don’t know the variety, a friend gave me seedlings. The pods grow up to 5-6 cm long, about the thickness of a little finger. I planted the seedlings around March last year, and are currently bearing fruit for the second round. It's the perfect accompaniment to borscht.
Hide
Add your review
Before growing chili peppers on the windowsill, decide on the variety, prepare a suitable container and soil, and after planting, do not violate the rules for caring for and maintaining the plant. In this case, a rich harvest will delight you every year.
0
0
Copy link
Botanical features of ornamental pepper
Decorative peppers are given their spiciness by a special hot substance called capsacin (translated as “biting”). Pepper flowers are similar to potato flowers, but some have a rim around the edge of each petal. Since ancient times, this plant has been grown in South America, Mexico and other countries as an aesthetic component, as well as for use in the preparation of local traditional dishes. For cultivation at home, special varieties were bred, the height of which did not exceed 1.5 m. Ornamental pepper easily adapts to external conditions and produces a rich harvest. The fruits of different species differ in shape, color, and also in the nature of growth. Is it possible to eat indoor peppers?
Only edible varieties of decorative peppers are used as food. These include: “Salute”; "Aladdin"; "Small miracle"; “Ogonyok”, etc. Their fruits can be eaten raw, and can also be used as a spice in cooking. If it is not possible to grow your own vegetables at your summer cottage, then many varieties of hot peppers are ideal for growing in apartment conditions. Decorative peppers contain potassium and ascorbic acid, which are necessary for bones, so this culture is very useful for the human body (in the absence of stomach problems). Edible pepper promotes better functioning of the gastrointestinal tract, disinfects food and enhances the taste of the dish.