Advantages of polycarbonate material
Polycarbonate greenhouses are popular among gardeners , because they have many advantages compared to conventional ones. The differences between them can be traced as follows.
- Polycarbonate allows you to build a greenhouse of any shape, as it is quite flexible and elastic, which cannot be said about other materials. It is convenient to work with because it is easy to cut and bend without being damaged.
- This material does not crack or freeze under sudden temperature changes, unlike, for example, glass and film.
- Greenhouses made of cellular polycarbonate are reliable and durable - they can last up to 20 years. If the frame of the greenhouse is covered with film, then its service life without damage is a maximum of 2 years.
Tomato diseases in a polycarbonate greenhouse
The main problems encountered when growing tomatoes include various diseases. Their nature of occurrence may vary, depending on the pathogen. Infection occurs through the ground or from neighboring plants; viruses are often carried by insects. You can recognize a particular disease by its appearance: blotches, spots, rot may form on the tomatoes, and then the bush begins to wither. To begin to fight the disease, you need to know the symptoms of infections.
Late blight
The most common diseases include late blight. The cause of the disease lies in the infection of tomatoes with a fungus. It lives in the soil, survives winter frosts well, and in the spring it becomes active and affects the crop. The fungus can be transmitted from potatoes and cucumbers.
The disease can be recognized by the formation of a white coating on the back of the leaves. Blurry brown spots begin to appear on the stem, then they move onto the leaves. The seedlings wither every day and then die. The development of late blight is promoted by high humidity, spring and autumn frosts. Careless use of nitrogen fertilizers also leads to the emergence of dangerous fungus.
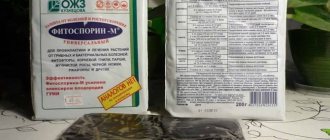
As soon as the first signs of the disease are detected on the tomato, treatment begins. Diseased areas of the plant are cut off and burned. 5 grams of Fitosporin are diluted in 10 liters of water and healthy shoots are treated with the resulting solution. Fitosporin can be replaced with Ecosil; it protects healthy plants from fungal infection. 15 drops of the substance are dissolved in 3 liters of water and irrigated tomato bushes.
Spraying with an iodine aqueous solution helps well to prevent late blight. Take 10 milliliters of iodine per bucket of water and irrigate the tomatoes 2 weeks after transplanting into the greenhouse. Repeat the treatment after 10 days.
Stem necrosis
At the beginning of fruiting, you can encounter a dangerous disease called necrosis. Brown spots appear on the stem, then they crack. A white liquid flows out of the resulting cracks - the juice contained in the stem. After some time, the seedlings dry out from loss of juice and die.
The causative agent of the disease may be present on the seeds or live in the soil. Sometimes infection occurs through gardening tools or from neighboring crops. The incubation period is 2 weeks. Then signs of wilting appear.
Tomatoes infected with necrosis cannot be saved. They are dug out of the ground along with the rhizome and thrown away. The remaining tomatoes must be treated with a fungicide. The drug Narcissus is used to treat stem necrosis. It significantly reduces the risk of infection, providing plants with normal growing conditions. For irrigation, dilute the solution to a working concentration of 0.25% and irrigate the plants. Part of the solution is used to water the soil.
Regular ventilation of the greenhouse and infrequent watering will help resist necrosis. Boric acid is often used to prevent this disease. A tablespoon of the substance is diluted in a bucket and sprayed on tomato bushes a few days after transplanting into the greenhouse.
Septoria
The disease is otherwise called dry spotting. The infection appears throughout the bush, gradually affecting its parts. The disease begins mainly with the leaves: brown spots appear on them, they increase in size and take on an oval shape. The surface of the stain has a velvety texture. The leaf gradually dies. On the stem and fruits, similar spots appear later.
Septoria blight is often transmitted to tomatoes from potatoes. The disease is transmitted by fungal microorganisms, their reproduction occurs by spores. Like all fungal infections, septoria disease progresses with frequent watering and high humidity. The disease is considered severe; a diseased plant cannot be recovered. The only way out is to save the still healthy tomato bushes.
Sick shoots are immediately isolated from the rest. For treatment, fungicidal drugs are used - Kuproksat, Acrobat, Skor, Ditan, Metaxil. Any of the listed products is diluted in the proportion specified in the instructions for the drug. Fungicides can be used not only for treatment, but also for spring treatment against diseases.
Attention!
When diluting and watering with fungicides, gloves and goggles are used.
Apical rot
The disease most often occurs due to improper care of tomatoes. When there is a lack of moisture in the soil, the root system begins to absorb water from the fruits and leaves. The pulp and stem begin to dry out, and a brown spot forms on the fruit, which grows in volume. Tomatoes infected with rot are not suitable for consumption.
To cure the crop, watering is normalized. For prevention, use copper sulfate or irrigate tomatoes with a pink solution of potassium permanganate. Nutritional supplements strengthen the immune capacity of tomatoes. Calcium nitrate (10 grams) is mixed with potassium chloride (30 grams) and the substances are dissolved in a bucket of warm water. Tomatoes are fed with the resulting solution during flowering and fruiting.
Root rot
Rot or otherwise “Black Leg” is a fungal infection. Transmission to tomatoes is possible from soil and neighboring plants. A diseased plant cannot be treated, as it is completely affected by fungal spores. At the initial stage of development, gray spots form on the tips of the leaves, then the spot covers the entire surface, and the leaf dries out. Gradually, root rot affects the stem and fruit.
In case of infection, dig up the entire infected bush and burn it. The soil in which the diseased plant grew is spilled with any fungicide. The remaining tomatoes are treated with antifungal drugs, for example, Rossa or copper sulfate, diluted in water to a concentration of 5%.
Other fungal diseases
Fungal infections include Alternaria, a less severe form of fungus than the listed varieties. Alternaria blight appears 10-14 days after infection. Signs include yellowed leaves and a limp stem that does not hold its shape well. If the tips of the leaves begin to turn yellow, cut them off. The bushes are sprayed with potassium permanganate diluted to pink, and the ground is watered with Fitosporin.
White rot is less common on tomatoes, but the disease is easy to notice by its characteristic white coating. The infection is difficult to remove; treatment is complicated by the fact that the spores quickly spread throughout the plant. Pruning infected bushes is still considered an effective way to get rid of rot. At the same time, healthy plants are protected from possible infection with the help of fungicidal agents.
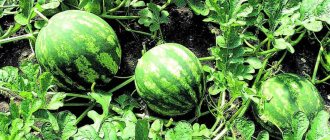
Fruit cracking
Unlike fungal and viral diseases, cracking of the skin is not so dangerous for the fruit, but it shortens the shelf life and spoils the appearance. Large tomatoes weighing more than 300 grams especially suffer from cracking.
The reason may be an excess of nitrogen components in the soil, as well as a large temperature difference. Frequent evening watering and the use of fertilizing also provokes the formation of cracks, as the fruit rapidly increases in volume. Most often, ripe red tomatoes with thin skins crack.
There is no cure for cracking. However, if you take the measures described below, you can avoid trouble:
- planting varieties with strong skins;
- use of a drip irrigation system;
- mulching the soil after watering;
- mandatory closing of the greenhouse at night.
Is it possible to grow tomatoes this way?
One of the best options for growing tomatoes is a greenhouse made of cellular polycarbonate. It has a lot of advantages:
The sun's rays do not overheat such a greenhouse, because all surfaces of the structure are moderately transparent. Thanks to this, plants do not get burned and harmful ultraviolet rays are not transmitted.
- The honeycomb material maintains a temperature regime favorable for tomatoes and reliably protects against spring frosts and various weather disasters.
- Attractive appearance.
The disadvantages include the following:
- Over time, colored polycarbonate fades in the sun, and transparent polycarbonate becomes cloudy.
- When temperature changes, the material narrows and expands; if you do not take this factor into account when cutting and do not make allowance for expansion, then the greenhouse may crack in the places of fastenings and bends in winter.
- Polycarbonate is not scratch resistant.
Important. Difficulties in the process of growing tomatoes in such a greenhouse can only arise if the temperature regime is violated and there is high humidity. This needs to be closely monitored.
The following features can be identified that must be taken into account when growing to obtain a good harvest of tomatoes:
- It is best to purchase self-pollinating tomato varieties.
- Be sure to ventilate the room.
- Do not allow condensation to form in the greenhouse.
Agricultural technology
In order to be able to grow high-quality tomatoes in a polycarbonate greenhouse, even in the absence of proper experience, it is necessary to carefully study the technology of planting and caring for plants.
You can learn about growing cucumbers in a greenhouse in winter here.
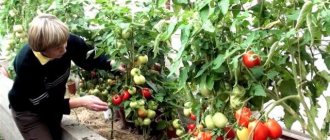
With the right agricultural technology, you can get up to 10 kg of tomato from one bush
Procurement of seeds
Before sale, seed material is not always treated with disinfectants. If it is missing, you can disinfect the seeds yourself at home. To do this, you need to wrap them in a small woven napkin and dip them in a strong solution of potassium permanganate for twenty minutes, then rinse thoroughly with clean water. Moisten the napkin containing the seeds generously with water and place it in a container for two days, constantly making sure that it remains wet at all times. During this time, the seeds will swell and can be planted for seedlings.
Potassium permanganate - a budget way to disinfect seeds
Landing
Before planting tomatoes directly in the greenhouse, you need to prepare seedlings from the seeds. To do this, boxes, cassettes or peat cups need to be filled with soil mixture or soil from the greenhouse, pre-heated in the oven or spilled with boiling water. Next you need to do the following:
- Thoroughly water the soil and compact it a little.
- Make grooves one centimeter deep with a distance of about seven centimeters from each other.
- Place the seeds at a distance of one and a half centimeters from each other, carefully cover with soil.
- Place the containers in a well-lit place (can be on a windowsill).
Planted tomato seeds are stored under film
The temperature for growing seedlings should be from twenty to twenty-five degrees Celsius. During the first month, it must be watered three times at regular intervals. As soon as the seedlings have the first two or three leaves, a picking procedure is required.
The timing of planting seeds depends on the growing region. As a rule, the procedure is carried out in late February-early March. Seedlings are planted in a greenhouse in late May-early June, when the soil warms up to a temperature of thirteen degrees.
It is recommended to plant plants in a polycarbonate greenhouse at a distance of at least a quarter of a meter. The depth of the hole should also be about twenty-five centimeters. Before immersing a seedling in it, you need to pour a liter of a weak solution of potassium permanganate into it.
Scheme of planting tomatoes in a polycarbonate greenhouse
The soil should not be filled above the growth level of the lower leaves, as this can lead to rot and disease.
Watering
It is recommended to carry out the first watering after planting no earlier than two weeks later. After this, the soil should be moistened approximately once a week. You need to know exactly how to properly water tomatoes in a greenhouse. You can pour water only on the soil, right to the roots. If moisture gets on the leaves and stem, burns may occur. We should also not forget about periodically loosening the soil so that liquid and oxygen can pass through it freely.
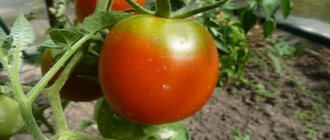
With proper care and timely watering, tomato yields a large harvest.
Temperature
The optimal temperature for the growth and development of tomatoes in a polycarbonate greenhouse should be about twenty to twenty-two degrees. However, during flowering it is recommended to increase it by one or two degrees. The greenhouse should be ventilated periodically throughout the season.
The greenhouse must be ventilated to prevent most fungal diseases.
Top dressing
It is advisable to take care of the fertility of the soil in the greenhouse in the fall. Then you should dig it up and apply purchased mineral fertilizers or mullein.
Read on to learn more about homemade and store-bought fertilizers and fertilizers for cucumbers.
During the season, during direct cultivation, it is also necessary to make three feedings:
- On the nineteenth day after transplantation. Mix half a liter of mullein with a tablespoon of nitrophoska in a bucket of water.
- On the thirtieth day. Mix a spoonful of store-bought fertilizer with a bucket of water.
- Forty-two days later. Mix two spoons of ash with a spoon of superphosphate and dissolve in a bucket of water.
The suggested amount of fertilizer must be divided per square meter of ridges.
It is recommended to water with solutions after sunset or early in the morning before sunrise.
Tomato feeding is carried out using complex mineral or organic fertilizers
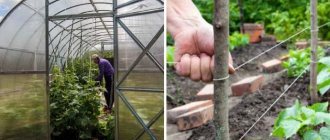
Garter
Staking tomatoes in a polycarbonate greenhouse is necessary. Short people rarely need it. It is advisable to form and tie plants to pegs in the morning. It is first recommended to remove all excess ovaries, leaving no more than seven to eight clusters. Thus, the harvest will be large and full, and stakes driven into the ground and bushes tied to them will prevent it from getting sick and spoiling.
You can read about gartering cucumbers in a polycarbonate greenhouse at the link.
In a greenhouse, tomatoes can be tied to a wire stretched under the roof.
Which varieties to choose?
When choosing a tomato variety for a carbonate greenhouse, you need to pay attention to the following qualities:
- Self-pollinating.
- Ability to grow into one stem.
- Disease resistance.
- The ability to easily tolerate excess humidity.
You can choose both low-growing and tall-growing tomatoes, early and medium ripening, for growing. The most popular varieties are:
Mikado pink
Large pink fruit (up to 600 g) for universal use, the plant reaches 2 meters, has excellent immunity. More than 5 kg of fruit can be collected from one bush.
Pink raisins
The fruits are of excellent taste, medium-sized. Fruiting is long and abundant.
King of Kings
A real giant, the fruits reach 1 kg, tasty and juicy. Resistant to rot and late blight, reaches a height of 1.8 m.
Junior F1
An ultra-early hybrid variety, the fruits are bright red, oval in shape, weighing about 100 g. The bush grows up to 50 - 60 cm in height.
You can learn more about tomato varieties for greenhouses from the video:
Where to begin?
Already in the fall it is necessary to start preparing the greenhouse for the future harvest. You can divide all the work into stages:
- After the end of the season, order is restored: all tops and remnants of tomatoes are carefully removed.
- All surfaces of the structure are washed with water (preferably with soap).
- Treatment is carried out with a disinfectant solution.
Important! Some of the work can be done in the spring, before growing tomatoes, but the greenhouse must be washed in the fall.
Greenhouse preparation
Before placing tomato seedlings in the greenhouse, they must be prepared for the arrival of residents: washed and disinfected.
Washing
Polycarbonate is easy to clean with soap and water. Cleaning powders and other abrasive products cannot be used; they can damage (scratch) the polycarbonate.
The greenhouse needs to be washed inside and out.
Disinfection
While growing plants, pathogens and parasites can accumulate inside the greenhouse. To destroy them, special disinfectants are used. It is necessary to treat all structures inside the building: walls, joints of polycarbonate sheets, windows, doors, equipment.
Lime
Lime powder is poured with water until it becomes liquid sour cream. Using a brush, the lime mass is applied to the frame of the greenhouse without touching the transparent walls.
Expert opinion
Stanislav Pavlovich
Gardener with 17 years of experience and our expert
Ask a Question
Bleach powder is used against pests that inhabit the soil. It is sprayed over dug up soil in the fall, using 2 cups of the drug per 1 square meter. m.
Formalin
A drug with a strong effect. Its disadvantage is the impact on all microorganisms, beneficial and harmful, without exception. The greenhouse is treated with formaldehyde only in the most extreme cases.
Important! When working with the drug, you must wear a respirator, goggles and gloves.
Formalin is sprayed on the walls of the greenhouse and on the ground, using 20–25 ml of a 40% solution per 1 square meter. meter. After spraying, keep the greenhouse closed for 1 day.
Sulfur
Effectively disinfect a greenhouse with sulfur bombs. The gas not only destroys microorganisms on open surfaces, but also penetrates 8–10 cm deep into the dug soil.
Sulfur blocks (“FAS”, “Climate”) are purchased at garden stores. The number of blocks needed for processing depends on the volume of the greenhouse (the height, width and length of the structure are multiplied). Processing principle.
- The required number of checkers are evenly laid out indoors.
- Close the windows tightly.
- They set fire to the checkers, walking from the far corner of the greenhouse to the exit.
- Keep the room tightly closed for up to 3 days.
When working with checkers, you must use personal protective equipment.
Expert opinion
Stanislav Pavlovich
Gardener with 17 years of experience and our expert
Ask a Question
Advice. To prevent sulfur from causing corrosion on metal structures, they are lubricated with grease before processing.
Soil preparation
After removing all plant debris, the soil is dug up. Various solutions are used to disinfect soil:
- “Fufanon” (10 ml per bucket of water);
- "Marshal" (7 ml per bucket of liquid);
- “Fitosporin” (5 g per 10 liters of water);
- “Copper sulfate” (30 g per 10 liters of water).
The surface of the dug up soil is sprayed with solutions or the soil is watered from a watering can with a sprayer. Treating the entire structure with a sulfur bomb will reliably disinfect the soil.
Important! These drugs also destroy beneficial microflora in the soil. Before planting seedlings in the spring, the soil is not only filled with fertilizers, but also watered with special solutions, enriching the soil with microorganisms. They use “Baikal EM”, “Shine”, “Phoenix”, vermichay.
Preparatory measures
Soil preparation
- In the fall, the soil is spilled with a solution of copper sulfate, fertilizers are applied and everything is dug up.
- In the spring, about 2 weeks before planting seedlings, the soil should be treated with a solution of copper sulfate, wood ash and potassium salt should be added.
- Lightly loosen the soil and form ridges, leaving passages of at least 60 cm.
- After about a week, you need to treat the soil with one of the biological preparations: “Baikal-M”, “Fitosporin” or “Trichodermin”.
Sowing seeds
Procedure:
- About 2 weeks before sowing tomato seeds, you need to disinfect the seedling boxes and fill them with prepared soil and water them well.
- Before sowing, the seeds need to be kept for 20 minutes in the Fitosporin-M solution, and then in a growth stimulator (any).
- Place the seeds in small grooves (about 1.5 cm deep), lightly sprinkle with soil and cover with film on top. It is advisable to maintain the air temperature at least 22 degrees.
- As soon as the seedlings begin to appear, the air temperature should be slightly reduced (to about 18 degrees).
- The film must be periodically opened slightly and as soon as the bulk of the seeds have sprouted, remove it completely.
- In April, seedlings begin to harden, everything is done gradually. First, the window opens for a short time, gradually this time increases. You can take boxes with seedlings out onto the balcony or veranda at an outside air temperature of +12 degrees.
Attention! The height of the seedling boxes must be at least 7 cm.
Watering and fertilizing
Watering should be very careful - strictly at the root and with warm water. You need to water approximately once every 5 – 7 days.
You can feed the seedlings about a week after picking. Complex fertilizer “Agricola” is very popular; it should be applied after watering.
For feeding, it is also very good to use the “Athlete” product (it will prevent the plants from stretching out and will strengthen the root system well), or “Zdraven”, “Krepysh”, etc.
How to transplant into a greenhouse correctly?
Transplantation into the greenhouse begins in early May, while the soil temperature (inside) should be about 15 degrees. Different varieties have their own planting nuances:
- Low-growing (with one stem) plants are planted at a distance of 25 cm from each other, between rows - 45 cm.
- Low-growing (highly branching) bushes are best planted in a checkerboard pattern (40 by 40 cm).
- Ideally, it is also better to plant tall
The transplantation process itself occurs in this way: each plant is taken out along with a lump of earth and moved into a hole (previously spilled with water).
Attention! You cannot deepen the bushes too much; an exception is possible only for overgrown plants.
How to care for tomatoes in winter
If you want to have tomatoes on your table all year round and enjoy the grown fruits even in winter, you should learn the features of growing tomatoes in a greenhouse during the cold season:
- seeds should be sown in late August;
- grown seedlings must be illuminated, providing at least 17 hours of daylight;
- after planting the seedlings in a permanent place, the required temperature and humidity should be created in the greenhouse;
- carry out double treatment with the Atlet inhibitor.
The necessary conditions
Humidity
The greenhouse must be ventilated periodically to avoid stagnation of moisture, which can destroy the tomatoes. Humidity must be maintained at 65 - 75%.
Temperature
Inside the greenhouse, the temperature should be maintained within 20-22 degrees and slightly higher (3-5 degrees) during the flowering period of tomatoes.
You can adjust the optimal temperature as needed:
- through ventilation;
- heating the soil (using covering material);
- heating the air - you can install a frame over the plants and stretch the film, which will increase the temperature.
Stepsoning
Stepchildren need to be removed, since because of them the plant only wastes energy in vain. These side shoots from the leaf axils can grow very large, shade the entire bush and slow down the ripening of tomatoes. It is best to do pinching in the morning; the length of the branch should be approximately 8 cm. You can remove it with scissors, or you can simply pinch it off with your hand.
Lighting
Polycarbonate greenhouses have a very high advantage - they have high light transmission. But in early spring, such lighting is still not enough; for tomatoes, daylight hours should last 12–15 hours. Therefore, it is best to install additional lighting in the structure, and you need to choose lamps with a neutral glow.
Advantages and disadvantages
The advantages of growing in these greenhouses include:
- the possibility of using biological products to combat diseases and pests (in open ground their effectiveness is low);
- early harvest;
- control over cultivation.
The disadvantages include, first of all, the very high cost of polycarbonate greenhouses. This material is also susceptible to scratches, their presence affects the ability to transmit natural light.
Therefore, for example, it is necessary to wash these greenhouses with non-abrasive means. Another significant disadvantage is that greenhouses create favorable conditions not only for tomatoes, but also for all kinds of diseases and pests .
If you intend to grow tomatoes and please yourself and your family with an early harvest, then recommendations for growing tomatoes in a polycarbonate greenhouse can help you with this. Follow these rules, and a positive result will not be long in coming.