Why and why peppers are grown in a greenhouse
Due to the fact that most pepper varieties take quite a long time from the appearance of full shoots to the biological ripening of the fruit, which sometimes reaches 150 days, growing it in a greenhouse often has no alternative. This is especially true for regions with short summers and cold climates.
Ural and Siberia
In these regions, obtaining a full pepper harvest is possible only in greenhouses or in warm beds under film cover. In conditions of short summer and sharp temperature fluctuations in open ground, it is almost impossible to grow even varieties with relatively short ripening periods.
Middle zone and Moscow region
It is in principle possible to grow peppers in the open ground of these regions, but this is not possible in every season. Often it is necessary to remove fruits at the stage of technical maturity and lose part of the harvest. Therefore, film or polycarbonate greenhouses are used everywhere here for growing peppers.
Northern regions of Russia
Glazed, heated greenhouses are the only possible option for growing peppers in harsh conditions.
Table: advantages and disadvantages of growing peppers in a greenhouse
| Advantages | Flaws |
| Extension of growing season | Relatively high costs for greenhouse construction |
| Getting early harvests | The need for labor and financial costs for maintaining a greenhouse |
| Leveling possible temperature changes | Quite complex and time-consuming plant care |
| Possibility of growing perennial peppers in heated greenhouses | |
| The only option for obtaining high-quality seedlings in large quantities |
How is the harvest going?
Peppers are harvested when grown in a greenhouse several times per season. You can cut the fruits at any time. Unlike many crops, bell peppers do not have a specific point at which they reach technical maturity. Cut the fruits as soon as they become large. You can wait for the skin to turn a red-orange hue, or you can cut off the green-skinned peppers.
Preparatory stage
Preparing a greenhouse for planting is a rather expensive and time-consuming process.
The soil
On fertile soils, you can get by with simply applying fertilizer, but more often you have to make high or combined beds in the greenhouse. For this:
- They dig a hole around the perimeter of the bed, 20-30 cm deep. If the soil under the greenhouse is quite fertile, then skip this point.
- A fence 20-30 cm high is installed along the same perimeter. It can be made of boards, flat or corrugated slate, tiles, etc.
Greenhouses often have high beds
- The internal volume of the resulting reservoir is filled with nutrient soil. Various options are acceptable depending on the capabilities of the gardener; the only important thing is that the soil is loose, permeable and fertile. Its composition could, for example, be like this:
- chernozem (imported) - 3 parts;
- high-moor peat - 1 part;
- humus - 1 part;
- sand - 1 part.
- Additionally, in the fall, superphosphate (50-60 g/m2) and wood ash (2-3 l/m2) are added to the digging.
Irrigation system equipment
Watering is an important part of pepper care. It can be carried out in various ways, the choice of which depends on the preferences and financial capabilities of the gardener.
Traditional watering
This is the cheapest, but also the most labor-intensive option. To carry it out, after planting the seedlings, grooves are formed along the beds, which are subsequently periodically filled with water manually or from a hose. This method is time-tested and works well for watering peppers. Its only drawback is the formation of a crust when the soil dries out, which requires loosening it after each watering. Since warm water is required for irrigation, special containers are installed in the greenhouse (or next to it) to accumulate and heat it.
Drip irrigation
Drip irrigation systems can significantly simplify the watering procedure. For this purpose, special drip tapes are used, which are laid along the rows of plants at a distance of 10-15 cm from the stems on both sides. Water is supplied to them by gravity (for this, the containers must be raised quite high - 1-1.5 m) or using a pump. If necessary, add water-soluble fertilizers to the water for irrigation. With this method, moisture enters the soil slowly and directly to the roots; a crust is practically not formed.
Tapes for drip irrigation are laid on the beds immediately after planting the seedlings
Watering with oozing hoses
This is an innovative technology, which is a type of drip irrigation. Its peculiarity is the use of special hoses made of porous rubber instead of drip tape. In this case, droplets of moisture are released over the entire surface of the hose, creating a continuous moistened strip. Other advantages of this technology:
- its operation does not require high water pressure - it can flow by gravity even from a low-standing container;
Water from a oozing hose is released over its entire surface
- durability of the hoses - at the end of the season they can be easily rolled into coils; they can withstand temperatures down to -30 °C during storage.
Hoses, buckets, watering cans, drip tapes and dripping hoses are tools for watering. The quality of watering depends on the experience of the gardener and his compliance with the rules of this procedure for a particular crop. In the 2021 season, 2 beds of pepper were planted at my dacha. It so happened that they ended up at different ends of the site. One of them was in the drip irrigation zone, and I had to water the peppers in the second bed by hand using a hose along the grooves. Since the intervals between watering, loosening and mulching for both beds were the same, then, as I expected, the result was also no different - the difference was only in labor costs and water consumption (with manual watering it was higher).
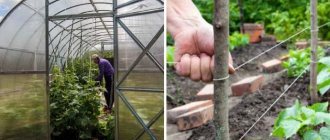
Support arrangement
If you plan to grow tall varieties of peppers, then before planting you should take care to install supports for their stems. For these purposes, trellises or crossbars with hanging cords are usually installed.
It is convenient to tie tall peppers to trellises
The best varieties of peppers for greenhouses
The State Register contains many varieties of pepper created specifically for indoor cultivation. Let's briefly introduce some of them.
Table: some varieties of pepper for greenhouses
| Variety | Ripening time, days | Height, cm | Productivity, kg/m2 | Fruit weight, g |
| Bon Appetit F1 | 118—120 | 50 | 4-5 kg per bush | 200 |
| Blondie | 110 | 60—70 | 12,9—13,6 | 105—140 |
| Winnie the Pooh | 107—111 | 25—30 | 1,6—1,8 | 48 |
| ox ear | 70—75 | 70 | 3,2 | 170—200 |
| Health | 80—90 | 140 | 4,6 | 50—70 |
| Magician | 101—110 | Tall | 11,1—13,2 | 145—168 |
Photo gallery: pepper varieties for greenhouses
Bon appetit pepper fruits are cube-shaped.
Blondie - productive pepper from Holland
Winnie the Pooh peppers grow on low, compact bushes
The Ox's Ear pepper has large, thick-walled fruits.
Zdorove - a tall variety of pepper for greenhouses
Creating favorable conditions for pepper growth
To grow sweet peppers year-round, it is necessary to maintain a certain level of microclimate in the greenhouse and create the necessary conditions for the active formation of the plant and high fruiting.
To do this, it is necessary to organize a high-quality ventilation system, the supply of the necessary light to stimulate photosynthesis processes, the best option for large buildings is drip irrigation, and it is better to use trellises for staking tall plants.
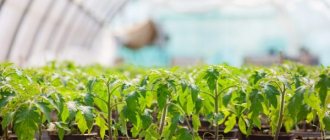
Transplanting seedlings into a greenhouse
The optimal age of seedlings for transplanting into the ground is in the range of 60-80 days, and the plants should have 5-8 true leaves.
Deadlines
Peppers can be planted in unheated greenhouses when the air temperature in it reaches at least +12 °C; in the middle zone this usually occurs at the end of April - beginning of May.
Scheme
Several methods are used to plant peppers in a greenhouse:
- On a bed 100 cm wide, plants are placed in 2 rows, located at a distance of 50 cm from each other and 25 cm from the borders of the bed. The interval between bushes in a row is 20-35 cm, depending on the variety. This method is called two-line tape.
The scheme for planting peppers in a greenhouse must be adapted to its size.
- For the square-cluster method, on the same bed, rows and bushes in a row are placed at intervals of 60 cm. In this case, the so-called pair planting is used, when 2 roots are planted in each hole.
- By arranging the plants in a checkerboard pattern, you can thicken the plantings to a pattern of 30x30 or even 20x20 cm.
- Other schemes are possible at the discretion of the gardener.
The optimal planting density is 8 plants per 1 m2. But sometimes, in order to increase the yield per unit area, thickened plantings are used, compacting them to 14 bushes per 1 m2. Due to the deterioration of illumination of plants, the ripening time of fruits increases, but during this time they grow to larger sizes, their size and wall thickness increase. And also in this case, the plants will need additional nutrition. We should not forget about the increasing risks of fungal diseases. The use of this method is not recommended for beginning gardeners.
Paired landing
Planting 2 roots per hole is used for low-growing and medium-growing varieties. This method allows you to do without tying the stems to supports, since neighboring plants support each other.
Compatibility with other crops
Better results can be achieved by growing each crop in a separate greenhouse, since in this case it is possible to provide them with the most suitable conditions. But on household plots and garden plots it is necessary to combine plantings for obvious reasons. In general, peppers get along well in the same area with tomatoes and eggplants, the conditions of which are similar. You should not plant peppers in greenhouses whose main crop is cucumbers, since the latter require more moisture. And also, you cannot grow hot and sweet varieties of peppers together, since, having been pollinated, the sweet peppers will become bitter. It is useful to plant some herbs around the perimeter of the beds:
- Basil - its aroma repels aphids and whiteflies.
- Marjoram repels pests and attracts bees.
- Lovage accelerates the growth of surrounding vegetables and improves immunity.
- Onions help disinfect the soil.
The best varieties of peppers for greenhouses
Selecting seeds is not an easy task. Their assortment is large, they differ from each other in characteristics, color and shape of fruits, and ripening periods.
| Name | Growing season from sowing to fruit (days) | Productivity (kg per 1 m2) | Characteristics |
| Orange miracle | 95-110 | 6-13 | An early variety of peppers with large orange fruits that grow on tall (up to 1 m) powerful bushes. The walls of the cube-shaped fruits are of medium thickness (5-8 mm). The weight of 1 vegetable is 200-250 grams. Their excellent taste, high level of transportability, and long shelf life are noted. |
| Star of the East F1 | 100-110 | 7-9 | The spreading bushes of the hybrid grow up to 0.7 m. The voluminous fruits weighing up to 350 g are colored yellow, red or chocolate. The wall thickness of the peppers is up to 10 mm, the shape is in the form of a prism. The original dark chocolate color of the vegetable is loved by many gardeners. |
| Gypsy F1 | 60 (after planting seedlings) | 3-5 | Hybrid of Dutch selection. Low bushes (up to 60 cm) do not require tying to supports. Cone-shaped fruits of different colors: red, yellow, burgundy, wall thickness 5-6 mm, weigh 100-120 g. These sizes are suitable for stuffing and canning |
| Red bull F1 | 110-120 | 9 | Bright red cylindrical fruits up to 20 cm long weigh 250 g, maximum weight - up to 400 g. Wall thickness is 10 mm, the pulp is juicy, the taste is wonderful. Versatile vegetables for preparing various dishes and winter preparations |
| Actor | 100-110 | 4 | Tall bushes up to 1.5 meters in height need to be tied to supports. The cone-shaped long fruits with thick walls are massive, each vegetable weighs up to 300 g. The color of the fruits is yellow, red, pink and intermediate shades. The plant has good immunity against many diseases |
Attention!
Sweet peppers of different varieties can be planted in the same greenhouse. However, it must be borne in mind that seeds cannot be collected from them. When planted next year, pollinated varieties will grow that may not retain the quality of the parent varieties. Bitter and pungent species are strictly not recommended to be planted nearby.
Caring for peppers in a greenhouse
Like any plant in a greenhouse, pepper requires constant attention and care.
Watering and mulching
Maintaining optimal soil moisture. To control it, it is not necessary to purchase expensive devices; it is enough to ensure that a crust does not form on the surface of the soil, and also that the soil does not sour. Typically, the interval between waterings is 2-3 days, but in extreme heat, daily watering may be necessary. In order to reduce the total number of waterings and loosening, the soil is mulched using available materials:
- straw;
- hay;
- peat;
- sunflower husk;
- compost, etc.
By rotating, the mulch additionally enriches the soil with nutrients.
Feeding
Peppers begin to be fed 2-3 weeks after planting the seedlings in the greenhouse. In this case, fertilizers are applied in liquid form - this way they are absorbed as quickly as possible. At first, plants need enhanced nitrogen fertilizing, which promotes the rapid accumulation of green mass and stem growth. The best nitrogen fertilizer is considered to be an infusion of mullein or chicken droppings, which are easy to prepare yourself. To do this, the selected component is loaded into a barrel (it is better to place it outside the greenhouse in a sunny place) and filled with water. After 5-7 days of fermentation, the strained concentrate is used to fertilize peppers, diluting it with water 5 times (chicken manure - 10 times). 1 liter of fertilizer is poured onto each bush. After 7-10 days, you should feed the peppers with potassium, which can be added in the form of an infusion of wood ash (3 liters per bucket of water infused for 2-3 days) at a rate of 1 liter per bush.
Mullein infusion is a natural nitrogen fertilizer
If it is not possible to prepare fertilizers yourself, then you can use urea (20-30 g/l) and potassium monophosphate (10-20 g/l), pre-dissolving them in water (it is convenient to add them to a barrel for drip irrigation). In the future, these feedings are carried out at intervals of 2 weeks, alternating organic and potassium.
Shaping, gartering and pinching
Low-growing varieties of pepper, as a rule, do not need such procedures, although it is recommended to remove leaves and stepsons from them before the first fork. All other peppers are usually formed into 2 stems, and the stepsons growing inside the crown are removed. If necessary, the stems are tied to pre-installed supports.
It is better to form peppers into 2 stalks
Video: shaping peppers
Lighting
Peppers can be grown in spring-summer greenhouses without additional lighting. If autumn or extended rotations are expected, then the installation of an additional lighting system will be required. For normal growth and development of peppers, they need 12-14 hours of daylight, just as was indicated for seedlings.
Ventilation of greenhouses
Greenhouses should be opened periodically for ventilation. This must be done in the following cases:
- The temperature in the greenhouse is too high (above + 28 °C).
- Air humidity exceeds 80-85%.
- After treatment with chemicals.
Features of bush formation
After planting the pepper seedlings in a permanent place, they begin to form bushes. Low-growing varieties (up to 70 cm in height) do not form plants. It will be enough to tie the main stem to a peg so that it does not break under the weight of the fruit. Medium-sized and tall bushes are tied to high supports or trellises.
Correct formation of bushes when growing peppers in greenhouses allows you to:
- remove unnecessary shoots, reduce the amount of green mass, thereby reducing the cost of plant vitality and nutrients for their reproduction;
- accelerate the ripening of peppers in a greenhouse, since on thinned bushes not shaded from sunlight, the fruits grow and develop faster;
- increase the weight of the crop. If seedlings receive more ultraviolet rays, photosynthesis improves and many fruit ovaries are formed. The size of the fruit increases 2-3 times.
Attention!
The shoots should not be pruned excessively; this can lead to a slowdown in plant growth and a halt in the formation of fruit ovaries.
Basic rules for pruning:
- Excess shoots, stems and leaves that do not play an important role in obtaining the harvest are removed from the bush - overgrown or crooked shoots, dried out, damaged leaves.
- Tools for cutting branches must be cleaned of dirt and rust and disinfected in an antiseptic alcohol solution.
- It is better to begin pruning work immediately after planting the seedlings and their establishment in a permanent place.
- At least 2 times a week you need to strengthen the regrown shoots on the trellis and remove damaged leaves.
- You should not prune sick or weakened bushes so as not to harm them further. They must be immediately treated with appropriate medications. If after 7 days of treatment the bushes do not recover, it is necessary to remove the plants from the garden bed, otherwise healthy bushes will be at risk of disease.
- Infected bushes are dug up and burned and not used in compost heaps.
Pollination
Pepper is a plant that can be pollinated without the participation of insects. Their flowers are small and do not attract large pollinators: bees, bumblebees. They are visited mainly by ants and thrips. Even they are rarely seen in greenhouses. If the plant does not form fruit ovaries, then you need to help them and carry out manual pollination.
This is easy to do with a hygienic cotton swab. It collects pollen well on male flowers and lingers on female stamens. It will be enough to carry out this procedure 2-3 times, and the peppers will begin to form fruits.
Diseases and pests common when growing peppers in a greenhouse
Greenhouse peppers are susceptible to some diseases and pest attacks. As a preventive measure, a few days before planting, the soil in the beds is treated with Farmayod, dissolving 10 ml of the drug in 10 liters of water. The consumption rate for treatment is 2 l/m2. This drug kills all soil bacteria, including beneficial ones. Therefore, 3-5 days after treatment, the soil is watered with solutions of Siyanie or Baikal EM1 preparations to restore the microflora.
The drug Baikal EM1 allows you to quickly restore soil microflora after treatments
To prevent fungal diseases on the plants themselves, the biofungicide Fitosporin M is used, which can be sprayed on peppers an unlimited number of times with an interval of 2 weeks.
Table: probable pests and diseases of peppers in greenhouses
| Disease/pest | Signs | Drugs for treatment/control |
| Blackleg | Rotting of the stem at the base, drying out of the bush | Farmayod, potassium permanganate (soil treatment) |
| Gray rot | Wet brown spots on the bottom of the stem | Fundazol, Skor, Previkur, etc. |
| Late blight | The appearance of brown spots on the leaves and fruits, then the leaves curl and dry out | Quadris, Gamair, Fitosporin M, etc. |
| Cladosporiosis |
| Screen, Barrier |
| Aphid | Small black insects on the undersides of leaves | Fitoverm, Fitolavin, Iskra Bio |
| Spider mite | Small yellow dots on leaves | |
| Colorado beetle | Larvae and beetles on leaves, holes in leaves | Decis, Commander |
Preparing to plant seedlings
Every year the structure needs to be prepared for spring work. The main part can be done in the fall, and before planting the seedlings in the greenhouse, all that remains is to create a favorable microclimate. Regardless of the materials from which the building is made and the crops growing in it, the main activities are:
- clearing of plant residues;
- creating warm beds;
- washing, disinfecting the frame;
- preparation of the top layer of soil.
The main thing is that the building is clean before spring planting. Some of the work can be done immediately before transferring the seedlings.
In the fall, wash the greenhouse with soapy water. Carefully inspect the joints for the presence of mold or bacterial plaque. After processing, ventilate and dry.
Disinfection
To disinfect polycarbonate buildings, spraying, sprinkling or fumigation with complex-action preparations is used. Treatment is carried out after preliminary washing of all structural elements and clearing the soil of plant debris. It is enough to wash the metal profile with a solution of potassium permanganate. Impregnate wooden parts with construction antiseptics and coat them with limescale.
Wash glass and polycarbonate panels on the outside with household chemicals, and on the inside with a solution of potassium permanganate or a composition containing chlorine. Carry out work in special clothing and gloves. Remove equipment and containers from the greenhouse during processing. Before entering, it is recommended to lay a mat soaked in copper sulfate, ammonium nitrate, and chlorinated lime.
Smoke bombs for fumigation are considered the most effective, but expensive method. They can be replaced with metal baking sheets on hot coals, into which pieces of sulfur are placed (50-80 g per 1 m3). Spraying is carried out with a solution of bleach, copper sulfate or Chloropicrin. You can sprinkle with slaked lime.
Soil preparation
To create warm beds, disinfect the soil and remove the top layer of soil. To disinfect, pour boiling water or a solution of potassium permanganate. Place a thick layer of straw and sawdust or compost at the bottom, followed by manure. Sprinkle previously removed soil on top, cover with dark film or mulch with dry grass and leaves. In winter, cover with snow, removing the film if available.
In the spring, dig up the soil and improve the clay structure by adding sand. A day before planting the seedlings, add fertilizer - per 1 m² you will need 25 g of saltpeter, 1 tbsp. superphosphate, 1 tbsp. wood ash, humus. In acidic environments, neutralization will be required. Carry out liming in the fall or add dolomite flour in the spring. Before transferring the seedlings, loosen the soil, form holes, and water.
Mistakes when growing peppers in a greenhouse
Novice gardeners can make mistakes when growing peppers in a greenhouse, which often lead to unpleasant consequences.
Temperature changes
Sharp fluctuations in day and night temperatures inhibit the growth of peppers and can cause blossom end rot.
High humidity
Excess moisture provokes various fungal diseases, such as:
- blackleg;
- various rots;
- late blight
Thickened plantings
Exceeding planting standards per unit area leads to nutritional deficiency, increased humidity and dampness, deterioration of lighting, which, in turn, causes fungal diseases, chlorosis, and deterioration in fruit quality.
Unbalanced diet
Deficiency or excess of various nutrients are equally harmful to plants. Therefore, the established norms for their application should be observed. It is easier for a beginner to use complex fertilizers that contain all the necessary elements in the quantities required for pepper.
Complex fertilizer for peppers contains all the necessary elements in balanced quantities.
Peppers don't turn red
There may be several reasons for this:
- Peppers were planted too late in their ripening period and did not have time to ripen in a particular region.
- Insufficient lighting.
- Low air temperature in the greenhouse.
- Potassium deficiency.
- Excess nitrogen.
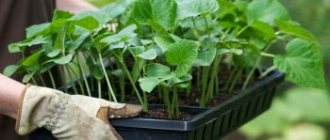
Growing seedlings
After a variety has been selected and seeds have been purchased, the gardener will have to prepare containers and soil for planting.
The emerging seedlings will need careful care; it is not for nothing that pepper is considered a capricious crop. However, there is nothing complicated about it; even novice vegetable growers can cope with growing seedlings.
Selection of soil and container
The ideal option for planting pepper seedlings would be purchased soil specially designed for this purpose. However, not everyone has the opportunity to visit large garden centers with their wide range of products. You can prepare the soil yourself.
To do this, mix:
- 4 hours of garden soil;
- 2 hours peat;
- 1 hour humus;
- 1 tsp rotted sawdust;
- 1/2 tsp coarse sand.
The main requirements for the land are that it must be loose and fairly fertile. As a nutritional supplement, you can add a small amount of wood ash (2-3 tbsp.).
Pepper has sensitive roots and does not tolerate picking very well, so it is better to avoid planting in a common container and immediately plant the seeds in separate cups.
In the future, you will need to transfer them into large containers. Peat cups are perfect for seedlings. Their advantage is also that during further transplantation the membrane does not have to be removed; it is only slightly torn.
The peat will decompose in the soil, providing the seedlings with nutrients. For initial planting, you can also take cups of yogurt, sour cream, and boxes left over from purchased juices or milk. The container must be clean. To disinfect it, rinse it with boiling water.
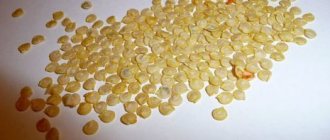
Seed preparation
Sweet pepper seeds quickly lose their quality; before planting, it is advisable to check them for germination. This can be done using a saline solution prepared at the rate of 1 tsp. salt per glass of water. The seeds are thrown into salt water. The seeds that fall to the bottom are washed and used for sowing, and those that float are thrown away.
If the seed material was purchased from a dubious place, it is subjected to pickling in a weak solution of potassium permanganate for 15-20 minutes and then washed.
To give future seedlings additional strength, the seeds can then be soaked in a solution of Epin or complex mineral fertilizer for 1 day. After this, the seeds are dried and after 2 days they begin sowing.
If you live in a cold region, it is advisable to harden the seeds before planting. To do this, they are soaked in warm water until they swell and then placed in the refrigerator for a day.
Sowing
Sowing begins by filling the cups 3/4 full with soil. The soil is lightly compacted by hand and grooves about 1 cm deep are made on the surface. 2 seeds are placed in each glass at some distance from each other in case one of them does not germinate.
In the future, if both seedlings are strong, they are planted, and if one plant is much weaker, it is disposed of.
The seeds are sprinkled with dry soil on top and slightly moistened with a spray bottle. At the end of the procedure, the crops are covered with film and placed on the windowsill.
The cover is removed after the first shoots appear. The film should be briefly lifted every day for ventilation and condensation should be removed from it.
Seedling care
Before emergence, seedlings are kept at a temperature of 25-27°C. The warmer the room, the faster the sprouts will hatch. On average, the germination process takes 10-15 days. All this time, the crops are moderately moistened once every 2 days .
For normal development, seedlings need:
- Sufficient lighting. After emergence of seedlings, additional lighting is turned on. The lamp is kept on from 8 to 20 hours daily, until natural daylight increases to 10-11 hours. With a lack of light, peppers will grow frail and overly elongated.
- Suitable temperature conditions. It provides for the difference between day and night temperatures. During the day, pepper should be at a temperature of 23-25°C, at night it is necessary to reduce the temperature to 16-18°C. The easiest way to ensure a temperature difference is to fence off the seedlings on the window with film and put the frame in the “micro-ventilation” mode or simply open the window slightly.
- Proper watering. Water the peppers generously, but not often. It is best to do this in the morning, using warm, settled water. After watering, the soil must be loosened - peppers are sensitive to oxygen deficiency.
- Feeding. During the entire seedling period, peppers are fed twice. It is best to use organic fertilizer (a solution of mullein in a concentration of 1:10 or bird droppings in a concentration of 1:20). The seedlings are fed for the first time after 3-4 leaves appear. The second feeding is carried out in the phase of appearance of 5-6 leaves. For foliar feeding, you can use a solution of complex mineral fertilizer.
- Hardening. 1.5 weeks before planting the seedlings in the ground, they begin to accustom them to the open air, taking them out onto the balcony. First, the pepper is kept outside for 10-15 minutes, gradually increasing the residence time. The procedure will help the seedlings to take root better in the new place, and the seedlings will become more resilient.
Pepper is one of those crops that do not like close proximity. As the seedlings grow, space the cups wider so that the leaves of the plants do not touch. Otherwise, the seedlings will begin to stretch out.