Advantages and disadvantages of planting onions before winter
The main advantage of this planting method is the opportunity to get early greenery for next year. The harvest is harvested almost a month earlier than with spring planting .
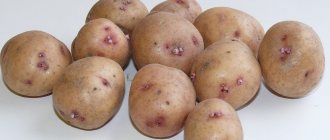
Wild oat grass is used as seed material - bulbs less than 1 cm in diameter . Such a set is cheap, does not go to waste and grows into a full-fledged turnip, which is well stored.
It should be noted other advantages of planting winter onions :
- The natural conditions of winter harden the plants, so they become more resilient and rarely get sick.
- Due to the early emergence of seedlings in spring, the crop is less affected by pests. During this period, many insects are still absent.
- Onions are not overgrown with weeds as quickly as they develop faster.
- In early spring, there is a large amount of moisture in the soil, which is needed for full-fledged bulbs to form.
This method also has disadvantages . One of them is the inability to plant large seed material (more than 2 cm). It is not possible to get a turnip from it, since the bow goes into the arrow. Therefore, large bulbs can only be used for growing greens.
Other disadvantages:
- Lower germination rate.
- Difficulty in determining the optimal time for planting seed material due to differences in climatic conditions. Bulbs that do not have time to take root die in frost.
Planting onions: main stages
With the onset of spring, the plowed area is loosened with a rake.
The day before planting, prepare the sets:
- The tops are cut off with scissors: this accelerates the growth of the core.
- For disinfection, immerse in a weak solution of potassium permanganate or hot water. A good effect is obtained when treated with the natural remedy “Epin”, which promotes the formation of immunity, and therefore large onions.
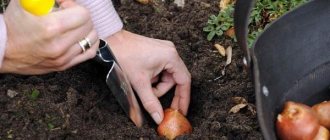
- Dry and seal into grooves at a distance of 20-25 cm. When processed by mechanized methods, leave at least 0.6-0.7 m. The distances in the row are approximately 10-15 cm.
- Small heads, up to 1 centimeter, are planted first. They will not begin to bloom, they will not have arrows.
- After 7-10 days, larger heads should be planted, up to two centimeters in size.
- Onion heads are sprinkled with soil a couple of centimeters.
Thickening prevents the growth of large bulbs. Further care consists of watering, fertilizing, surface loosening and mulching.
At the time of ripening, the stems begin to dry out. During this growing season, our grandmothers trampled green leaves, redirecting nutrients from the stem to the turnip.
The harvest is harvested in July on the eve of the Feast of Peter and Paul. Delay leads to root growth, which also reduces the quality of large heads.
Winter onion varieties
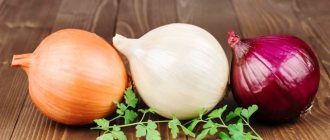
Yellow and red varieties are more suitable for winter planting Planting material is selected taking into account the weather conditions in which it will grow.
Most popular among gardeners:
- Black Prince . Mid-season variety. It has dark purple flesh and a semi-sharp taste.
- Robin . Suitable for growing in southern regions. The bulbs are red. They give a good harvest and easily tolerate drought.
- Lugansk . Ripens late. The flat bulbs have a pungent taste.
- Buran . A medium-yielding variety with yellow-brown turnips. Suitable for different climate zones.
- Radar . Dutch variety with high resistance to diseases and pests. Produces large bulbs weighing 200-300 g.
Further care
The onion plant develops best in well-drained, light soils and does not tolerate excessive moisture, which leads to stagnation of water in the soil. Therefore, if there is sufficient rainfall, watering should be resorted to only when the top layer of soil dries out. In hot weather, watering twice a week is sufficient.
Onions need much more fertilizing with fertilizers, of which there are 3 during the growing season:
- After the first feather appears in the spring, the plant is fed with a mixture of superphosphate, urea and potassium chloride in a ratio of 2:3:1 and in an amount of 5 g for every 1 square meter. m.
- The second feeding is carried out 3 weeks later using a nitrophosphate solution consisting of 40 g of fertilizer and a bucket of water and applied in an amount of 5 liters per 1 sq. m. m.
- The third time, fertilizing is done when the bulbs reach a diameter of 30 mm. The bed is fertilized with superphosphate, 40 g of which is diluted in 10 liters of water. The resulting mixture is used to water the soil at the rate of 1 bucket for every 1 square meter. m.
Of the pests, the greatest danger to onion vegetables comes from:
- onion fly , which is fought with drugs in the form of “Karate”, “Aktara” or “Iskra-Bio”;
- aphids , destroyed by universal insecticides in the form of “Mospilan”, “Tanrek”, “Aktellika”, “Inta-Vira”;
- tobacco thrips , which is combated through the use of “Zeon”, “Karate”, “Aktara”;
- onion moth , for the destruction of which the drugs “Entobacterin”, “Lepidotsid” or “Bitoxibacillin” are used.
Most often, winter onions suffer from:
- powdery mildew , which is treated with solutions of Quadris, Polycarbocin, Topaz or 1% copper sulfate and Bordeaux mixture;
- peronosporosis , which is fought with the help of “Thanos”, “Polyram”, “Abiga-Pika”;
- fusarium , for the prevention and control of which biofungicides are used in the form of “Previkur”, “Maxim”, “Vitaros” or “Trichodermin”;
- gray rot of the neck , from which onions are cured with “Switch”, “Quadris” or “Bravo”;
- mosaic disease , a cure for which has not yet been developed, but which can be prevented by correct agricultural practices and especially competent crop rotation.
Winter onions solve the problem of the summer shortage of one of the most popular types of vegetables. Some extra effort that goes into growing it is well worth it with a high-quality product in mid-summer.
Preparation of planting material
For planting before winter, take a seed about 1-2 cm in size . To obtain early greens, larger seed material is used.
Important! Only healthy seeds without damage or signs of disease are selected.
Two weeks before planting, the seedlings are placed in water at a temperature of about 50°C for 2-3 hours . Then the bulbs are pickled. For this purpose the following means are used:
- "Tiram";
- "Fitosporin-M";
- "Maksim".
You should keep the wild oatmeal in the solution for half an hour.
For the purpose of prevention, it is recommended to soak the bulbs in a strong solution of potassium permanganate for an hour and then dry.
How to plant onions in open ground correctly
The quality of the harvest directly depends not only on the timing of planting, but also on how correctly the planting material was prepared. That is why this event should be carried out without deviating from the established algorithm. Let us next consider the rules for planting onions in open ground.
Selection and storage of planting material
There are several recommendations that guide the selection of onion sets:
- compliance of the variety with the climatic conditions of a particular region;
- 100% quality: tight fit of scales, no damage, rot, damp or wrinkled fragments, stains;
- the scales have integrity, smoothness, uniform color and shine;
- medium size (14-21 mm) - such bulbs are most suitable for planting in spring and are not subject to bolting.
Important! It is recommended to purchase seed only from specialized retail outlets or from reliable farmers.
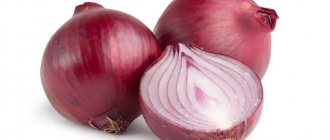
Sharp and bitter varieties, distinguished by yellow, brown or red husks, are well suited for long-term storage Varieties with white and purple bulbs are intended for use in summer salads and are not suitable for winter storage.
After purchasing a set, it is necessary to provide it with suitable storage conditions , otherwise the onion will go into the shoot, which will negatively affect the yield. Basic requirements for the premises:
- good air circulation;
- stable temperature from +10 to +15 ° C (if it fluctuates even by 1-2 degrees, the bow will go into the arrow);
- humidity – 70-75%.
Nets, as well as plastic or wooden boxes, are good for storage. The use of cardboard boxes for this purpose is not recommended due to their ability to quickly absorb moisture. Before planting, sprouted bulbs are placed in a cool place, for example, in the refrigerator.
If for some reason the planting material turns out to be damp, it is laid out on the surface in one layer and left to dry.
Preparing bulbs for planting
Preparatory activities for spring planting consist of several important stages:
- Sorting - the procedure involves a careful examination to detect and reject damaged, rotten, and also those with signs of disease specimens.
- Warming up is intended to prevent bolting. To do this, planting material is placed for 8-10 hours in a place with a temperature of +40-45°C, for example, near a heating radiator.
- Treatment against diseases and pests - in order to prevent fungal diseases, the seedlings are soaked in a fungicide solution. For this purpose, drugs such as Fitosporin-M, Dachnik, Maxim are used. You can also use a dark solution of potassium permanganate (1 g/1 l) or copper sulfate (1 tsp/10 l) to soak the sets before planting.
We explain in the video what to soak onions in before planting:
For prevention against pests, the bulbs are placed in a saline solution (2 tablespoons of salt/2 l) and kept for 2-3 hours. After disinfection procedures, the seeds are washed in clean water.
It is also possible to use a soda solution to soak onions.
with wood ash before planting . This option not only creates protection from diseases and pests, but also has a beneficial effect on the quality of the crop. For this purpose, 250 g of ash are dissolved in 5 liters of water. The seeds placed in the prepared solution are kept for 5-7 minutes and laid out to dry.
Important! After all preparatory measures have been carried out, the planting material is thoroughly dried.
Selecting and preparing a site on the site
A fertile sandy loam or loamy substrate is well suited for growing onions . Clayey, acidified and heavy soil negatively affects the quality of the future harvest.
The planting site must meet the following criteria:
- location on a hill, eliminating swampy soil;
- good lighting.
Soil preparation
They begin to prepare the site 10-14 days before planting the bulbs . Soil with a dense structure is dug up using 1-1.5 shovels. When preparing light soil, you should not loosen it so deeply, as the plantings may not sprout.
Vegetable crops love fertilized neutral or slightly alkaline soil . If the soil is acidic, add lime.
Important! When planting, do not use fresh manure.
For 1 m2 of area, 20 g of superphosphate and the same amount of potassium chloride are used. If wood ash is added, potassium fertilizing is abandoned.
If the bed has heavy, clayey and dense soil, add sand - 1-1.5 buckets per 1 m2.
Predecessors
When choosing a place for onions, you need to take into account what crops grew on the site in the previous year .
Seeds are planted after:
- cereals;
- cucumbers;
- tomatoes;
- cabbage;
- melons;
- watermelons
Areas where green manure used to grow are also suitable for vegetable crops .
It is not recommended to plant onions in the area where they were grown:
- potato;
- parsley;
- alfalfa;
- celery;
- beans.
Methods for preparing onion sets for sowing
Fertilizers for potatoes when planting in a hole in spring
In addition to the above soil preparation, you need to know how to prepare onion sets for planting in the spring. Planting material is usually prepared in the fall. If it is an onion set grown from nigella, you need to store it at the correct temperature in a room without high humidity.
It is important to know! Do not store onion sets in plastic bags. The room must have ventilation or constant ventilation
Using the rich experience of vegetable growers and their recommendations, before planting the seedling in the soil, you need to sort the planting material by size. After this, carry out a comprehensive treatment: disinfect and treat the seedling with phytosporin against onion diseases, bacteria and fungus; take measures to prevent turnip rotting, as well as increase resistance to all kinds of pests and natural disasters.
Note! When selecting planting material, you need to know that small bulbs (less than 1 cm in diameter) (oat grass) produce small turnips and do not form shoots, while large sets produce shoots more often. Large and medium fractions of sowing cannot be stored at low temperatures. This also leads to the formation of arrows on the bow.
From the sets sorted by size, you can immediately use very small ones (wild oatmeal), which are difficult to store until spring, and use them in winter sowing. Also used for pre-winter planting is the so-called onion, the diameter of which is up to 3.5 cm. The heads of this onion are not used in cooking; it is used for green feathers in the spring.
Warm-up method
Planting material purchased in a store must be dried by scattering the onion in a warm place at room temperature +20 - +24°C. If the onion was grown by gardeners and was stored for the entire period before planting at a low temperature of +18°C, it also needs to be warmed up to start the growth processes. The heating method prevents the further formation of arrows, as well as various bow diseases.
Store-bought planting material must be dried
Warming up should begin two to three weeks before planting at a temperature of 20°C. The next stage of warming up is up to 10 hours at a temperature of 30-40°C. The sowing should not be allowed to overheat, otherwise its germination will noticeably decrease.
Soaking method
Another method of preparing for sowing is soaking. This is an important point, since the onion sets undergo disinfection, which is necessary for growing healthy turnips. The seedling should be immersed in hot water for 10-15 minutes. It is better to do this in a net so that it is convenient to remove it from a bowl of water. Water temperature – from 45 to 50°C. After this sudden heating, drain the water and cool the onion sets with cold water.
Stimulation of growth
Regardless of the heating method, experienced gardeners recommend stimulating the growth of pre-sowing material with preparations such as, for example, Humisol, Zircon, Epin-Extra or others. How long to stain onion heads in a chemical solution is indicated in the instructions for the preparations.
In addition, vegetable growers, as an option, recommend soaking the seedlings in a solution of complex fertilizers for five hours. The dosage is as follows: for 5 liters of water, a teaspoon of complex fertilizer for vegetables.
Currently, there are enough drugs that accelerate the forcing of roots and disinfect the onion head; they are always available in specialized stores. Growth stimulants are a good help for accelerating the emergence of seedlings and increasing yields.
Note! If you plant onions before winter, the sets are not treated with growth stimulants.
Scheme and rules of planting before winter
When planting seed material, you should follow the recommended planting pattern to obtain maximum germination and development of large bulbs.
At what distance from each other should I plant onions before winter?
The planting scheme is chosen depending on the purpose of the crop . To obtain turnips, the distance between the bulbs when planting is left about 10 cm, and between the rows - 20 cm.
If a vegetable crop is grown for greens , compact planting is practiced. Leave 2-3 cm between the bulbs and make row spacing of about 10 cm.
At what depth to plant onions?
Oatmeal is placed at a depth of 3-4 cm .
Landing technology
Planted according to the following scheme:
- The soil is loosened and leveled with a rake.
- Make a groove about 6 cm deep.
- Add sand (2 cm). It will perform the function of drainage, eliminating excess water and preventing the seeds from getting wet.
- Lay out the wild oatmeal, sprinkle with earth and lightly compact it.
Planted onions are not watered for 10-14 days .
What happens if you don't keep the distance
An incorrect pattern and distance between planting onions in the fall will lead to a decrease in the yield of the vegetable crop. If you plant onions deeply, they may not germinate in the spring. In the case of shallow planting, the seedlings will end up on the surface and, when the soil settles, will freeze in winter.
Features of planting onions before winter
Timing for planting in open ground
Inexperienced gardeners often make a big mistake by planting onions too early in the spring. In damp and unheated soil, seedlings stop developing and rot. In conditions with low temperatures, the crop almost always shoots up, since in the cold the plant tends to quickly prepare seeds.
The appropriate timing of planting activities must be determined taking into account weather conditions and recommended dates according to the lunar calendar.
Depending on the region
Onions are planted after stable warm weather has established, preventing the return of frost. In this case, the minimum soil temperature at a depth of 15-20 cm should be at least +10°C .
The timing of spring planting differs in different regions, due to the peculiarities of the climate.
| Region | When to plant onions in spring |
| middle zone: Central part of Russia, Moscow region | from late April to mid-May |
| St. Petersburg and Leningrad region | second ten days of May |
| southern Russia: Kalmykia, Kuban, Stavropol region | second half of March |
| Ural and Siberia | the beginning of June |
Important! Since the dates are directly dependent on weather conditions, they can be moved back and forth.
According to the lunar calendar for 2021
According to the lunar calendar, favorable days for spring planting onions in 2021 are as follows:
- March – 22, 24, 27, 28;
- April – 1, 3, 5, 8, 9, 10,13, 24, 25, 26, 27, 28;
- May – 1, 2, 5, 6, 7, 10, 13, 17, 19, 20, 21, 22, 24, 25, 26, 28;
- June – 2, 3, 6, 7, 8.
Unfavorable days are considered:
- March – 19, 20, 21, 25, 26;
- April – 4, 15, 16, 17, 20, 21, 22, 30;
- May – 3, 4, 8, 9, 30, 31.
Lunar calendar recommendations
In addition to the dates recommended by the lunar calendar for planting, it is worth taking into account a number of factors:
- The waxing moon is a period of moisture accumulation in the root system. Sowing work is undesirable due to the high probability of rot.
- Full moon - water is retained only in the ground parts, so onions are grown only for feathers at this time.
- The waning moon is a time for the accumulation of useful substances in the root system. Ideal for planting onions.
Features of cultivation and care
In spring, winter onions emerge early, as soon as the sun warms up . He is not afraid of slight frosts. At lower temperatures, plant damage may occur, causing leaves to turn white-yellow. In this case, potassium fertilizer or calcium nitrate is used, which promote the regrowth of young greenery and reduce stress in the plant crop.
Loosening and thinning
When growing winter onions, remove weeds in a timely manner and loosen the soil to a depth of 4-5 cm. The vegetable crop is thinned out after the formation of 3-4 leaves, leaving 5-6 cm between the bulbs.
Attention! Thinning must be carried out in a timely manner. Failure to comply with the recommended deadlines leads to a decrease in yield.
Top dressing
In the first half of spring, winter onions are fertilized with a nitrogen composition. As soon as frost has passed, the following is added to the soil :
- weed infusion;
- humates;
- carbamates.
After two weeks, feed with potassium-phosphorus fertilizer - 1 tbsp. l. for 1 bucket of water - or infusion of wood ash. If the soil is fertile, fertilizers are not used.
Reference. Using manure during this period is also not recommended. The nitrogen contained in it promotes the formation of feathers and prevents the formation of bulbs.
Watering
The crop requires moderate soil moisture. During the hot period, water 1-2 times a week, the rest of the time - 1 time every 10 days . In rainy summers you can do without watering.
Protection from pests and diseases
During the growing season, onions can be affected:
- cervical rot - tissues when affected resemble a baked onion;
- black mold - the upper juicy scales of the onion dry out, a black dusty mass forms between them;
- green rot - present on the bottom of the bulb in the form of a brown spot, later a greenish or bluish coating appears in the form of mold.
Possible development of fungal diseases:
- downy mildew - damage occurs in warm, humid weather, the tips of the feathers turn yellow and spots of pale green or grayish-violet appear;
- rust - rusty-yellow streaks appear on the leaves, then the greenery dries out;
- fusarium - the root system of the plant is affected, the roots acquire a pinkish tint and die, the leaves dry out.
If a fungal disease develops , onions planted on a feather cannot be treated with chemical compounds .
When caring for turnips, disease control comes down to therapeutic and preventive measures :
- Before planting seeds, the soil is treated with copper sulfate - 30 g per 10 liters of water.
- In early spring, during the emergence of seedlings, Bordeaux mixture is used. The procedure is repeated when the feather grows 10-12 cm.
Medicines will help to reliably protect onions from diseases:
- "Fitosporin-M";
- "Glyocladin";
- "Alirin";
- "Gamair".
with these products 3-4 times during the growing season .
Onion pests:
- onion moth;
- root mite;
- stem nematode;
- tobacco onion thrips;
- onion fly.
Insects settle on the leaves and penetrate the bulbs, suck the juice from the green stems and gnaw the pulp from the turnip. To protect plants from pests, the same measures are taken as to prevent diseases. Systemic biological products are used, for example, Bicol.
After treatment with such means, onions can be used for food within 48 hours..
Rules of care
- The first two months, during active growth, watering is done at least twice a week, and in hot weather - even more often. Indeed, with abundant feather growth and the development of bulbous heads, the plant requires a large amount of moisture. With the onset of July, watering is sharply reduced. And three to four weeks before harvesting, stop watering altogether so that the bulbs dry out.
- Be sure to lightly loosen the soil every week, but not deeply, no more than five centimeters in depth, so as not to damage the roots of the bulbs.
- It is equally important to promptly weed out weeds, which retard growth and spread various parasitic insects.
- Particular attention should be paid to fertilizing. To do this, use diluted chicken manure and mullein. If growth is slow and the color of the feathers is pale, then this is a lack of nitrogen in the soil. And when the leaves take on a gray color, this is a signal that potassium feeding is needed.
Harvesting should begin when the feathers on the bushes have completely withered and the neck of the bulb has become dry. This work should not be delayed, because with the arrival of rains the bulbs may begin to take root again.
Do I need to cover the plantings for the winter?
To protect the bulbs, cover the soil with mulch 2-3 weeks after planting.
Used as mulch:
- peat;
- fallen leaves;
- straw;
- hay;
- spruce branches;
- branches.
In the northern regions, the thickness of the protective layer is increased.
Important! You cannot put plastic film on top, as air does not pass through it. The condensation that forms causes the bulbs to rot and freeze.
How to plant onion sets correctly
Before planting onion sets, it is not enough to process the bulbs alone. The land also requires the necessary preparation. For an onion bed, it is better to choose an open place, well lit by sunlight. It is also necessary to take into account that this crop does not tolerate excess moisture at all, therefore, the lower the groundwater lies, the better.
On a note! It’s great if the predecessors of onions were tomatoes, potatoes or cabbage. After these vegetables, loose soil remains, saturated with a large amount of minerals, which is so necessary for onions. And if carrots grow nearby, the essential substances they secrete will repel the onion fly. Do not plant onions after onions, garlic, carrots and cucumbers.
You need to start preparing the beds in the fall. The soil must be thoroughly loosened and peat, sand and fresh manure added. If the soil is acidic, it is limed with dolomite flour or chalk to reduce the pH to values close to neutral. Acidic soil will not allow onions to properly absorb nutrients and develop. In addition, in such soil, plants are more easily susceptible to downy mildew.
On a note! Lime and organic fertilizers should not be applied at the same time; they react with each other, resulting in a decrease in the nitrogen content in the soil.
In the spring, fertilizers are no longer applied, otherwise the onion will release feathers, to the detriment of head growth. They simply loosen the soil and immediately begin planting. The seedlings are planted on the ridge after the soil has completely warmed up. In the middle zone, planting is possible no earlier than the beginning of May.
Planting too early will lead to the formation of arrows to the detriment of the development of the bulb itself. But we cannot be late with this event. In this case, the moisture content in the soil will significantly decrease and, in addition, the onions may not have enough time to fully ripen. Planting should take place no earlier than the soil warms up to +12 degrees.
The landing procedure itself consists of the following steps:
- Before planting the seedlings, rows are marked on the ridge. This will allow you to calculate in advance the amount of seed that will fit in a given area.
- The bulbs are sorted into large and small; they must be planted separately, using a different planting scheme for each size of bulb.
- Sets, the diameter of which does not exceed 1 cm, are planted at a distance of 4-5 cm from each other.
- For large bulbs, the distance when planting is increased by 3 cm.
- Between the rows you should leave 20-30cm to make it easier to care for the plantings. In addition, you can plant, for example, dill in the spaces between the rows.
- You should not bury the bulbs deeply - this will negatively affect the germination process. They are simply stuck with the bottom into the ground and pressed lightly.
- After planting, the soil in the garden bed is mulched.
If you do everything according to the rules, the bulbs will have enough space for normal growth and they will not interfere with each other. The plantings will be well ventilated and the risk of disease will be reduced. At the same time, you will be able to rationally use the space of your garden. In a week, greenery will begin to emerge through the mulch; after another 7-9 days, the mulching material can be removed.
The bed should be regularly and thoroughly weeded to remove weeds. An undesirable proximity to them will cause excess moisture in the soil, which can cause rotting of the bulbs. The first fertilizing is applied 2 weeks after planting, using mullein infusion. The second time the bed is fertilized no earlier than after 3 weeks. Mineral fertilizers can be applied in the form of solutions or dry. This is done once per season.
In the first half of the growing season, onions are watered 2 times a week, if there is no rain. From July, plants are watered less frequently so as not to harm the bulbs, and 2-3 weeks before harvest, watering is stopped completely. After each watering, the soil must be loosened, making it easier for oxygen to reach the roots. There should be no hard crust on the surface of the bed. When the bulbs begin to fill up, the soil needs to be raked away from them a little.
How to do pre-sowing treatment of seedlings in spring
You can strengthen the immunity of the seeds to resist pests and diseases by soaking . There are quite a lot of recipes for solutions for the pre-sowing procedure; you can easily make them and choose a convenient option.
Among the popular components:
- salt;
- potassium permanganate;
- copper sulfate;
- baking soda;
- ammonia;
- Birch tar.
Soaking in a salt solution helps fight pests.
The main enemy of onions is the onion fly . Treating the seedlings with a saline solution will help prevent its invasion of the beds. The same method will protect the crop from thrips and mites .