Preparing beds for winter, taking into account the characteristics of certain crops
Certain types of plants are especially demanding on the quality of the soil and its composition. For their growth and fruiting, it is necessary to prepare the site in advance.
Raspberries quickly deplete the soil, remaining in one place for many years. Before planting young plants in the soil, it is necessary to fertilize it. To do this, organic fertilizers are added to the soil, mixing them with ash and compost. In the fall, the soil is dug up, removing the roots of weeds, then a layer of fertilizer is distributed over its surface and the area is dug up again.
To get a good potato harvest, you need to loosen the soil as much as possible. This can be achieved not only by adding sawdust, compost and sand, but also by deep digging the area.
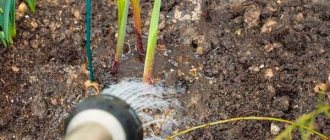
When preparing the soil for growing cucumbers, you must first disinfect the soil with copper sulfate. A week after treatment, compost is added to the soil and buried to a shallow depth.
Option 1 - The classic process of preparing the soil for winter:
Preparing the soil for winter - Classic version
Preparing the soil for winter begins with removing weeds, the rhizomes of which are hidden at a depth of only 3-5 cm. If you start digging the ground along with the weeds, they will go deeper underground, but sooner or later they will germinate. To prevent this, you need to chop the weeds with a sharp hoe or a Fokin flat cutter and let them dry in the scorching sun for 2-3 days. Having lost all the moisture, the weeds simply will not survive. By following these simple steps, you will actually cut off the top layer with weeds from the main fertile layer of soil, giving it the opportunity to “breathe” without the harmful effects of weeds.
Preparing the soil for winter. The next step on the path to ideal spring soil will be to saturate it with useful components - the weed-free soil must be thoroughly fertilized and saturated with mineral fertilizer. The first step is to add a deoxidizer to the soil, which can be ash and dolomite flour. You just need to mix them and scatter them on the drying grass. After this, mineral fertilizers, for example nitrogen, must be added to the soil. The best option would be to use grass fertilizer or diluted humate mineral fertilizer.
After the weeds have completely dried, the soil can be dug up to a depth of about 10 cm. Don’t be afraid to dig along with leaves and weeds - they will later turn into humus and further saturate the soil. After preparing the soil in this way in the spring, you will receive land ready for planting any garden crop.
Autumn fertilizers for the garden and vegetable garden
Fertilizers used in the garden and vegetable garden in the fall contain a minimal amount of nitrogen. Agronomists advise paying attention to the packaging of the drug: the manufacturer indicates on it the seasonality of use. Autumn fertilizers contain potassium, phosphorus and calcium. Exceeding the dosage of medications is unacceptable.
A popular autumn fertilizer is superphosphate. It decomposes slowly and is suitable for use in rainy autumn weather. The drug is applied at a rate of 40-50 g per 1 sq.m.
The classic autumn fertilizer is potassium chloride. Its dosage is small and amounts to 10-20 g of the drug per 1 sq.m. You need to wear a respirator when working with potassium chloride.
You can also fertilize the soil with organic compounds. It is recommended to apply rotted manure or compost once every 3-4 years. This will require 3-4 kg of organic matter per 1 sq.m of beds. If bird droppings are used as fertilizer, the amount of the applied composition is reduced due to its high concentration. It is enough to take 2 kg of litter per 1 sq.m of land.
For the bed where cabbage will grow, the best fertilizer will be ash. It is also suitable for potatoes, carrots, beets and other vegetables. Wood ash is rich in minerals and reduces soil acidity. When fertilizing the soil with ash annually, it is enough to use 1 cup of fertilizer per 1 sq.m of beds.
How to prepare the soil for the winter. How to prepare the soil in the fall: how to fertilize the soil
Autumn digging of the soil should be accompanied by the addition of basic organic and mineral fertilizers, as well as limestone, phosphorus and potassium.
It would be a good idea to add sand and clay to the soil. Manure.
This is an ideal organic fertilizer for autumn fertilizing of the soil, which improves its composition. Horse manure is especially famous for its qualities. Fertilizer is embedded in the ground, but not too deep. If the manure is fresh and gets into the deep layers of the soil, it will not decompose. If such fertilizer is left in the upper layers for the winter, it will decompose during frosts and in the spring it will become good food for beneficial microorganisms. But the best fertilizer is not fresh, but half-rotted manure. By spring it will practically decompose. The rate of decomposition of this fertilizer in the fall depends on soil moisture, aeration and temperature inside the bed.
Liming.
This work is performed only during autumn tillage and only once every 5-6 years. Liming helps deoxidize the soil. In addition, calcium increases its fertility. It is especially important to carry out liming on heavy substrates. Thanks to calcium, they become loose, and the water-air regime improves. Various microorganisms, under the influence of limestone, enhance their activity in the absorption of nitrogen or more actively contribute to the decomposition of humus, as a result, plant nutrition improves.
The dose of alkali to be applied is different for each site. This depends on the pH level of the soil, on the calcium content in it, on which components predominate in it - loam, clay or sand. Currently, there is no shortage of alkaline materials - slaked lime, ground limestone, chalk, dolomite flour, cement dust, marl, peat and wood ash, etc.
After liming, it becomes noticeably easier to cultivate heavy soils, and if the soil is light, then, on the contrary, it becomes cohesive and moisture-absorbing.
Mineral supplements.
These fertilizers are applied to the soil in the fall along with organic matter. If the soil is heavy and clayey, coarse river sand is added to it once a year at the rate of 1-1.5 buckets per 1 m2 and peat chips in the same quantity. If the soil is peat, it must be “clayed” and “sanded”, for which river sand and crushed dry clay in the same quantity are added to the soil.
Green manure.
There is another way to improve the quality of the land. After harvesting and loosening, it is necessary to sow the bed with a mixture of green manure plants - peas, mustard, sweet clover. And after they sprout, they will need to be mixed with soil. You can also try burying the remains of green plants in the garden bed - nettles, marigolds, calendula. Onion and garlic peels are also suitable for these purposes.
What do you plant in the garden in the fall before winter?
The traditional crop for autumn planting is onion sets. It is recommended to plant it before the first hard frost so that the plants have time to take root. The seed material is chosen small, no more than 1 cm in diameter. The depth of planting onions before winter is minimal - about 1 cm. In the first half of October, garlic is planted before winter. Unlike onions, garlic cloves are buried 5-10 cm into the ground so that the plant does not freeze. After planting, the bed is mulched with fallen leaves, pine needles or covered with spruce branches.
Spicy plants get along well in one bed and are suitable for autumn planting. Dill, cilantro and parsley can be planted after the first overnight frost. A bed with sown furrows is covered with slightly frozen soil and mulched.
For autumn planting, you can use lettuce. To ensure that its greens appear on the table as early as possible, the seeds are sown in a greenhouse. At the same time, they do not require special covering material or mulching.
In regions with cold and long winters, beets are planted before winter. Cold-resistant varieties are suitable for such planting. Winter stratification ensures early spring shoots. If not all seeds have overwintered, beets can be replanted in the spring.
How to treat your garden in the fall against pests and diseases?
The first stage of pest control is cleaning the garden and vegetable garden from organic residues. Pests and bacteria can multiply in rotting fruits and diseased leaves, so healthy carrion and leaves are used to prepare compost, while diseased and rotten ones are destroyed.
You can spray the trees in the garden with special preparations. A vitriol solution helps fight pests and rot. Bordeaux mixture destroys pathogens of powdery mildew and scab on apple or pear trees. Fruit-bearing bushes are treated with a solution of soap and soda ash to avoid damage by powdery mildew. Spraying with a urea solution prevents damage to trees by leaf rollers, aphids, and flower beetles.
Soil preparation in open ground
Proper soil preparation allows the soil to rest during the winter, get rid of pests and prepare for spring planting. The garden must be dug up in the fall, the soil structure improved, and the soil prepared in hotbeds and greenhouses.
Improving soil structure
The minimum required amount of work when preparing beds in the fall for winter is the introduction of organic and complex mineral fertilizers enriched with phosphorus and potassium into the soil. If a piece of land is not used for planting garden crops every year, you can feed the soil once every few years. Intensively sown beds require annual feeding.
In areas with heavy clay soil, add sand, compost or leaf humus with a small amount of wood ash. This makes the soil looser and improves its saturation with air and moisture. A good additive for sandy soils is sawdust mixed with humus or compost. These components retain moisture in the soil. If the soil on the site is acidic, it can be neutralized by adding lime, chalk or dolomite flour to the soil.
Digging the soil in autumn
There are 2 ways to dig up your garden and vegetable garden in the fall:
- Dumpless - when a lump of earth raised with a shovel does not need to be turned over and broken. This method of cultivating the land allows you to preserve its natural microflora.
- The second method is the dump method, when the raised lump of earth must be turned over and its top layer embedded in the ground on the bayonet of a shovel. In this case, the weed seeds will end up deep in the ground and will not be able to germinate to the surface. Pest larvae, on the contrary, will end up directly on the surface of the earth and freeze.
You can dig up the ground with a bayonet shovel or a pitchfork. The recommended depth of machining is to the bayonet of a shovel. It is better to dig the beds that are being prepared for early crops to a shallower depth. In this case, they will dry out faster in the spring.
With any method of autumn tillage, agronomists do not recommend breaking up the soil, otherwise the soil will freeze. By spring, large lumps will be saturated with moisture and become crumbly.
Preparing beds for certain crops
Above we looked at the general rules for preparing beds. As you already understand, all work is carried out quickly and simply: you just need to clean the area, dig it up so as to outline the edges of the future bed. Now it’s time to talk about how to prepare a garden bed for vegetables, which almost all gardeners grow.
Preparing a bed for vegetables
Beet beds
Do you want to harvest a rich harvest of table beets? Take care of preparing the garden bed in the fall. Choose a well-lit area with loose and well-drained soil for this vegetable crop. It is recommended to prepare a place for beets on sandy loam and loam with a neutral pH level. Heavy loamy soil is not suitable for beets. It will grow poorly on it, even if you provide it with adequate nutrition. It is also important to avoid places where there is an accumulation of melt, irrigation and rain water. The same applies to areas with acidified soil.
Tillage in a greenhouse
The best option for autumn soil preparation in a greenhouse or greenhouse is a complete replacement of the fertile soil layer. To do this, a layer of soil about 10 cm thick is removed and replaced with fresh turf. Pest larvae live in the top layer of soil, and pathogenic microorganisms and spores of various fungi remain here, so this operation improves the microclimate of the greenhouse.
It must be remembered that simple garden soil is not suitable for a greenhouse. Pests dangerous to plants also live in it. You can prepare the soil yourself by mixing humus, sand and sawdust. It is evenly laid out on the beds in the greenhouse and is additionally treated with copper sulfate or potassium permanganate. After treatment, the soil is mulched, and the closed greenhouse awaits the start of the new gardening season.
The soil that is removed from the greenhouse should not end up in the garden, as it is rich in pathogenic microflora. To disinfect it, you should select a separate area and treat the soil with lime. Next summer it is carefully dug up and after a season returns to the greenhouse or garden beds.
How to dig up beds?
Digging can be carried out in two ways: dumpless and dump. Let's consider the first option. While digging, they try to keep the earthen lump intact. The task is to preserve the beneficial microflora of the lower and upper layers of the earth. During moldboard tillage, the clods must be turned over and broken up. As a rule, this method is used in the fall. The procedure allows you to embed fertilizers deep into the soil and bring to the surface pests and diseases that are lurking in order to survive the winter. There is no need to break up clods of soil; it will freeze to a great depth.
If your task is to create a full-fledged bed with strictly defined edges and you do not want to bother yourself in the spring with destroying clods, it is advisable to complete the digging job: break up the clods, level the ground and make a bed of 2-3 by pouring layers of earth while digging on top of each other cm above ground level. This way she will be able to warm up faster.
Related article:
5 quick and easy window racks for growing seedlings
Mulching
Mulching the soil provides plants with better conditions for wintering. Covered soil retains more moisture and heat, while it continues to breathe. This work is carried out at the end of October or beginning of November, when the autumn garden is ready to greet winter.
Various materials are used to mulch the soil:
- fallen leaves, which will rot over the winter and enrich the soil with minerals;
- pine needles, which prevent the soil from freezing and retain enough moisture in it;
- bark and wood shavings;
- stems of garden plants;
- partially rotted sawdust;
- hay.
You can mulch both adult plants (fruit bushes, flowers, perennial shoots) and beds with vegetable crops planted before winter. The mulch is spread on the soil in an even layer and left until spring. In this case, additional use of covering materials is not required.
Preparing the soil for winter
Preparing the soil for winter is one of the most important activities in the autumn gardening cycle. The fact is that in the spring, when the time for planting many garden crops begins, the soil turns out to be very frozen, undug, and saturated with weeds that strive to germinate. In order to avoid this, preparing the soil for winter must be carried out responsibly.
Soil plays a major role in gardening, so it should be taken care of first. It doesn’t matter what exactly is planted on the site, the soil in any case must be ready for planting.
Sowing green manure
Green manure is an effective organic fertilizer and good care for the garden in the fall. Most often, they are planted in garden beds in the fall, when the harvest is harvested. Green manure not only enriches the soil with useful microelements, but also protects it from weeds. To do this, use plants that have a powerful root system and quickly gain green mass.
Plants from the legume family are often planted as green manure: lentils, lupine, alfalfa. It can also be winter rye or wheat, mustard, amaranth, buckwheat, etc. Plants planted as green manure not only increase soil fertility and make it loose, but also protect the soil from scab, various rots and insects living in the soil.
After mowing, the plants can be used as mulching material.
Winter green manure allows you to retain snow on the beds, which provides the soil with the necessary moisture.
When planting green manure in the autumn garden, you must remember the main principle of crop selection: the same bed cannot be used several times to grow plants belonging to the same family. This means that rapeseed, which belongs to the cruciferous family, cannot be planted in the garden after or before cabbage.
When green manure grows to 20-25 cm, they are mowed. This must be done before the seeds appear, otherwise the beneficial plants will become uncontrollably growing weeds next season. Green stems are embedded in the soil. When decomposed, they, like the roots remaining in the ground, will enrich the soil with useful substances.
Green manure, planted in the garden before winter and mowed in the spring, can be left in the beds for several weeks. This mulching of the soil will speed up the decomposition of the root system remaining in the soil.
How to prepare your cottage for winter in October?
I usually burn a lot of ash, wood ash, ash is a soft deoxidizer, and it is advisable to add the ash for digging and in the fall. And somewhere for digging, I add at least a third of a bucket of sifted wood ash per square meter. This helps maintain the required soil acidity. And plus ash is a good fertilizer, it contains potassium, a little phosphorus and microelements.
I'll give you one more piece of advice. Look how many rotten apples are lying around - both you and your neighbors, hanging in the trees. You see, rotten apples aren't just unsightly or unsustainable - they're a recipe for even more illness next year. That is, when an apple rots, it bears spores and scatters spores. And if we somehow do not utilize them, it means that these diseases will develop in geometric progression. Therefore, of course, all this must be disposed of.
I have seen some gardeners have trash containers; they throw bags of apples there. This is wrong, because even rotten apples are organic, and organic matter is a big shortage in the country. As a rule, I bury such fruits. So I dug several holes for black currants, filled them with apples... When planting crops, you can simply bury them in the holes. They will rot there with the help of bacteria, earthworms will eat them, and seemingly rotten, completely unnecessary apples will turn into a good nutrient for plants. Compost is the best fertilizer you can't buy.
Therefore, use organic matter as much as possible, and diseases buried in the ground will not come out if you put at least 20-30 centimeters of soil on top. This way I recycle all organic matter. These are not only apples, these are also potato tops, which are one hundred percent sick with late blight. In theory, it should be burned, but I feel sorry for burning organic matter. I also use it. Tops of tomatoes, cucumbers, zucchini - all these are diseased, but they can also become organic.
You can also do winter sowings. It’s quite possible to plant garlic - even, perhaps, in some regions of the country it’s too late, where the cold has already arrived. But if you haven't done this, plant winter garlic immediately. You can plant small bulbs: scylla, crocuses, tulips, hyacinths, daffodils. All of these are planted in the fall, so hurry to plant so that you have a beautiful flower garden in the spring. You can also make vegetable beds already - all winter-hardy vegetables, such as potatoes, beets, salads, onions, seeds, can be planted in the fall. The harvest will be at least one and a half to two weeks earlier. So the game is worth the candle.
Having dealt with all this, you can, if there is time left, do some of the spring work to relieve the workload next spring. For example, trimming bushes. In general, of course, I repeat, this is work for the spring, but black and red currants, gooseberries, and ornamental shrubs, for example, can be pruned immediately after the leaves fall. Just for bushes, autumn pruning is painless.
There is always enough work at the dacha, I speak from my own experience. So get to work!
Making compost
In autumn, a lot of foliage remains in the garden, and matured leaf compost is the best way to saturate the soil with humic compounds and essential microelements. It restores the fertility of the mail and improves its structure.
Compost made from fallen leaves is suitable for any type of soil. It makes sandy soil more moisture-absorbing and adds breathability to clay soil. Partially rotted leaves can be used to mulch shrubs, perennial flowers or plants planted before winter: garlic, onions, herbs.
To get fresh compost every season, agronomists recommend preparing 3 compost bins on your plot. The first is used to lay a new batch of leaves, grass and plant debris. In the second compost bin, last year's mixture of leaves, grass and soil matures. The third container produces a portion of fully matured compost, which can be used to fertilize the beds and feed garden plants throughout the season.
Construction of warm and high beds
The rotting of organic matter, which is used to create warm and high beds, provides plants with nutrients and warmth. Since the process of rotting plant residues lasts several years, all this time you can get a rich harvest of early vegetables from the garden bed: cucumbers, zucchini, etc. After the lower layers have rotted, the soil can be transferred to the garden, and new layers can be poured inside the garden bed.
Autumn preparation of beds for winter is a good time to create a warm bed, since there is a lot of organic matter left in the garden. The type of beds is chosen based on the depth of groundwater. If they are low, the structure of the warm bed is buried in the soil. When the groundwater level in the area is high, a high bed is built. In both cases, the structure requires fencing. It can be made from boards, slate, plastic.
Large organic matter is placed at the bottom of the future warm bed: uprooted stumps, cuttings of boards, sawn branches. The larger these components are, the longer the lifespan of the bed will be.
The next layer is fine organic matter. Tops of vegetable plants, branches of shrubs, fallen leaves, mown grass, straw, paper, etc. are suitable for these purposes.
A layer of unripe compost or manure is laid on top of fine organic matter. It will stimulate the decomposition of the lower organic layers.
The top layer is a layer of turf cut and turned upside down along with grass. Ready compost is laid out on top of it.
Each layer of the warm bed is spilled with water. Moisture accelerates the process of rotting organic matter and increases the temperature inside a warm bed. To speed up decomposition, a warm bed can be watered with a biologically active preparation, but regular use of such products will shorten its service life.
Features of the design and preparation of warm beds
To obtain an early harvest of garden crops, warm beds are built in the fall. The layer under the fertile substrate is organic matter, which, when decomposing, releases heat. The height of the structure is 30-70 cm, this determines the intensity of heating of the soil by solar heat in early spring.
The nuances of creating a warm bed:
- Construct a box no more than 1.2 m wide with a height of within 70 cm. The length of the solution depends on the scale of the site.
- Drainage is carried out using broken bricks, crushed stone, gravel 15-20 cm thick. A fine-mesh metal mesh is laid to protect against rodents.
- The next layer consists of organic waste in the form of branches, stalks of corn and sunflowers, small fragments of lumber, sawdust, and cardboard. Tops and vegetable peelings, straw, fallen leaves, compost, manure and other organic matter are placed on top.
The outer layer is fertile soil at least 30 cm thick. In the spring, you need to cover the structure with black film to speed up the biochemical processes in the inner layers.
Protection of fruit tree trunks
One of the stages of garden care in the fall is the autumn whitening of the trunks. It is held in October. Covered with white lime, tree trunks will be protected from exposure to sunlight, which in frosty weather causes cracking of the bark. To give the lime solution bactericidal properties, special preparations are added to it, for example, Farmayod. When sulfur is added to lime, the whitewash composition provides trees with protection from hares, which feed on the bark of garden plants in winter.
Another effective way to protect the garden from representatives of the rodent family is to tie the trunks with spruce branches. It allows the tree bark to breathe, but repels animals. You can tie wormwood stems to the trunks. Its smell repels both hares and mice.
Autumn pruning
Autumn pruning of fruit trees involves 2 methods: shortening and thinning. These events not only help the garden grow and bear fruit, but also protect the trees from branches broken under the weight of snow. Pruning the garden in the fall also has a sanitary purpose. Dead or diseased branches must be removed to maintain the health of the entire tree or shrub.
Thinning the crown will provide the plant with good ventilation and the opportunity to receive enough ultraviolet radiation. Young trees are thinned out every year until their crown is fully formed. To do this, only a few main branches are left on the trunk, cutting off all the young shoots. After thinning, the seedlings are watered and fed with mineral fertilizers so that the plant quickly recovers from stress. The crown of mature trees is thinned out no more than once every 2 years. When pruning, it is necessary to remove all abnormally growing shoots.
They resort to shortening the branches so that the crown of the trees has the correct shape and grows in the right direction. The branches are shortened to a bud, which will ensure the shoot grows in the desired direction. Agronomists recommend forming the crown of trees so that their branches are parallel to the ground. This makes harvesting and further care of the plant easier.
All diseased and lichen-covered branches must be removed at the end of September or October. It is worth pruning them in the autumn, since diseased shoots are sensitive to cold. This can affect the health of the entire tree. After pruning, sections whose diameter exceeds 10 mm are treated with garden varnish.
Autumn pruning of trees is carried out only in regions with a temperate climate. It is not recommended to carry it out in cold zones: the trees do not have time to recover before the onset of winter, and the bark on the cuts freezes. This subsequently leads to drying out and death of the entire tree.
Cleaning of tools and equipment
When the preparation of the beds for winter is completed and there is no work left in the garden, the water must be drained from the barrels and the containers themselves must be turned upside down. All garden equipment requires thorough cleaning and washing, from shovels to buckets and secateurs. In the fall, you can sharpen your working tools: bayonet shovels, flat cutters, scissors, etc. Then in the spring, at the height of the gardening season, you will not need to waste time on preparatory work.
After cleaning and inspection, you should make a list of necessary purchases: gardening tools, seeds, fertilizers, biological products. By purchasing the little things and tools you need for your garden in stages, you can save money and prepare in advance for the new gardening season.