How to sow carrots in the ground in spring without thinning? Carrots are one of the healthiest root vegetables, so vegetable growers pay a lot of attention and care to the orange beauty. To get a good harvest, you need to choose the “right” variety of seeds and prepare the soil so that the vegetable can grow comfortably. Finally, caring for carrots has its own nuances.
When to plant carrots in open ground according to the Lunar calendar
Each region has its own rules, which are dictated by weather conditions and climate characteristics. If in the Urals carrots are not sown before May, then in the Moscow region work begins in April. In any case, you need to focus on the weather and the gardener’s lunar calendar.
In 2021, the following days are recommended for sowing:
- March 8, 10, from 16 to 19;
- From 5 to 7, from 9 to 15, from 17 to 22, from 27 to 30 April;
- From 2 to 6, 11, 12, from 20 to 22, from 29 to 31 May;
- From 7 to 9, from 11 to 14 June.
As for unfavorable days, in the first spring month it is forbidden to sow crops on the 9th, from the 19th to the 21st and 24th, in April - 8th, from the 15th to 17th, 23rd, in May - on the 7th, 13th, 14th, 22nd, in June – 5, from 9 to 11, 21st.
Determining soil acidity on a site in various ways
Soil acidity is an important indicator for successful carrot growing. Summer residents can independently determine it using certain methods.
| Determination method | How to determine |
| Litmus paper | 1. Buy a set of chemical reagents with a color indicator of the pH reference scale. 2. Dig a hole to a depth of 35 cm, which corresponds to the location of the plant roots. 3. Collect soil from the vertical walls (at least 4 samples) and mix. 4. Moisten with distilled water. 5. Squeeze the litmus paper and soil together. 6. Attach the paper to the indicator and determine the acidity by its color. |
| External signs | Acidic soil shows signs of: 1. Water in depressions with a rusty tint. 2. Rainbow film on the surface of the water. 3. There is a brown-yellow sediment at the site of moisture absorption. 4. The soil surface is whitish. |
| Typical plants | For sour availability:
For slightly acidic:
For neutrals:
For the poor:
For alkaline:
|
| Folk signs | A test batch of soil (1 teaspoon) is placed on the glass. Vinegar (9%) is poured on top. Reaction depending on soil acidity:
|
Use modern methods for determining soil acidity to get an accurate result.
Which carrot variety is better to choose?
When choosing a variety of carrots, it is better to choose those that are well stored in winter without losing their taste. It must be remembered that varieties whose growing season is from 115 days are well stored. You should also pay attention to varieties that are not capricious and grow on any soil and are resistant to disease. In terms of taste, preference should be given to varieties of medium ripeness.
Of the mid-season varieties, the following varieties hold the palm:
- Samson. The ripening period is 110 days. Grows in any soil. It stores well all winter, until the next sowing.
- Nantes-4. Middle length. Ripens in 120 days.
- Chance. It is stored in the cellar until the beginning of spring. Large root vegetables. Prefers loam.
Of the late varieties, they are well stored in winter:
- Queen of Autumn. Prefers loose soil. Root vegetables 25 centimeters long. Productivity is high.
- Dolyanka. This variety is not afraid of carrot flies.
- Flaccoro. Long root vegetables, large. The harvest is good.
Among the sweet varieties, it is worth noting the Favorite variety. Root crops are cylindrical in shape, medium length. Not afraid of humidity.
Of the early varieties, it is better to sow Artek. The root crops are large, juicy, and the harvest ripens quickly. If you want to grow large carrots, then it is better to choose “Russian size”. This variety grows well in light soil. Root crops up to 30 centimeters long.
Soil parameters
When choosing a site for carrots, you should consider the following soil parameters:
- density;
- acidity;
- fertility.
Chemical composition
The optimal soil acidity for carrots is neutral , i.e. with pH values in the range of 6.5-7.0. It is possible to grow orange vegetables in slightly acidic soil. The humus content should not be less than 4%.
Mechanical composition
It is better to sow carrots in loose sandy or loamy soil.
It should not contain stones, large lumps or roots. The ideal soil density for carrots is 0.65 g per 1 cm3. In light soil, which includes a sufficient proportion of sand, root vegetables are sweet and juicy. When growing vegetables in heavy soil, the yield is significantly reduced. Clay soil is not suitable for planting carrots (read about planting methods here, and find out which carrot planting scheme is best to choose and why it is so important, read here). A dense crust forms on it, which prevents seed germination. The shoots will be weak and uneven. In soil with a high clay content, water stagnates, which leads to rotting of root crops.
How to prepare seeds for sowing
It is known that untreated carrot seeds will take at least two or even three weeks to germinate and sprout. After all, the seeds contain a lot of essential oils that inhibit the germination process. Therefore, before planting, the seeds must be freed from essential oils. This will reduce the waiting time - shoots will appear in a week. It is believed that two-year-old seeds are better suited for planting, since they contain little essential oils.
If you bought processed carrot seeds, granulated, coated, at a gardening store, then such seeds are not processed again, they are already ready for planting. Also, you should not subject seeds that are sold in ribbons to additional processing. They have already gone through all the necessary operations and the seed material does not require additional shocks. In other cases, the seeds are treated to speed up their germination, but are not germinated until planted in open ground.
There are several ways to prepare seeds:
1. Thermal preparation. Seeds, wrapped in gauze, are placed in hot (but not boiling water!) water for about 20 minutes. Afterwards they are placed in cold (but not ice!) water. Then they dry and sow. Instead of a “contrast bath,” you can use “bathing” the seeds in water at room temperature, but you need to keep them in such water for a day. At the same time, the water is changed from time to time, because the seeds release essential oils into it, and the water cools down, but it is necessary that the comfortable water temperature be maintained.
2. With a growth stimulator. Zircon solutions are used. You can take Epin. Following the recommendations indicated on the packaging of the drug, make a solution, place the seed material in it, leave for two to four hours, and then strain, dry and sow.
3. Saturation of seeds with oxygen. The bubbling method is also suitable for leaching out essential oils. Place the seeds in a bubbling device, fill with water, and add growth stimulants. Now all that remains is to turn on the oxygen supply button on the device and wait a day until the seeds receive the required dose. The water needs to be changed periodically as the seeds are freed from essential oils. Then the seeds are removed and dried. You need to remove it from the water using gauze; straining is used.
4. Stratification. Place the seeds in a thick fabric bag and place them in moist soil in early spring. Depth - on the bayonet of a shovel. The soil has not yet warmed up, so they will harden in natural conditions. Having kept the seeds in cold soil in this way, they are taken out, dried, and then they can be sown.
Radishes: planting and care in open ground
Increasing soil fertility for carrots in summer cottages
The following methods will help increase fertility:
| Method | Advantages | Flaws |
| “Live fertilizers” – earthworms | Naturally cultivate the soil. They form vermicompost. They do not spread diseases. | No obvious ones identified |
| Adding organic matter. For carrots - humus, bird droppings, mullein. | Variety of types of organic fertilizers. Natural composition. | Do not use fresh or without dilution. An overdose for plants is undesirable. |
| Green manure | Enrich the earth with mineral components. Improves the structure of the soil and loosens it. Prevents the proliferation of pathogenic microflora and weeds. Some reduce soil acidity. Used for mulching and composting. | Strictly observe the compliance of the cultivated crop and green manure. |
| Crop rotation. | Helps avoid the accumulation of carrot by-products in the soil. The ability of the soil to recover after loss of nutrients. | Follow recommendations for combining crops. Carrots are sown after pumpkin, onions, and nightshades. Do not sow after beans, parsley and carrots. |
Use the mowed green manure after some time as a mulching material to improve the soil composition.
What kind of soil does he like?
Carrots love the sun, this must be taken into account. It is sown in open beds, not shaded by bushes. The soil should be loose. It grows best in loamy soil, but peaty soil is also suitable. If the soil is heavy, it needs to be prepared by diluting it with sand and peat. Usually, half a bucket of loosening ingredients is used per square meter of land. You can’t add manure; carrots don’t like it. The soil acidity level should be 6-7.
Humus should be added to the soil; ash and bone meal are also needed. Superphosphate and potassium sulfate are suitable fertilizers, but if fertilizers are applied, ash and bone meal are not needed. As a mineral fertilizer, you can use urea (10 g per sq. m).
Secrets of experienced gardeners
The advice of experienced gardeners who have been cultivating this crop for many years and have managed to achieve some success in this field will help to properly prepare the soil, build a bed and ultimately grow an excellent carrot crop. Let's look at the most interesting recommendations in more detail:
- If you grow carrots after cucumbers, for each square meter of the bed you will need to add at least one and a half kilograms of cow manure and 5 kilograms of crushed corn leaves. When growing carrots on chernozem, you will need to add potato peels and river sand to the indicated amount - 1 kilogram per square meter of planting;
- It is important to track and remember how previous crops grew in the selected area. So, for example, if cabbage grew there before carrots, and the harvest was not pleasing, the likelihood that a similar thing will happen with carrots is quite high. Abundant fertilizing with mineral and organic fertilizers will help correct the situation;
- If the tomatoes previously grown in the area for carrots turn black during the growth process, there is no point in planting carrot seeds. It is better to sow the area with parsley or beets;
- To get rid of carrot flies, it will be useful to plant carrots as early as possible and in the same bed with onions. Such a move would be beneficial for both cultures;
- To distribute the seeds evenly, it is more effective to mix them with closter rather than sand. If you add a certain amount of mineral fertilizers to the latter, the benefits (and, accordingly, germination) will be much higher. It is most convenient to place this mixture in the grooves using a pastry syringe;
- Soil that is too wet will promote carrot diseases. Therefore, stagnation of water on the site should be avoided by all means;
- If the farm has a sufficiently large amount of compost and physical strength, you can prepare the beds for carrots in a fundamentally different way: dig a trench at least 30 centimeters deep, fill it with compost mixed with fine river sand, and seeds are poured into this fertilized soil.
Despite the fact that carrots are an integral part of the daily diet of a large number of our compatriots, growing them with your own hands is not as easy as it might seem at first glance. But if you prepare the bed properly, avoid mistakes when sowing seeds and provide the crop with proper care, a decent harvest will not be long in coming.
Potatoes that are usually sold are grown industrially using mineral fertilizers and pesticides. Real gardeners will never purchase such a product, but will try and grow excellent carrots in their own garden plot. If you strictly follow the recommendations given, there should be no problems with cultivating the crop.
When to sow carrots in open ground, depending on the region
Carrots are sown when the temperature outside does not drop below 4 degrees Celsius. Each climatic region has its own weather characteristics, so it is impossible to say exactly: in what month and on what specific date the crop must be sown in open ground. Therefore, the best guide is a thermometer. If the thermometer remains at 4 degrees Celsius or higher, you need to get to work.
In the Moscow region and other areas of the central zone, carrots begin to be sown in the last weeks of April. On the Ural soil and in Siberia they are planted in May. In the Krasnodar region, the vegetable is sown in early April.
How to fertilize the soil in a greenhouse in the spring before planting
Healing properties of carrots
Naturally, many people have known about the healing properties of carrots since childhood. It is this vegetable that we are strongly advised to improve lung function, improve vision, as well as many other preventive measures.
Carrots contain a set of minerals and vitamins necessary for the human body:
- iron;
- carotene;
- phosphorus;
- potassium;
- zinc;
- magnesium;
- chromium;
- iodine;
- vitamins C, B, K, PP and E.
The owner of these useful and incredible properties can actually be called the queen of the beds. This is the most accessible source of the required beta-carotene for the retina, which is converted into vitamin A in the human body. The healing properties of carrots can be listed for a long time, but in this article I would like to talk about the basics of proper cultivation of this invaluable crop, and what kind of soil is needed for carrots.
In addition to its healing properties, carrots have another excellent property - this vegetable can be stored for a long time, providing a person with all the required minerals and vitamins throughout the cold period of the year, when there are no fresh fruits. When properly stored, carrots remain fresh for many months. This is a valuable property that can be obtained not only from the natural qualities of this root crop, but also through proper cultivation.
How to sow carrots in spring: the classic way
Before sowing carrots, you need to prepare the bed. Seven days before sowing, pour hot water onto the soil, to which Fitosporin has been added, cover with polyethylene and leave. Before sowing, the covering material is removed and furrows are made in the bed. The grooves should be small in depth, a couple of centimeters. Each row is separated from the next by a gap of several centimeters. The grooves are moistened with hot water with Fitosporin. You can also use a solution of potassium permanganate.
Then lightly sprinkle with wood ash. Then - tobacco dust, this is a way to protect carrots from pests. Sow seeds into the prepared grooves, trying to keep the seeds 2 centimeters apart from each other. There is a layer of soil on top. You can use mulch - peat chips are suitable for this. Then the compacted bed is covered with polyethylene or other covering material. When shoots appear, the covering material is removed.
How to feed tomatoes after planting in the ground
Mistakes in soil preparation
- Excessive amounts of nitrogen fertilizers are used. Root vegetables are of low quality and taste bitter. The correct dosage of nitrogen fertilizers allows you to get large sweet carrots.
- Immediately before sowing, add a large volume of fresh manure to the bed. As a result, the tops actively develop, weak and small root crops grow, which branch strongly and quickly deteriorate during storage. Carrots can be sown only two years after adding manure to the ground.
- Sow carrots in acidic soil. In such an environment, the process of assimilation of beneficial microelements is disrupted. You won't be able to grow sweet root vegetables. In autumn it is necessary to liming acidic soil.
- They don’t loosen the ground or remove stones. The carrots turn out to be twisted and highly branched. The soil must be carefully prepared for planting. If possible, it is better to sift.
What is the best way to sow in the garden so as not to thin out later?
Caring for carrots would not be so troublesome if it were not for the tedious thinning. Work that requires special attention and care. To avoid the thinning procedure, gardeners have invented several ways to get rid of the dreary task.
Method for germinating seeds in a cloth
Soak the seeds in water for a couple of hours, transfer to a cloth, and wrap. Wet the cloth periodically to prevent the seeds from drying out. Plant the sprouted seeds in the garden bed.
There is also a method of sowing into tissue. The seeds are placed in a cloth and wrapped to form a box. After the ground is free of snow, lower the bag into the dug hole. The seeds will stay here for two weeks. During this period they will swell. The seeds are taken out of the bag and mixed with chalk. It is convenient to sow such seeds; they can be placed in the furrows at the required distance. Usually the seeds are spaced at intervals of 10 centimeters. Afterwards the seeds are covered with earth. There is no need to water immediately.
How to plant carrots on tape
Seeds are glued to the paper strips, and then the strips are placed on the bed, leaving a gap of 15 centimeters between them. A layer of soil is placed on top. You can use ready-made seed tapes, which are sold in gardening stores.
Sowing carrots in toilet paper
A paste is prepared from a glass of water and a teaspoon of starch, with the help of which carrot seeds are glued to toilet paper. When the seeds are dry, place them in furrows in the garden bed and sprinkle soil on top.
Planting seeds with sand
For half a bucket of sand, take a couple of tablespoons of seeds. Sand and seeds are mixed, sprinkled with sand and seeds in the furrow.
Sowing carrots in egg cells
To avoid thinning, you can sow carrots in egg cells. Turn the cell over and make holes in the convex cups. To do this you will need a stationery knife. There is no need to soak the seeds. Pour soil into the cells and compact. Sprinkle the seeds into the soil using a moistened toothpick. You can have two grains per cell. Sprinkle earth on top. Water. Loosen the beds, place cells with seeds on the bed, and cover with soil. Water.
Sowing carrots with starch: jelly
To sow, you first need to make a paste. It is prepared like this: dilute a couple of tablespoons of starch in a glass of water, then pour the mixture into boiling water (800 ml). Cook, stirring, for a couple of minutes. Cool. Pour the jelly into a bottle, add the seeds there, and shake. This mixture is poured over the grooves. It is better to use a plastic bottle so that you can control the flow of the mixture.
When to plant cucumbers in open ground
Cultivation care
Carrots, although unpretentious, require attention. Firstly, it grows slowly, and weeds quickly, so weeding is a constant need. Secondly, the process of planting seeds itself means an uncontrolled amount of seeds in the furrows. In this case, after the seeds sprout and grow by 10-15 centimeters, the bed should be thinned out. In order for roots to be large and developed, they need space to grow. Dense planting without thinning will produce frail, unedible root crops.
Watering should be done according to circumstances. If the summer is rainy, then you need to make sure that the crop does not rot - you need to drain the area in time. During a drought, it is necessary to prevent the soil from drying out; nevertheless, the carrots should be juicy and plump. Long, regularly shaped carrots grow in soil that is not too dry, while gnarled and short roots are a sign of improper soil preparation or poor choice of site.
How to care for seedlings after planting
Proper watering is very important. You need to water carrots with water at a comfortable temperature, so watering with water from a well is prohibited. Therefore, gardeners keep a barrel of water on the plot, which warms up in the sun. The best watering hours are morning or evening. It is not watered during the day, especially in the heat. Both the sprinkling method and the root method are used. Drip irrigation is best. It is recommended to water once a week, this is enough for the culture to feel great. Watering should be stopped when the carrots are already ripe. There is no need to water two weeks before harvesting.
It is important not to forget about mulching. The row spaces are lined with peat, sawdust, and other material that will help retain moisture. Moreover, mulching is also prevention against carrot flies.
Experienced gardeners recommend weeding and thinning carrot beds. You need to loosen the soil after watering, waiting a couple of hours until the water is well absorbed into the soil. You don’t need to loosen too deeply; it’s enough to immerse the garden tool three to four centimeters into the ground. By the way, loosening is another way to protect against pests.
Thinning is necessary to ensure that root crops grow evenly and of the same size. Thinning begins when the first three leaves appear on the carrots. Excess specimens are removed, trying to leave a gap of a couple of centimeters between the bushes. After a couple of weeks, thinning is repeated, leaving gaps of three centimeters. You need to thin out carefully, trying not to damage the roots of nearby plants, otherwise this will lead to deformation of the root crops. You can thin out manually, pulling out excess “grass” from the ground. For greater accuracy, tweezers are suitable.
Fitosporin: how to use and why
Testing the soil for water permeability
You can determine the moisture permeability of the soil in a garden bed intended for carrots yourself. To do this, you need to make a ditch 10-12 cm deep and 1.5 m long in the area. Pour a bucket of water into it and wait until the moisture is absorbed.
- If this happens within 5 minutes, then the soil has a high level of absorption, but it is not able to retain moisture. Therefore, additional peat and humus should be added to it.
- If the water has disappeared within 10 minutes, then such soil is ideal for growing carrots.
- In the case when the moisture remains for 30-40 minutes, sand must be added to such soil to loosen it.
Taking into account all the recommendations for preparing a bed for carrots, you can count on high yields. Moreover, they are useful not only for growing this root crop, since most agricultural crops also need to comply with these requirements.
When to dig carrots and how to store them
Harvesting carrots depends on:
- from variety,
- weather conditions of the region,
- appearance of the culture.
Early varieties begin to be harvested in mid-summer - at the end of July or at the beginning of August. Mid-season varieties are harvested at the end of August and early September. Late varieties, which are considered the best for winter storage, are dug up in the first two autumn months.
You can tell if carrots are ripe by the following signs:
- The lower leaves have turned yellow.
- The root crop began to grow overgrown with white roots.
Carrot harvesting begins when the temperature is comfortable, does not fall below 4 degrees Celsius, in dry weather. If the air temperature is still high, it is worth holding off on harvesting, because the crop does not like sudden changes in temperature and, if placed in a cold vegetable pit or cellar, it will get sick, and the shelf life will be significantly reduced. Gardeners in central Russia begin harvesting in mid-September, in the Ural region - in the early days of the coming autumn.
In order not to damage the root crops during digging, you need to resort to proven tricks of experienced gardeners:
- Short carrots are harvested by hand, without any tools. However, if the soil in the garden bed is light, the vegetable will come out easily. Otherwise, you will have to use garden tools.
- Medium or long carrots are dug out using a fork. First, the root crop is dug up, and only then, grasping the tops, they are removed from the ground.
- To prevent the pitchfork from piercing the “body”, you need to be extremely careful. Damaged root vegetables will not be stored.
The dug carrots need to be dried, without removing the tops, right in the garden bed. It will take no more than two hours for it to dry. Then, using the scrolling method, you should remove the tops, cut off the growing points, and clean the roots from the soil. You need to carefully inspect the carrots and discard any damaged roots.
To store orange root vegetables you need:
- Temperature from 0 to +2 degrees;
- Humidity almost 80 percent;
- Good ventilation;
- Boxes - wooden or plastic, polypropylene bags.
Experienced gardeners use the following methods to store carrots:
- Sawdust. Sawdust is poured into the boxes, and root crops are placed on this bed and covered with a “blanket” of sawdust. You can make several layers. Sawdust acts as a natural antiseptic, so the vegetable is protected.
- Sand. Sand is poured into a container, carrots are placed on it, sand is placed on top, root vegetables are placed on top of the sand, and sand is placed on top again. There can be many layers. The sand used is slightly damp, but not wet.
- Moss. Sphagnum is used as a layer for several rows of root vegetables; it allows the vegetable to “breathe” and has antiseptic properties.
- Clay. A root crop that has received clay “armor” is stored better, some vegetable growers are sure, and therefore each root crop is coated with liquid clay, then dried and stored. The clay crust prevents the penetration of bacteria.
- Onion peel. The principle of laying is the same as with sawdust. Root vegetables are interspersed with layers of onion peel.
- Chalk. Before storage, carrots are treated with dry chalk.
- Horseradish roots. Root vegetables are mixed with horseradish and placed in a container for storage. Horseradish is a good antiseptic, so it protects against rot and mold.
- In sugar bags. This is a durable material in which carrots will be comfortable. However, it is forbidden to seal the bags; tasty supplies must “breathe”.
How to plant onion sets in open ground in spring
To grow carrots, you need to be careful when caring for this crop, from the very first moment when choosing a seed variety. Seed treatment, correct sowing, watering in the right amount and with water at the right temperature, wise choice of neighbors - crops that can become protectors of the orange beauty - all these details need to be thought out in advance. And when all the rules are followed, you can expect a good harvest.
Health to you and your loved ones! Natalya Belokopytova.
How to make the soil suitable for planting carrots?
If the type of land is identified, then it becomes clear what needs to be done in the future. When your garden plot consists of fertile black soil, then in addition to the usual bait, you don’t need to do anything else. Clay soil will require peat with sand, peat soil will require sand.
Preparing the land for planting carrots in spring
As mentioned above, the land must be cultivated 2 times a year - in the autumn, after harvesting, and in the spring - before planting. In the fall, the earth is thoroughly dug up to the full depth of a bayonet shovel in order to enrich it with air and prepare it for winter. Deep digging is also required to ensure that low winter temperatures destroy pathogenic microorganisms from the soil surface. In spring you only need to loosen and level the ground.
The most important thing is the choice of the site itself, since carrots do not like excessive moisture and love the sun. The best site is a flat area that is well accessible to sunlight. If you plant carrots in lowlands, in places where moisture accumulates, the fruits will grow deformed and small.
In spring, the soil must be saturated with organic matter - compost or humus. The soil must be as light and loose as possible, and the beds must be arranged in such a way that water can drain freely.
Carrots are not afraid when they are planted after other types of crops, for example, tomatoes, cucumbers or potatoes. The most important thing is that there is nothing foreign in the soil, like weeds.
Suitable predecessors
When choosing a bed for sowing carrots with seeds, observe crop rotation and plant the vegetable crop after the desired predecessors, including:
- cucumbers, especially if after them manure and corn leaves were added to the soil, 1.5 kg and 5 kg per 1 sq. m respectively,
- red beets, the ground for sowing carrots with seeds after beets is fertilized with 0.5 kg of manure and 5 kg of peat mixture per 1 sq. m, for winter varieties - fodder beet,
- potatoes, by the good harvest of which the potential fertility of the land is judged,
- tomatoes, based on the good quality of the fruits, one can conclude that medium-moist soil is suitable for carrots.
Carrots are not planted after legumes and parsley, which are active distributors of pests that are dangerous to the carrot crop. Vegetable crops do not grow after sunflower and tobacco.
Fertilizers for soil for beets
Nutrient supply to the soil is also done with the help of mineral fertilizers in the spring. For 1 m2 you will need about 35 g of powdered superphosphate, 15 g of ammonium nitrate and the same amount of potassium chloride. It is recommended to fill poor soil with organic additives, but this is already in the fall. This fertilizer is long-lasting, so it will be possible to sow beets only after 2 years. Otherwise, the root crops will not receive sufficient nutrition.
Speaking about what kind of soil carrots and beets like, it is important to note the differences in approaches to fertilizing these root crops. So, one of the basic components of fertilizer in the case of carrots is manure. It is not recommended for beets. But this plant, like carrots, prefers moderate lighting and does not like shade.
Disinfection of soil at a summer cottage for carrots
This event is necessary to get rid of fungal infections that lead to diseases of garden crops. The infectious background of the soil is reduced by proper treatment and disinfection measures. Biological, chemical and agrotechnical methods are distinguished.
Agrotechnical ones include:
- Dividing the garden into narrow ridges, which allows them to be thoroughly aerated and processed.
- Compliance with planting patterns so as not to create thickening.
- Maintaining crop rotation.
- Thorough cleaning of plant residues after the end of the season.
- Balanced application of nutrients.
Biological:
- For a small area, avoid the use of chemicals, replacing them with solutions of preparations with beneficial microorganisms.
- Use of ready-made biological fungicides “Trichodermin”, “Baktofit”. "Fitosporin", "Baktofit".
- Repeat the treatment twice a season - in autumn and summer.
Chemical:
- Use, but only 3 or 4 hazard classes.
- Autumn - soil treatment with Bordeaux mixture (3%).
- Spring - application of copper oxychloride (4%) or Oxyx (2%). Apply to a depth of 10 cm.
- When planting, add “Bravo” and “Quadris” according to the instructions.
Tip #2. Use chemicals only if other methods are ineffective.
Preparing the bed
This vegetable is planted not by scattering, but in even rows, which should be reflected in the design of the bed. Typically, two- or three-row beds about a meter wide of arbitrary length are used. A carrot bed like this will allow you to always have access to any plant on it. Using more than three rows in a garden bed is not advisable, since the distance between rows is recommended to be at least 20 cm.
If the groundwater level is no more than half a meter, to avoid diseases of root crops, it is necessary to make high beds. Their height can vary from 20 to 35 cm. In this case, the sides of the beds must be reinforced, for example, with wood or any other available material.
Compost delivers nutrients slowly but over time and generally improves soil properties. And the plants begin to grow well after planting. But it is necessary to use mature compost, mixed with soil and sifted, which was “ready” last fall (especially for seedlings). It is best to apply it a couple of weeks before sowing. First, spread the compost with a shovel or bucket over the planting surface in a layer of about 1 cm, and then mix it with the soil, but do not bury it!
If deep loosening of the soil was carried out in the fall, light loosening in the spring is enough to ventilate its top layer:
- To do this, use a grubber, cultivator or ripper.
- In dug up soil, you first need to use a pick to crush large clods of earth.
- At the same time, carefully collect the roots of the weeds - these efforts will be worth it in any case.
The rotary cultivator, or star roller, is a practical tool for breaking up lumps and clods and removing weeds. It will be especially useful on soils prone to clumping; in other cases, you can get by with a rake.
Some soils are sometimes very difficult to level. To do this, you have to work with a rake along and across the surface and rake large clods to the side. The fact that the soil is slightly compacted again does not harm the plants at all; on the contrary, it provides the seeds and roots of the plants with better contact with the ground.
If the rows are not paved with anything, then it is best to trample them thoroughly and then cover them with bark mulch or crushed stone. To keep the edges of your beds clear, use a string stretched between pegs or a piece of hose. A simple and flexible border for garden beds can be durable plastic border strips or vertically embedded plates. A wooden picket fence looks, of course, more beautiful, but it outlines too harshly.
A good harvest always has several components. All of them are important: the quality of the seeds, their proper preparation for sowing, the choice of variety, conditions and care. But there is one parameter whose influence is most important. This is the quality composition of the soil in which seedlings are grown. The harvest of all seedling crops (and in our climate most vegetables are grown through seedlings) depends to a large extent on properly composed seedling soil.
There is no one universal soil that meets the needs of all plants. Each garden crop requires an individual approach. Each plant has its own requirements for the soil mixture. But there are general rules that allow you to create a base soil and then optimize it for one or another crop with minimal effort.
Depending on the type of plants that are grown as seedlings, the soil mixture can be made up of different components mixed in certain proportions. But in all cases it is necessary to comply with the initial requirements for seedling substrates.
The soil intended for sowing seeds must contain components of organic and inorganic origin.
Organic ingredients:
- soil – turf, leaf, garden;
- vegetable compost;
- rotted cattle manure;
- peat – lowland and highland;
- sphagnum, coconut fiber, seed husks, bark, sawdust;
- wood ash.
Peat is one of the popular components of seedling soil mixtures.
It is not necessary that absolutely all components from the list are present in the soil, but most of them are. It is better to mix the soil from three different soils: garden soil, which can be taken directly from the ridge (unless, of course, sick or insect-infested plants grew there); leafy (from leaves rotted with the ground); turf (which is obtained by cutting turf). Soil is the basic element of the seedling substrate.
Compost - rotted plants - must be mixed with rotted manure, which is called humus. This is a supplier of necessary substances.
You will definitely need peat, it is what makes the soil fertile. The lowland contains about 70% organic matter, the upland, consisting of sphagnum, makes the soil structure loose.
Peat is found in most soil mixtures for seedlings. It is obtained from swamps. This is not to say that it is a non-renewable resource. From decomposing organic components under the influence of natural processes, it is formed in swamps, but very slowly - over thousands of years. In addition, peat is part of the natural ecosystem - if it is completely removed from the swamps or at least a serious deficiency is created, the ecological balance will be disrupted.
That's why scientists have been trying to find a replacement for peat over the past decades. And finally they found it. More and more manufacturers of soil mixtures for seedlings are now switching to using.
Benefits of Coconut Fiber.
- It is 100% organic without chemical impurities.
- They are able to absorb and retain water, working like a sponge, retaining moisture for plants and not removing useful substances from the soil.
- The layer of soil in a pot or container with a substrate that includes coconut fiber remains dry, which prevents the appearance of soil fungi.
- Coconut fiber has a pH level of about 6, so it normalizes the overall acidity of the entire substrate.
- The fiber contains phosphorus, potassium, as well as other substances needed by plants in significant quantities.
Sunflower seed husks, tree bark, rotted sawdust, dry moss and other loosening agents are also used to loosen the soil. Wood ash is added to normalize soil acidity.
Inorganic components:
- river (or, in extreme cases, quarry) sand;
- perlite;
- vermiculite;
- expanded clay;
- mineral supplements.
It is an excellent component of seedling soil mixture. This substance has a number of significant advantages.
- Sterility - spores of fungal diseases and pathogens of infectious diseases do not settle in perlite.
- The absence of insects - they simply do not grow in the substance.
- Lack of weed seeds - they do not take root in the soil mixture with perlite and do not sprout.
- Preservation in its original condition for a long time - perlite does not rot.
- Light weight - perlite is very light.
Vermiculite is a porous, environmentally friendly material that contains a record amount of magnesium, potassium and calcium necessary for sprouts already at the initial stages of life.
Drains the soil, acting as an organic loosening agent and helping to improve the structure and moisture capacity of the soil.
- a polymer compound, which, due to its properties, also serves to maintain high moisture capacity in the soil.
In addition to the required components, the soil mixture also includes the following elements:
- ash;
- urea;
- potassium sulfate;
- potassium chloride and sulfate;
- ammonium nitrate;
- superphosphate.
This small but important point is often ignored. Amateur gardeners neglect it, as a result, all efforts to prepare the right soil are wasted.
The following components should not get into the soil mixture:
- clay;
- fresh manure;
- not rotted plant residues;
- tea leaves, coffee grounds and other similar waste;
- salty sea sand.
Clay will make the soil heavy, impervious to moisture and air, and dense. Unrotted organic matter and coffee/tea will cause rotting processes - they can begin to decompose, increasing the temperature of the substrate, which will be detrimental to many seeds and seedlings. Also, the decomposition of organic matter will entail the release of nitrogen, which will evaporate, depleting the substrate.
Fertilizer for soil for dill
Even before sowing, it is necessary to add fertilizer to the ground: half a bucket of humus per 1 m2 with the addition of nitrophoska. When selecting other compositions, it is necessary to take into account what kind of soil carrots, onions, dill and beets like, of course, if you plan to grow them in one area. The fact is that dill does not tolerate calcareous soil and additives in the form of ash, which are often used when filling the soil for root crops. For optimal feeding, you should look for universal fertilizer recipes that will not harm neighbors in the garden and at the same time can ensure good development of dill. For example, humus, which is not recommended for onions, can be replaced with mullein diluted with water. You can do the same with other components - there will always be an alternative.
Subtleties of winter sowing of carrots
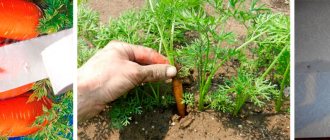
Without timely thinning, carrots grow small and clumsy
Winter sowing of carrots is a delicate matter. An important condition for its success is the correct choice of timing.
It is too risky to start sowing in October - during the thaw period, the seeds often hatch, and the frosts that follow mercilessly destroy the tender seedlings. Therefore, I advise you to sow carrot seeds only when the ground has cooled to at least +2 degrees. It’s even better to sow on frozen soil.
The seeds are lowered to a depth of 2 centimeters and sprinkled with a prepared mixture of sand and humus (1:1). Keep in mind that if your site is located on a drained peat bog, plant the seeds even deeper - 3-4 centimeters. This will prevent the seeds from coming to the surface under the influence of the wind.
To be on the safe side, the sowing rate is increased by 30-50%
After the first snowball falls, it is carefully raked with a broom onto the garden bed, and brushwood or spruce branches are thrown on top. The crops remain in this form until spring.
However, during periods of winter thaws, I advise you to additionally mulch the bed with carrots with compost (a small layer). The technique is designed to protect the seeds from untimely awakening.
Landing dates
Before sowing seeds in open ground, a gardener must decide why he is growing carrots and when he wants to get the harvest.
Sowing time:
- Early spring sowing from April 15 to May 15. Throughout June you can already collect bunches of carrots, and with the arrival of August you can enjoy the sweet root vegetables.
- Summer sowing from May 15 to June 10. The harvest will take place at the end of September; these carrots are stored in the cellar for winter storage.
- Pre-winter sowing from October 20 to November 15 allows you to consume young root crops before harvesting the main harvest. The main thing is to choose the right place for the beds - it should be on a hill so that the spring melting of snow does not drown the seeds.
If you sow at all possible times, then fresh vegetables will be on the table all year round.
During winter sowing, the formation of root crops occurs at a time when the carrot fly is just beginning its life activity. It is not yet capable of harming the harvest in the garden; the vegetables will be of better quality.
Purchasing seed material
When choosing carrot seeds, preference should be given to zoned ones; they are adapted to local conditions and give a stable harvest in a specific area. Planting material of foreign selection has good germination and produces beautiful, even root crops. Domestic varieties have advantages in carotene content and taste.
When purchasing seeds, go out and formulate clear requirements for the variety; buy them in specialized stores, where the percentage of fakes is kept to a minimum
Pay attention to the manufacturer, do not purchase seeds in homemade bags
Be sure to check the expiration date; germination lasts for 2-3 years. Carrot seeds are small, so it is convenient to sow them coated and coated.
Pre-sowing seed preparation
Pre-sowing preparation allows you to immediately identify “defective” seeds and accelerates germination. Therefore, you should not neglect this stage. Moreover, the procedure requires virtually no effort.
- To begin, the seeds must be filled with warm water. After 10 hours, all the “illiquid stock” will surface.
- To speed up germination by a week or even more, you need to carry out one more simple manipulation. The seeds are placed on a damp piece of cloth or cotton wool and kept there for several days. The air temperature should vary from +20 °C to +24 °C. In such conditions, within three days the seeds will hatch and fragile roots will appear.
From sowing to germination
The main thing in growing carrots from sowing to germination is to conserve moisture. Beginning gardeners, seeing that seedlings do not appear, resort to watering. A crust forms on top of the soil, then it becomes covered with cracks through which water intensively evaporates. How to deal with this? Firstly, if you follow the “dry on wet” principle when sowing, the top layer will reliably retain moisture. Secondly, when a crust appears, surface loosening is carried out with a rake. To make rows of carrots appear earlier, add radishes, lettuce, and spinach to the seeds - they will act as beacons.
Typical mistakes:
- Watering until germination. The achene does not have enough strength to break through the formed crust - the shoots are weak, uneven, and delayed.