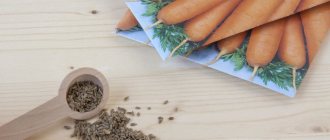
Anyone who grows carrots in their own country plot knows how difficult it is to evenly distribute its small seeds in the garden bed. With conventional sowing, the seedlings are too sparse or too dense, and then the excess sprouts have to be pulled out.
Sowing carrots on toilet paper helps me solve this problem. The peculiarities of the life hack consist in the preliminary distribution of seeds onto a long paper strip, which is then moved into the soil. With this method of germination, seedlings are uniform, so there is no need to thin out the sprouts.
Pros and cons of the method
Planting carrots with preliminary gluing on paper is gaining increasing popularity among gardeners, thanks to the advantages of the technique:
- Possibility of rejecting low-quality seeds at the pre-germination stage.
- Obtaining uniform seedlings without subsequent thinning.
- Resistance of crops to being washed out and displaced from the bed during watering or rain.
- Placing seeds in the soil at the required depth.
- Saving planting material.
Despite the obvious advantages, the technology has some disadvantages:
- The labor-intensive process of gluing seeds onto paper.
- Increases seed germination time by 1–2 weeks.
Rules for choosing seeds
The quality and size of the crop depend on the choice of planting material.
The size of the harvest of any crop primarily depends on the quality of the planting material, therefore, before making tapes, you need to check the germination rate and reject the seeds. A good germination rate for carrots is from 70% . To determine this figure, 20 specimens are taken from the batch and germinated in a warm place, wrapped in a damp cloth. If out of the total number of sprouts there are 15 or more sprouts, the quality of the seeds is good.
Expert opinion
Yulia Safronenko
Big fan of experiments and personal gardening techniques
Ask a Question
After checking germination, I carry out the rejection procedure in a saline solution - 1 tbsp. for 1 l. water. I mix the seeds and drop them into the liquid. After 10 minutes, I drain the floating specimens, and wash and dry those that have sunk to the bottom. This calibration method helps to use for sowing only full-fledged specimens that are sure to sprout.
What to glue on and with what?
I use soft toilet paper as a base for making ribbons, since it dissolves well and does not prevent seeds from germinating in the soil. I cut the paper into strips 2 cm wide.
Seed paste can be made from flour or starch using the following recipes:
- 2 tbsp. starch is diluted in 100 ml. warm water. 400 ml. Bring the water to a boil and pour in a thin stream. Constantly pour in a stream of starch solution.
- 4 tbsp flour is diluted in a glass of warm water until the lumps dissolve. 400 ml. Bring the water to a boil and pour in the flour solution, stirring constantly. Keep the mixture over low heat until thickened.
Be sure to cool the paste before using, otherwise the seeds will be spoiled!
Planting carrots on tape (toilet paper)
For 2 years we have been planting carrots on tapes that we harvest ourselves, with our own hands . Grandma thinks that this is convenient: carrots planted on a tape do not need to be thinned - at the distance at which the seeds are glued, they will sprout (provided that the planting material is of high quality). We, like many other gardeners, use regular toilet paper as tape.
Arrangement of seeds on paper
Gardening retail outlets offer consumers ready-made paper tapes with carrot seeds glued to them. But the cost of such planting material is quite high. Gluing seeds onto toilet paper yourself will cost much less .
I do this kind of work on long winter evenings, when there is nothing to do in the garden. Then the prepared ribbons calmly wait for favorable weather to sow carrots in open ground.
Inventive domestic gardeners have come up with several ways to stick small seeds onto strips of paper.
Expert opinion
Yulia Safronenko
Big fan of experiments and personal gardening techniques
Ask a Question
Personally, I do this:
- I lubricate a strip of toilet paper with a narrow brush with boiled paste.
- At a distance of 4 cm from each other, I sequentially lay out the seeds with a moistened cotton swab.
- I leave the tape until the paste dries completely (in a warm room this is about a day), then I roll it up with the seeds inside and place it in a column in a shoe box.
To simplify the gluing procedure, purchasing coated seeds will help: they are covered with a nutritious shell and due to this they have a larger size compared to untreated ones.
How to glue carrot seeds onto paper?
Sticking carrot seeds onto toilet paper is easy. A couple of evenings of work in front of the TV - and the planting material is ready. It is better to take soft, white paper (it will get wet faster in the soil).
Before gluing, we calibrate the seeds:
Prepare a saline solution in a glass (salt dosage by eye) and drop the seeds into it and stir. Those that surfaced are bad, we merge them. Those that sank to the bottom are good, we leave them and wash them in water at room temperature. Now the carrot seeds need to be dried so that they can be conveniently taken with your hands and glued to paper .
In the meantime, cut the toilet paper to fit the width of the bed - usually 80 or 90 cm. Then cut it into strips 2-3 cm wide.
To glue carrot seeds onto paper you will need paste. It can be cooked from flour (rye, wheat) or potato starch.
Carrot paste: recipe
Starch. We will prepare 500 ml of paste. Place a container with 400 ml of water on the fire and bring to a boil. Turn off the fire. In a separate bowl, dissolve 1.5 - 2 tbsp in 100 ml of warm water. l. dry starch, stirring well. Then pour this starch solution into boiling water in a thin stream. Stir thoroughly. The paste should not be too thick.
Flour. Fill an enamel pan with water and bring to a boil over heat. Add flour in a thin stream in small portions, stirring regularly. Flour paste is cooked at the rate of 1 tablespoon per 100 ml of water. Once the mixture reaches the consistency of a batter, remove from heat. Let the solution cool and use it as glue for seeds.
So, you can glue:
- We lower the match into the cooled paste, touch it to the seed, and glue it onto the paper. The distance between the seeds is 4 cm. Another way: first drop them on paper, and then use a match to transfer the seeds onto these drops of paste. The seeds are taken and pasted one at a time.
- After gluing the tape, dry it for 24 hours and put it in paper bags until sowing.
Landing rules
In order for sowing carrots to result in a successful harvest, you need to know how to use a prepared tape with seeds.
The success of sowing carrots using this method directly depends on how to use the prepared tape. I prepare the planting bed two weeks in advance, and not according to the “dig up and immediately sow carrots” principle. The pre-dug soil will settle in 14-15 days, and the seeds will be at the required depth. In too loose soil they will gradually go deeper and may not emerge .
The tape planting technology is as follows:
- In the beds prepared for planting carrots, I make furrows 3 cm deep at a distance of 20 cm from each other and water them with warm water.
- I place prepared ribbons at the bottom of the furrows, seeds down. In windy weather, it is better to do the installation with a partner, since the light paper will mix out of the grooves and the planting process will be delayed.
- I sprinkle the laid strips with soil. I level the surface of the bed. This must be done with the utmost care, otherwise there is a risk of snagging the tape and pulling it out of the furrow.
- I compact the surface to improve seed-soil contact and retain moisture.
After laying all the tapes and compacting the planting surface, I water it and cover it with non-woven material. This technique will preserve moisture in the soil for the entire period of seed germination and protect the surface from crust formation.
Some gardeners doubt the need to cover their beds to retain moisture. After all, you can water your crops every day, and the soil will always be moist. I learned from my own experience that this is wrong. In order for water to penetrate to the required depth, the bed has to be literally flooded until puddles form on the surface.
After drying, the earth turns into a dense crust and cracks appear on it. It is difficult for carrot sprouts to break through such a “shell”, so they sprout unevenly. Moisture is retained under the non-woven material for a long time; it is enough to water the tapes embedded in the soil during sowing. The main thing is to remove the cover in time, otherwise the sprouts will die.
If you pour a thin layer of mature compost at the bottom of the furrow and water it, the nutrients and heat it releases will speed up the emergence of seedlings.
More details about growing carrots in our other article: Growing carrots in open ground. Planting and care, best varieties, pest control
Advantages and disadvantages
Planting carrots on tape helps eliminate the tedious thinning process.
- Root crops grow large and even.
This method of planting is not suitable for large-scale sowing of carrots, since if you use purchased tapes, it is very expensive, and making them yourself in large quantities is labor-intensive.
Carrot seeds on a ribbon are not the best option for those who like to buy for future use. For treated seeds, germination directly depends on freshness.
Difficulties and tricks of caring for plantings
Carrots sown on a tape also require careful care, and then the carrots will produce a good harvest.
Caring for carrots sown on a tape is generally no different from traditional care. The main condition for successful germination, as I noted earlier, is maintaining soil moisture. If the weather is dry, hot, the crops need to be moistened regularly, since a lack of moisture will lead to the hardening of the paste and the death of the sprout. The beds covered with non-woven material are watered without removing it. If pelleted seeds are used, the crops need to be watered abundantly so that the nutrient shell dissolves faster.
If carrot sprouts have not appeared 20 days after laying the tapes on the bed, you should not wait for results; it is better to re-sow. New grooves are made between the original ones.
Lack of seedlings is observed if mistakes are made:
- Tapes are placed too deep in the soil.
- Close contact of seeds with soil is not ensured.
- A crust was allowed to form on the surface of the soil and the sprouts were unable to break through it.
Characteristics of the method
Planting carrots on tape is a convenient and time-saving way to grow. It is characterized by:
- saving space;
- maintaining humidity;
- good germination result.
Among the advantages it is noted that:
- it does not require thinning;
- all vegetables are at the same depth;
- all seeds will sprout at the same time;
- sowing is carried out in any weather conditions.
During the first 10 days, plantings do not require care. Watering is carried out 14 days after sowing. The plant is fed 2 times a year. The first fertilizer is applied 30 days after emergence, the second - after 40-50 days.
Reviews from vegetable growers
Have you tried the method of planting carrots on toilet paper?
I'm using it I'll try it
On the Internet I come across different opinions from vegetable growers about sowing carrots on toilet paper. There are positive and negative. For myself, I concluded that this method is completely unsuitable for gardeners who go to the country on weekends.
Anastasia Tsaregorodtseva
“The method may be good, but we didn’t succeed. We go to the dacha once a week and rarely water the plantings. The seeds were good, but none of them sprouted. Think. They have dried up."
Nika Frolova
“I really like the method. If you use high-quality seeds, bury the tapes correctly and water them, then everything will sprout. I have been planting carrots like this for 4 years. It’s easy to weed and there’s no need to thin out at all.”
Alena Konshenkova
“My grandmother tried to plant carrots on toilet paper for 2 years and nothing worked. In the evening he plants, and in the morning everything is dug up and only scraps of tapes are lying around. It’s all about the paste that mice eat!”
Nadezhda Ivleeva
“I use the method of gluing seeds for many crops: carrots, asters, parsley, onions. I cut ribbons one meter long. I take the paste into a syringe and apply drops onto paper. Then I use a wet match to pick up the seeds and place them in the drops. Everything comes up wonderfully, evenly and not too thickly. The main condition is to be sure to select full-fledged seeds. If you don’t do this, you’ll end up with a half-empty garden bed.”
I think the method of planting carrots using ribbons is good, you just need to adapt to it, follow the technology and take into account the characteristics of the site.
What are the benefits of seeds on a tape?
This method of planting garden crops is very convenient and simple, it is ideal for the lazy. All you have to do is make a furrow in the garden bed, stretch the tape in it and cover it with soil. Subsequently, you will not have to thin out the seedlings, which means you save seeds and your time.
The main advantage of seeds on a tape is the ease of planting them
Tape planting is suitable for most garden crops:
- carrot;
- radish;
- cucumbers;
- onion (seeds);
- red and fodder beets;
- tomatoes;
- greens - parsley, dill, lettuce, etc.
All this applies to small-seeded crops. Large seeds, such as peas and beans, will not stick to the paste. They are easier to sow in the traditional way.
