How to water garlic correctly?
When watering garlic, take into account the size of its heads and the characteristics of the root system. The heads of this crop are small and the roots are poorly developed, so it takes its nutrition mainly from the surface soil. In this regard, garlic requires a lot of water when watering, but it is strictly forbidden to overfill it. The task of farmers is to maintain a balance and ensure optimal moistening of the beds.
So that soil moisture does not harm garlic and brings maximum benefit, it is important to follow the watering rules:
- If the soil has cooled to +15°C, moisture will be detrimental to the garlic.
- The maximum water temperature for irrigation is +18°C.
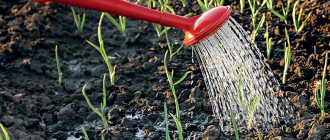
- The best way to water garlic is by drip.
- The best time to water garlic beds is early morning and late evening.
- After watering, when the moisture is absorbed, the soil is loosened to a depth of 2 cm.
- If it rains, watering is canceled.
- If garlic is grown for long-term storage, then during the period of active growth of the heads, the frequency of watering should be reduced. Then the bulbs will not be as large as with intensive watering, but they will be very durable.
With frequent and abundant watering, garlic heads grow very large, but you should not count on their long-term storage.
Removing winter shelter
In regions with a harsh climate, the bed is covered with spruce branches or a thick layer of mulch to protect the plants from freezing. Under such shelter, garlic overwinters well and does not die even in a snowless winter.
In the spring, as soon as the snow melts and the surface layer of soil begins to warm up, you must immediately remove the material from the garden bed to avoid damping off of the roots. Without shelter, the earth will warm up faster, and as a result we will get an early harvest of garlic.
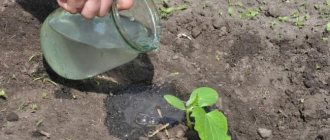
Small debris is collected from the garden beds and the remaining mulching material is raked. Then the soil is loosened to a depth of no more than a few centimeters and leveled with a rake. If the winter turns out to be snowless and dry, then the soil is moistened with settled water from a watering can.
How does watering affect garlic yield?
Studies have shown that the difference in yield between irrigated and non-irrigated garlic is about 40%. In arid regions the difference is even higher - with drip irrigation it is approximately 70%. Due to the artificial irrigation system, optimal soil moisture is maintained, and nutrients in the form of solutions are delivered directly to the roots of the garlic.
Sometimes gardeners, getting carried away, water the garlic more than necessary. But excess moisture can cause irreparable harm to garlic plantings - waterlogging leads to rotting of the garlic heads.
When to start watering?
As soon as the growing season begins, garlic needs watering. If the spring is rainy, they do without artificial humidification. Usually the watering season begins in April-May or a little later, when the heads begin to grow. In winter garlic, bulb growth occurs in May, in spring garlic – in July.
In the open ground
Watering garlic beds usually begins in April. Garlic leaves begin to grow rapidly from late April to early May. Before this time, you need to water the beds twice. But only under dry weather conditions.
Indoors
When growing garlic in greenhouses, it is watered especially abundantly during the period of active growth. There is no rain (natural) irrigation, so the amount of watering and water costs are always higher than when growing without shelter. Water the beds as the soil dries out. Typically, the frequency of watering is once every 7-10 days.
Garlic care in July
In July, we reduce watering of beds with winter garlic. But we are monitoring the soil. It should be moderately moist, but not dry. No longer needs feeding.
And be sure to remember to loosen the beds throughout the entire period. Without oxygen, the plant will not grow. And be sure to remember to loosen the beds throughout the entire period. Without oxygen, the plant will not grow. And by doing this, we repel pests and carry out disease prevention. So the choice is yours. What do you want to receive?
Watering methods
There are several methods for watering garlic, each of which has its own pros and cons. Among summer residents and gardeners, the manual watering method is often practiced; when growing large volumes, garlic is watered by sprinkling and drip method.
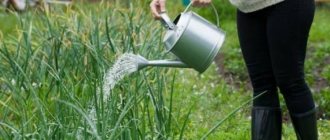
Manual irrigation
This is the most primitive method of watering, which does not require investment, but takes a lot of time and effort. If there are few beds, then the event can be perceived as a small physical exercise.
Pros of manual watering:
- low cost - no need to spend money on irrigation systems;
- no need to supply water to the beds;
- no dependence on electricity.
Minuses:
- greater physical stress on the gardener - if the plantings occupy a significant area;
- you have to move around the plantings, trampling down the rows;
- The amount of water poured out is not measured accurately.
Sprinkling
When sprinkling, water splashes like rain. Water falls on the plantings in the form of drops. To implement this method, special sprinkler systems are required.
Watch a video about watering garlic using the sprinkling method:
Pros:
- the method allows you to comply with irrigation norms;
- accurate and uniform distribution of moisture between plants is achieved;
- sprinkler systems are mobile;
- You can spray various substances along with water - for example, pesticides;
- the system does not interfere with soil cultivation.
Minuses:
- high water consumption;
- high cost of the system;
- the need for a lot of energy to create water pressure;
- wind affects the quality of watering;
- promoting the spread of diseases - due to the evaporation of moisture from the soil surface;
- if watering norms are exceeded, secondary salinization of the soil is possible - this will negatively affect the quality of garlic;
- low efficiency on heavy soils and in dry climates;
- there is a risk of negative effects on the leaves - sprinkling can provoke mineralization or disease.
Drip irrigation
There are two types of drip irrigation:
- superficial (ground);
- intrasoil (underground).
Surface drip irrigation system. Water is supplied through tubes with dropper dispensers directly to the plants. The tube system is laid out directly on the soil - in close proximity to the garlic.
Advantages of drip ground irrigation:
- less water consumption than with sprinkling;
- less moisture evaporation;
- you can use alternative irrigation schemes - small amounts of water at short intervals;
- there are no burns on the leaves from water drops.
Disadvantages of surface irrigation:
- it is necessary to replace watering tapes every 2-3 years;
- labor-intensive work when laying out, assembling and repairing tapes;
- clogged droppers.
Below is a video of drip irrigation of garlic:
Subsoil irrigation method. It is a stationary system designed for long-term use. The principle of its operation is practically no different from the functioning of the ground-based system, the only difference is in its location. Tubes with thickened walls are laid underground. In addition, emitters are used to prevent roots from entering the holes.
Advantages of subsurface irrigation:
- does not interfere with tillage;
- you don’t have to install and assemble the system every year;
- water and nutrients are delivered directly to the plant roots.
Disadvantages of subsurface irrigation:
- it is difficult to diagnose a breakdown of the emitter - a miniature dropper;
- difficulty of repair;
- high cost of the system - it is more expensive than ground-based.
The yield of garlic when using above-ground and underground drip irrigation systems is the same.
The optimal humidity level depends on the growth period of the garlic. The table shows approximate irrigation rates calculated for drip irrigation of winter garlic on medium loamy soils. Planting pattern – 60+20 x 6 cm.
| Development phase | Pre-irrigation humidity, % | Depth of control, cm | Average daily moisture consumption, cubic meters m per 1 ha | Irrigation norm, cubic meters m per 1 ha |
| Autumn | 70 | 25-30 | — | 65-80 |
| From germination to 3rd leaf | 80 | 15-20 | 7-16 | 35-40 |
| From 3rd to 5th leaf | 80 | 15-20 | 15-23 | 35-40 |
| From 5th to 8th leaf | 80 | 20-25 | 30-57 | 65-80 |
| From the appearance of arrows to the drying of leaves | 70 | 20-25 | 27-47 | 65-80 |
| From mass drying of leaves to harvest | 60 | 20-25 | 9-31 | 25-40 |
Growing rules
When planting in autumn, you need to follow certain rules that will allow you to do everything correctly and get a rich harvest. You can grow garlic using cloves and bulbs. In the first case, the harvest of garlic heads will be obtained the next year, and in the second, the bulbs will make excellent planting material, and the harvest can be harvested in another year. But it will be of higher quality, the bulbs will be of the same variety, larger.
Preparing the beds and soil
Winter garlic loves fertile loamy neutral soils. You should not plant garlic in the place where onions grew. Onions and garlic are the worst predecessor crops. They can infect the crop with dangerous diseases. It is better if, before planting garlic, legumes, cabbage, pumpkin, grain crops or greens grew in the garden bed.
Before planting garlic, you need to start preparing the bed in August. The place for it should be the sunniest and driest. When digging the soil, it is necessary to add a glass of lime, a tablespoon of nitrophoska and superphosphate. For each square meter, we recommend adding a bucket of compost or humus.
If the soil is very heavy clay, dense and not fertile, you need to add a bucket of peat to it. Loamy soils are added to peat lands. Sandy soils are also not suitable for planting garlic for the winter; they need to be filled with peat, a bucket of clay soil, and fertilizers. Digging should be carried out to a depth of at least 20 centimeters. A solution of copper sulfate is introduced. There is no need to compact the soil in the garden bed; just level it with a rake. The bed is left for a month so that the soil settles by itself. Cover with film.
You may be interested in: Planting garlic in the fall before winter in the Leningrad region
Preparation
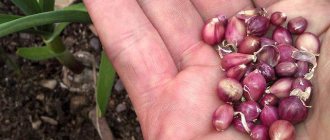
When planting winter garlic, you need to select and prepare planting material. To do this, take healthy, dry bulbs. Each is divided into cloves; damaged cloves are immediately removed. For planting, you need large teeth without traces of pest damage, completely protected by scales.
Large and medium-sized teeth are placed in a solution of table salt and kept there for 2 minutes. After this, transfer to a solution of copper sulfate for 60 seconds. Cloves should be planted on the beds without rinsing with water. There is another method: the planting material is soaked in a light-colored solution of potassium permanganate for 30-60 minutes.
Landing dates
It is necessary to plant winter garlic forty days before a strong cold snap. The plant must have time to take root and form a root system. It should penetrate deep to a depth of 10-12 centimeters. The first leaves must not be allowed to appear on the plant, otherwise the seedlings will die. In the northern regions, cloves should be planted in the second or third ten days of September. In the Krasnodar Territory, in the Stavropol Territory, you can start planting on October 15. Garlic may germinate if planted too early, or die if planted too late.
Planting scheme
For planting, it is necessary to make grooves 6-8 cm deep. There should be a distance of about 25 cm between the grooves. The cloves are planted in the ground bottom down to a depth of about 5 cm. The grooves are sprinkled with earth without compacting it. After a few weeks, when it starts to get colder, you need to pour a 2 cm layer of humus or peat onto the beds. This will help insulate the beds. If weather forecasters predict a frosty winter, mulching is necessary. Pour 2-3 cm of sawdust; they can be removed in the spring.
Growing garlic from bulbs
Winter garlic produces flower shoots in June. Aerial bulbs develop from them. They are collected when the wrapper bursts and the bulbs themselves change color. Before sowing, aerial bulbs are sorted, and the largest ones are used for planting.
Plant the bulbs 5 centimeters deep; you don’t need to stick them in too hard to avoid damaging them. In the summer, a single clove will grow from the bulb, which will become an excellent material for getting a large head of garlic from it next year.
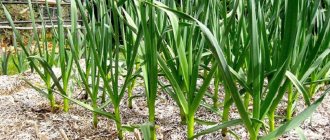
Frequency and features of watering
In order for the garlic heads to ripen large and have good keeping quality and taste, you must follow the rules for watering the garlic. When choosing the frequency and rate of watering, you should take into account the ripening period and specific weather conditions.
At the beginning of growth
From the moment shoots emerge to the formation of cloves, garlic needs high-quality moisture. At the beginning of the growing season, garlic is watered abundantly to a depth of 30 cm. The recommended frequency of watering is once every 7-8 days. In early May, garlic beds are watered along with top dressing.
When ripe
When garlic begins to ripen, its heads actively grow and watering becomes more frequent. The recommended frequency of watering during the growth period of the bulbs is once every 5 days. Or more often, depending on the weather. If the weather is hot and windy, the beds are watered every 3 days.
When to stop watering?
To ensure that garlic is well stored and has high commercial qualities, experienced gardeners stop watering before harvest. The time of the last watering depends on the purpose of the garlic:
- Garlic intended for current use stops watering 7 days before pulling the garlic out of the soil.
- If garlic is to be stored for long-term storage, watering is stopped 15-20 days before harvesting.
Differences between winter and spring garlic
Garlic is a bulbous plant. There are two types of garlic: spring and winter. They differ in appearance and in the method of planting.
Spring garlic is planted at the beginning of the season, when the ground has warmed up a little (up to 5-7 degrees), but still retains moisture. The crop does not like completely damp soil - the roots begin to rot, and then the bulb itself.
Winter crops are planted in late autumn, about two to three weeks before frost, so that the garlic has time to take root.
Using the table you can easily see the differences between the types.
| Winter garlic | Spring garlic |
| Frost-resistant. | Does not withstand low temperatures. |
| A large onion with 6 to 10 large cloves. | The bulb is smaller in size, the teeth are also small, up to 30 pieces. |
| The teeth are evenly shaped and grow in a circle. | The teeth are located chaotically. |
| Arrow to be deleted. Once removed, it remains as a hard stem in the center of the bulb, with cloves growing around it. | Has no arrows. |
| The shelf life is short, so it is recommended to consume it within several months after collection. | Stored until new harvest. |
| Ripens long before the end of the gardening season. | It does not always have time to ripen in areas with a cold climate. |
How to combine watering with fertilizing?
Experts recommend combining watering with fertilization:
- When the garlic has 3-4 leaves, prepare a urea solution - place a tablespoon on a bucket. Or the same amount of Agricola-Vegeta fertilizer. The solution is poured into a watering can and the garlic beds are watered with it. Consumption rate – 2-3 liters per 1 sq. m.
- 2-3 weeks after the first feeding, the garlic is watered with a solution of nitrophoska or nitroammophoska. To prepare the solution, dilute 2 tbsp in a bucket of water. l. one or another fertilizer. For 1 sq. m consume 3-4 liters of solution.
- The final feeding is carried out during the formation of garlic heads, so the period of its implementation depends on the characteristics of the variety and the climate of a particular area. During watering, the garlic is fed by adding a superphosphate solution. To prepare it, superphosphate (2 tbsp) is dissolved in a bucket of water. For 1 sq. m of garlic beds spend 4-5 liters of solution.
Basic rules to follow
When planning an irrigation system for garlic plantations, pay attention to the following rules:
- Weather: There is no need to water the beds after rain.
- Irrigation is carried out in the morning or evening hours.
- The water should be warm (about +18 C).
- After watering, loosening is carried out and weeds are removed.
Garlic prefers sandy loam soils and does not grow well in lowlands and shaded areas. Garlic beds should be watered sparingly, avoiding excessive moisture. Stagnation of water at the roots is unacceptable; expanded clay drainage can be installed.
Sprinkling garlic with salt
Watering garlic with a salt solution helps scare away pests and saturates the soil with useful minerals. Water the garlic with saline solution in the phase of 3-5 leaves. Recipes for preparing saline solutions:
- Against root nematode. Take 50 g of salt (2 tablespoons) per 10 liters of water. This amount of solution is enough for 2 square meters. m beds. After 1.5 weeks, watering is repeated.
- Against onion fly. A solution of higher concentration is prepared and the leaves are sprayed with it. Take 250 g of salt (10 tbsp) per bucket of water.
After watering the garlic with salt, the beds are watered with clean water. The saline solution should be used carefully - if there is a lot of sodium and chlorine in the soil, this will negatively affect plant growth.
Planting garlic before winter - all the subtleties of planting with cloves
If you plan to grow garlic on your plot, it is best to worry about this in the fall. Planting this bulbous plant before winter will ensure excellent quality and large size of garlic heads and cloves.
It is no secret that the main conditions for obtaining a rich harvest of winter garlic are the correct determination of the planting site and compliance with the bed preparation technology. We tell you how to plant garlic in the fall.
Planting dates for winter garlic
When to plant garlic before winter depends primarily on the planned planting depth.
Planting garlic before winter to a depth of 3-5 cm
Most often, garlic is buried 3-5 cm. In this case, planting is carried out 2-3 weeks before the first frost
.
In the middle zone, this period usually falls on the 20th of September – the 10th of October
.
In warmer regions with mild climates this is November
.
Planting winter garlic to a depth of 10-15 cm
Many gardeners prefer to plant garlic at greater depths; with this method, it takes root better and tolerates winter frosts more easily. When to plant winter garlic during deep planting? In the middle zone - from the last ten days of August to the second ten days of October
.
How to distinguish winter garlic from spring garlic
Naturally, the main difference is that winter garlic
planted before winter, and
spring
- in spring.
In addition, they can be distinguished by external features.
After which you can plant garlic before winter
It’s better if tomatoes, cucumbers, and legumes
.
early cabbage, zucchini, and pumpkin
can be good predecessors of garlic . In this case, the soil for garlic will be maximally saturated with organic fertilizers.
It is not recommended to plant garlic in areas that were occupied by potatoes or onions. This is due to the fact that there is a high risk of “exchange” of diseases between these crops (nematode, fusarium, etc.).
You should also not plant winter garlic in areas where manure was applied this year: garlic will produce abundant tops, loose heads and will be less resistant to fungal diseases.
Choosing a place for a bed for winter garlic
Find the most fertile soil on your site with normal or low acidity. It is in this place that you should plant garlic. Make a bed on the sunny side, positioning it from north to south.
How to prepare a bed for winter garlic?
Preparations for planting winter garlic begin early.
Preparing the soil for garlic
Late August – early September
it is necessary to fertilize the soil: for each square meter of area add 10 kg of humus, 1 cup of chalk and 2 cups of ash, add 2 tbsp. potassium sulfate and 1 tbsp. superphosphate. Having distributed all the components evenly on the soil, you need to dig it up. The digging depth should be at least 20 cm.
Forming a bed
An ideal bed for winter garlic will be up to 1 m wide and up to 25 cm high.
Allow time for the soil to shrink
Next, the bed is left alone until the soil settles after digging. If there is little precipitation in September, then for better shrinkage you can water the prepared bed several times.
We cultivate the soil
To prevent garlic diseases, treat the soil with a 1% solution of copper sulfate.
(dilute 1 tablespoon of the substance in 10 liters of water). Using a watering can, pour the resulting solution over the entire area of the bed. Then cover it with film.
urea on the surface of the bed.
at the rate of 10-20 g per square meter and water the soil with water.
How to prepare garlic for planting
We have already figured out how to prepare a bed for planting and when to plant winter garlic; now it’s time to decide how to prepare the planting material itself.
Taking the head apart
Firstly, it is important to carefully examine the garlic and disassemble the heads into individual cloves, from which you need to select the largest, healthiest ones for planting.
Disinfect garlic
The selected cloves must be soaked for a day in a 0.1% solution of potassium permanganate or a 1% solution of copper sulfate.
After these procedures, garlic can be considered ready for winter planting.
Proper planting of single clove winter garlic
Now we proceed directly to the technology of planting garlic in the fall.
Making holes
On a bed prepared in advance, we outline a place for planting winter garlic. To do this, use a stick to make holes in the ground at a distance of 10 cm.
from each other.
The depth of the holes is from 3 to 15 cm
, depending on the method and time of planting. We already discussed this at the beginning of the article.
Distance between rows – 20-25 cm
.
Burying the garlic cloves
Place the garlic cloves into the holes.
We cultivate the land
If the soil is dry, you can spill it with a pink solution of potassium permanganate.
Filling up the holes
The holes must be covered with rotted compost.
Mulching the bed
The optimal layer of mulch is about 10 cm. For mulching, it is best to use peat, pine needles or spruce branches, and fallen leaves.
An alternative way to plant winter garlic
There is another, less usual approach to preparing a bed for winter garlic.
We apply fertilizers for planting garlic
At the end of August, it is necessary to apply fertilizer to the garden bed:
- potassium sulfate (2 tbsp per sq.m.);
- superphosphate (1 tbsp per sq.m.);
- wood ash (2 cups per sq.m.);
- chalk (1 cup per square meter);
- humus (10 kg per sq.m.).
All fertilizers are applied dry and scattered over the soil surface.
We cultivate the soil
After this, the ground must be thoroughly dug up. Again, to speed up shrinkage, water the soil generously. If the weather is rainy, watering is not necessary.
Filling the bed
First of all, along the prepared bed, 35-45 cm from it, you need to sow rows of peas, oats and white mustard.
We cultivate the soil before planting
1-2 days before planting garlic, it is necessary to apply fertilizing. To do this, urea is added to the beds (10-20 g per sq.m.). Then the ground is generously watered.
How to find out soil moisture in garlic beds?
To avoid confusion with watering and to moisten garlic plantings on time, gardeners can use a moisture meter. This device measures soil moisture. If it shows that the soil moisture is less than 70%, it’s time to water the garlic plantings. If you don’t have a moisture meter, you can use the old-fashioned method of determining humidity.
Taking a handful of earth in your hand - from a depth of 10 cm, squeeze it. With your palm open, determine the soil moisture by its condition:
- For closed ground:
- if there are fingerprints on the ground - 70%;
- if the lump has crumbled - 60% (it’s time to water);
- if drops of liquid appeared on the ground - more than 80%.
- For open ground:
- a lump does not form from the soil – 60% (it’s time to water);
- a lump of dense structure is formed - more than 90%;
- a dense lump is formed, when pressed the palm becomes wet - 80%;
- a lump forms, but when pressed it falls apart - 70-75%.
Mistakes when watering
Even experienced gardeners can make mistakes when watering garlic:
- Watering during the day. Do not water garlic during the sun. Bright sun has a negative effect on wet leaves and burns may occur.
- Moisture getting on the leaves. When watering garlic, you should avoid getting water on the above-ground parts of the plants. It cannot be said that garlic is particularly sensitive to this method of watering, but at high temperatures the risk of fungal diseases increases.
- Frequent watering with small amounts of water. With this irrigation scheme, water cannot penetrate deep into the soil and will only be available to those plants whose roots are located in the top layer of soil. Water, being close to the surface of the earth, will evaporate quickly, and the garlic will not receive enough moisture. As a result, a developed root system capable of absorbing moisture from the depths will not form.
- Watering with a strong stream. Due to the strong pressure, the leaves and thin stems of garlic can be damaged. These damages, hardly noticeable to the eye, can cause a decrease in yield. Damaged leaves and stems run the risk of fungal infection. Therefore, it is not recommended to water garlic with a hose; it is better to use a watering can. And although it is more difficult and takes more time, the garlic will be healthy and its heads will be large.
- Late watering. It is not advisable to water the garlic too late. If the soil does not have time to dry out before night, favorable conditions will appear for the development of fungi.
Proper watering - in the right volumes and with the right frequency, not only increases the productivity of garlic, but also the quality of the garlic heads. When determining the norms and frequency of watering, the crop’s water needs are taken into account, as well as regional climate characteristics and current weather.
0
0
Copy link