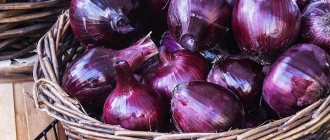
In addition to the “classic” onions and family onions, exhibition onions have become increasingly common in the beds of Russian gardeners in recent years.
This interesting and unusual-tasting vegetable differs from the usual varieties in its increased size, as well as good yield. Dear readers!
For you, we have created communities on social networks in which useful articles and interesting ideas are published several times a day! Subscribe and receive useful content in a convenient format! In this article we will tell you how to grow exhibition onions from seedlings, as well as how to properly care for seedlings and transplant them into open ground.
Botanical description of the exhibition onion variety
Exhibition onions were bred by breeders from the Netherlands. The variety is considered medium late. Harvesting usually occurs 100–120 days after sowing the seeds.
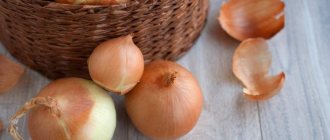
Externally, exhibition is practically no different from the varieties we are used to, with the exception of size and weight. The exhibition bulb grows the size of a fist. The average weight of one piece is about 0.7 - 0.9 kg. Also, individual specimens can grow up to 1.2 - 1.5 kg.
The variety shows high productivity. With proper care, you can remove up to 5 kg from 1 square meter.
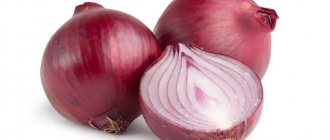
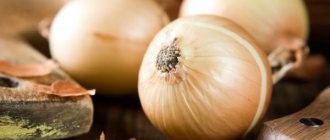
The bulb is slightly elongated, with a thickened neck, covered with a thin light brown husk. The pulp of the root vegetable is tender, juicy, rich white.
The taste of exhibition is rich, moderate, without the usual onion acid, and does not leave an aftertaste or aroma. This onion is suitable both for fresh consumption and for preparing salads.
ON A NOTE. Exhibition onions do not store well. Therefore, it is practically not prepared fresh for the winter.
Diseases and pests
When growing Exhibition onions, it is necessary to take preventive measures against diseases. The Dutch representative may suffer from rot or be attacked by insect pests. The plant's immunity is average.
Rot
During the season of prolonged rains, with infrequent loosening and an abundance of weeds, fungal diseases can develop in onion beds. Neck rot can develop during crop storage. All types of rot quickly spread and infect other bulbs. To avoid this, you must:
- Remove all infected plants.
- Stop feeding onions.
- Spray the beds with potassium permanganate or copper sulfate solution.
- Adjust the care system.
Treatment of seed material and disinfection of soil before planting seedlings or nigella is a mandatory preventive measure against fungal diseases.
Onion smut
Most often, young onions attack in the first weeks after planting. The causative agent is a fungus that penetrates inside a healthy bulb and forms black veins. This disease is combated with the help of antifungal drugs; diseased plants should be removed.
Stem nematode
A dangerous onion disease that can destroy the entire crop. Nematodes are stem parasitic worms that suck out all the nutritious juices from onion crops. Small thread-like white worms penetrate the bulb and multiply quickly.
A popular method of prevention is to plant repellent plants next to onion beds, for example, marigolds. Among chemical preparations, Lindane is suitable.
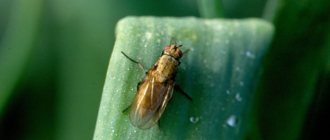
Onion fly
A small winged insect that lays eggs on the stems of onion crops, which subsequently hatch into voracious larvae. The disease has been known for a very long time; there are many chemical and folk ways to combat onion fly:
- Watering and spraying the beds with saline solution.
- Sprinkling onions with wood ash.
- Tobacco dust.
- Vinegar solution.
- Chemicals: “Aktara”, “Extraflor” and other drugs.
How to prepare planting material for sowing
If you decide to simply pour the seed into the soil, do not wait for germination. Before planting, the seeds must be treated.
Typically, planting material is soaked in water to soften the outer shell. Then the seeds are disinfected in a weak solution of potassium permanganate. The disinfection process lasts about 1.5 – 2 hours.
After all these procedures, the planting material is dried and sent for stratification.
At this time, you should prepare the container and soil. The soil you need is not heavy, nutritious and quite loose. Soil for seedlings, which you can buy in a store, is quite suitable.
Some summer residents calcine the soil mixture in the oven or pour it with potassium permanganate for disinfection.
When choosing a container for planting, you should be guided by the availability of the material. Plastic containers, cups, half bottles, as well as cassettes or peat pots are quite suitable for seedlings. Containers must also be processed.
Selecting the required area for the onion
To plant onions, you need a well-lit area.
According to the advice of gardeners, attention should be paid to:
- looseness of the soil and its acidity, which should not be high, preferably neutral and moisture-resistant;
- the place should be warm, the soil can be either sandy or sandy loam.
Why is stratification needed?
Stratification is the process of activating seed germination. In general it looks like this. The seeds are disinfected and placed in a small amount of substrate (usually a mixture of sand and peat). The soil is moistened, then excess moisture is removed and placed in a container. Most often they use plastic boxes for ice cream, cottage cheese, etc. The container is covered with a rag or gauze (occasionally film) and placed in a warm place for about 2 days. When the change is swollen, the container is moved to the refrigerator or basement.
Every 7 days the substrate is ventilated and loosened. The soil is moistened as needed.
The main task of stratification is to simulate winter conditions. Then, falling into warm soil after the cold, exhibition onion seeds “think” that spring has come and begin to grow actively.
Cold stratification
Not all plant seeds require stratification, but exhibition onions are usually stratified. The duration of the procedure for this culture is several days. Planted seeds grow faster after stratification.
ON A NOTE. In other crops, the stratification process may take a longer time: from 1 to 3 months.
Watering and fertilizing
Proper care of Dutch onion seedlings Exhibition also involves regular watering and feeding of the seedlings. First, let's focus on selecting the optimal watering schedule.
Agricultural cultivation technology includes the following nuances:
- Seedlings should be watered only with warm, but not hot or cold water, so as not to provoke stress in the plants.
- In the first few days after sowing, the soil should be constantly moderately moist, but it is not recommended to constantly open the film or lift the glass. Under the shelter you need to create a kind of greenhouse effect that will speed up the process of seed germination.
- After the first shoots appear, the seedlings are watered as the top layer of soil dries, preventing it from becoming waterlogged.
It is important to adhere to the “golden” mean: do not make the soil too wet, as this can cause rotting of the seedlings, but also do not overdry it, as this will slow down the development of the seedlings. In the first stages of seedling development, it is enough to water once every 2-3 days, and then reduce it to once a week (Figure 5).
Note: This schedule is considered universal, but it is still recommended to control the level of soil moisture, since onions are moisture-loving crops.
Caring for Exhibition onion seedlings also involves periodic feeding. For this purpose, it is best to use complex mineral preparations, which should be applied twice, with an interval of two weeks.
Most often, drugs are applied after the seedlings have sprouted. To feed, you can use a liquid solution of chicken manure and water in a ratio of 1:10, a solution of saltpeter (1 gram of the drug per 1 liter of water), as well as a mixture of fertilizers. A universal composition is considered to be 5 grams of potassium chloride, 20 grams of superphosphate and 10 grams of urea, dissolved in 10 liters of water.
Figure 5. Regular watering and fertilizing is the key to a rich harvest
You should be prepared for the fact that hybrid onion seedlings grow slowly, so you need to care for them quite carefully, and this care is not limited to watering and fertilizing, but also preparing the plants for transplanting into an open garden bed.
Favorable days for sowing exhibition onions in 2021 depending on the month
It is well known that the best time for sowing seeds for seedlings is the waxing moon phase. Seeds sown during this period germinate better, and the seedlings turn out strong and healthy.
In the table below we have compiled for you a list of all the dates when you can sow exhibition onion seeds in 2021 according to the lunar calendar.
| Month | Favorable days |
| January | 16, 17, 18, 19, 20, 21, 22, 23, 24, 25, 26, 27 |
| February | 12, 13, 14, 15, 16, 17, 18, 19, 20, 21, 22, 23, 24, 25, 26 |
| March | 14, 15, 16, 17, 18, 19, 20, 21, 22, 23, 24, 25, 26, 27 |
| April | 13, 14, 15, 16, 17, 18, 19, 20, 21, 22, 23, 24, 25, 26 |
| May | 12, 13, 14, 15, 16, 17, 18, 19, 20, 21, 22, 23, 24, 25 |
| June | 11, 12, 13, 14, 15, 16, 17, 18, 19, 20, 21, 22, 23 |
Reviews
Exhibition onions delight farmers with their size, taste and presentation, and high productivity. Some note different germination rates of seeds depending on the company.
Akulina, Iskitim : “I have been planting Exibishen onions in my garden for five years now. I came across this variety by accident: my daughter bought 2 bags in one of the stores. When I read the description and looked at the picture, I decided that this was just an advertisement. But once the seeds are there, they need to be planted.
I grew it for seedlings, as the manufacturer advises. I was very pleased with the 100% germination rate. The sprouts were all preserved and did not hurt in any way. To make the onion larger, the feather was not torn off. The crop ripened early. I was very surprised and delighted by the bountiful harvest. The fruits are simply gigantic! I had specimens from 500 g. The onions are tasty and not bitter, they lasted until the New Year. When I found out how useful it is, I wanted to grow only this variety.”
Svetlana, Yurga : “I bought a package of Exhibition seeds, and at the end of February I began to grow them for seedlings. Planted in the ground at the beginning of May. I cut off 1/3 of the roots and the top of the plants. Further care: weeding, watering and mulching with humus. The harvest turned out good. The bulbs, as they say, are in marketable condition. The description of the variety and the photo on the packaging correspond to reality. The taste didn’t disappoint either.”
Elena, Moscow : “I read rave reviews about Exhibition onion seeds from Aelita and decided to grow them for the first time this year. I followed all the care requirements, but only 5 sprouts sprouted from three bags. I will plant onions again, but I won’t buy the seeds.”
Bad days
As mentioned above, there is no need to sow seeds on days when the moon is in the new moon or full moon phases.
For convenience, we have compiled in a table a list of all unsuccessful dates for sowing exhibition onions in 2021 according to the lunar calendar.
| Month | Bad days |
| January | New Moon -13, Full Moon - 28, Moon in Aquarius - January 14 and 15 |
| February | New Moon – 11, Full Moon – 27 |
| March | New Moon – 13, Full Moon – 28 |
| April | New Moon – 12, Full Moon – 27 |
| May | New Moon – 11, Full Moon – 26 |
| June | New Moon -10, Full Moon – 24 |
Preparing a garden bed
To ensure proper planting, the bed should be prepared in the fall. It is recommended to dig it up, remove weed roots and debris.
With the onset of spring, the soil in the beds must be loosened using a hoe and a rake, then grooves must be drawn, maintaining a distance of 30 cm. It is recommended to install arches on the bed with onions to cover it with film or agrospan in case of cold weather and bird attacks.
Landing on a waning moon
It is necessary to say a few words regarding sowing exhibition onion seeds on the waning moon.
In general, any summer resident will say that it is undesirable to sow seeds on the waning moon. And indeed it is. But there are some exceptions.
Onions are essentially root vegetables, that is, they “grow down.” This means that the seeds of exhibition can be sown on the waning moon too!
In 2021, the moon wanes on the following dates:
- in January from 1 to 12 and from 29 to 31;
- in February from 1st to 10th and 28th;
- in March from 1 to 12 and from 29 to 31;
- in April from 1 to 11 and from 28 to 30;
- in May from 1 to 10 and from 27 to 31;
- in June from 1 to 9 and from 25 to 30.
Characteristics of the variety, its advantages and disadvantages
Exhibition was launched in Holland. The characteristics of the variety are as follows:
- large bulbs - one specimen can weigh 0.5 kg, sometimes the weight reaches 1 kg;
- oval bulb shape;
- the husk is thin, yellowish in color;
- tender and juicy, but dense pulp;
- sweet taste, no bitterness.
This variety is considered a salad variety. Due to its taste, the main method of consumption is raw. Onions are also used to prepare first and second courses.
The advantages of the Exhibition variety are as follows:
- growing in different ways: seeds, seedlings, onion sets;
- possibility of winter sowing;
- versatility - grown both for greens and for fruits;
- good yield indicators - from 1 sq. m you can collect up to 3 kg of onions;
- ease of harvesting;
- excellent taste characteristics;
- treatment without tears, which is caused by a lower content of essential oils;
- There is no characteristic odor after eating raw.
The variety has minimal disadvantages. These include the crop’s fastidiousness to growing conditions and short-term storage.
When to plant depending on the region?
Another advantage of this onion variety is that it grows well in almost all regions of Russia where farming is practiced. It can be grown not only in the Kuban or Black Earth Region, but also in Siberia, the Moscow region, the Urals, the Leningrad region, etc.
The only thing that differs in growing a variety in different regions is the time of sowing it for seedlings.
- In Siberia, onions are sown for seedlings towards the end of February. This is done in order to begin hardening the seedlings in the second half of May, and transplant the seedlings into open ground at the beginning of summer.
- In the Urals, exhibition planting dates coincide with Siberian ones. By the way, in both cases it is advised to initially cover the transplanted plants overnight with spunbond or other covering material. This is done due to the fact that there is still a high probability of morning frosts.
- In central Russia, seedlings begin to be cultivated in February - March. However, in the Black Earth Region, onions can be sown directly into open ground in the second half of May.
- In the Moscow region and surrounding regions, seedlings begin to be planted in early March, and seeds are sown in open ground in early June.
- In the Southern regions, exhibition onion seedlings are grown only to obtain early harvests, since in this climatic zone the crop grows well immediately in open ground.
ON A NOTE. Experienced summer residents advise that in areas with a harsh climate, onion seedlings should be older before planting (about 50 - 60 days). In the southern regions, seedlings 1-1.5 months old take root well.
What kind of variety is this
Exhibition is a salad variety, the bulbs of which are consumed in their pure form .
Origin and development
This mid-late onion was selected in Holland by the seed industry. In 2000, the variety was included in the State Register of the Russian Federation.
Composition and beneficial properties
The vegetable crop has a rich chemical composition :
- B vitamins, which have a beneficial effect on the health of skin, nails and hair, supporting metabolism and brain function;
- vitamin E with antioxidant properties;
- vitamin C, which improves immunity;
- vitamin PP, which normalizes the amount of sugar and cholesterol in the blood;
- fiber, which cleanses the body of toxins and toxic substances;
- essential oils and organic acids;
- macro- and microelements: zinc, iodine, iron, potassium and others, which support the functioning of the endocrine, cardiovascular and nervous systems, metabolism.
The composition of onions does not change after heat treatment.
Ripening time
From the appearance of mass shoots to the harvest of Exhibition onions, an average of 4 months passes.
Productivity
If the rules of agricultural technology are observed, the variety is highly productive : its marketable yield is up to 4.5 kg/m2.
Disease resistance
Under certain conditions (high humidity levels, sudden changes in temperature), Exhibition is capable of contracting onion smut, rot, and downy mildew.
Characteristics
The main feature of the variety is the size of the bulbs. Each weight is 170–550 g. Giant specimens weighing up to 800 g are often found. The vegetables themselves are slightly oblong, smooth, and light yellow in color on the outside. Juicy scales are white. The husk is thin and adheres tightly. The taste of onions is sweet and juicy, without bitterness.
What regions is it suitable for?
Exhibition does not tolerate low temperatures, but is approved for cultivation throughout the country . It is planted in greenhouses regardless of the weather, but in open ground only after the ground has warmed up sufficiently. In most regions of Russia this is the second half of April.
In Siberia, the Urals and more northern latitudes, wait until mid-May to avoid freezing the plants. Even then, it is better to prepare small arches over the bed to protect the plantings in case of frost.
Other onion varieties:
Time-tested variety of onions “Karatalsky”
Varieties of onion varieties “Family” and their characteristics
Planting exhibition onions with seeds step by step
Sowing seedlings
Sowing exhibition seeds does not differ from a similar procedure carried out with other plants. Below are step-by-step instructions for planting exhibition onion seedlings:
- Step 1. Purchase of planting material. When purchasing onion seeds, read the information on the back of the packet. The manufacturer indicates there the specifics of growing the crop.
- Step 2. Seed preparation and stratification. At this point we select good seeds that have sprouted.
- Step 3. Preparing the container and soil. Disinfection will help avoid accidental contamination of planting material with fungal and bacterial diseases.
- Step 4. Sowing seeds. The distance between the seeds should be 2 cm. The seeds should not be buried too deep, otherwise there will be no seedlings. The optimal planting depth is 1 cm.
- Step 5. Water and close. For watering, it is better to use a syringe, syringe or spray bottle. Cover the seeds with glass or plastic wrap.
- Step 6. Create the necessary conditions. The container with the seeds should be placed in a warm place (about 22 degrees). Occasionally, the crops need to be ventilated, slightly moistened and loosened the soil.
Preparing Exhibition onion seeds for planting
Exhibition onion seeds (nigella)
The seeds of any onion are covered with a dense shell, so they do not hatch very well. To improve their germination, pre-planting preparation is carried out, which consists of two stages:
1.Disinfection
Planting material is soaked for 30-40 minutes in a dark solution of potassium permanganate, heated to +40°C, then washed with clean water and dried.
Heat treatment can also be used for disinfection. To do this, place nigella in a thermos with water heated to 40°C for 8 hours. After heating, the seeds are kept in cold water for several minutes to bring them out of heat shock.
2.Soaking
The seeds are immersed in warm (minimum +25°C) water for 2-3 hours to soften the shell. After which they are wrapped in a damp cloth (gauze, cotton pads, etc.) and left to swell for another day.
Reference.
Experienced summer residents do not use onion seeds older than 2 years or damaged grains for sowing - they will not sprout.
After a day of soaking, some onion seeds may already hatch
How to care for exhibition onion seedlings, what are the tricks?
If you did everything correctly, then shoots will appear in 1.5 - 2 weeks. Now you need to slightly change the rules for caring for seedlings.
The onion seeds have sprouted, what to do next?
As soon as most of the crops have appeared, it is necessary to lower the temperature of the seedlings to 15-17 degrees. Also, the containers should be well lit by the sun.
ON A NOTE. Daylight hours should be at least 16 hours. This means that the seedlings will most likely have to be illuminated with special phytolamps.
Humidity should be moderate, otherwise the seedlings will begin to rot. It is important to water the plants very carefully so as not to wash the sprouts out of the soil. Therefore, at first it is better to continue using a syringe or syringe.
How to feed onion seedlings?
Fertilizing should be done very carefully, otherwise there is a high chance of “burning” the seedlings. It is best to use mineral fertilizers. At first, Humat, Zircon, Epin are suitable. Also now in hardware stores you can find complex liquid fertilizers for seedlings.
If you prefer organic fertilizers, then solutions based on chicken manure (1 to 10) or saltpeter (1 g per 1 liter) are effective.
IMPORTANT! Feeding should be done once every 10-15 days. Do not exceed the specified dosage of organic fertilizers and the recommendations of manufacturers of mineral fertilizers.
How to pick onion seedlings?
Seedlings
After about 40-45 days, the onion shoots will reach 3 cm in height. At this time, you can pick.
Picking is necessary so that individual seedlings have room to grow and develop.
Picking is carried out using the transshipment method. If you get the hang of it, you can use an ice cream stick to dig up seedlings.
BY THE WAY. No more need for film or glass cover.
Do I need to harden off onion seedlings?
In a few more weeks, when it gets noticeably warmer outside, you need to begin the procedure of hardening off the seedlings.
WHY IS THIS NEEDED? The fact is that in the weeks that have passed since the seeds sprouted, the seedlings have become accustomed to the home climate. But the conditions outside are different from those you created for plants in your apartment or house. If the seedlings are not hardened off and immediately transplanted into the soil, most of the seedlings will die from shock.
Harden the seedlings for 1-2 weeks. First, containers with exhibition onions are taken out onto the balcony or into the yard for literally a few minutes. Every day the time spent in the fresh air is increased. Until, finally, the seedlings are left to spend the night outside.
BY THE WAY. Seedlings can be covered with spunbond at night.
It is believed that after spending the night, the plants are ready to be transplanted into open ground.
Planting methods
Exhibition can be planted in different ways. This advantage allows you to choose the best option for a specific region and according to your own preferences. Each case has its own characteristics.
Seeds
When choosing this planting method, the bulbs do not reach their maximum size. They usually weigh an average of 250-300 g.
Exhibition seeds are planted in April. Specific dates depend on the climatic characteristics of the region. In Siberia and the middle zone, it is better to wait until mid-May, since the possibility of frost is high.
There is another option for planting Exhibition onions with seeds - winter sowing. This option attracts with its rapid germination in the spring and early harvest. When sowing in winter, the seeds are well hardened, so the immunity of the crop is noticeably increased. Planting is carried out immediately before frost or at the very beginning.
When choosing a method for planting this variety with seeds, you need to follow the following algorithm:
- Germination test . This stage is recommended to be carried out in advance, preferably a month before sowing. It is necessary to select several seeds, wrap them in cloth and soak in warm water. Then leave them in the fabric for 5 days and constantly moisturize them. It remains to evaluate germination.
- Disinfection . For this, a solution of potassium permanganate is used. The seeds should be kept in it for a quarter of an hour.
- Preparing for landing . Although this step is optional, it greatly facilitates further work. If you complete this preparation, then thinning the beds will not be necessary in the future. You need to prepare strips of toilet paper by cutting it lengthwise into 3 pieces. The seeds are attached to these strips with a liquid paste based on potato starch - 2 tsp. pour a glass of water over the product and cook over low heat until thickened, remembering to stir. To use AVA complex fertilizer effectively, it should be added to the cooled mass. It is convenient to apply the glue pointwise with a syringe, making intervals of 5 cm. Add seeds to each glue point using tweezers. Wait for the paste to dry, roll each strip and put it in a plastic bag.
- Adding wood ash . You need 50 g of fertilizer per square meter.
- Loosening and leveling the soil . The procedure allows you to saturate the soil with oxygen.
- Fungicide treatment to prevent fungal diseases . Usually they resort to Fitosporin. You need to dissolve 1 tbsp. l. drug in a 10-liter bucket of water.
- Preparing the grooves . It should be buried a maximum of 2 cm.
- Landing . Carefully place a strip of paper into each prepared groove. The seeds should be on top. Carefully sprinkle the grooves with soil.
- Watering . Carry out this immediately after filling the grooves, and do not spare water.
- Shelter . Film or other suitable material can be used. This allows you to protect the crop in case of frost.
Basic soil preparation should be done in the fall. It is necessary to dig up the selected area, get rid of weeds, roots, and insect larvae. If the soil is light, then loosening it in the spring will be enough.
Exhibition can be grown both in open ground and in a greenhouse or greenhouse. The second method is attractive because it preserves heat and a sufficient level of humidity, which ensures a good harvest.
When sowing Exhibition onions in winter, the work algorithm is as follows:
- Select a suitable site . The place should be sunny and elevated.
- Prepare the beds . They must be tall. Be sure to add humus and sand and get rid of weeds.
- Make grooves or holes . Deepen by 2 cm. Leave 20 cm between rows.
- Sow the seeds . The sowing must be dense, since not all seeds will sprout.
- Sprinkle the plantings with soil and water . Use a watering can with small holes, the water should be warm.
- Mulch . Use peat, straw and sawdust. The layer thickness is 2 cm. Mulch provides plantings with moisture retention, protection from weeds and frost.
- Re-mulch . This stage is recommended for cold regions that are prone to spring frosts. The beds are mulched again when the snow melts.
Seedlings
For the Exhibition variety, this planting method is considered the best, but also the most difficult. Seedlings allow you to harvest earlier, the bulbs reach maximum size and weight.
Seeds should be planted for seedlings in March. You must act according to the following algorithm:
- Soaking and drying seeds . The seeds need to be wrapped in a thin strip of cloth and soaked in warm water. Then dry the material in a shaded place for 3-4 days.
- Disinfection of planting material . To do this, it is better to use a weak solution of potassium permanganate - just dissolve 1 g of the drug in 1 liter of water. The optimal water temperature for disinfection is 40 degrees.
- Soil preparation . You can buy ready-made soil suitable for this crop, or you can make a mixture yourself using turf soil, humus and rotted mullein in a ratio of 9:9:1.
- Sowing seeds . You can use special boxes or plastic containers for this. There is no need to make any depressions; the seeds are sown on the surface and then covered with soil. A layer of 1 cm is sufficient.
- Watering . Use a spray bottle and water generously.
- Waiting for shoots . The container with the plantings should be placed in a shaded place and kept there for 1-1.5 weeks, covering the crops with film.
After the emergence of seedlings, the film cover must be removed and the seedlings placed in a sunny place. The ideal option is the south side.
To successfully grow seedlings, certain conditions must be met:
- temperature regime - 20-22 degrees, after the appearance of young leaves, it is recommended to reduce the daytime temperature to 17-20 degrees, the night temperature to 10-15 degrees;
- regular ventilation of the room with seedlings, optimally doing this every 3 days;
- daily watering; it is recommended to add mineral fertilizers to the water.
The process of growing seedlings takes 2 months. 2 weeks before planting it in open ground, it is necessary to begin hardening. To do this, the seedlings are taken out into the fresh air; at home, they are limited to a balcony or an open window. Increase the duration of hardening gradually, starting from a quarter of an hour.
Seedlings should be planted in early May. The site must be well lit, the soil must meet the requirements of this variety. Manure can be applied only in the fall; its use in the spring provokes looseness of the bulbs.
Planting of seedlings is carried out according to the following algorithm:
- Loosen the soil and level the surface.
- If necessary, get rid of weeds.
- Water the soil and seedlings.
- Make holes.
- Trim the roots of the seedlings to a third of their length.
- Deepen the seedlings into the soil by 2.5-3 cm. Keep a distance of 20 cm between them, and 10 cm more between rows.
- Gently sprinkle the planted seedlings with soil.
- After 20 days, make the first feeding.
Only healthy and strong seedlings should be planted. Sick and weak specimens should be discarded immediately.
Onion sets
This method of planting Exhibition onions is less common. Sets of this variety are not available for sale, although you can find them from some private traders, so they usually grow them from seeds themselves.
Planting seedlings can be done in spring or winter. In any case, it is necessary to carry out disinfection and antifungal prophylaxis of planting material. You can disinfect it with a solution of potassium permanganate, and fungicides will help prevent the appearance of fungus.
Planting seedlings is attractive due to its simplicity and good harvest. To obtain sets, the seeds must be planted densely. General landing rules.
Is it possible to immediately sow seeds in open ground?
In warmer regions of our country, exhibition seeds can be sown immediately in open ground. This is usually done when the soil warms up to at least 10 degrees.
Several beds are made on the site at a distance of 15 cm from each other. The soil can be pre-treated with a fungicide.
Then the seeds are laid out on a special tape (or the old fashioned way on toilet paper), sprinkled and watered.
IMPORTANT! When planting seeds directly into open ground, they still need to be prepared, i.e. treat with potassium permanganate, germinate and stratify.
By the way, in especially warm years, exhibition onions can be grown right in the garden, even at a dacha near Moscow.
Preparing soil and seeds for seedlings
To get really large fruits, it is advisable to sow the seeds not directly in open ground, but to use the seedling method. In this case, you need not only to know when it is better to sow Exhibition onions for seedlings, but also how to do it correctly.
Note: The process itself includes the preparation of soil, containers and seeds, as well as certain care of the crops in the future.
First, let's focus on preparing the soil and containers. It is better to sow Exhibition onion seeds immediately into fertile, loose soil. You can buy it in specialized stores or make it yourself. In the latter case, you will have to mix 10 parts of turf soil, one part of rotted manure or compost and 9 parts of high-quality humus. All components are thoroughly mixed and placed in containers for seedlings.
Figure 2. The crop can be grown either by seedling method or by direct sowing in the ground
It is best to use special cassettes, but regular plastic cups will also work. At home, onion seedlings are often grown in snails. Regardless of the type of container chosen, before sowing seeds in the ground, the container must be disinfected with a solution of potassium permanganate and dried thoroughly.
You also need to prepare the seeds, because the health of the seedlings will depend on the quality of the planting material (Figure 2).
To improve the germination process, you need to:
- Immerse the planting material in clean warm water and leave it for several hours.
- After this, the seeds are wrapped in a damp cloth and left in a dark place for three days. Such manipulations will help speed up the germination process.
- Next, it is necessary to sterilize the planting material. To do this, you will need a special solution: dissolve 1 gram of potassium permanganate in 1 liter of water and heat the finished mixture to 40 degrees. Seeds are immersed in liquid for 7-8 hours. After this, you should try to maintain the temperature at a stable level. If you fail to do this, nothing bad will happen, but it is still better to try to process the seeds properly.
After this, the planting material can be considered ready for planting, but it is advisable to dry it slightly before the procedure.
When to plant seedlings in open ground?
When the air outside the window warms up to 18 - 20 degrees, the seedlings can be planted in a permanent place.
Planting in open ground
It is important to choose the right place for planting. Swampy, acidic and heavy soils are not suitable. The soil should be light, loose and fertile. In the spring, even before planting onions, the soil can be fertilized with humus or compost.
Seedlings are planted at a distance of 20 cm from each other. A hole that is too deep is not needed, 3 cm is enough.
After planting, the seedlings are watered. In general, exhibition onions love moisture. It needs to be watered about once a week in dry weather, but during heavy rains the soil needs to be loosened to prevent stagnation of water.
Fertilizing must be done every month. It is best to use complex fertilizers. Also, during temperature changes and after heavy rains, it is necessary to treat crops with fungicides. This is done to prevent fungal diseases.
Growing
Exhibition onions can be grown from sets or from seeds that are sown for seedlings in winter; in the southern regions it can be sown directly into the ground.
Growing seedlings
Due to the long growing season, it is recommended to grow this onion through seedlings. The period for planting onions in bowls is from early March to mid-April. If it is not possible to illuminate the seedlings with special lamps, then sowing should be done later, when daylight hours are longer.
Soil preparation
You can make your own soil for seedlings using the following components:
- coconut substrate briquette;
- 5 liters of peat humus soil;
- 5 liters of garden soil;
- 1 liter of vermicompost;
- 1 cup vermiculite.
The coconut briquette is soaked in 2-3 liters of water, peat and garden soil are added there, everything is mixed, vermicompost and vermiculite are added and mixed again. Garden and peat soil can be preheated in the oven at 800C for about 30 minutes - this will help get rid of pests and diseases.
Photo gallery: ingredients for preparing soil for seedlings
Any universal soil for seedlings is suitable as a base for soil.
Garden soil can be taken from the garden or purchased at the store.
Vermicompost is produced by earthworms and is an important fertilizer for seedlings.
Vermiculite loosens the soil, making it more breathable
Coconut substrate contains micronutrients accumulated by the coconut skin during the growth of the nut
Selecting a container for planting
To grow onion seedlings, it is preferable to take a bowl with a depth of more than 10 cm. As experiments have shown, onion seedlings grow better in such containers and by the time they are planted in the ground they have already formed small heads.
In a shallow bowl the seedlings are thin, but in a deeper bowl the heads have already formed
Deep cake boxes or disposable containers will work.
Planting seeds
Most often, the seeds of this onion have already been treated with various preparations, as indicated on the packaging, so they are sown dry. Stages of planting onion seeds for seedlings:
- Pour soil into the container and compact it slightly.
- Make grooves at a distance of 2 cm from each other.
- Spread the seeds out with tweezers, leaving 1 cm between them.
- Sprinkle with soil, filling the seeds 5 mm deep.
- Pour hot water (60–700C).
- Cover with film and place in a warm place (on a heated floor or under a radiator).
In order not to measure the water temperature, it is easier to use this scheme: boil a kettle, pour boiling water into a cold ceramic or glass glass, then take a metal tablespoon and scoop water from the glass, pouring the bowl with the seeds. If the area is large, then take several spoons.
When boiling water comes into contact first with a mug, and then with a spoon, the water cools and the desired temperature is obtained. This helps wash away the essential oils from the seeds, and they sprout in 3–5 days.
Seedling care
After the onion has sprouted, the most important thing is not to dry out the seedlings and prevent them from stretching. Therefore, containers with seedlings are placed in the brightest, but not too warm place. It’s best to place it on the windowsill of a south-facing window or under additional lighting, putting it away at night in a cooler place with a temperature of 10–15 degrees.
The difference in day and night temperatures will harden the onions and make the seedlings strong.
The onion sprouts in small loops
Watering during the seedling period is moderate, without overdrying. At a room temperature of +220C, it is enough to water once a week.
2 weeks after planting, you need to start fertilizing with mineral or organic fertilizers, diluted 2 times the norm and always alternating them. For example, use liquid vermicompost for one week, and fertilizer for Kemira seedlings during the next.
In a deep bowl, onions can grow without transplanting.
The Kemira product is good because it does not contain chlorine
Planting seedlings in the ground
Onions are a cold-resistant crop and can withstand light frosts, so depending on the region, they are planted from late April to mid-May.
It is best if cabbage, potatoes, legumes, grains, zucchini or pumpkin grew in the selected bed in the previous season. Do not plant onions where carrots, onions, garlic, beets, cucumbers or corn grew.
The bed is loosened or dug up, fertilizers are not applied, but furrows or ridges are immediately made. The distance between rows should be 40 cm.
The best method of planting is considered to be planting in ridges . As the onion continues to grow, the soil falls off the ridge and by the end of the growing season the entire onion is on the surface—there is no need to rake the soil away from the bulbs. However, in more southern, drier regions, planting in ridges will result in more frequent and abundant watering.
When planting in ridges, there is no need to rake the soil away from the bulbs.
Stages of planting in the ground:
- If the onions are not placed from the bowl into individual cups, then the entire bowl is placed in a bowl of water.
Soaking is necessary to remove soil from the roots
- The resulting seedlings must be trimmed, leaving 10 cm of green feathers and approximately 5–6 cm of roots.
Pruning is done to stimulate further growth.
- The furrow is watered, and holes are made at a distance of 10 cm from each other with a round stick, no less deep than the remaining onion roots.
- The seedlings need to be immersed in these holes so that all the roots are facing down, then pressed down with soil from the side.
- You can plant a compacting crop, for example, celery seedlings, between the onion rows.
- Arches with covering material are placed on the garden bed to protect the seedlings from possible frosts, cats, and birds.
- To repel onion flies, you can place a glass of sawdust soaked in tar in the greenhouse.
- You can remove the greenhouse after 2 weeks. By this time, the seedlings will have become stronger and begin to grow.
Video - planting Exhibition onion seedlings in the ground
How to get nigella from exhibition onions?
Nigella is an onion seed that is obtained from the inflorescences of the plant. That is, all you need to do is wait for the arrows to appear and the onions to bloom. By the way, it is best to take care of the support for the arrow in advance so that it does not break.
When flowering is over, tie a regular stocking on the ball. This is necessary so that the seeds do not get lost.
IMPORTANT! Leave a few plants for nigella; you don’t need to extract seeds from all the seedlings. The fact is that flowering takes a lot of energy from the bulb itself. The optimal number of plants “for nigella” is 20–25% of the total number of crops.
Picking and hardening
The technology for growing onion seedlings is practically no different from growing seedlings of other crops. The cultivation process itself also involves picking if the grown plants become too crowded in a common container.
As a rule, seedlings begin to be planted one and a half months after sowing. If you fed the seedlings, by this time they will already be strong enough and it will be better if you plant them in separate cups for growing (Figure 6).
Figure 6. Picking seedlings is an important stage in growing strong and healthy plants
The picking scheme itself remains the same: the plants are carefully removed from the common pot and planted one at a time in separate small cups filled with fertile soil. Two weeks after picking, when the plants are stronger and take root, you can begin hardening them.
This procedure is considered extremely important, since it will determine how quickly young plants adapt to new growing conditions in open ground. The essence of hardening is that the plants begin to gradually become accustomed to the temperature of the open environment. To do this, pots with plants are taken outside or to the balcony and left there, first for 20-30 minutes, and then gradually increasing the time spent in the open air. Ideally, before transplanting into the garden, the seedlings should be outside all day without any problems.
Interesting Facts
- Exhibition onions are susceptible to fungal and bacterial diseases, so it is very important to pay special attention to disinfection.
- To save yourself from the need for daily weeding of the beds, it is recommended to mulch exhibition onions with straw or sawdust.
- Exhibition onions grow slowly. Therefore, there is no need to panic ahead of time.
- You can tell that it’s time to harvest by the yellowed feathers.
- Exhibition loves water very much, but does not tolerate excess moisture well: it begins to get sick and loses most of its taste.
Onion Exhibition: cultivation and care in beds
Further agricultural techniques when caring for Dutch onions are quite common:
- watering;
- mandatory loosening;
- feeding;
- weeding.
Experienced gardeners who have already mastered all the intricacies of growing this onion cover the plantings with arcs with film or non-woven material. This allows you to protect the planted seedlings or first shoots from the cold.
Seedlings planted according to such a free pattern at first look very unusual, and the bed seems somewhat deserted. But you shouldn’t thicken the plantings, since when the bulbs are filled and ripened, the picture will be different, and the onions will have a lot of space and freedom to grow. Water the Exhibition approximately once every two to three weeks, avoiding waterlogging of the soil. It is not allowed to water plants with cold water directly from a well or well.
Important!
From the end of July, it is necessary to first reduce and then completely stop irrigation. This will allow you to get dense and high-quality bulbs.
Be sure to loosen the soil after watering, while trying not to touch the onion roots and the bulbs themselves. The peculiarity of the variety is that the bulbs “protrude” above the soil surface by about 2/3, so it is very important to prevent their damage. They also carefully weed the onions.
Mulching the soil between the rows has a very good effect. It is recommended to use grass clippings or straw. For onions, they usually do not use sawdust or bark as mulch, as they affect the composition of the soil. Also, when mulching, many gardeners use black non-woven materials, in which they make slits for the bulbs.
Fertilizing is carried out based on the condition of the plants, adhering to the principle: “it is better to underfeed than to overfeed.” It is better to take complex fertilizers; also in the first half of summer you can feed onions with organic matter (bird droppings or mullein, diluted with water 1:20 and 1:10, respectively). Application schedule: once every three weeks.
Important!
A month before harvest, all fertilizing is stopped.
When growing onions, it is not recommended to cut off the feather from it, as this weakens the bulb and it will not grow large.
Answers to frequently asked questions
Since exhibition onions came to our country relatively recently, many summer residents still have some questions regarding its cultivation.
What soil should I buy for growing seedlings?
A universal soil for seedlings is suitable. There is no need to invent anything here. The purchased soil has all the necessary qualities for growing exhibition seedlings.
How can you stimulate seeds for further growth?
Everything is standard here too. Use the most famous and common growth stimulants: Energen, Zircon, Epin. You can also occasionally water the seedlings with Humate solution.
Why don't the seeds germinate?
First of all , it may be too early. The onion will sprout in about 10–15 days.
Secondly , there may be low-quality seeds. Always buy “fresh” planting material. Don't try to save money. Old seeds germinate much more poorly.
Thirdly , you could bury the seeds too deep, or use too heavy soil. This means that the seeds simply could not get out.
And fourthly , the most important mistake. Lack of stratification and preparation of seed material.
Why are seeds soaked?
The seeds are soaked to awaken them. After this procedure, you can usually see which seeds germinate and which can be thrown away.
How to harden seedlings?
Hardening off seedlings is a very simple procedure. Just gradually take the seedlings outside and increase the time they stay outdoors every day. After all, the seedlings must spend the night outside the house.
But don't overdo it. On rainy, windy and too cold days, it is better to leave the seedlings in the apartment.
What to do if exhibition onion seedlings do not grow?
Exhibition onions grow quite slowly. But, if in doubt, dilute a weak solution of a growth stimulator and water the plants with it.
Harvest and storage
Despite the fact that the variety has low shelf life, it is important to follow the basic rules for harvesting and storing the crop so that the efforts made are not in vain.
How and when to collect
Harvesting time for Exhibition onions depends on the region. In Siberia or the Urals this is done at the end of August-September. In warmer latitudes - in July-early August.
Reference. If the feathers turn yellow and lie on the ground, the onion is ready for harvesting.
Vegetables are taken out of the ground in dry weather , as they are dried in the sun for several days. Then they are transferred to a ventilated area and continue to dry. The entire procedure takes up to three weeks. Its shelf life depends on how well the onion dries. The feathers of dried vegetables are trimmed, leaving a high neck.
The main signs that the onion is ready for storage :
- the husk became smooth and rustling;
- the neck is dry;
- the surface of the vegetables is hard and dry.
Storage features and shelf life
The maximum shelf life of Exhibition onions is no more than four months . Therefore, optimal conditions for storage are created indoors:
- good air circulation;
- temperature - about +4°C;
- air humidity - 70% (onions will wither in dry air, rot in humid air).
A basement or cellar works well .
Onions are stored in small hanging nets or in baskets or boxes with ash. Many people braid it or put it in nylon stockings.
Onion harvesting
It is necessary to accurately determine the harvest time of Exhibition onions. A sign of ripening is the fallen tops, which indicates that the roots have also begun to dry out and the nutrition of the plants is becoming worse. This means that the time has come when it’s time to dig Exhibition onions from the beds. If this is not done in time, new roots will begin to grow, which will reduce the shelf life of the crop.
To harvest onions, it is recommended to choose a dry, sunny day, preferably with a slight breeze. The bulbs should be removed from the ground using a shovel or carefully pulled out. Place in rows on dry soil or cardboard and dry a little. It is then recommended to dry it on the veranda, in a barn or other well-ventilated area.
As soon as the neck of the onion dries, it is ready for winter storage. This will take about 14 days. Then it is necessary to sort the crop, examining each bulb, and select healthy ones for storage. Additionally sort by fruit size. If there is even slight damage, the heads are set aside and consumed first.
Onions must be stored in a dry place. It can be braided or made into bundles. When storing in boxes, it is recommended to sprinkle the heads with onion peels, which can be collected after drying and sorting the product.
Pros and cons of growing
Exhibition onion is an extremely successful hybrid, and yet there are pros and cons of growing this variety.
Advantages
The advantage of the exhibition variety is the ability to grow it in any region of Russia. If planting and care techniques are followed, it is unpretentious and adapts to different weather conditions.
The variety produces a large harvest, has fruits of large size and weight (from 0.7 kg to 1.5 kg). Of course, to obtain such a harvest, it is necessary to create all the conditions and use the lunar calendar
Both the turnip and the green feather part are used, that is, it is not necessary to plant several varieties to obtain one or another type of onion.
Due to its pleasant taste and lack of odor, it is suitable for dishes, both ready-made and after processing.
Flaws
The main disadvantage of the exhibition variety is that it is poorly stored; the preparations will not survive until winter, so it is better to eat it fresh or pickle it in rings.
The variety is considered mid-season; the harvest will have to wait up to four months. A large harvest and large fruits have a long life.
Preparing seedlings for planting in the ground
To grow Exhibition onions through seedlings, it is recommended to treat the seeds with a solution of potassium permanganate. The temperature of the liquid should be about 40 °C, then the seeds must be slightly dried so that they do not stick to your hands and can be sprinkled.
You can soak them to wake up in warm filtered water with aloe juice, then wrap them in damp gauze and keep them like that for about 3-4 days. It is usually recommended to plant seeds for seedlings in late February and early March.