Timing for planting oyster mushrooms on stumps
In order for the sown mycelium to quickly take root and be able to produce a powerful and well-branched mycelium, it is necessary to know the optimal time for its planting.
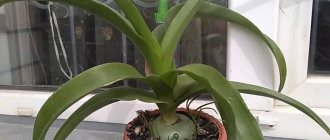
Mycelium at magnification
The best time is mid-spring - October. It is at this time that the air temperature drops and it is no longer very hot. You also need to take into account that air humidity often rises in the early morning and in the evening. This factor has a positive effect on the development of mycelium and the formation of large fruiting bodies.
What kind of oyster mushrooms can be grown in a summer cottage?
Initially, naturally occurring oyster mushrooms or oyster mushrooms were grown. Thanks to the efforts of scientists, special hybrids of these mushrooms have been developed that are characterized by higher yields. They are better suited for growing in artificial conditions.
These mushrooms grow well both on artificial substrate and on stumps.
If you are going to grow mushrooms in a small volume, it is better to buy ready-made mycelium. When starting a large plantation, it is more economical to grow it yourself. Unfortunately, manufacturers do not always sell high-quality mushroom mycelium. Therefore, there is a risk of wasting money and labor and ultimately being left without a harvest.
Warning! When purchasing, carefully inspect the mycelium to ensure its good quality.
What stumps are suitable for growing oyster mushrooms
Growing oyster mushrooms on a stump is based on the use of stumps of certain tree species.
Hardwood stumps are best suited for these purposes:
- aspens,
- poplars,
- chestnut,
- maple.
Fruit wood can also be used effectively.
Pine species cannot be used for growing oyster mushrooms, since pine wood contains a large amount of resins. And the resin will quickly destroy the oyster mushroom mycelium.
It is important that the diameter of the trunks is at least 17-18 cm.
Landing location
In a shady, damp place in a garden plot or vegetable garden (possibly between currant bushes, gooseberries and in raspberry bushes), I dig holes 15-20 cm deep, slightly larger in diameter than stumps. In this case, it is important to maintain a distance between the holes - 30-35 cm. At the bottom of each I place moistened sawdust (or small shavings, straw) in a layer of 1-1.5 cm. On top I pour the planting mycelium of mushrooms in a layer of 1 cm and place the hemp with the notches facing up. It is very important.
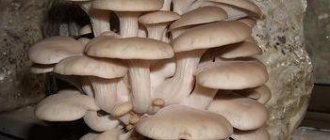
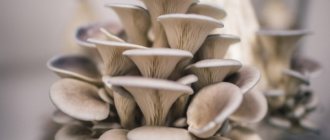
Growing oyster mushrooms on stumps
The fact is that wood has the ability to absorb water only in the direction from the root to the crown. And if the stump is positioned incorrectly, with its “roots” up, it will not absorb water from the soil and will produce a very small harvest of mushrooms (only one harvest, and in dry weather there may not be any at all).
Preparing stumps for growing oyster mushrooms
In order for the mycelium located on the stump to quickly form a powerful mycelium, it is necessary to perform a number of measures.
First of all, this is the preparation of the required number of stumps with a diameter of at least 17-18 cm and a height of 30-40 cm. Next, the stump is inspected and all areas with rotten or rotten bark are removed. After this, the stumps are soaked in a container for 12-14 days so that the wood absorbs the maximum possible volume of water.
What mushrooms can be grown on stumps?
If certain conditions are met, mycelium of almost all types can be grown on wood. Mushroom yields will vary significantly. In practical plant growing today, it is customary to cultivate two types of edible mushrooms: oyster mushrooms and honey mushrooms. However, it is most advisable to grow oyster mushrooms. This genus of wild plants produces the largest yield and cycles throughout the year. The technology of reproduction of different genera of this kingdom of botany on wood chocks is identical. The only difference is the natural ability of different variants of mycelium to bear fruit in a woody environment.
Selecting a location
To start a mushroom plantation, you need to choose the right place to install stumps with mycelium. A shady area, protected from direct sunlight with good ventilation, may be suitable for this. In such conditions, moisture around the stumps is well preserved for a long time.
You can place stumps under the shade of trees or under the walls of brick buildings. Stumps with mycelium should not be placed in close proximity to mullein, humus or a compost heap. After all, organic fertilizers release carbon dioxide, which can negatively affect the growth and development of fruiting bodies.
Comments (19)
Irina
02/29/2016 at 00:22 |
We once grew oyster mushrooms on our site. First for yourself, and then for sale... Not a bad help for the family budget, I’ll tell you. And they don’t require any special trouble, except that in dry summers you need to constantly monitor the humidity.Answer
Yulia Expert Plodogorod
09.11.2019 at 21:59 |
Hello Irina! If oyster mushrooms are cultivated simply on the plot, and not in a special room with adjusted parameters, it is important to initially select good planting material and a place for the mushroom “beds”. Especially if you want to harvest a good harvest and sell part of it.
We recommend placing the plantings in a shaded area, but with good air circulation. If several stumps are used, do not place them close to each other. The optimal distance in a row is 35-40 cm, and in row spacing 50-60 cm.
You are absolutely right, for normal development the mycelium needs moisture. This parameter needs to be monitored especially carefully in the first year. The soil needs to be moistened not only on the driest days, but also until the end of fruiting.
The maximum harvest can usually be harvested in the second season. This must be taken into account if you plan to sell part of the harvest. It is important to timely rotate and change those areas that have been bearing fruit for more than 5 years.
Answer
Semyon
05/19/2016 at 00:17 |
To be honest, I couldn’t even think that oyster mushrooms could be grown like this right at home in the garden, I’ll have to try to do this, especially since summer has already arrived)))).
Answer
Yulia Expert Plodogorod
09/09/2019 at 20:45 |
Hello, Semyon! If you decide to grow oyster mushrooms on stumps on your own plot, it is best to start work in the autumn days. During such a period, a stump or log will require less watering due to increased natural humidity. In addition, when planting in the fall, you will be able to try the first mushrooms grown with your own hands within a year.
During the summer, you can prepare materials, for example, select a suitable stump or log. Almost any deciduous tree will do. You can take fruit ones.
If there is a tree in the garden that has long needed to be removed and replaced with a younger crop, you can use it to grow oyster mushrooms. To begin with, you need to cut down the old plant, leaving only the stump, and then infect it with mycelium in spring or autumn.
In addition to a good harvest of mushrooms, this technique will eliminate the need to uproot the remains of the tree. Which is a very labor-intensive process. The mycelium will turn everything into dust in about two or three years.
Since growing oyster mushrooms requires shade, it is important to create such conditions. If the area where the stationary stump is located is sunny, we recommend building a canopy over it. It is very convenient to use a scattering mesh.
Answer
Irina
05/23/2016 at 00:26 |
I don’t grow mushrooms; it seems to me that this requires experience. It's easier for me to buy ready-made ones. In general, I really like oyster mushrooms and often add them to various dishes. They say they are very useful.
Answer
Yulia Expert Plodogorod
09.09.2019 at 21:26 |
Hello Irina! Of course, having experience makes it easier to act. But such a variety of mushrooms as oyster mushrooms is quite easy to grow, especially on stumps when the conditions are close to natural.
The main thing is to choose high-quality planting material. It is best to buy fresh mycelium for oats. Pay attention to its quality. The presence of stains or mold will negatively affect the development of mycelium.
If there is no permanent stump on your site, this is not a problem. These unpretentious mushrooms grow well on logs. The main thing is that the selected log house has no mold colonies and sufficient humidity.
You don't even have to make holes in the wood or bury the stump in the soil. It is enough to apply about two cm of mycelium to the cut of the stump and cover it with a piece of wood. You can fix the top part, for example, with nails.
If the colonization of fungi is successful, a white coating will form on the surface of the wood. Caring for plantings involves creating shade and moisture. There is no need to cover the log for the winter; the mycelium usually tolerates cold weather without problems.
Answer
Igor
10/12/2016 at 00:32 |
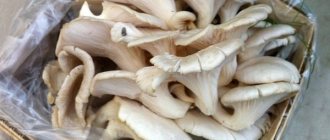
In our city, oyster mushrooms are sold in plastic bags, already with a nutrient substrate and mycelium. This method of growing mushrooms gives 3 waves. After this, the bag is thrown away.
Answer
Expert Fruit Garden
07/17/2018 at 07:08 |
Good afternoon, Igor! Yes, when growing oyster mushrooms on grain, straw, or on sunflower husks, it gives a MAXIMUM of 3 waves of fruiting. However, if you have a poplar or linden log, you can easily “infect” it with the mycelium you have! To do this, simply drill holes in the log and push particles of the fruit-bearing briquette into them! Important! The log must be soaked before use.
It is worth noting that oyster mushrooms can live EXCLUSIVELY on dead wood, so you can safely place “infected” logs under the canopy of living trees. They are in no danger
Answer
Julia
04/25/2017 at 00:37 |
This is the second year we have been growing oyster mushrooms at home. We tried a lot of mycelium options, but now we settled on sprouted grain. Whenever possible, we plant them on stumps. And if that doesn’t work, fill a thick garbage bag with sawdust, make holes and plant one grain at a time. It grows well and is easy to collect and water. You can take the bag and rearrange it - so I liked this particular method.
Answer
Andrey
06/03/2017 at 19:55 |
I really liked the idea of growing mushrooms on tree stumps. Oyster mushroom is a very tasty mushroom. . I have a suitable room for this. I will definitely try to grow this mushroom. Thanks for the info.
Answer
Antonina
07/07/2017 at 00:56 |
My father-in-law has been growing hanger mushrooms on stumps for quite a long time. This does not require much painstaking work if you get the hang of it and gain some experience. The mushrooms turn out large and tasty.
Answer
Vladlena
07/16/2017 at 00:26 |
We do not specifically grow oyster mushrooms. But three large nuts were cut down in our garden, but the stumps remained. These delicious mushrooms began to grow rapidly on them. At first they were afraid to eat it, but experts said that this is generally the most natural way for them to grow.
Answer
Vasilisa
05/30/2018 at 03:28 |
At our dacha we grew oyster mushrooms on stumps, having bought planting material from an agricultural company’s nursery. They drilled holes and loaded material into them. They are growing well, we are planning to expand production.
Answer
Nastya
09/08/2019 at 20:06 |
My parents tried to grow oyster mushrooms, but something went wrong. We bought material. The stump was very conducive to growing, it would seem. But no matter how hard they tried, nothing grew. We fiddled around for two years and abandoned the matter. We still don’t know what was the matter. Our house goes down slightly into a ravine, it seems to be damp there, and we planted it in the fall, and the stump looks so good. They don't grow. Maybe the material was of poor quality or some days were not so good.
Answer
Yulia Expert Plodogorod
09.09.2019 at 22:00 |
Hello, Nastya! To help us understand why it was not possible to grow oyster mushrooms on stumps, please tell us in more detail about what type of wood was used and how the mycelium was introduced.
First of all, you should not use stumps and logs from coniferous trees. Substances that are present in such wood inhibit the development of fungi. Further, if the stump was old, there could already be a colony of mushrooms there, even if the fruiting bodies were not noticeable. In such conditions, it will not be possible to colonize the mycelium.
Perhaps, if the house descends into a ravine, the area where the mycelium was located was too cold and damp. Of course, mushrooms love humidity, but its excess could cause the death of the colony. Also, cold drafts could negatively affect the vital activity of mushrooms, especially if they were already weakened by other factors.
You cannot plant mycelium in dry wood. Then, even if it is damp around, the likelihood of successful settlement is reduced. The mycelium will not take root in a sunny area, even if the humidity meets the requirements.
Also, do not use too large a piece of wood if the log is located vertically.
Sometimes the mycelium is simply placed in the ground, and the log is placed on top. This is also not an effective method. It is important that there is a layer of sawdust between the soil and the planting material, otherwise the mycelium will simply deteriorate.
Perhaps the problem really lies in the planting material; it is important that when purchasing it there are no signs of mold. If planting in the fall does not go well, try starting mushroom beds again in the spring.
For the good development of such planting material, it is important that it is warm enough, so it is better to start work at the end of April. If you decide to do another experiment in the autumn days, it is better to carry out the work in early September.
Answer
Julia
08.11.2019 at 20:24 |
I bought a ready-made substrate with mycelium. I got three harvests and managed to plant oyster mushrooms on stumps in the city. But the problem! For some reason they grow small and that’s it, they don’t grow any further. Why might this be, can anyone tell me?
Answer
Yulia Expert Plodogorod
09.11.2019 at 22:33 |
Hello Julia! Do you cultivate oyster mushrooms on stumps outdoors or indoors? In the first case, the reason may be a lack of humidity. It is necessary to regularly moisten the soil near stumps that are infected with mycelium. Also, the area where the stumps are located should not be exposed to direct sunlight.
If oyster mushrooms are grown indoors, it is important to check that the parameters are optimal. Such as temperature and humidity. Oyster mushrooms do not grow well if the temperature is too high. But even in the cold, fruiting bodies will not develop. Dry air can have a detrimental effect on crop growth. In addition, sometimes the described problems are observed in musty indoor conditions.
Also, if mushrooms have been cultivated in the same place for several years, this may be a natural phenomenon. You need to check the fruiting bodies for spots or growths. Sometimes, due to an attack by pests or another infection on the mycelium, development stops or simply slows down.
Also, the clusters develop poorly if the substrate is not nutritious enough or the air does not circulate well. Sometimes just a hood is not enough. Normal air flow is important. This can be achieved by adding several fans to the hood, which will disperse fresh air throughout the room.
Temperature fluctuations also have a negative impact. Slow or delayed development of fungi is sometimes caused by condensation settling on fruiting bodies.
We recommend checking the compliance of cultivation parameters, adjusting humidity, temperature and avoiding stuffiness in the place where cultivation is taking place. Also, you may need to change the substrate to a fresher and more nutritious one.
Answer
Roman Borovoy
12/22/2019 at 07:45 pm |
I didn’t quite understand what dimensions the stumps and cut tree trunks should have. Is there a direct relationship between the quality and growth rate of mushrooms and the diameter of the stump? Is it better to use long stems and short cuttings?
Answer
Yulia Expert Plodogorod
01/05/2020 at 22:19 |
Hello, Roman Borovoy! If your garden has stumps of a suitable type of tree, you can place mycelium there, regardless of size. It is only important that such stumps are not infected with other fungi, especially mold, otherwise there will be no result, even with very viable mycelium.
If the remains of the tree are located in a dry and sunny area, you will have to artificially provide humidity and shading.
If you decide to use saw cuts and specially prepared bars, it is better to choose ones that are not too long. The optimal size is 35-55 cm. The diameter of the stump selected for infection can be 20-30 cm.
To obtain a good harvest, the humidity of the environment and wood, as well as the quality of the mycelium, are of greater importance.
The size of the stumps is much less important than the quality of the wood itself. Indeed, in nature, oyster mushrooms can be found on large, long logs and small stumps.
Answer
Planting oyster mushroom mycelium on stumps
Now there are several fairly effective ways to sow oyster mushrooms into the wood of a properly prepared stump. The survival rate of the sown mycelium and the volume of the resulting harvest largely depend on the correctness of these activities.
Method of sowing mycelium into a cut
Seeding mycelium into a cut is quite often used. To do this job, you need to cut the stump a little further than the middle. Then the material infected with mycelium - wheat or sawdust - is hammered into the cut and the hole is closed. To do this, you can use shavings or sawdust, some are covered with garden varnish. We wrote how to prepare garden varnish here.
Seeding mycelium into holes in a stump
You can also sow oyster mushroom mycelium into pre-prepared holes in the stump. To do this, use a drill or screwdriver. The holes must be made 5-8 cm deep and staggered. It is best to make such holes on the side of the stump.
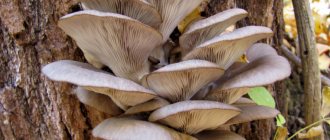
Growing oyster mushrooms on a stump using holes
This work should be done before soaking the wood. The mycelium is poured into the holes, which are sealed with tape and shavings. You can use children's plasticine to fix the mycelium in the hole.
A wine bottle cork is perfect for sealing. The main thing is that the diameter of the hole is slightly smaller than the diameter of the plug.
Sowing oyster mushroom mycelium between stumps
You can also successfully use the method of sowing between stumps. If there is not enough space to place stumps, then it is better to use this method of sowing and growing mushrooms.
To do this, take a properly prepared stump and sprinkle its end with an even layer of mycelium. A layer of mycelium is applied on top and covered with another stump.
If you use this technology, you can place 2-6 stumps located on top of each other. Moreover, the mycelium is the connecting link between neighboring stumps and is thus securely fixed. It is preferable to use stumps of the same diameter, but not less than 20 cm. To increase the durability of the structure, adjacent stumps are fastened with nails or self-tapping screws.
To obtain the expected result, it is necessary to place the mycelium between stumps 1.5-2 cm thick.
Methods of growing on stumps
There are several methods for growing oyster mushrooms on stumps at home.
- Suggests the appearance of mushrooms in the trench. Dig a trench 15 cm deep. The bottom is covered with boiled wheat or barley. When grown, such a layer will serve as a cushion for oyster mushrooms. Grain mycelium, previously kneaded by hand, is also placed there, approximately 350–400 g for each stump. Wood is placed directly on the mushroom spores and sprinkled with earth.
- Prepare long logs. The bark is removed from opposite sides to create a relatively flat and smooth surface. When growing, these logs are stacked horizontally on top of each other, so that the cleaned areas are in contact. Oyster mushroom mycelium is placed in layers. Further actions are similar to the method described above.
- The following growing methods involve introducing oyster mushroom spores inside a stump, log, or scattering them on the surface of cuts. The technology depends on the method of seeding the fungal mycelium and is described below.
Humidity for oyster mushroom growth
For the rapid development of mycelium and the formation of high yields of fruiting bodies, it is necessary to keep the wood moist.
This figure should not fall below 60-70%. To do this, you should soak the stump before sowing the grain mycelium. Also during the growing process it is necessary to moisten the soil at the base of the stump. It is not recommended to water the stumps from above, as this can cause serious diseases of the fungus fruiting bodies.
Drill a hole in the top of the stump for the neck of a plastic bottle. Cut off the bottom of the bottle. When it's hot, just screw the neck into the hole and fill the bottle with water.
The location of the stumps plays a big role in maintaining humidity in optimal conditions. Due to the fact that for normal growth of oyster mushrooms there is no urgent need for sunlight, you can place stumps for growing mushrooms in the shade of trees or near various buildings.
Growing oyster mushrooms on stumps at home: the most reliable and proven method
Oyster mushroom is considered a parasitic mushroom, since the crop prefers to develop at the expense of other plants. The ideal substrate for the species is deciduous tree species, such as oak, poplar, aspen, acacia, walnut, rowan, ash, etc. At the same time, edible fruits are found not only in the forest, but are also cultivated artificially. Today we will look at what it means to grow oyster mushrooms on stumps, since the method is popular not only in our country, but also abroad (Belarus, Germany, Ukraine, Italy, Czech Republic).
Preparation of substrate with mycelium
The so-called extensive method of propagation of the mushrooms we are considering involves the use of industrial, wood waste - tree cuttings, stumps. It is important that the bars or logs are made from crops on which wild, forest oyster mushroom grows. Next, let’s dive into the step-by-step process of preparing the substrate for future fruits:
- We select wood of suitable species. We saw large logs into neat, medium-sized bars (from 30 centimeters). Place the tree in a large container and fill it with clean, cold water. Soaking period is 6-8 days. If it is possible to obtain fresh raw materials that have only been “mined” in the forest, the “wet impregnation” stage can be skipped.
- We remove the bars from the liquid; the ideal humidity of the substrate is not lower than 80 and not higher than 90 percent.
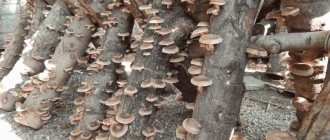
We keep the hemp in water for 6-8 days
Seeding mycelium
Unlike other types of edible mushrooms, growing oyster mushrooms on stumps or bars eliminates the need to add additional fertilizers. Therefore, the next step is the direct transfer of mushroom mycelium to the substrate. There are several methods for infecting wood with parasitic rhizomes. The first is the installation of a “tower” of wood, when 120-150 grams of mycelium are poured onto the edge of each part of the structure. The second is replanting mycelium into the drilled holes. Fans of the first method wrap the logs with an airtight film. Due to this, the raw material maintains the required level of moisture. Adherents of the second seal each hole with adhesive tape or natural forest moss. There is a third type of manipulation - you can cut out a thin wooden disk and transfer the mycelium to its end. However, for some reason the first two are in great demand among mushroom growers.
After the wood has become a carrier of mycelium, it is necessary to place the raw material in a sufficiently warm room. The optimal temperature for crop development is 16-20 degrees plus. Periodic moistening is also required - professionals recommend spraying the “farm” with water once every few days. You can additionally cover the wood with perforated film. Over the next 8-10 weeks, no additional actions are needed; for several months the raw material will become overgrown, wrapped in rhizomes.
Humidity
It is very important to maintain a fixed humidity level - no more than 90 percent. With proper care, after the specified time, light, airy growths resembling fluff will appear on the surface of the wood. As soon as the plaque begins to evenly cover the bars, it is time to transfer the logs to a permanent habitat intended for fruiting. A suitable place may be a vegetable garden or a shady garden in the country.
Preparing for the growing season
So, you have chosen a piece of land without direct sunlight. There are still several stages ahead:
- Carefully dig holes in the soil and place the bars there so that one-third of the wood protrudes above the surface. Fill empty spaces with dirt. In this situation, the raw material will not dry out, which will accelerate the growth of the fungus.
- If the warm season prevails outside, periodically moisten the area around the “plantings”. Since the crop bears fruit from the end of August to October, the delicacy will begin to ripen in the fall, when there are showers and the average air temperature reaches 8-13 degrees Celsius.
About stumps
The amount of harvest can be adjusted independently. Growing oyster mushrooms on stumps or large blocks of the desired type of wood can guarantee the mushroom grower a large number of “forest gifts.” The most successful raw materials are oak or beech - on their basis you can collect about 20 kilograms of mushrooms from 100 kilograms of substrate. If willow or poplar is used as a basis - up to 15 kilograms.
Experienced experts note that the peak yield of oyster mushrooms is reached in the third year of cultivation.
If a farmer is interested in the technology of growing oyster mushrooms in the cold season, he can build a plantation in a greenhouse or other room (provided it is possible to control the air temperature artificially). As you can see, the process does not require huge financial or energy costs - anyone can set up production at home. You need to have access to the basic necessities - water, wood of suitable varieties, your own land.
Placing stumps with oyster mushrooms
Successful cultivation of oyster mushrooms on a stump largely depends on the correct placement of the stumps in the most suitable place for the development of mycelium and fruiting bodies.
Work on installing stumps in a permanent place for growing oyster mushrooms should begin by checking the condition of the mycelium seeded into the wood. Next, the stumps are transferred to a pre-selected location and installed in holes 18-20 cm deep. The depth of the hole can vary and directly depends on the characteristics of the soil.
So, if the site where the stump is installed is clay, then the depth of the hole can be reduced to 5-6 cm, since clay soil retains moisture for a long time. If the soil is sandy, then you need to make holes to the maximum permissible depth. If there is only an open space with high intensity sunlight, then the soil around the stump must be compacted and covered with a mulch layer (straw, sawdust).
You also need to cover the top cut seeded with grain mycelium with mulch. For this purpose, you can use a piece of cardboard or plastic film.
What and how to plant
First, you need to purchase planting material - grain sterile mycelium . For example, order online or buy from local companies that breed and sell oyster mushrooms. Mycelium in this form is occasionally found in ordinary gardening stores.
To grow oyster mushrooms on stumps, I recommend buying mycelium in the spring or autumn, since its transportation must be carried out at positive temperatures.
In this case, the storage of the mycelium until the planned planting is carried out only in the refrigerator at a temperature range from 0 to +2 degrees. Under such conditions, it remains viable for 3-4 months, at room temperature - only a week and a half.
Mycelium is usually sold in bags weighing 200 grams or 2 kilograms. It seems to me that it is better to take a two-kilogram package for two reasons - firstly, it will cost you less, and secondly, the quality of such a substrate is definitely higher. If this amount is too much for you, you can team up with some neighbor in your dacha who also wants to try his hand at amateur mushroom growing.
Oyster mushroom mycelium in sticks is a less reliable option than grain mycelium
Having purchased the required amount of oyster mushroom mycelium, in early spring they begin to harvest logs of any deciduous tree species - poplar, aspen, walnut, oak, birch, and so on, excluding stone fruits.
Please note that oyster mushrooms grown on hard trees (oak, beech, etc.) take quite a long time to master the wood - you will get your first harvest only in the second or even third year. But on such logs the mushrooms live longer than the usual 5-6 years.
To grow oyster mushrooms on stumps and logs, their length should be no more than 25-30 centimeters, and their diameter should be at least 15 centimeters, optimally 25 centimeters. It is advisable that the wood has already had time to sit for a year or two.
Stumps formed in the garden after cutting down old apple trees, pears and other fruit crops are suitable for cultivating oyster mushrooms. And as a bonus to the harvest of delicious mushrooms, you will remove unnecessary stumps from the site, the uprooting of which, by the way, is a very labor-intensive task. In a few years, oyster mushrooms will simply turn them into dust.
The prepared logs are kept in water for two to three days. After this, they are transported in a wheelbarrow to a cellar or any other closed place and the mycelium is spread on the upper end parts with a layer of one to two centimeters.
To speed up the spread of the mycelium inside the tree, it can not just be applied to the log site, but planted in drilled holes with a depth of 4 to 5 centimeters and a diameter of about 3 centimeters. Drilling holes and infecting wood is carried out on a clean polyethylene film, wearing gloves and a sterile instrument.
It is more convenient to make holes in a spiral every 5-10 centimeters - this way the mushrooms will grow from different sides of the log. After placing the mycelium in the holes, they are covered with slightly damp sawdust, wood chips, garden pitch, moss, and small pieces of bark. This will also protect it from drying out and attacks from mold fungi.
The logs are placed one on top of the other in the form of a column about two meters high. On average, for one piece of wood you will need from 70 to 100 grams of mycelium (or about 250 milliliters of mycelium per 50 kilograms of wood).
Next, the resulting structure is covered with a layer of burlap, straw, unnecessary rags or straw. For this purpose, you cannot use polyethylene film - it will prevent the penetration of fresh air to the wood. Such a shelter reduces the evaporation of moisture and stimulates the development of mycelium, which will slowly but surely penetrate inside the logs.
If you used the method of seeding stumps and logs using holes in wood, then instead of building a column, you can put each log in a separate thick garbage bag and plug it with a cotton or foam swab to ensure good air exchange. To do this, place a piece of unnecessary hose with a diameter of 4 to 5 centimeters and the same length into the neck of the bag. Then a little foam rubber or cotton wool is inserted into the upper part of the hose and the polyethylene is secured with rope or twine. Hemp packed in this way is also moved to the cellar or any other room with a positive temperature.
At a temperature of +10...15 degrees, it takes 2 - 2.5 months for the mycelium to climb into the internal parts of a dead tree . All this time, the humidity in the room is maintained at a level of about 90%, while water should not accumulate on the logs themselves. If there is insufficient humidity, it is necessary to spray water, making sure that it does not get on the wood.
How to care for oyster mushrooms on stumps
After placing the stumps, there is an important period of caring for the developing fungi.
In general, this work comes down to maintaining optimal moisture content of the wood.
During the development of the mycelium, the fungi intensively use moisture in the wood. At the same time, the humidity of the stump begins to decrease. If the moisture content of the wood is not increased in a timely manner, this can lead to inhibition of development and subsequent complete death of the mycelium.
It is better to use rainwater for irrigation. If this is not possible, then you can simply fill a container with ordinary water from the central water supply and let it sit for at least 2-3 days. This will purify the water from bleach and other chemicals.
Next, use a watering can to moisten the soil around the stump. This work is best done in the evening. Watering should be done regularly at least once a week.
An important indicator of a lack of moisture is the drying out of the soil around the stump and a significant slowdown in the development of fruiting bodies.
As previously written, there is no need to water the entire stump. After all, some of the water will fall on the surface of the mushrooms. Even small drops that remain on the surface of the mushroom can cause dangerous mycelium diseases.
In addition to timely watering, you need to ensure that stumps and mushrooms do not show signs of fungal diseases or that tree pests do not appear.
It is very important to harvest crops in a timely and correct manner, thereby making room for a new wave of fruiting bodies.
How to grow oyster mushrooms on stumps
To obtain oyster mushrooms on stumps at home, you need: healthy, strong wood and mushroom mycelium. If there are no special problems with the first component for growing, then it will be more difficult to buy mushroom spores.
Initially, varieties of oyster mushrooms that grow in nature were popular. However, thanks to the efforts of scientists, hybrid varieties were bred for cultivation, characterized by high yields and more adapted to the artificial growing environment. Hybrids grow in a special substrate and on stumps. For small volumes, it will be easier to purchase ready-made mycelium for cultivation from manufacturers.
However, when buying oyster mushroom seed, you need to pay attention to the following:
- the color of the mycelium is light beige. The exception is mushrooms with bright caps; they may have mycelium of a different shade;
- absence of sprouted spots;
- gas exchange filter included.
It improves the quality of the product and allows odor control. The aroma when grown should be richly mushroom without any unnecessary shades.
Attention! There should be no green sprouts on the surface or inside the bag. Their presence indicates a weak mycelium and, accordingly, a low yield of oyster mushrooms.
Landing dates
Operations for growing stumps with oyster mushrooms in the country begin to be carried out in mid-spring. Then by July the mycelium will have time to take root well. Freshly cut wood requires sowing of planting material in early spring, which accordingly implies further storage in conditions with positive air temperatures, otherwise the oyster mushrooms will freeze.
Stumps for growing are wrapped in burlap or agrofibre, leaving small gaps for air circulation. Stored in a room with a temperature of +15 ° C and in the absence of drafts. The tree is regularly sprayed with water to maintain the required humidity. Thus, the stumps are stored until the beginning of May, and after the final warming, they are taken out to the site. A white coating on the wood signals the need for planting.
Selecting a location
When planting a mushroom plantation for growing oyster mushrooms, any free space in the garden or vegetable garden is suitable. It is important that it meets certain parameters:
- the area was shady, without direct sunlight, thus better retaining moisture in the wood;
- well ventilated;
- It is undesirable to choose a place near a pile of compost or humus; excess carbon dioxide negatively affects the development of mushrooms and their growth slows down.
In the selected area for cultivation, holes are dug slightly larger than the diameter of the stump, 20 cm deep. The distance between the holes is 30–40 cm. A layer of natural material (village, straw, sawdust) 1 cm thick is laid on the bottom of each hole. Then a layer of planting mycelium is laid out. the same thickness. After this procedure, the stumps are installed in the recesses with the notches facing up. Exactly so, since wood is able to absorb moisture in the direction from the roots to the crown, and not vice versa. If the stump for growing is placed incorrectly, then it will not absorb water and will result in an insignificant harvest of mushrooms. Only 1 collection is possible, and in the complete absence of rain, even that will not happen.
Attention! Increased humidity in the country stimulates the yield of oyster mushrooms and reduces labor costs for growing mushrooms - you will need to water the wood less often. Therefore, a place in the lowlands, on flooded soils, is ideal for growing.
Stump preparation
If your garden plot already has stumps, you can use them. It is recommended to choose the stumps of deciduous trees for cultivation: maple, poplar, aspen, birch, chestnut; fruit trees are also suitable. Pine wood cannot be used. The caustic resin contained in them in large quantities destroys the mycelium of oyster mushrooms.
You will need a tree with a diameter of at least 18 cm. It is advisable to use high-quality, fresh material for growing; old material will not work. Saw it into pieces 30–40 cm high. Small notches are made on each and marks are made on the cut to indicate which side the crown is located on. There is no need to peel the bark.
Holes are drilled in the side surface of the growing stump. Diameter 1–1.5 cm, depth 8–10 cm. Leave the distance between the holes made at least 10–15 cm.
The stumps must be kept in containers with water for several days to achieve the required level of humidity for growing oyster mushrooms. This is not necessary if freshly cut wood is used.
Mycelium seeding method
Sowing oyster mushroom mycelium into stationary stumps that were already on the site is carried out in April - May, after the final establishment of warm weather. As for fresh wood, they don’t delay the deadlines; sowing begins with the arrival of spring.
There are several methods for sowing mushroom mycelium.
- Sowing oyster mushrooms for cutting. From the stump, remove the upper part, 2 cm thick. Then sprinkle the end with mushroom spores, and cover it with a cut circle, fixing the tree with nails or screws.
- Sowing oyster mushrooms in holes. File holes in the side surface in a checkerboard pattern. Their depth is approximately 5–6 cm. A handful of grain mycelium is placed inside, and the holes themselves are sealed with tape or covered with moss. The mycelium for growing, which has an oblong shape, is inserted into the hole and sealed with plasticine.
- Sowing mushroom mycelium on bars. Make indentations in the wood, as in the previous case. Small pieces of wood with pre-applied planting material are placed inside. Cover the holes with sawdust or moss.
- Column method. It works well when grown when there is a lack of free space in the summer cottage. A stump is taken and its end is sprinkled with a layer of mushroom mycelium. The second log is placed on top, then the third. Mushroom seeds are poured into the layers between the logs. The height of the structures should not exceed 2 m, and it is preferable to take chocks less than 20 cm thick in diameter, otherwise there will be no instability. Such a trunk is fastened with nails.
Attention! The layer of oyster mushroom mycelium when grown at home on stumps should be at least 2 cm.
Placement of stumps
Before installing stumps in holes, you should carefully check the holes with planting mushroom mycelium. If there is an open growing space, seal it hermetically to prevent moisture from evaporating. Thus, the upper cut is sealed with raw sawdust or wax.
The soil is compacted near the stumps placed in the holes. They are covered with polyethylene on top, and holes are first pierced in clusters for ventilation. Leave it in this state for 15–20 days. Plastic bags are also used for this purpose. Put them on and secure them so they don’t fall off. This shelter during cultivation protects oyster mushroom spores from drying out and promotes rapid establishment.
Crop care and harvesting
Maintenance involves keeping the soil around the stumps moist. In the first year, water regularly until fruiting ends. For the winter, stumps do not need additional shelter. However, in cold climates, when growing, they are covered with straw or spruce branches on top.
At home, the first collection of oyster mushrooms from stumps occurs in August or early September. If weather conditions are favorable, harvesting continues until November. The readiness of the mushroom is determined based on the size when the stalk has reached 4 cm and the cap has reached 8 cm in diameter. Mature mushrooms are collected using a sharp knife, cutting off at the root. It is not recommended to selectively remove oyster mushrooms from the bunch, which may have a bad effect on the remaining harvest.
When using high-quality mycelium and a properly selected variety of oyster mushrooms, mushrooms are harvested twice per season - in spring and autumn. Depending on the variety, density and diameter of the wood, fruiting of oyster mushrooms lasts 5–6 years. The climatic features of the region directly affect the yield during cultivation.
Attention! In the first year, the harvest is 0.7–0.8 kg of selected oyster mushrooms. The following year, fruiting increases to 2.5 kg.
Harvest ripening time
Harvesting oyster mushrooms depends on the cultivation technology and the year the stumps are used. So, on average, harvesting occurs annually throughout August and the first half of September. If the weather is wet during autumn, mushroom picking may last until the end of November.
When using high-quality mycelium, you can harvest two harvests per year - in spring and autumn. Depending on the growing conditions, you can harvest from one stump for 5 or even 6 years. The yield of mushrooms will only increase over the years.
Oyster mushrooms are in high demand among buyers; a huge number of them are sold through the retail chain. But few summer residents know that growing oyster mushrooms at home is a troublesome task, but quite possible. There are several ways to grow this mushroom; they will allow you to get a rich harvest throughout the summer-autumn period, or even all year round. In addition to the natural method of growing oyster mushrooms on wooden chocks, there is a method of growing on straw or a mixture of straw and sawdust.
Content
- Growing oyster mushrooms on stumps video
- Growing oyster mushrooms in garden beds
- how to prepare a substrate for growing oyster mushrooms
- creating beds for growing mushrooms
- how to plant mycelium
- Intensive method of growing oyster mushrooms throughout the year
- substrate preparation
- seeding mycelium video
- preparation period
- Features of caring for oyster mushrooms during the fruiting period
- harvest video
- Diseases and pests of oyster mushrooms
Growing oyster mushrooms on stumps
The easiest way to obtain oyster mushrooms at home is to grow them on the stumps of deciduous trees; conifers are not suitable for this. The grain mycelium is applied in a layer of a couple of centimeters to a fresh cut, covered with polyethylene, and sprinkled with earth. The best time for sowing is early April. To sow one stump you will need about 100 grams of mycelium. The second sowing method involves introducing mycelium into cuts on stumps or holes drilled in them. After adding the mycelium, it is covered with sawdust. The stump sections are covered with polyethylene and covered with soil.
The development process of the fungus lasts from 3 to 4 months; at the end of September it will be possible to harvest. Before fruiting begins, in the middle of the month, the soil and film from the stumps are removed. We should not forget that the growth of fungi requires high air humidity and a nutrient medium, so the soil around the stumps should be watered several times a week.
Growing oyster mushrooms in garden beds
how to prepare a substrate for growing oyster mushrooms
To grow mushrooms of this type, you can use not only hemp or wooden chocks - the use of a straw substrate makes it possible to speed up the process of obtaining a harvest and even helps to increase it. In addition, when preparing it, there is no need for heat treatment, and the period of possible cultivation of mushrooms in it reaches two years.
To prepare the substrate, you can use a mixture of sawdust and straw, preferably rapeseed, pea, and wheat. Only fully matured and thoroughly chopped straw should be used. It should be borne in mind that in order to prevent the mycelium from becoming infected with mold, it is advisable to subject the straw not only to moisture, but also to fermentation without access to air.
Fermentation of straw is carried out as follows: it is placed in a container with water, pressed down with a weight and kept for 2 to 3 weeks, depending on the temperature. It is undesirable for the temperature to drop to +10 or drop even lower - the fermentation process will slow down greatly. During the fermentation process, water should be added to the container as needed.
The fermentation that occurs will lead to the creation of an acidic environment, which the oyster mushroom mycelium loves and is very poorly tolerated by fungal bacteria. After processing, the color of the straw will become lighter and it will acquire a characteristic sour smell.
Next, the straw needs to be removed from the vat and laid out in such a way that excess water drains from it; this will take a day. Next, the straw is mixed with hardwood sawdust, preferably beech, in the proportion: 6 parts straw to 7 parts sawdust. Chalk is added to the mixture - 3% of the total weight and urea, no more than 0.5%. It is not recommended to exceed this amount - the yield may decrease significantly. If alfalfa or pea straw is used, then the addition of ammonium potassium nitrate is allowed, also not more than 0.5%. When using wheat or rapeseed straw, the maximum amount of mineral fertilizer is calculated based on the weight of the dry mixture and is no more than 0.8%; urea can be used half as much.
creating beds for growing mushrooms
Next, the technology for growing oyster mushrooms involves creating a bed. They lay it as follows: dig a trench 20 cm deep and up to 1 m wide, formwork is assembled in it, slightly expanded downward, its dimensions: 30x100x20 cm. The substrate is tightly placed in the resulting wooden form and pressed. After removing the mold, there should be a block for oyster mushrooms with an area of about 0.3 sq.m and a height of 18-20 cm. The blocks in the trench are laid side by side, with an interval of 15 cm. It is covered with soil, but the surface of the blocks must not be allowed to become contaminated. In order to increase productivity, experienced mushroom pickers recommend placing sections of beech branches 2 cm thick and up to 7-8 cm in diameter in the top layer of the substrate.
how to plant oyster mushroom mycelium
To begin with, it should be noted that storing oyster mushroom mycelium for a long time is not recommended; it is advisable to buy it no more than a couple of weeks before the planned planting. The mycelium is planted to a depth of 3-4 cm; to plant one square meter of mycelium area, 1 to 2 liters will be required. The pieces to be laid should be the size of a chicken egg, they should be placed at the same distance. The sown beds are covered with foil, then with boards.
The planting of the beds is carried out in August; they should be covered until the third ten days of September. Next, you will need to remove it and surround the beds with a structure made of boards up to 15 cm high. Direct sunlight should not fall on the beds; for this, a canopy is built over them.
The first fruits can be obtained in early October; the duration of fruiting depends on weather conditions. Harvest as the oyster mushrooms grow. When fruiting is over, the beds are left in the same condition until spring. The only maintenance measure may be watering the beds in case of severe drying out of the soil.
With the onset of spring or autumn next year, fruiting may be restored, but the yield of oyster mushrooms will be lower.
Judging by the results obtained by experienced mushroom pickers, it can be argued that the best substrate option is a mixture of rapeseed straw and beech sawdust; it practically does not suffer from the development of molds that prevent the development of oyster mushrooms.
Preliminary cultivation of mycelium in boxes is considered to be a fairly effective measure: they are placed in a temperature-controlled room, which allows for more complete colonization of the substrate with mycelium. The boxes used for mycelium growth should have an area of 0.5 square meters and a height of 0.2 m. At an indoor temperature of about 22-25 degrees, the process will last from 3 to 4 months. To make it easier to remove the substrate from the boxes, the bottom is lined with foil. After turning them out of the boxes, oyster mushroom blocks are used to form open ground beds.
Also, to grow oyster mushrooms in the country, you can use straw bales without adding sawdust; they are fermented, then urea and saltpeter are added.
This method of growing oyster mushrooms at home is called extensive. There is another, more expensive intensive method of growing in special illuminated rooms, the main advantage of which is high yield.
Intensive method of growing oyster mushrooms throughout the year
In such conditions, it is rational to use a substrate that can be colonized by mycelium in the shortest possible period: wheat straw, corn stalks, reeds. In nature, fungi cannot grow on such materials - it is difficult for them to compete with microorganisms and mold. Therefore, it will be necessary to slow down the development of harmful microorganisms by artificial means:
- by sterilizing the nutrient medium by heating and continuing cultivation under sterile conditions - a complex, expensive, but reliable option;
- by initially sterilizing the substrate and growing in non-sterile conditions - a more affordable option popular among amateur mushroom growers.
substrate preparation
It is the second method that can be considered in more detail and used in practice for growing mushrooms in a suburban area. The substrate is prepared from peeled corn cobs and chopped straw, avoiding the entry of rotten material. 2-3% limestone flour is added to the mixture. Next, the substrate is moistened; for 1 quintal of ground cobs, about 120 liters of water should be used. It will be necessary to achieve uniform strong moistening of the material by mixing - when pressing any sample taken, water should drip.
Next, the substrate is subjected to heat treatment, and, if possible, steaming. At a temperature of about +55 +60 C, it must be kept for 12 hours. Small containers can be sterilized in an autoclave.
If it is not possible to use steam, you can provoke natural heating of the substrate - it is trampled into boxes, piled up and wrapped in foil for 8 days. The material can also be heated in a hot water bath - bags with substrate are placed in it for 12 hours. In addition to sterilization, heating helps improve the structure of the material.
sowing mycelium
At the preliminary stage, at a temperature of +16 to +27 C, the prepared nutritional mixture is packaged in boxes or bags, the weight of each container is from 5 to 15 kg. After lowering the temperature of the mixture to +30 C, inoculation is carried out, i.e. mix the oyster mushroom mycelium with the substrate or spread it in a thin layer on the surface. It is possible to place lumps of oyster mushroom mycelium in the nests. The amount of mycelium sown is up to 5% of the total mass of the moistened substrate.
If oyster mushrooms are grown in plastic bags, then cuts are made in them at a distance of 12-15 cm through which mushroom bodies will emerge during the fruiting period.
preparation period
An important condition for properly growing oyster mushrooms is maintaining ideal cleanliness in the room. Air humidity should be 90%, but it is not allowed to wet the substrate directly. The temperature required for the development of mycelium is within +25 +27 C. If an increase in temperature is detected during measurement, the room should be well ventilated.
How well the sowing is done will become clear quickly enough; after about 10-12 days, numerous fiber-hyphae will appear. You will definitely need to check the substrate for the presence of moldy areas of a greenish or bluish tint - they must be removed.
After the substrate has cooled, the temperature inside the room is reduced to +20 C. Lighting is not required at this stage of cultivation. During the process of mushroom ripening, it will be necessary to maintain the temperature within +22 C; direct watering of the substrate is undesirable. Air humidity should be maintained by watering the walls of the room. This period lasts about 3 weeks.
Features of caring for oyster mushrooms during the fruiting period
The upcoming fruiting period will require:
- convenient arrangement of oyster mushroom blocks,
- maintaining the temperature within +16 C,
- air humidity is about 90-95%
- high-quality ventilation of the room, but without drafts,
- backlight for at least 10 hours a day.
Regarding lighting, it should be noted that its norm is determined in each particular case separately, the goal being pursued is to obtain a normal fruiting body of the mushroom, in which the length of the mushroom stem is half the diameter of its cap. The growing mushroom should be illuminated from above, in this case its stem will not stretch too much. Excessive extension of the pedicle may occur in the absence of proper ventilation. You can place bags with growing oyster mushrooms only on the floor or shelves, but do not create “multi-story structures” - in this case, proper lighting will not be possible.
In order to increase fruiting, experienced mushroom growers recommend creating the so-called. cold blow - lower the temperature to +5 C for a period of 3 to 5 days, then raise to +15 C. The appearance of fruiting bodies can be expected in 10-12 days.
harvesting
Oyster mushrooms are collected when their caps reach the optimal size. Oyster mushrooms should be cut with a thin, very sharp knife and placed in prepared containers. A good harvest is considered to be about 25% by weight of the dry substrate. Ideally maintained growing conditions can lead to a 10% increase in yield.
Since oyster mushrooms usually produce up to 75% of the potential harvest in the first wave of fruiting, experienced mushroom pickers prefer to start the next growing cycle.
Diseases and pests of oyster mushrooms
Usually there are no problems with pests or diseases during the first rotation, but flies or fungus gnats may appear during repeated cultivation.
If the nutrient mixture is heated poorly, the appearance of a weed fungus may occur. Its spores do not always die from exposure to elevated environmental temperatures. Every plant that appears that differs from a typical oyster mushroom, for example, excessive fragility of the stem or a clear separation of the stem and cap, must be destroyed.
Infection with mold fungi can cause significant yield losses; to prevent the disease, the substrate should be thoroughly treated and the premises disinfected before each new planting.
Author: Sergey and Svetlana Khudentsov
10