Loading…
Loading…
Growing mushrooms on your own is not only an interesting, but also a very profitable activity. This requires mycelium. How to grow mushroom mycelium at home to get a complete product? In some cases, laboratory equipment will be required. All procedures must be performed in a state of complete sterility, strictly following the instructions.
What is mycelium called, its functions
What is mycelium or mycelium? These are the spores of the fetus, its vegetative body, which changes after the formation of new organs. Under good conditions, many shoots are formed inside the mycelium. Gradually a dense network appears, formed from small fibers. If they are placed in a nutrient medium, fruits will begin to develop from the mycelium. This is the main function of the fungal mycelium.
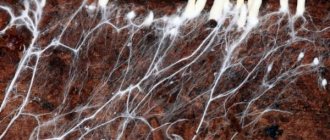
Externally, the mycelium is represented by the finest threads, brown, yellow or white. They form networks, certain interlacings, which are called hyphae. They often resemble cotton wool or fluff, and if you examine them through a magnifying glass, you can see threads of mycelium. This is an underground organ, but sometimes it protrudes beyond the substrate in which it grows. It is the mycelium that is responsible for feeding the fungus and fixing it in the soil.
Hyphae are sometimes visible in places where the mycelium was previously located (stumps or favorable soil). Sometimes mushroom pickers collect them to plant mycelium for later growing mushrooms at home.
Types and forms
Biology divides mycelium into two varieties:
- Submerged. A form that is fully hidden in substrates.
- Air. A form attached on the upper side to the nutritional surfaces.
But experts identify another classification:
- Coenotic form, that is, nonseptate mycelium, which is represented by a multinucleate cell.
- Septate form, where all cells are divided due to intercellular partitions.
Several types of mycelium can be used as nutrient substrates. Let's consider several variations for the food environment:
- Grain (grain mycelium).
- Liquid mycelium.
- Stick mycelium.
The first option is a certain amount of light and crumbly material, which is necessary to saturate the environment for further maturation of the bodies. This material is perfect for mixing with soil or a small pile of sawdust. Grain substrates are used in large-scale industries. It is considered a fairly practical method of cultivation.
The liquid variety must first be placed in a small container with fructose or honey, and then transferred to a permanent place for further ripening. This is also a very practical method. Sealed containers contribute to the favorable flow of the first stages of the growing season. Sealed containers prevent the formation of mold.
Natural conditions (trees, sticks) require the use of the latter form of cultivation. This form goes well with deciduous wood; other types are unlikely to be suitable. There is a symbiosis with the roots of trees. It should be remembered that the amount of harvest will be less than when using other cultivation methods.
Types of planting mycelium
There are several types of this material:
- seed - ready-to-use material that is collected from previously fruiting myceliums;
- uterine - it is grown in sterile conditions close to laboratory ones, using test tubes;
- mycelium of the mushroom body - in this case, the seed material is particles of fresh caps harvested under certain conditions.
The seed can be purchased in specialized stores and placed in a special substrate for further germination. The last two options must be grown first. How to grow mushroom mycelium at home using equipment is further in the article.
The first method of preparing potato agar
The estimated yield of the substance is 1 liter.
Ingredients: 300 g potatoes, 20 g agar (found at relevant medical laboratory supply organizations, health food stores or Asian food markets), 10 g dextrose or some other sugar, 2 g brewer's yeast (you can also use without them).
Work process.
Step 1. Before making agar for mycelium, you need to boil the potatoes with 1 liter of water for 1 hour. Next, remove the potatoes, leaving only the broth.
Step 2. Mix the broth, agar, sugar and yeast (if you are using them) thoroughly, for example, using a whisk; this mixture should not be beaten.
Step 3. Pour the resulting mixture into bottles or flasks to half or three-quarters of their volume.
Cover the necks with cotton swabs and wrap with aluminum foil. Pour water into the pressure cooker so that its layer from the bottom of the cookware is 150 mm, and install a grid on which to place bottles or flasks. Cover the dish with a lid and snap the latches.
Step 4. Place the steamer on the fire and wait until steam comes out. After ventilation for several minutes (depending on the specific model and in accordance with the instructions), close the valve. Bottles are boiled at 121 °C (1 atm) for 15 minutes. In this case, you need to ensure that the temperature does not exceed this level, because in this case the medium will caramelize, which will completely ruin it.
Step 5. After 15 minutes, turn off the stove and leave the dishes until they cool (about 45 minutes). Then, without wasting time, take free test tubes, remove the caps and place the containers on a stand or in clean cans, and then place them on a surface previously cleaned of dust and dirt.
Step 6: Once the bottles of nutrient medium have cooled, remove them from the pressure cooker using a towel or oven mitts. Stirring lightly, remove the foil and swabs, and using a funnel, pour the contents into the test tubes approximately one-third full.
Step 7. Close the test tubes with caps, but less tightly than before, place them in the pressure cooker, pouring out excess water if necessary. Having reached a temperature of 121°C, leave the dish on the fire for 30 minutes, then leave it to cool slowly again until the pressure reaches a normal level.
Step 8. Take out the test tubes and screw the caps on tightly. Fix the tubes in an inclined position. As a result, the surface of the agar medium should be at an angle with respect to the flask, thus creating as large an area as possible for the subsequent development of mycelium (such tubes are sometimes called “oblique agar”).
As the medium cools, its consistency becomes increasingly jelly-like and will eventually become so hard that the tubes can be stood upright and the agar medium will remain in the same position.
This video explains in detail how to prepare mycelium agar:
The tubes can be used immediately or after weeks or even months. In the latter case, they need to be placed in the refrigerator, and before use, make sure that there are no traces of mold or bacteria contamination on the medium.
The next section of the article is devoted to how to obtain potato agar for mycelium at home in a different way.
How to grow mushroom mycelium at home
To grow, you will need the following tools and materials:
- burner, alcohol;
- tweezers;
- glass test tubes with stoppers;
- wort and agar-agar;
- hydrogen peroxide;
- gloves are sterile.
All items that will be involved in the process must undergo additional sterilization, including the work area.
Preparation of royal mycelium
Before making mycelium at home, you need to prepare a nutrient medium. You need to start by mixing the wort with agar-agar. The mixture is boiled over low heat until thick. The mushroom particles should already be prepared by this time - treated with hydrogen peroxide and placed in a special container.
Pour the thickened mixture into clean test tubes. Leave them to cool for a while at a slight incline. As the mass cools, it becomes jelly-like, at which time you can begin adding mushroom particles. This should be done with sterile tweezers.
Before sealing the test tube with a stopper, it must be held in front of the burner for disinfection. After this, the test tubes should be stored in a warm, dark place. Under these conditions, the mycelium of the fungus is grown for two weeks. This period is sufficient to obtain ready-made material for sowing.
The main reason why some mushroom pickers fail to grow mycelium is failure to maintain sterility. When microorganisms enter the test tubes, the result is mold.
Preparation of seed mycelium from the body of the mushroom
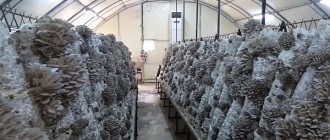
This method is considered the simplest. More often this mycelium is produced for growing oyster mushrooms and honey mushrooms at home.
The cooking process is as follows:
- Choose the ripest caps. It is important to choose large specimens without damage.
- Soak them in warm boiled water for a day.
- After a day, drain the water and grind the caps into a paste using a sterile object.
- The resulting mixture must be immediately placed in the substrate prepared in advance.
The gruel cannot be stored for a long time - it must be used immediately. When growing mushrooms, a certain room temperature and humidity should be maintained.
There are a number of other ways to grow mycelium.
Growing royal mycelium on grain
This method is considered common among mushroom pickers who grow oyster mushrooms. To make grain mycelium at home you will need oats, millet or corn seeds. The most effective method of growing mycelium on rye grains is recognized. They must be prepared before use.
The first step is to boil the grains. To do this, prepare 30 kg of grains, add 30 liters of water. Cook for half an hour over low heat. After this, drain the remaining water and dry the grains. Next, they must be mixed with chalk (100 g) and plaster (350 g). This will provide air access and make the grain crumbly.
The next step is to fill glass containers (it is better to take 2 or 3 liter jars) 4/5 of the way with grains. Cover the neck of each jar with clean gauze. They need to be placed in a large saucepan or medical autoclave, if available. Containers need to be sterilized twice for 2-3 hours, taking into account the interval of about a day. During boiling, it is important to ensure that water does not get inside the jars. Then all containers must be moved to a clean room and infused for about 15 hours.
After this, the resulting grain can be considered ready to be colonized by spores. To do this, pieces of mushroom are placed in containers with grain. Parts of the mushroom are taken from the cap. Before placing them in containers, the fragments should be treated with hydrogen peroxide.
Next, the jars are moved to a warm, shaded place. There should be no drafts in the room. Also avoid direct sunlight.
Provided that the technological process is carried out accurately, white fluff will begin to appear within 12-15 days. This is the mycelium for growing mushrooms.
Benefits of growing mycelium on cardboard
The method, which is recognized by many mushroom pickers who grow champignons, is carried out using cardboard. Pieces of thick cardboard need to be soaked in boiled water for 30-60 minutes. Then squeeze it out and divide it into layers. Disassemble the stem of the fruit into small fibers and place them on paper, covering the top with a layer of cardboard. Place the material in a plastic container with holes and wrap it in cellophane. For proper development of mycelium, a temperature of at least 20°C, daily ventilation and absence of sunlight are required. The first shoots will form within 20 days.
Advantages of the method:
- cardboard is made from wood, which is already familiar to the mycelium from sawdust and wood chips;
- it is quite accessible;
- it does not need to be sterilized;
- retains moisture well;
- Corrugated cardboard, due to its shape, allows the mycelium to breathe.
Before starting to work with cardboard, it is important to cut out all the inscriptions and remove traces of glue and tape.
Mycelium storage
At temperatures up to 4-5°C, oyster mushroom mycelium can remain viable for about a year. It is better to store mycelium in vacuum bags. However, first they need to be heat treated with boiling water for 20 minutes. Only after this can the grain mycelium be packaged in bags.
What should the room be like?
You need to choose a suitable room, you need it to be clean and convenient to put in order. To obtain high-quality seed, you need to maintain a certain level of humidity, preferably within 60-70%. Excessive amounts of moisture in the air will cause the development of pathogenic (harmful) microorganisms. In addition, it is necessary to maintain the required temperature in the room within 20-24 degrees. The area of the work space should not be less than 2 m2, but an overly spacious room will not be beneficial, it is more difficult to disinfect and it will be difficult to maintain cleanliness.
It is important not to forget that many harmful microbes enter the air with dust, for this reason it is necessary to eliminate any source of dust, and wet cleaning is often done. In addition, powerful artificial ventilation equipped with a good air filter will help in the fight against dust. To work on growing mycelium, you will need a comfortable table where you need to install a powerful lighting device.
How to choose ready-made mycelium
Mycelium can be purchased if there are no conditions for growing it. You need to choose it carefully. When purchasing, it is important to pay attention to the production date and shelf life. As a rule, the shelf life of mycelium is 3-4 months under certain conditions.
Advice! Experienced mushroom pickers do not recommend purchasing dry mycelium. Many have noticed that it grows much more slowly and does not adapt well to the environment.
Before starting work, you should take a small batch from a specialized store until you are sure of the quality of the product. You should pay attention to the packaging. It must be clean, without damage, without signs of mold or unpleasant odor.
Before sowing, the recommended storage temperature is not higher than 4°C. Under no circumstances should the mycelium be frozen, otherwise the crop will die. Packages with mycelium should be placed at some distance from each other for ventilation.
You need to start working by grinding the product, but do not open the packaging. Sterile gloves must be used before opening the package. In this case, the temperature should be room temperature.
Features of substrate preparation
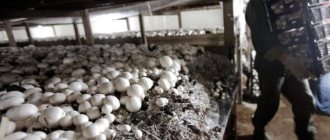
Mushrooms will grow well only if the growing conditions are as close to natural as possible. Therefore, you will need special compost for growing champignons. It needs to be nutritious and loose. Only in this case will it be possible to achieve high yields.
Since there are different varieties of mushrooms, the preparation of the substrate may vary slightly. However, despite this, there are general recommendations for preparing compost. To prepare the substrate you will need the following ingredients:
- 15-20 kg of gypsum;
- 10 kg of superphosphate;
- 800 kg of horse manure mixed with straw;
- 10 kg of saltpeter;
- 5 kg of urea.
The compost preparation scheme is as follows:
- Pour the straw into a container and fill with warm water. After 24 hours, horse manure is added to the mixture.
- 3-4 days after preparing the manure mixture, add superphosphate with urea, gypsum and saltpeter.
- After five days, add a little more gypsum and mix the resulting mixture thoroughly.
You can tell when the compost substrate is ready by its smell. The ammonia aroma should completely disappear. The color may also change. The mixture will take on a brownish tint.
What types of mushrooms can be grown using mycelium?
Now that you know how you can grow mushroom mycelium at home, you should know which fruits you grow yourself. Those varieties of mushrooms that can be grown at home do not require special material costs or hard work. A large share of time and money will be spent on obtaining mycelium.
You can independently grow mushrooms that belong to wood (shiitake, winter mushrooms, oyster mushrooms) and soil (ring mushrooms and champignons). Many people have mastered this business, especially since this activity does not require large areas. If desired, you can even get mushrooms on the balcony.
Diseases and pests
There are several fairly common diseases and pests that pose a danger to champignons. Mushrooms often suffer from rotting. This disease most often develops due to high humidity in the mycelium. If you do not get rid of rotten mushrooms in a timely manner, the rotting will begin to spread further, which is why the entire crop may die. Also, planted mushrooms may suffer from mummies. This disease develops due to light deficiency. The first sign of the disease is the appearance of dark spots on the surface of the caps. It is impossible to cure the disease, so you will have to completely get rid of the mycelium.
Among the dangerous pests is the fungus mite. This is a small yellowish parasite that eats mushroom stems. Metaphos solution will help get rid of it. In rare cases, mushrooms are attacked by fly larvae. They also feed on legs. If you do not get rid of such larvae in time, the planted mushrooms will die. You can destroy them with chlorophos. Due to its composition, this product acts not only on larvae, but also on other pests.
Selecting a substrate for planting mycelium
The substrate must be selected based on what mushrooms you plan to grow. For example, champignons develop well on compost, oyster mushrooms on straw, and shiitake on sawdust. Before sowing, it is recommended to sterilize the mycelium to prevent the entry of microorganisms.
Next, the mycelium is evenly distributed in the substrate. First, the mycelium is heated to a temperature of 20-21°C and left for 20 days. The temperature should then be reduced to 13°C and remain there until the harvest appears.
Mushrooms will gradually begin to appear after 3 weeks. During their growth and development, it is necessary to maintain not only the temperature, but also the humidity, and provide them with darkness.
Fruits can be considered fully ripe when their caps are easily separated from the stem. When harvesting, it is important not to damage the spores, so it is better to use a fairly sharp knife.
The positive result of preparing mycelium mainly depends on the conditions under which it is prepared. The room in which the process takes place must be completely sterile. Cleanliness must be maintained at all stages, and procedures must be performed using sterile gloves.
Selection and preparation of premises
Before growing champignons, you need to select and prepare a room for their further cultivation. How well the mushrooms will grow depends largely on the location chosen.
The most suitable place for organizing a mycelium is considered to be a cellar under a private house or any basement. In such rooms there is no large amount of light and a fairly low temperature. These are ideal conditions for growing champignons.
Not every person has a basement or cellar. In such cases, you will have to create a special greenhouse in which mushrooms can be grown. It is worth noting that building a suitable greenhouse is not so easy. It must have concrete walls and a cemented floor. You also need to build a high-quality ventilation system for normal air circulation. The ventilation holes must be covered with a special mesh material. With its help you can protect yourself from pests getting inside the greenhouse.
Methods for obtaining mycelium
In the production of champignons, spore and tissue methods are used. In laboratory conditions, in order to prepare pure, highly productive mycelium, an aqueous suspension of fungal spores is isolated and sown in a special substrate.
With the tissue method, planting material - a small piece of tissue - is isolated from the body of the champignon and then grown in a nutrient medium. Since isolating fungal spores is a much more complex method, when propagating at home, the tissue (vegetative) option is usually used.
Spore
French specialists were the first to learn how to grow a sterile mushroom culture of champignons from spores at the end of the century before last.
Fungal spores are single-celled formations with which the culture carries out asexual reproduction. Under the cap of a mature champignon, laid with its underside on a clean sheet of paper, lines radiating radially from the center of the stem will soon be imprinted. This is an accumulation of microspores that have fallen out of the plates.
They quickly die in air, but in a nutrient medium each germinates, creating a new mycelium. In conditions favorable for growth, they form hyphae, or small outgrowths, which, growing in all directions, form a mycelium.
Germination of spores is carried out under sterile conditions at an air temperature of 25 ° C with careful control to avoid possible contamination of the mycelium by harmful organisms. Spore powder is prepared by attaching a mushroom cap to a sterile Petri dish.
The mycelium sprouted from spores is inoculated (grafted) onto moist sterilized wheat, rye or millet grain and other nutrient media.
Fabric
The vegetative method was widespread before the discovery of the technology of spore propagation of champignons.
Tissue propagation technology involves placing pieces of fungal tissue in a sterile nutrient medium. Growing rapidly, the cells form mycelium. The tissues of the mushroom are taken from its middle, where the likelihood of them becoming infected with harmful bacteria is low, and they are additionally disinfected before use.
For home use, the fabric method is more suitable - it is easier for them to obtain champignon mycelium. But such myceliums are less productive and, compared to spore myceliums, degenerate faster.
Mycelium on cardboard
To obtain champignon mycelium, the best option would be brown corrugated cardboard, cleaned of any glue or paint stains. And planting material can be selected from mushroom waste.
The technology for obtaining champignon mycelium on cardboard is very simple:
- cardboard, cut into small pieces, is soaked in boiled, lukewarm water for about an hour or more, and then laid out in a spacious plastic container with drainage holes;
- manually or using a knife, the champignon should be divided into fibers;
- Having removed the top layer of paper from the cardboard, you need to lay out the champignon pieces on a corrugated surface, first disinfecting them in peroxide, and cover the top with the removed paper;
- Lightly compact the layers to prevent air pockets from forming;
- to avoid drying out, the container is covered with plastic film, which must be removed every day and the cardboard mycelium plantation must be ventilated;
- The cardboard should not be allowed to dry out, so it must be moistened periodically;
- Planting champignon mycelium should be in a dark and warm place until the entire cardboard turns white from the overgrown mycelium - the process can last up to three months.
Having grown champignon mycelium on cardboard, you can plant this mycelium on the next sheet of cardboard. It will grow even faster on it, since information about the environment is transmitted genetically to the next generation of mushrooms. You can use part of the cardboard mycelium to obtain a new portion of champignon mycelium. The rest is used to colonize the substrate, for example, to populate bags with pasteurized straw or sawdust with cardboard mycelium. It grows well on other types of substrate - coffee grounds, tea leaves, paper.
Preparing grain mycelium
How to make champignon mycelium at home using grain? Most often, wheat or oats are chosen for this purpose, but other grains can also be used - rye, barley.
Dry grain is filled with water in a ratio of 2:3. For disinfection, you can add hydrogen peroxide in a ratio of 1:10 to water. The mixture is cooked for 20-30 minutes, depending on the hardness of the grain. It should soften enough, but not cook.
After draining the water, the grain should be dried. A wooden box containing a small fan is very convenient for this procedure. The box is closed with a metal mesh. Grain with chalk and gypsum additives is poured onto the mesh on top. These substances improve the grain structure and regulate its acidity.
The jars are filled 2/3 of the volume with dried grain and sterilized under pressure. After adding the mother culture to the jars, they are placed in a thermostat at a temperature of 24 degrees and a humidity of about 60%.
The champignon mycelium must colonize the entire substrate in the jar. The grown grain mycelium can be used for the next seeding of containers. The resulting mushroom culture is suitable for several crops, after which it needs to be renewed.
During the colonization process, the jars should be reviewed regularly. If green or brown spots or liquid with an unpleasant odor appear, the contaminated jar should be sterilized under pressure for 2 hours.
To prevent the grains from sticking together and accelerate the growth of the mycelium, you need to shake the jar from time to time.
It is convenient to pack the finished grain mycelium of champignons in plastic bags to protect them from foreign microflora. Grain mycelium is stored for up to four months at 0-2 degrees. In contrast, compost mycelium lasts up to a year.
