Description of the cherry variety Malyshka
The external attractiveness of Malyshka fruits is rated 5
The variety was bred at the Saratov Experimental Horticulture Station and in 1995 included in the State Register with a recommendation for cultivation in the Lower Volga region. The authors of the variety are breeders Kruglova, Dymnova and Kaverin. The correct name of the variety is Saratov Malyshka, but among the people, and then in literature, it began to be called simply Malyshka.
Baby is a hybrid of cherry and sweet cherry, therefore, like other hybrids, it is distinguished by good winter hardiness, abundant harvest and sweet berries. In addition, hybrids do not suffer from coccomycosis and moniliosis. The cherry tree of this variety is fast-growing with a compact, spherical, slightly spreading crown. Height 2 or 2.5 meters. The bark is smooth brownish, the shoots are thick, arched. Winter hardiness of wood and buds is high. The leaves are large with a concave plate. Most of the fruits are formed on bouquet branches. The plant is self-sterile, that is, it needs pollinators. The varieties Lyubskaya, Turgenevka, Molodezhnaya and Nord Star are suitable.
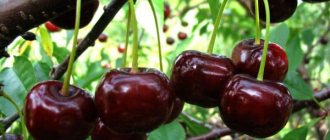
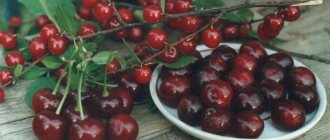
The fruits of Malyshka are the same size, 5 grams each, slightly flattened. The color is dark red, the skin is of medium thickness, the flesh is also dark red, juicy. The fruit contains 7.5% sugars, 1.2% acids, and 8 mg of ascorbic acid per 100 grams. Tasting score 4.4 points. The Baby begins to bear fruit at 3–4 years. The average yield from one mature tree is 15 kg. The trees bloom in mid-May, and the berries ripen after June 20. The main purpose of the variety is table.
Video about the Saratov variety
The baby is distinguished by lush flowering
Pollinators
The Malyutka cherry, as it is sometimes called, is self-sterile, so to obtain a harvest it must be planted next to other varieties. The following varieties of cherries can act as pollinators:
- North Star;
- Youth;
- Turgenevka;
- Lyubskaya.
To attract bees, it is recommended to irrigate the tree with sweet syrup.
Attention! Pollinating cherry varieties should be located at a distance of no more than 30 m.
Advantages and disadvantages: table
| Advantages | Flaws |
| Compactness of the tree | Does not bear fruit without pollinators |
| Frost resistance | |
| High yield | |
| Early ripening | |
| Excellent presentation | |
| Good taste | |
| Transportability | |
| Does not suffer from some fungal diseases | |
| Suitable for freezing |
Cherries contain many essential oils and pectins, which promote the breakdown of fats, and 100 grams of berries contain only 50 calories.
Malyshka fruits have an excellent presentation
Reviews from gardeners
We bring to your attention reviews about the Malyshka variety.
Anastasia, Moscow region: “I planted Malyshka 7 years ago, and for 4 years now the cherry has been pleasing me with delicious and beautiful berries. Their taste is pleasant, sweet and sour, I like to eat Malyshka immediately after harvesting. It is not a hassle to grow - pruning and shaping are easy. During all this time, the cherry tree never got sick. It’s also good for winter preservation.”
Alexander, Saratov: “I planted the Malyshka variety on the recommendation of a gardener friend. I can't say that I'm delighted with this cherry. The fruits are small, I like Miracle Cherry better. The taste is a C grade, the yield is average. And last year the bushes got rust and half the berries died.”
Cherry planting
Preparations for planting cherries begin in advance. If planting is planned in the spring, it is better to prepare the planting holes in the fall. In any case, the finished planting pit should stand for at least several weeks. This is necessary for the soil to restore its structure, microflora, and settle.
Video on how to properly plant a young tree
Landing dates
It is believed that in the southern regions of the country it is better to plant cherries in the fall until mid-October. It will take root before the cold weather, and in the spring it will quickly grow. In the north it's the opposite. When planted in spring, by autumn the trees will fully take root and grow mature wood, which is necessary for successful wintering and subsequent growth. Spring planting is carried out before the buds open. You can replant cherries from pots, closed containers, or with a lump of earth in the summer.
Selection and preparation of a landing site
Cherry is very sensitive to light, so you should choose a place where it will not be shaded by buildings or tall trees throughout the day. It will grow well even in partial shade, but the branches will begin to stretch towards the sun and form fruit buds only in the illuminated areas of the shoots, mainly at the ends. Such trees bear fruit poorly.
The next requirement concerns the depth of groundwater. If they are less than two meters away, then you can try planting a tree on a mound.
The ideal pH value for cherries is 6. On acidic soils, they wither rather than grow, so if necessary, the acidity of the soil should be adjusted using lime, gypsum or dolomite flour.
You can choose raspberries, strawberries or grapes as neighbors for cherries, but apple trees and pears are not suitable. These trees oppress each other.
The area intended for cherries is dug up and weeds, especially perennial ones, are removed. Level it so that water does not stagnate in the recesses and mark the holes. Since Baby’s height is small, the distance between plants can be no more than 3 meters. When planning, you should provide space for planting pollinator varieties.
Select a sunny place for cherries.
Preparation of planting holes
The size of the planting holes depends on the soil on the site. If the soil is loose, it will be enough to dig a hole 50 cm deep and 60 cm in diameter. If the soil is dense and does not allow water to pass through well, the depth should be 60 cm and the diameter 80 cm.
The soil to be removed is laid out on both sides. The top, fertile layer is about the size of a spade on one side, the bottom on the other. After this, the top layer of soil is mixed with humus or compost in a one-to-one ratio with the addition of ash in a volume of half a liter and returned to the pit. Pour 2 buckets of water there to compact it. The pit is ready. You should leave it for a while.
The planting hole for spring planting is prepared in the fall
Step by step planting process
- Remove the top layer of soil from the hole so that the root collar of the seedling is flush with the soil surface.
- Form a mound in the center and place the seedling on it, spreading the roots to the sides. They should fit freely without bending or twisting.
- Install the landing peg.
- Cover the roots with small portions of soil, making sure that there are no voids underneath them.
- Pour half a bucket of water into the hole to compact the soil, and then continue to fill it up. If there is not enough enriched soil, you can use soil from the bottom of the hole as the top layer.
- Lightly compact the soil around the stem, tie it to a planting peg and form a watering circle.
- Pour two buckets of water and when the water is absorbed, mulch the soil.
The root collar should be flush with the surface
Selection of seedlings
When choosing seedlings, you first need to determine the place of purchase in order to purchase exactly the variety that is announced. It is better to buy planting material in nurseries or specialized stores. It is advisable to purchase annual seedlings, they take root better. Their height does not exceed 1 meter, the number of side branches is 8–10, the length of the roots is 25 cm. The root and trunk should not have stains, growths, thickenings, scratches, or broken branches.
Be sure to inspect the vaccination site. It should be 5–15 cm above the root collar. In this place, the stem is slightly curved. You should also slightly bend the branches and roots. In a good seedling, they are elastic to the touch and easily bend into a ring without crunching. If they crunch or bend with effort, there is no need to purchase seedlings; they are most likely overdried.
Cherry Baby requires additional pollinators for normal fruiting, so when purchasing, be sure to find out about the availability of suitable varieties and purchase them too.
Cherry care
Caring for cherries consists of simple procedures, which can be followed to obtain good harvests.
Watering, loosening, weeding, mulching
Newly planted cherries are watered frequently, especially in soils that do not retain water. In the first days you need to keep the soil moist. As they take root, for the first 2–3 months you can switch to a watering regime once every 2 weeks, and fully rooted cherry trees are watered 4 times per season. This is done during particularly important periods of plant development:
- after flowering,
- during the fruiting period,
- after harvesting,
- in early or mid-October (pre-winter watering).
Watering rates are selected depending on the age of the plant. For an annual tree, you should spend 2 buckets of water, for an adult tree, 5–7. The indicated dates and norms are valid only for a normal summer, but if it is dry, additional watering needs to be done, and during prolonged rains it may be completely abandoned.
Cherries are watered not often, but abundantly
After each watering, loosening is carried out. This procedure is most relevant for cherries, because they especially need air flow to the roots for normal development. This is why cherries grow better on light soils. Loosening is carried out after the water has been absorbed and the surface of the earth has dried slightly. The resulting crust needs to be broken.
The fact is that the hardened layer after rain or watering prevents the normal supply of oxygen to the roots, and this makes it difficult or even stops their nutrition. In addition, a lot of moisture leaves the ground through cracks in the crust. Regular loosening is also useful because weeding also occurs at the same time. Weeding is necessary because weeds draw water from the soil and create a moisture zone that is comfortable for the development of fungal spores, pathogenic bacteria and shelter for parasitic insects.
You need to loosen the tree trunk circle shallowly so as not to damage the roots by about 8–10 cm, and at the very trunk of a young tree by 2–4 cm. In autumn and spring, instead of loosening, the tree trunk circle is dug up. This is done because loose soil freezes less and also in order to destroy the winter shelters of insect pests and thus destroy them.
It is useful to keep the tree trunk under mulch. It retains moisture and, as it rots, serves as fertilizer for the tree. Compost, sawdust, straw are suitable. You can mulch the tree trunk circle with cones, which look very picturesque.
The trunk circle mulched with cones looks elegant
Fertilizer
Cherries are fed at the same time as they are watered. From spring to mid-summer, plants need nitrogen fertilizers to quickly increase green mass. You can use urea or ammonium nitrate from the store with a dosage according to the instructions, or you can fertilize it with mullein, infusion of chicken manure or vermicompost.
To prepare fertilizer from cow manure or bird droppings, it is placed in a container and filled with water in a ratio of one to three by volume. Leave for three to seven days. The resulting infusion of mullein is diluted with water 10 times (1 liter per bucket of water), and bird droppings 20 times (0.5 liters per bucket of water). After dilution, water according to the norm: 1 bucket per 1 square meter. crown projection meter. They also insist on vermicompost. Proportion: 3 cups of vermicompost to 1 bucket of water. Insist for a day. There is no need to breed. The watering rate is the same.
The first and second feeding is carried out in the described way. After harvesting, nitrogen fertilizers are no longer needed, so the third and fourth fertilizing should be done with superphosphate. Dosage of the drug according to the instructions on the package. You can replace superphosphate with ash at 0.5 liters per 1 square meter. crown projection meter. There are three options for applying fertilizer:
- spread the preparation evenly around the tree trunk, and then loosen it,
- dig circular grooves starting at a distance of 50 cm from the trunk, sprinkle fertilizer over them, and then seal them with a flat cutter. The last groove should extend 50 cm beyond the crown projection, because the root system has a large area,
- Dissolve the required amount of fertilizer in water and water.
After applying fertilizer, the tree should be watered. It should be remembered that:
- the first two years after planting there is no need to fertilize cherries,
- Fertilizing is also not applied if the annual growth of shoots is more than 50 cm,
- overfed trees endure winter worse,
- Organic fertilizers in the form of rotted manure and compost are applied 1 bucket per 1 sq. meter no more than once every 3–4 years,
- Once every 4–5 years, lime or dolomite flour is added to the tree trunk circle in an amount of approximately 400 grams per 1 square meter. If the soil on the site is acidic, the acidity in the tree trunk circle should be determined annually and, if necessary, adjusted.
Video: caring for cherries
Feeding cherry trees for a good harvest
Fertilizers are applied immediately after watering. From the spring until the second decade of July, fertilizers containing nitrogen should be applied to the cherries. Such fertilizing activates the growth of green mass. As fertilizers, you can use urea or ammonium nitrate, or use organic matter (a solution of cow manure or bird droppings).
These substances should be fed to Malyshka cherries in spring and early summer. After collecting ripe berries, superphosphate is applied to these stone fruit trees twice before the end of the season.
Preparing for winter
The Malyshka cherry variety tolerates cold well, even the buds do not freeze, however, some measures should be taken at the end of the gardening season.
First, you need to protect the trunks of young cherries from mice and hares. To do this, they are bandaged with strips cut from sugar bags or old tights. You can put tubes made of plastic bottles on the trunks or wrap the trunk with wire mesh to a height of at least a meter. All these protective structures are removed at the beginning of the snow melting, otherwise the bark may become supported.
Secondly, the trunks and skeletal branches should be whitened to prevent winter burns of the bark and to destroy pests. Whitewashing is done with lime mortar with the addition of 10 grams of copper sulfate per 1 bucket.
Whitewashing trunks protects cherry trees from winter burns
Trimming
Cherry is one of the plants that need to form a crown and remove damaged and unnecessary branches. Without this, it thickens very quickly and bears fruit poorly.
Sanitary pruning is carried out as broken or diseased branches are discovered.
Formative - over several years, usually in the spring. The purpose of formative pruning is to grow a strong trunk and skeletal (growing directly from the trunk) branches. Since the Baby tree is low-growing and there is no need to limit its growth, formative pruning concerns the branches. Tree formation begins in the second year after planting. At this time, the plant reaches a height of approximately 2 meters and has 10–12 lateral branches.
Trimming starts from the bottom. At a height of 40 cm, select a strong branch and shorten it by one third. This will be the first skeletal branch. Higher up the trunk, select another strong branch, which is directed in the other direction from the trunk. The distance between them should be at least 10–15 cm. It should also be cut by one third. In the same way, you should select the third skeletal branch and cut it. As a result, a lower tier of skeletal branches was formed.
After this, you should begin to form the second tier. In varieties such as Malyshka, it consists of one branch located 60–70 cm above the third. Another 60–70 cm higher, the last fifth skeletal branch is formed. All remaining growth below the fifth skeletal branch to the very ground should be removed from the trunk into a ring, that is, cut at the level of the surface of the trunk without stumps. Subsequently, all seedlings that appear on the trunk must be removed in the same way.
Next year, the pruned skeletal branches will give off their side shoots. From them, skeletal branches of the second order should be formed, by analogy with last year’s process. There should be 3-4 of them and directed to the sides. Shoots growing at a distance of 50–60 cm from the tree trunk are selected. Shoots growing up, down and in the center of the crown are cut into a ring.
In subsequent years, every spring, all last year's shoots should be shortened by one third for better branching. After fruiting begins, the tree trunk is cut 20–25 cm above the skeletal branches. The cut is made above the kidney, directed to the side.
A year after the start of fruiting, anti-aging pruning should begin; it consists of clearing the middle of the crown from dead and old 6-year-old branches that have buds only at the very tip.
Video: cherry pruning
Diseases and pests
Cherries, like other fruit trees, are affected by various diseases. If you carefully monitor the plantings, you can see the onset of the disease and take timely measures.
Table: cherry diseases and treatment
| Disease | Description | Control measures |
| Clusterosporiasis | Fungal disease. The source of infection is plant remains of diseased plants: leaves, wood. Small spots of red-brown color on the leaves later with a crimson edging. As the infection progresses, necrosis of leaf tissue occurs and through holes appear. Leaves are falling en masse. | Cut off all affected leaves and branches. Cover the cut areas with lime mortar with the addition of copper or iron sulfate. Treatment of trees with 1% or, in case of extensive damage, 3% Bordeaux mixture. If necessary, repeat the treatment. |
| Rust | Fungal disease. Swollen spots resembling orange-brown rust form on the leaves. | Immediately collect and destroy affected leaves. Preparation Hom before and after flowering. Dosage: 40 grams per 5 liters of water. Consumption per adult tree. Processing is plentiful. After fruiting, treatment with 1% Bordeaux mixture. |
| Scab | Brown spots appear on the leaves. The leaves curl, dry out, and crumble. The fruits stop growing and dry out. | Remains of leaves and damaged fruits are destroyed. The soil is dug up and loosened. Spraying with 1% Bordeaux mixture in the budding phase, after flowering and harvesting. |
Photo: cherry diseases
Clusterosporiosis can damage entire foliage
Scab dries out leaves and fruits
Rust damages leaves and reduces yield
Cherry pests
Garden pests, unfortunately, do not bypass cherries. Timely treatment of trees and soil allows you to get rid of them.
Table: cherry pests and control measures
| Pests | Description | Necessary activities |
| cherry fly | The cherry fly lays larvae in cherry fruits. A massive invasion can ruin the entire harvest. The insect overwinters in the surface layer of soil. | Repeated loosening of the tree trunk circle starting in spring. Destruction of aphids, as the cherry fly feeds on their secretions. Spray the acacia with Karate, Iskra, and Lightning from the beginning of flowering. Repeat after 2 weeks. |
| Slimy sawfly | Slimy sawfly larvae eat away the upper surface of leaves. The leaves are drying. With a large number of insects, the foliage is so damaged that the tree does not have time to prepare for winter. | Autumn and spring digging of tree trunk circles. Spraying trees and soil before buds open with urea solution: 700 grams per bucket of water. Preparations Kemifos, Fufanon in a solution of 10 grams per bucket of water. |
| Hawthorn larva | Hawthorn butterfly caterpillars actively eat foliage and can leave the tree bare. | Manual collection of caterpillars. Preparations Metafos, Teofos, Alatar, Kinmiks, Inta-Vir according to the instructions. It is impossible to process during flowering. |
Photo: cherry pests
The slimy sawfly feeds on cherry leaves. In case of a mass invasion, it can cause great harm
The hawthorn caterpillar eats cherry leaves, reaching 45 cm in length
Cherry fly larvae can ruin the entire harvest
Pros and cons of the variety
The advantages of the Saratov Baby have ensured her high popularity:
- The plant is small in height, very compact. It’s easy for him to find a place on the plot;
- this is one of the earliest ripening varieties of cherries, the first ripe berries appear on the 20th of June;
- the fruits are very tasty, large, juicy, and tolerate transportation well;
- the tree grows quickly and begins to bear fruit already at 3–4 years of age;
- The baby is unpretentious: if the soil suits it, then all the tree needs is timely pruning and watering 4 times a year;
- Compactness and large berries make care and harvesting much easier.
The disadvantages of a hybrid include the following:
- self-sterility - to obtain a harvest, you need to plant pollinating varieties;
- although the winter hardiness of cherries is good, the tree still needs to be covered for the winter, since its root system is not adapted to extreme cold;
- The baby is resistant to a number of diseases, but is susceptible to insect pests. Cherries need to be protected from them. This link will tell you how to fight aphids on cherries.
Harvesting
The baby is maturing together. The variety is early, so it seems especially tasty. Cherries are picked in dry weather. Malyshka fruits tolerate transportation well and do not wrinkle, but it is still better to collect them not in deep buckets, but in small containers. Collected fruits should be kept away from sunlight. They do not keep fresh for long. Refrigerate for a maximum of 10 days.
The best use for cherries is to eat them fresh, straight from the branch. The usual preparations are also very good:
- Jam,
- compote,
- jam, dried and dried berries,
- juice,
- tinctures and liqueurs,
- freezing.
Cherries make excellent dumplings, pies, and desserts.
Chocolate covered cherries are every child's dream
