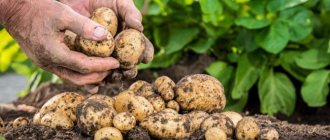
Alternative ways of growing the most democratic product - potatoes - have always attracted the minds of summer residents. Today we will talk about the so-called warm planting of a popular vegetable - growing potatoes in barrels. This option is considered one of the highest yielding, especially if you have a fairly modest-sized hacienda.
Planting potatoes in a barrel will provide many benefits
Pros and cons of this method
The advantage of growing potatoes in a barrel is that:
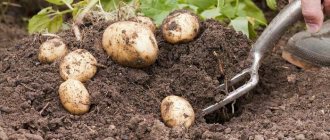
- In one barrel we can grow about three buckets of potatoes, while we save space on our plot.
- This method will save time when processing beds and in the fight against annoying pests.
- Using this method, we can prevent the potatoes from rotting and water from stagnating in the barrel.
The downside of this method is that we cannot grow large volumes of crops for further large-scale sales.
Potato rejuvenation
Zucchini in a barrel - growing
Each farmer has his own favorite potato variety, which they try to grow from year to year, selecting seed tubers from each harvest. But experienced gardeners know that in this case, selectivity deteriorates, the tubers become smaller, and after 5 years the planting will give a meager yield of potatoes with deteriorated qualities.
To prevent this from happening, they renew potatoes at home. At the same time, it is not necessary to buy a new variety externally - it will be cheaper to rejuvenate your seeds, if you take into account the advice of experienced farmers.
Methods for rejuvenating seed potatoes
| Option | Description | How is it carried out? |
| Using seeds | After flowering, small green balls form on the bushes - they contain seeds. Not all gardeners know that they can also grow potatoes; · Propagation of planting material will take a lot of time. But the result will be a disease-resistant tuber; Collected seeds can be stored for 10 years | · The balls are placed in a canvas bag and hung for further ripening (in warmth and light); · When the flower fruits soften and lighten, the seeds are removed from them, washed well and dried; · Having planted next year, they receive seed tubers, which are not used for food, but are left for planting in the next season |
| Cloning | The essence of this method is that mini-fruits are grown from a fairly large tuber, which will become seed material next year | · In the spring, several large tubers are left in the cellar and sprayed throughout the summer. At the same time, optimal conditions are created: low temperature and high humidity; · In the second half of autumn, you can already see a well-developed root “loofah” on potatoes, in the branches of which small nodules have formed; · Having collected the mini-potatoes, they are dried and left until spring to be used for sowing. A fine mesh net is suitable for storage. |
| Cuttings | Oddly enough, you can also get cuttings from potato tops. To do this, select the largest and strongest bush in the garden, which should be marked (for example, tied with a red ribbon) | · When the bush fades but does not wither, cut off all the stems and divide the middle part into cuttings 4 cm long, leaving at least 1 leaf; · Soak for 4 hours in weak potassium permanganate; · Plant in a shaded place, maintaining a distance of 3 cm between cuttings, and 20 between rows; · The cuttings are buried 60% into the soil, placing them vertically; · The beds are mulched (straw will do) and watered well; · After the crown turns yellow and dries, wait another 2 weeks and dig it up; · The nodules are disinfected in potassium permanganate, dried in the sun and packed in burlap to be planted in the beds next season |
| From the tuberous tops | · For this method, potatoes are selected in advance - during harvesting. Take the largest, undamaged tubers and store them separately until spring; · The remaining potatoes from pruning are immediately planted in the ground in the standard way; · Beds with top plantings and ordinary ones should be distinguished. The crop from the experimental plot should be left as a seed for the next season. | · The apical part of the tubers along with the sprouts is cut off by about 1/3; · Place in a box with sawdust to continue germination, while constantly moistening; · In 3 weeks, roots form and the tops can be planted in the beds. The hole should be 5 cm deep, and the distance between tubers should be 30 cm |
| Sprouts | · This is the fastest way to update a variety. One tuber can provide material for 40 bushes; · During germination, sprouts of different sizes and strengths are formed on fruits. They are all suitable for this method; · Sprouts can be planted directly in the beds or first grown in pots | · Juicy, strong green eyes are taken together with the rudiments of the roots and planted separately; · Pale, frail ones are cut into pieces (according to the number of buds present); · All sprouts are buried 2/3 in well-fertilized soil; · Feeding is carried out with alternating components: 1 week – ash or herbal infusion, 2 – vermicompost; · During the harvesting process, the largest tubers are selected for seed material for the next season |
In the autumn sorting of the harvest, some gardeners leave the best fruits for food, and put aside small potatoes for seeds. With this approach, degeneracy will occur within 2 years. In order not to carry out frequent rejuvenation, it is better to use, on the contrary, high-quality large tubers for propagation.
Potato selection
To select material for planting, we must pay attention not only to taste, color and yield, but also to where the variety is zoned.
An important factor when choosing potatoes is their ripening period and resistance to diseases.
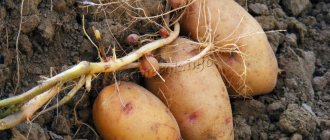
In order for the plant to grow strong, it is necessary to choose large tubers. You need to beware of scammers who, under the guise of elite potatoes, may offer the most common fruits.
When purchasing, ask for a certificate that will confirm the quality of the potatoes. Hardy and prolific varieties in our area:
- Bezhitsky.
- Lyra.
- Zhukovsky early.
- Timo.
- Cardinal.
- Right hand.
Suitable varieties
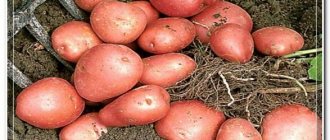
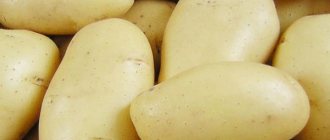
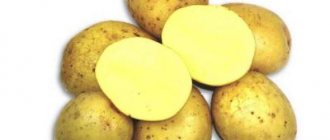
Tasty potatoes will grow if the right variety is chosen. Summer residents tried the following varieties for planting in barrels:
- Timo.
- Zhukovsky early.
- Cardinal.
- Lyra.
To get an early harvest, you should choose early-ripening, large-fruited varieties.
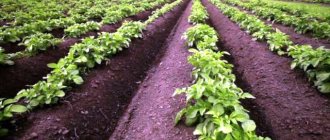
Land and fertilizers
During the growing season, potatoes are not very picky, unlike other crops, and do not require feeding. This is due to the fact that the substances contained in the fertilizer are not absorbed in sufficient quantities . Due to the voluminous tubers and poorly developed root system, the consumption of nutrients by potatoes is more intensive than other vegetables.
To achieve a high-quality harvest, the choice of future fertilizer must be taken responsibly.
Components for preparing the soil mixture:
- turf land;
- drug "Em-bokashi";
- ordinary soil.
Top dressing
Nutrients are actively consumed, fertilizing helps restore soil fertility, using:
- herbal infusions;
- ash infusion;
- complex mineral fertilizers for potatoes;
- during flowering superphosphate.
Urea and ammonium nitrate should not be used as fertilizer; it is enough to add them to the soil when planting. Excess nitrogen has a bad effect on the quality of tubers. Adding phosphorus-potassium fertilizers to the soil brings more benefits.
Growing technology
What is it like to grow potatoes in a barrel?
Before planting potatoes, we need to find a metal, plastic or wooden container, it can also be a plastic bag.
- The height of the barrel must exceed 30 cm, this is necessary so that sufficient moisture and oxygen enter the soil. If there is insufficient moisture, the potatoes will not take root and you may not get a harvest.
- One of the important conditions is that the barrel does not have a bottom to provide access to the soil for earthworms. The housing requires a large number of holes. For every 10-15 cm, the diameter of which should be approximately 1 cm. This is necessary so that excess moisture is removed and the roots of the plant are saturated with oxygen.
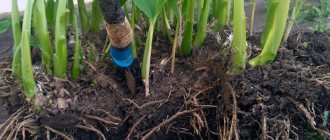
- Also, to avoid oxygen starvation, we place a rubber hose at the bottom of the barrel, which we first roll up in a spiral with a distance between turns of 8 cm. We make small holes in the hose at a distance of 15 cm. We plug the inner end tightly and take the outer one out so that using pump to saturate the soil with air. This procedure is done approximately 3 times a week.
- We fill our barrel with the prepared mixture to 1/2 of its height, do this in layers. It is necessary to ensure that the sprouts do not hatch completely.
- When the sprout reaches the top layer, cover it with the next layer. If you do not follow this process, the root system of the plant will not be fully formed and will devote all its energy to the growth of the green stem.
- The place where the barrel will stand can be absolutely anything. If it is not possible to constantly add soil, it is allowed to grow tubers in three floors.
- In a round container, potatoes must be planted according to their diameter, but if the container is square in shape, then planting occurs in a checkerboard pattern.
How to build a barrel
You can take a plastic or iron barrel. Any will do. The main thing is that no toxic substances have been stored in it before. For a good potato harvest, its dimensions are important. The most suitable volume is from 100 to 200 l, the minimum height is from 0.6 to 1 m.
It will take little time to prepare the container for planting if you have an electric drill at hand. Drilling holes will take no more than 30 minutes. Holes are drilled in the walls at intervals of 20 cm, in the bottom at intervals of 3 cm. The bottom can simply be knocked out.
A serious mistake of vegetable growers is that they do not make holes in the barrel, their potatoes do not receive oxygen in the required quantity, and excess moisture stagnates at the bottom. That is why they cannot boast of large harvests.
What kind of care is needed?
- The prepared soil must be steamed, this will help us get rid of pests and microorganisms. If the soil is sufficiently steamed, it has undergone a kind of disinfection. In this case, the soil is considered safe.
- You need to know that the soil, which has a sandy composition, must be filled with magnesium sulfate and dolomite flour.
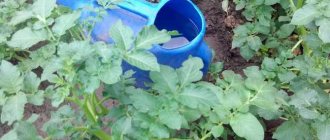
- On hot days, we must ensure our potatoes are well watered.
To ensure a good harvest, fertilizing is necessary, which is carried out with ash, organic or complex fertilizers.
- Approximately 3 months after the last feeding, the tops will become yellow and dry. This means the potatoes are ripe. To collect the long-awaited harvest, it is necessary to turn over or disassemble our structure. A good harvest should be one bag per square meter.
- The soil that remains can be reused, pre-saturated with fertilizers.
- The barrel can be replaced with special containers called “Potato Barrel”, and online stores will help us with this. But it is worth noting that more expensive equipment will not affect the quality of the harvest in any way.
Growing potatoes in a barrel is a young and not well-known technology that will help us provide ourselves with a harvest at the lowest cost. Plus, it's a fun process that can involve the whole family.
Comparison with planting in bags and boxes
The principle of planting potatoes in boxes and bags is almost no different from planting them in a barrel. The soil needs to be prepared in the same way; you can take ordinary garden soil and treat it with Bionex.
Keep bags (boxes) with soil in a warm room; you can plant potatoes in them early. If you have a greenhouse, you can transfer the bags there already in April. Potatoes planted in boxes (bags) must be periodically covered with soil or covered with a layer of mulch. Care is identical to care for potatoes planted in a barrel. Most of the time is spent on watering.
Sequencing
First of all, you need to wait for the onset of warm days, when the danger of return frosts has already passed. For temperate regions, this period begins in late April or early May. It is also important to know the basic nuances of cultivating crops for the region in order to grow a good harvest. If the summer resident has the opportunity to keep the bags indoors, then he should plant the potatoes earlier. The sequence of actions will be as follows:
- As soon as the planting time has arrived, place a layer of nutritious soil of a loose structure on the bottom of the bags. The mixture should contain more humus than garden soil. The soil layer is calculated based on the depth of the planting container. Usually it is 10 cm...35 cm.
- Place pre-selected tubers on top of the layer. Healthy medium-sized specimens are selected for cultivation. Some gardeners use parts of potatoes with eyes.
- Cover with a layer of light, loose soil about 15 cm thick.
- Moisten the “bed”.
The first shoots appear after 10-14 days. It is necessary to monitor the condition of the soil and water the seedlings on time. When the height of the stems reaches 10 -15 cm, add soil to the level of the first leaves. The agricultural technique forces the potatoes to form new roots, on which additional tubers will form.
Repeat adding soil several times. The soil layer should not be more than 2/3 of the height of the bag. It should not be made higher, otherwise the potatoes will not have enough strength to form a crop. The entire supply of energy and nutrients will be spent on the growth of tops. This is the main mistake that potato growers make when growing crops in bags.
Care
The most important procedure is watering. Moisture from the bags evaporates more than when growing in soil. Therefore, you will have to water the potatoes on a different schedule - more abundantly and more often. The main attention should be paid to the period of flowering and tuber formation. Vegetable growers advise watering the garden bed so that all the soil is moistened. This raises one difficulty. It is necessary to ensure good water flow to avoid stagnation, and air access for ventilation. It is most convenient to make small cuts at the bottom of the bag and a valve for removing the tubers before planting. This option is only suitable for bags made of dense material. Thinner material can be pierced with an awl.
Diseases and pests
Potatoes in barrels hardly get sick, and pests are easy to notice in a small area. If the month is rainy, then cover the container with film, this will avoid fungal diseases. Without care, plants can become infected with late blight or rot.
Late blight affects tops and tubers. Vague red spots with a whitish coating appear. Brown stripes form on the petioles and stems. When there is drought, the spots dry out. The development of mycelium is favored by warm weather and frequent rains. All greenery gradually turns into a dark mass, the bushes die. In a small container, the plants are located close to each other, so if one bush is infected, the infection will quickly spread to neighboring ones. It is better to plant varieties that are resistant to late blight. For preventative purposes, tubers are treated with fungicides before planting.
The Colorado potato beetle can fly over and settle in a barrel. It is much easier to collect and destroy uninvited guests in a small area. But if a mole cricket arrives, there may not be a harvest. It damages the roots and stems of plants and eats tubers. This insect can be brought in with garden soil, so it is necessary to cultivate the soil before planting.
You may be interested in: Dates for planting potatoes in May-June 2021 according to the lunar planting calendar Favorable days for planting potatoes in 2021 according to the lunar calendar Dates for planting potatoes in 2021 for central Russia and the Moscow region
Together with untreated soil, you can introduce nematodes, potato cutworms and wireworms, as well as a lot of harmful microorganisms. Potato moth flies from bush to bush. One individual breeds up to 8 generations of harmful insects. Caterpillars gnaw through leaves and tubers, turning potatoes into dust. Deep embedding will save potatoes from the pest; the larva does not fall lower than 10 cm.
In the fight against parasites, biological products are used: Entobacterin, Bitoxibacillin, Agrovertin, Fitoferm. The aphid infestation is washed off with a soap solution mixed with ash. Insects do not like garlic and mustard infusions. Ash is used against slugs; if you sprinkle ash around a barrel, the slug will not overcome the barrier.
Attention!
Insecticides are used only to treat late varieties of potatoes.