An important aspect of keeping chickens is proper ventilation in the chicken coop in winter. It is necessary to maintain a balance: to prevent birds from becoming hypothermic due to constant drafts. But at the same time provide them with a regular flow of fresh air. The ventilation system can be made with your own hands according to the diagrams. It is important to consider the basic rules when installing and operating the structure. And also keep the area with chickens clean.
Why does a chicken coop need ventilation in winter?
Health and egg production
Living conditions affect the egg production of chickens. High performance indicators will only be achieved if the chicken coop is kept comfortably. It should be clean and fresh.
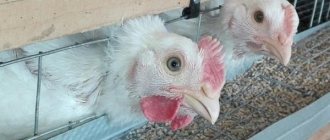
The health of chickens often worsens in winter. Low temperatures and lack of ventilation cause colds and other diseases. They also negatively affect the quantity and quality of egg laying.
Humidity and ammonia
A chicken coop usually has high humidity because it always contains water bowls, bedding, and perches that produce moisture. Lack of air circulation threatens the appearance of fumes.
They cause dampness and the proliferation of pathogenic microorganisms. As a result, chickens begin to get sick and their egg production decreases. The worst outcome is death.
In a room with a large number of chickens there is always a lot of waste products. Manure smells bad and emits ammonia fumes. It is dangerous if inhaled, causing severe intoxication of the body.
Thus, ventilation performs several tasks: it eliminates unpleasant odors, eliminates ammonia vapor and normalizes the air temperature.
Types of ventilation
Passive (natural) ventilation means that there are openings in the walls or roof and air flows through them freely, simply due to the natural movement of the wind and the tendency of warm air to rise. Passive ventilation may include an openable window, a ventilation duct, a grille, or other similar items. Passive ventilation is the simplest, cheapest, safest and most reliable for the vast majority of backyard chicken coops. Building such a system is not at all difficult.
Wind turbine ventilation means that there is a special turbine, about the size of a basketball, and it is installed on the roof of a building. When the wind blows, it rotates the turbine blades, and they actively suck air from the pipe. This system can move a fair amount of air, but only when the wind blows. When the wind stops, it just turns into a small hole in the roof.
Active (mechanical) ventilation means using an electric fan, although a small percentage of systems also use solar energy. This allows for strong air movement even with narrow ventilation ducts, but there are several important disadvantages. You should have a fan designed for dusty and unheated areas. But you need to keep in mind that such a fan is not cheap and quickly becomes clogged with dust, as a result of which it stops working or breaks down completely. Fans also need to be cleaned regularly, otherwise their performance will decrease and they may even cause a fire. And solar panels as a power source do not ensure the operation of the device at night and in cloudy weather.
Whatever you choose, remember that simply opening the door to the coop does not provide ventilation!
Ventilation system requirements
Dirty litter and ammonia fumes from excrement are unpleasant even for a farmer. What can we say about the chickens that have to live in similar conditions.
There are two main requirements for organizing ventilation:
- it is necessary to ensure constant access to fresh air;
- The equipment must be of high quality, otherwise you will have to constantly repair it.
After installing the structure, you need to enter the room and stay in it for 20 minutes. A well-installed system eliminates unpleasant odors and stuffiness in the chicken coop.
If it is uncomfortable, stuffy, or your head starts to hurt, it means mistakes have been made.
What is it for?
Many novice breeders do not dare to install a ventilation system in the chicken coop with their own hands. Are they right? No, but why spend more money on it? With its help, harmful ammonia vapors are removed from the chicken coop so that the chickens do not become seriously poisoned, become seriously ill, and stop laying eggs. When installing a fan, the humidity (sixty to eighty percent) and the temperature of the air masses are regulated : the room will never be damp and hot. Requirements:
- Ensuring a constant flow of fresh air.
- Lack of drafts to prevent poultry diseases and death of livestock.
How can you determine on your own whether the ventilation system is working correctly?
TIP : To do this, go into the chicken coop and spend some time in it. If during the visit there is obvious lack of air, headaches appear, there is no ventilation or the locations for the ventilation holes are chosen incorrectly.
Supply and exhaust system
On many private farms, supply and exhaust ventilation made of plastic pipes is installed. This natural type is the most common today. The design is simple and easy to install with your own hands.
This option is popular among farmers due to its advantages. The device is characterized by a high efficiency in a small private premises. It works silently and uninterruptedly around the clock. Does not require an electrical connection to operate.
But it is necessary to take into account the disadvantage of supply and exhaust systems. They are only suitable for small chicken coops. The design cannot cope with the large air flow in large poultry houses. You will have to install an additional hood in the chicken coop.
Electrical installations – a mechanical type of ventilation – are common in poultry farms.
Find out more about installing the listed systems in the article “How to properly ventilate a chicken coop.”
Methods for organizing ventilation inside the poultry house
Natural ventilation scheme
Ventilation of a poultry house can be organized in several ways:
- Forced ventilation system, when the air flow is created due to the mechanical action of fans. Such an air duct system can be: supply, if the fan is placed on the supply pipe;
- exhaust, when the fan is installed on the exhaust pipe;
- combined - simultaneously combine supply and exhaust ventilation systems in one room;
- supply and exhaust with a recuperator, which has an anemostat installed at the outlet to regulate the air flow.
Be sure to read:
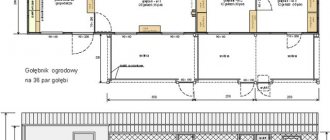
How to build a chicken coop with your own hands for 20 chickens: drawings and design details
Natural design
Natural ventilation works due to natural forces that obey physical laws. Warm air, which has less density and mass, is lighter than cold, heavier air coming from the street.
Pushed by the cold air flow below the floor, warm air tends to the top. He is pulled out into the street through the exhaust pipe shaft.
Most often, supply natural ventilation is installed in the exit door of the chicken coop in its lower part.
In frosty winters, to prevent the cold from dragging across the floor, such a round inlet can be slightly covered by twisting it to the right. The exhaust pipe must be located above the supply ventilation.
A simple natural ventilation scheme for a chicken coop
In addition, to obtain natural heating, when the temperature in the barn room increases further due to the chickens’ own warmth, caring owners lay a deep bedding about 40 cm high on the floor for the winter, made of dry sawdust, leaves, hay and straw.
It is advisable to spray such litter once with “Siyanie-2” or “EM” preparations. They are based on microorganisms that easily process and decompose organic matter excreted in abundance by birds.
They are also used for mulching beds.
Mechanical extraction from plastic pipes
It is advisable to install a ventilation pipe in the corner of the room in order to lead it directly through the attic to the roof above the ridge at a distance of 1.2 meters.
If you make a hole in the wall for mechanical exhaust, then the plastic pipes will have to be additionally connected using a corrugated tin elbow, secured with clamps.
In the upper part facing the street, a convex round mushroom damper should be installed in the hood made of plastic pipes, which will protect against precipitation in the form of raindrops and snow drifts.
In cold weather, condensate encloses the entire lumen of the pipe in a solid monolith, which cannot be easily knocked out in the cold. Therefore, some craftsmen recommend directing the outer part of the pipe not up, but down.
Be sure to read:
How to get rats out of a barn: effective methods of control using folk remedies and chemistry
This will get rid of ice along the edges and inside the pipe walls.
The ventilation pipe can be insulated with cotton wool and wrapped in foil. Or use another option for thermal insulation of exhaust pipes - the hood is covered with a special foil insulation for pipes, and a heating cable can be placed inside.
Other options for winter
Device with opposing parts
There is another popular option for arranging a ventilation system using pipes. Let's look at a step-by-step ventilation scheme in a chicken coop in winter.
First you need to calculate the exact area of the room to determine the required amount of materials. For example, a chicken coop with an area of 9 m2 will need two pipes installed opposite each other.
Holes are made on the roof of such a size that the used pipes pass through them. Holes must be made at different ends of the roof.
The pipes are installed in the chicken coop and lead to the roof. One pipe is mounted above the floor, the other - under the ceiling (about 30 cm).
The pipe on the roof is installed at a right angle in the shape of the letter “g”. This will help avoid clogging of ventilation due to precipitation in winter.
You can increase system efficiency by using additional fans. They are installed in the chicken coop. The devices accelerate air circulation inside.
Important nuances
If the room has a gable roof, the draft pipes do not need to be placed beyond the horizon of the canopy. In a chicken coop with a flat sloped roof, the device is lowered at a distance of 35 cm from the roof.
The pipe is installed at a distance of at least 30 cm from the floor, taking into account the height of the litter.
A hole with a diameter of 5 mm is made in the section of the exhaust pipe facing the street. Its task is to remove accumulated condensate.
In order for the ventilation to work effectively and last as long as possible, it is dismantled and garbage removed twice a year.
Passive type - no electricity
There is another option that does not require an electrical connection - ventilation. But it is not suitable for harsh Russian winters.
The flow of frosty air will quickly cool the room. Chickens can catch colds and get sick. The cold is deadly for chickens.
Do-it-yourself ventilation in a chicken coop: step-by-step instructions
Each ventilation system has its own characteristics, but there are basic general requirements:
- It must constantly provide the premises with fresh air, thereby reducing the risk of infection and improving the health of the livestock.
- The design should not create a draft, so special attention is paid to its location.
- To prevent the system from becoming clogged, it is necessary to promptly clean the chicken coop from excess debris, droppings, and stale feed.
- The air humidity level should not exceed 75%.
- The temperature should be at least +16-17 degrees for adults, and for young fragile chickens - 25-28.
- The speed of fresh air flow in summer is 0.7-0.8 meters per second, in winter - 0.4-0.5 m/sec.
- Ventilation performance is calculated as follows: per 1 sq. m should account for 5 chickens.
- The chicken coop must be periodically disinfected against rodents and pathogenic microorganisms.
To determine whether the ventilation is installed correctly, you need to go into the poultry house and spend about half an hour there. If during this time a person feels unwell (a headache begins, a feeling of lack of air appears, etc.), it means that the system is installed incorrectly, that is, there is no normal air circulation.
Any type of ventilation structure requires the use of different materials and tools. If wood is used, then you will need a wood saw, nails, and boards. If metal, then tools for working on metal, etc. Sealant for filling cracks, paints, etc. are required.
As an example, let’s look at the installation and production of the main types of ventilation that are most appropriate to use in a chicken coop:
- Natural ventilation. Punch a square hole in the ceiling or wall.
The optimal size is 20x20 cm. Next, make a frame from the boards. Divide the inside of the window into a couple of parts. One of them should be completely covered with wood, after which it is painted over and small diameter holes are made in it. The walls are sealed with sealant. Thus, a flow of fresh air passes through the longitudinal compartment, and carbon dioxide escapes through the other section. A do-it-yourself natural ventilation device is clearly shown in this video: - The system is mechanical using an axial fan. To do this, you need to make a window into which a special frame is installed. The structure is attached to it. A prerequisite is the presence of electrical power, since the stationary fan runs on mains power. Modern models have sensors that monitor humidity levels and temperature conditions. The only drawback is the energy consumption.
- Supply and exhaust option. You will need 2 plastic or metal pipes (length - 2 meters, diameter - approximately 20-22 cm) and a 90 degree elbow. Fresh air must pass through the first pipe, and out through the second. Installation process:
- make a round hole in the ceiling with a diameter equal to the diameter of the pipe;
- install pipe No. 1 in the ceiling in a place where birds rarely sit (the distance from the roof to the top of the structure should be at least 1 m 30 cm);
- in the chicken coop, the distance from the floor to the bottom of the pipe should be 20-30 cm;
- in the area above the perch, also make a hole in the ceiling;
- insert the pipe so that it is 30-50 cm lower than the first one on the street;
- both holes with pipes are filled with sealed foam to eliminate cracks;
- Install special canopies-umbrellas over the pipes to prevent precipitation (snow, rain, hail) and debris from penetrating into the premises.
Making a deflector
A deflector is a structure that is aimed at cutting through the wind blowing in its direction. This allows you to reduce the pressure inside the device and increase the traction properties in the pipe that performs the exhaust function. The device is installed on the roof. It can be purchased at a hardware store, but to save money, poultry farmers make the deflector with their own hands.
Before starting work, the following calculations are carried out:
- to determine the height, it is necessary to multiply the cross-sectional size of the pipe by 1.8;
- to determine the width of the cap, the cross-section is multiplied by 1.7;
- To calculate the width of the diffuser, multiply by 1.4.
Next, you need to take sheets of thick paper onto which all measurements are transferred and patterns (templates) are cut out. After this, the blanks are placed on a steel sheet and redrawn. Metal scissors are used to cut out elements that can be connected using a rivet gun. The final step is to install the deflector in the exhaust pipe.
Manufacturing of rotary valve
To make a rotary valve, you need to do the following:
- To create the structure you will need metal corners, wood, and a welding machine. A frame is welded from the corners, on the sides of which holes need to be made. The axis will pass through them.
- Make bushings from the pipe (you can use pieces) and weld them.
- Take a steel sheet and cut out the locking plate. Its size must correspond to the diameter of the exhaust pipe.
- Install the damper into the frame from the corners and weld it to the axle.
- Mount a wooden handle on the axle, which will allow you to adjust the damper.
- In strong winds, the locking device may open independently. To prevent this from happening, a wooden latch is installed.
Tips from the professionals
How to reduce energy costs
Energy costs can be reduced using sensors installed on structures. They automatically control the humidity and temperature in the room. Ventilation will only turn on if the climate in the poultry house changes.
This method is great for rooms with fermentation mat. Bacteria process excrement and leftover food, generating heat. As soon as the temperature rises above the permissible values, the ventilation will turn on.
What to do to ensure that ventilation performs its functions
Before organizing ventilation in a room with chickens, several requirements for the poultry house must be met. Otherwise, even a professionally installed system will be useless.
There are several recommendations for maintaining a poultry house: there should be a constant supply of oxygen in the room. But it is necessary to exclude even short-term drafts.
You also need to regularly monitor the cleanliness of the chicken coop: remove excrement, garbage and rotten food in a timely manner.
Another important requirement is the elimination of rodents. Read more in the article “How to get rid of rats in a chicken coop.”
Types of hoods
There are three ways to ventilate a chicken coop. Let's look at how to do each of them correctly.
Natural ventilation
This type of hood is the easiest to manufacture and the cheapest, but it is unregulated. It consists of a window above the door or in the ceiling. The advantage of this method is its simplicity and absence of significant costs; it will provide natural lighting.
The disadvantages of this type of hood are that it is impractical; in winter, additional heating will have to be installed. In hot weather, when the temperature outside is identical to the temperature in the chicken coop, the room will not be ventilated. Only a few hours per day are enough for good oxygen saturation.
How to make ventilation:
You need to make a small window in the wall or ceiling of the chicken coop. For convenience and regulation of ventilation, you can make a window in the form of a window. It is better to place the hood above perches and doorways. Air masses enter from the doorway and exit through the window.
Supply and exhaust ventilation
According to poultry farmers, supply and exhaust ventilation is the most effective to use and quite inexpensive. A ventilation system of this type can be classified as natural ventilation, but it is suitable for ventilating a chicken coop in winter. The difference is that the system consists of installing at least two pipes: a supply pipe and an exhaust air duct.
Materials required for work:
- Two PVC pipes with a diameter of 150-200 mm. Length from 2 meters.
- Jigsaw.
- Plastic plugs.
- Two passage nodes.
- Protective caps for air ducts.
- Roulette.
How to install:
To make ventilation, the first thing you need to do is measure the height of the room. To work, you will need two plastic pipes (you can use several for a large chicken coop) with a diameter of 150-200 mm. Make two holes in the ceiling taking into account the diameter of the pipes. The exhaust pipe is installed closer to the perch so that ammonia vapors evaporate.
They install it under the ceiling, leading it out to the street at 1.5 meters. The supply pipe is installed above the roof at a level of up to 40 cm, lowered almost to the floor, while the distance between the pipe and the floor should be 30-40 cm. Make sure that the structure is airtight.
For complete tightness, we use passage units, attaching pipes to the roof. Protective caps should be placed on the air ducts, and dampers should be fitted using plastic plugs.
Mechanical hood
The mechanical hood is equipped with sensors that regulate the humidity in the room. The circuit includes an electric fan; it contains the main differences between supply and exhaust ventilation and mechanical exhaust.
It is very rare to see such an exhaust ventilation scheme, because it is used exclusively on large poultry farms. Moreover, if the room is small, then operating a mechanical hood will be expensive for the poultry farmer. Design and installation require calculation of the volume of air flow necessary for the normal functioning of birds.
The calculation can be done by first measuring the area of the chicken coop. You should not start work if measurements have not yet been completed. The incoming volume of air masses affects the health of chickens; competent calculations will help you avoid mistakes in installation.
How to install:
The goal is to locate electrical air circulation on opposite walls of the structure. The method is similar to supply and exhaust ventilation, but is classified as adjustable. An industrial fan needs to be attached to one of the walls.
A water pipe is connected to the ventilation, which is subsequently discharged to the street. On the opposite side, install the same fan, the purpose of which will be to remove stagnant air.
Important! In one hour in the chicken coop, the air masses should be renewed about 20 times, which will lead to cooling of the room . When installing electric ventilation, additional heating must be used.
Electric ventilation
Electric hoods in chicken coops are mostly found on farms. When installing such a structure in a home chicken coop, you need to remember that this method requires electricity. It is best to install electric ventilation if there are a large number of birds on the farm.
It is quite problematic to equip a finished room with ventilation, so it is easier to do this in advance, even before construction. The fan is connected to the electrical network. The wiring is insulated outside the chicken coop.
To fill the chicken coop with clean air, electric ventilation can be used for 2-3 hours a day. For convenience, you can install sensors in the fan that will start or turn off the system, depending on the humidity coefficient.