Author: Tamara Altova. December 06, 2017
Category: Garden plants.
Hosta (lat. Hosta) is a genus of herbaceous perennials of the Asparagus family, which was previously classified in the Liliaceae family, and the genus itself was called Funkia - in honor of the German pharmacist Heinrich Funk. The current name of the plants of the genus was given in honor of the Austrian botanist and physician Nikolaus Host. Under natural conditions, hostas grow in Japan, Southeast Asia and the Far East. There are about 40 species and more than 600 varieties in the genus, many of which are used in landscape design, both professional and amateur. Hosta is called the queen of shade, although it grows well in full sun: in its habitats it can be found on mountain slopes, wetlands, sand dunes and forest edges.
Hostas appeared in Europe at the end of the 17th century, and already in the next century they began to become widespread in ornamental gardening. The value of the hosta lies not only in its decorativeness and shade tolerance, but also in its amazing unpretentiousness.
Hosta - growing in the garden. When and where to grow
Hosta begins to grow later than other plants. Therefore, it can be safely planted in the spring. In the fall, if you plant it not too late, it also takes root well. But even in the summer, if you replant it together with a clod of earth, it also does not suffer from replanting. Still, the best time to plant a flower is spring, when the threat of frost has passed. April-early May is the best time.
When choosing a place for planting, you must take into account that not all varieties prefer shaded and cool places. The lighter the leaves are, the more sun it needs. When choosing a place for planting, take into account some of the features of its cultivation.
- Varieties with a dark green or blue color should be planted only in the shade.
- Light varieties can be planted in partial shade, where the sun illuminates the area before 11 a.m. or after 4 p.m. It is allowed to place bushes in sunny places, but with a lacy shadow from trees or shrubs at midday.
How to grow hosta in a pot
Many hosta varieties are not recommended for planting in open ground. Until the plants get stronger and form a dense bush, it is best to grow them in a pot at home.
The pot must be suitable in size and contain the required volume of substrate.
As the plant grows, transplant it into a larger pot, subject to the following care conditions and planting rules :
- Pour drainage into the bottom of the pot and a layer of rotted manure on top. This will provide the plant with additional nutrition.
- The top layer of the substrate should be mulched, this will help avoid excessive evaporation of moisture.
- A plant in a pot requires careful care: frequent watering and fertilizing.
- Outdoors, the pot should be placed so that the sun does not heat it to prevent burns to the roots.
- In winter, keep the pot with the plant in a cool, dry room.
- Check the condition of the soil once a month to prevent drying out.
- After winter, a hosta growing in a pot “wakes up” in the spring much faster than in open ground.
- Take the hosta outside after the threat of frost has passed. You can take it outside during the day and bring it indoors at night.
How to plant purchased hosta roots
When choosing seedlings, pay attention to its root system. They must be at least 10 cm long, optimally 10-15 cm. The roots must be juicy, elastic, that is, alive. The more buds the seedlings have, the better. A young plant with 3-4 buds is the best option.
What else needs to be considered when purchasing seedlings? When choosing varieties when purchasing, some gardeners give preference to several varieties with different leaf colors. And they don’t think at all that different varieties have different sizes of adult bushes. After all, there are giant hosts, and there are also dwarfs. And if this is not taken into account when planting, then in 2-3 years the giants will most likely strangle the babies.
Therefore, before buying seedlings, carefully study the characteristics of the varieties. Especially consider the size of adult bushes.
Mr. Summer Resident advises: hosta in landscape design
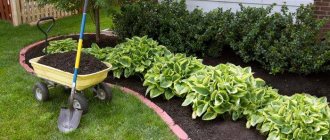
The plant is widely used in the landscape field due to its decorative properties and shade tolerance. Large representatives of the species are used as single elements; specimens with a size of less than 10 cm are used to decorate alpine slides or ridges. Medium flowers fit harmoniously into various garden compositions.
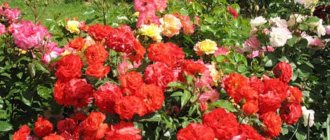
Hosts emphasize the originality of flower beds and borders. Against the background of modern-style paths or ground cover mats, flowers fully demonstrate their decorative properties.
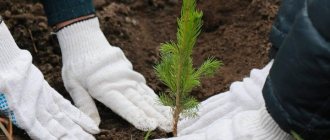
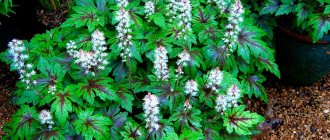
They are grown in the vicinity of low coniferous perennial plants, ferns, daylilies and a number of other flowering deciduous and ornamental varieties of flora.
Planting and growing hosta in open ground
It is better to choose the time for planting seedlings in the evening, optimally after 18 hours, when the sun is no longer scorching. At this time, it is easier for a young seedling to endure the stress of transplantation.
For planting, dig a fairly wide and deep hole. Its size depends on the size of the adult plant at the age of 6 years.
- For giant and large hostas, the pit should be 80-150 cm wide and up to 0.5 m deep.
- The dimensions of the planting pit for medium and small bushes are 30-60 cm and up to 25-35 cm deep.
- For miniature and dwarf varieties, the width of the hole should be 15-20 cm and depth 10-15 cm.
Compost or rotted manure is added to the bottom of the planting hole, thereby significantly improving the nutritional value of the soil, and hosts are very fond of organic matter. It will be good if you add peat. This will give the soil breathability and lushness. Add a handful of wood ash to the soil mixture - this will also not be superfluous. If the area is dry, add more perlite or perlite sand; it absorbs moisture well and then gradually releases it to the roots.
Also, add a tablespoon of complex mineral flower fertilizer to each hole, so you don’t have to bother with fertilizing later. Such fertilizers dissolve in the soil gradually, up to 6 months. In this case, overfeeding does not occur. The hosta will absorb as much fertilizer as it needs.
Fill the planting hole to 2/3 of its volume with nutritious soil mixture and water well. We form a mound at the bottom of the hole. We lower the seedling, straightening the roots down the mound. Fill the hole with soil and lightly compact it with your hands. And water again.
It is better to mulch the soil around the planted seedling to maintain soil moisture and prevent the appearance of an earthen crust. For mulch, you can use peat in a layer of at least 2 cm.
Types and varieties of hostas with photos
Plants such as hostas are very popular in landscape design. At the moment there are more than 4 thousand varieties of hybrid hosta. However, the main species that served as a kind of material for creating all this diverse splendor are relatively few. The main species used by breeders:
Hosta curly
The bush reaches a height of 60 centimeters, its wide dark green leaf plates have a white border, for example: Dream Weaver;
Hosta tall
The bush reaches a height of 0.9 meters, large shiny leaves are painted dark green, for example: Tom Schmid;
Hosta Fortune
Bush up to 50 centimeters high, green leaves edged with a cream stripe, for example: albopicta;
Hosta Siebold
The bush is about 60 centimeters high, the veins are clearly visible on the leaf blades, for example: Elegans;
Hosta wavy
Height is about 75 centimeters, the edge of the leaf blades is wavy, the central part is white with a green border with strokes, for example: Undulata Mediovariegata;
Hosta swollen
The height is about 50 centimeters, the leaves have a pointed tip, for example: Thomas Hogg;
Hosta plantain
The height is approximately 50 centimeters, the shiny leaves are colored rich green, for example: Royal Standard.
Fashionable host varieties
Varieties are classified by size and color
Such plants are divided into 5 groups according to leaf color:
- hosta blue (hosta blue-B) - the color of the leaf blades is bluish-blue;
- hosta yellow (Go) - it includes all these plants that have yellow leaves;
- green hosta (Gr) - green leaves;
- Hosta variegata (V) - varieties with variegated foliage, and also varieties with a light edge along the edge of the leaf blade;
- Hosta mediavariegata (MV) - light-colored leaf blades have a green border along the edge.
There are 6 groups separating hosts by size:
- Dwarf - bushes no higher than 10 centimeters, Draft (D): Blue Mouse Ears (leaf plates of light blue color are very similar to mouse ears).
- Miniature - height varies from 10 to 15 centimeters, Miniature (Mini): La Donna (leaves are colored yellow, blue and green at the same time).
- Small - height 16–25 centimeters, Small (S): Gold tone hosta (green leaf blades have a yellow or white stripe), Headsmen Blue (greenish-blue leaves).
- Medium - height 30–50 centimeters, Medium (M, Med): Night Before Christmas (the leaves are dark green, and their central part is white), So Sweet (green leaf blades have a whitish-cream border), White Feather ( This unique plant has white leaves, but over time it acquires a green color).
- Large - height 55–70 centimeters, Large (L): Alvatine Taylor (green-blue leaves have a yellow-green border), Golden Meadows (compressed round leaf plates have a golden center, a fairly wide greenish border and light green streaks ).
- Giant - height more than 70 centimeters, Giant (G): Blue Vision (greenish-blue leaves), Sum of All (the central part of the leaf plate is green and has a golden border of quite large width).
How to care for hosta in spring after winter
Hosta wakes up in the spring much later than other plants. And some gardeners even think that it has already died. Other flowers, for example, the same peonies, have already released their buds. However, there is no need to be upset. If you look closely, you can see how small buds emerge from the ground - beaks, these are sprouts that have hatched. This means that it’s time for the first feeding.
To do this, scatter 1 tbsp around the bush. l. complex slow-release flower fertilizer. And from organic matter it is better to scatter chicken manure in granules, it will also be absorbed slowly. There is no need to dilute chicken manure with water. After this, all that remains is to loosen the soil, water and mulch.
If you were unable to buy a complex slow-release fertilizer, then you will have to feed the hosta several times a season.
- The first time is in the spring after winter, as soon as the buds hatch;
- the second time - during flowering;
- and the last time after the plant has flowered.
Alternate organic fertilizers with mineral ones. Before and after flowering, any complex mineral fertilizer will do. After flowering and in the fall, you can put ready-made compost from fallen leaves or humus under the bush. Organic matter will perfectly serve as mulch.
Care
So that your site can be decorated by a beautiful hosta. Not only planting, but also care must be carried out in accordance with all the rules. Caring for this perennial is not at all difficult. However, you should know that in the first year after planting the plant develops rather slowly, and the color of the leaves very often does not correspond to the varietal characteristics. Hosta will show its full potential only after the 2nd or 3rd year of cultivation.
Attention! In order for the bush to have a neat appearance and not fall apart in different directions, it is necessary to remove flower shoots from a number of varieties. The exception is hostas with fragrant white flowers.
Watering
Hosta is a moisture-loving plant, so watering in open ground must be regular and plentiful. Some varieties of this plant can even grow successfully in marshy soils. Older specimens have a more powerful root system and are located much deeper, so they are able to withstand short-term drought without much damage.
Top dressing
Hosta is very responsive to fertilization. Often, many gardeners neglect this and therefore, instead of luxurious plants, their plots have pitiful and stunted bushes with small leaves.
You can feed the hosts with both organic matter, for example, mullein infusion, which is diluted in a ratio of 1:10, and a mixture of mineral fertilizers, which consists of potassium sulfate, nitrate and superphosphate.
Advice! Hostas growing in the sun require more frequent fertilizing, since due to more abundant watering they experience accelerated leaching of nutrients.
On average, fertilizers are applied 3 times during the growing season. The first time in the spring at the time of leaf growth. The second is in the budding phase, and the third is after flowering.
For the successful development of hostas in open ground, the soil surface under its leaves is mulched with peat and humus. But this rule applies only to tall varieties; miniature and dwarf varieties very often rot from this. You should also be aware that an excessively thick layer of mulch can harbor large numbers of slugs.
When growing hostas, do not forget about timely weeding and loosening the soil surface. Weeds and soil crust, which limit the access of oxygen to the roots, will negatively affect the condition of the plant.
Growing, caring for and feeding hosts
The main care of the plant is regular watering. Watering is best done after sunset, but not too late. It is necessary that the leaves have time to dry by night. Otherwise, the hosta will become a habitat for slugs.
She loves watering by leaves. However, you should know that blue varieties cannot be watered from above. The leaves of these varieties are covered on top with a thin layer of wax, which is washed off when watered from above. This should not be watered because the flower remains unprotected from external influences, and in addition, the decorative effect of the bush is lost. It is the wax that gives the leaves their blue color.
Promptly remove leaves that have lost their decorative properties. And also do not forget to remove the arrows of faded flowers. They spoil the appearance, and the plant itself spends a lot of effort on ripening the seeds. If you don’t like the flowering of a certain variety, don’t be afraid and feel free to cut off the young flower stalks. In this case, the bush will look better and will not fall apart. Trimmed leaves from healthy specimens can be composted and treated with antifungal agents in the spring.
Hosta varieties
There are quite a few types of hosta; they differ not only in color and external characteristics of the inflorescences, but also in size. Let us consider only the main varieties of plants, which are also used for breeding.
The main types of hosta are:
Flower bed of wavy hosta
wavy (medium-sized spherical flower, with twisted leaves, distinguished by a green-white hue);
Blue hosta bush
blue hosta or blue angel (a large plant with wide leaves of a blue-green hue, the flowers are distinguished by a light lavender hue and a pleasant aroma, quite frost-resistant);
White hosta in the garden
white hosta or “white bikini” (refers to large varieties of hosta, the leaves are wide, dark green with a bright white stripe in the middle, the peduncles have a delicate lavender color, grows well in dark and semi-dark places, blooms for a month);
Gold Regal variety
gold regal (refers to medium-sized varieties that feel quite good in sunny flowerbeds);
Pot of Hosta Honeybells
honeybells (a medium-sized variety of hosta with wide, even green leaves);
Hosta bush high
tall (belongs to giant plants, grows up to 1 meter in height, is distinguished by wide dark green leaves and delicate pinkish flowers).
White hosta and blue hosta are among the most popular among gardeners and breeders. These species take root well in our latitudes and do not require serious efforts when growing. Caring for hosta is easy and simple; any gardener can cope with growing this type of plant.
Preparing hosta for winter in the fall
As soon as the leaves begin to turn yellow, they cease to perform their decorative function, and the plant no longer needs them. When the trees begin to shed their leaves, it is time to cut off all the leaves on the host and prepare it for winter. But in different varieties this happens at different times. Therefore, do not rush to trim the leaves if they are still alive and beautiful. Some varieties remain young until late autumn.
For the winter, the entire hosta is pruned. It is not necessary to cover it specially; it tolerates cold well. And those leaves that attacked her from the trees were quite enough for shelter. But if there is no snow for a long time and severe frosts set in, for example, as in Siberia or the Urals, then cover the plantings with coniferous spruce branches or white covering material.
Main features of the flower
Dwarf hosta
The variety of varieties and varieties makes it possible to use the plant in gardens to decorate, for example, a veranda in a private house. There are giant varieties that grow up to 1 meter in height and very small ones, not exceeding 10 cm. This allows the gardener to decorate different corners of the garden in an original style.
Hosta became known to us thanks to the efforts of eastern breeders. The first specimens of the perennial plant appeared in Japan and China. Two centuries ago, the plant was very fond of the British and was used by them everywhere to decorate gardens and premises.
Today the flower is experiencing its rebirth and a new round of popularity. Gardeners all over the world want to have it in their garden. And its unpretentiousness and ability to grow in dark and damp corners makes it even more desirable.
Since ancient times, it was believed that hosta, a plant that loves partial shade or shade, can grow in places with high humidity. Today, through the efforts of breeders and professional gardeners, some hosta varieties get along well in well-lit areas of the garden.
Hosta Funderbolt
Hosta flowers are valued mainly for their unusual leaf color and beautiful spreading structure. The leaves can have different colors, from rich green to pale yellow with a less bright edging along the edge.
There are varieties with different leaf shapes:
- round;
- in the shape of a heart;
- lanceolate;
- ovoid;
- oval shape.
It is noteworthy that within one season, hosta leaves can change greatly in color. This makes the plant even more unusual and attractive.
The inflorescences of the plant are not as significant as the leaves. Many gardeners do not pay any attention to these delicate flowers, which rise above the main bush on thin straight stems. The flowers have a small palette, from lavender to pure white. Flower shapes vary and depend on the plant variety. Some of them have a rather intense and pleasant aroma.
Hosta "Empress Wu"
Depending on their size, hosta flowers are divided into miniature, medium, large and giant . The smallest representatives of the plant reach 7.5–10 cm in diameter. Such varieties are excellent for decorating a home or an alpine hill in the garden.
The largest representative of the hosta is the Empress Wu variety. The plant reaches one and a half meters in volume, and cannot leave any gardener indifferent. Large spreading leaves reach 60 cm in length.
Hostas planted in open ground in accordance with the recommendations do not require special care and feel great with minimal labor input from the grower. Their color and size directly depend on the microclimate, soil, place of growth and fertilizer application schedule. Many varieties change color throughout the season.
Hosta propagation
Hosta does not like to be disturbed. It can grow in one place for up to 20 years. But sometimes the bush grows so intensively that the buds simply begin to protrude from the ground. The flower begins to suffer from this. Therefore, in this case, the bush must be divided and replanted. This is how hosta is most often propagated.
However, dividing a bush is not an easy task, and sometimes you have to resort to the help of an ax. But this method of reproduction is the most reliable. Dividing it into several parts, we prepare the planting hole and carry out all the planting steps that have already been described above.
Growing hosta from seeds at home
Hosta has become a fashionable element of home garden decor quite recently, but more and more of its fans are found among gardeners and those who want to propagate it. Of course, it can be propagated by simply dividing the bush. Or you can collect the seeds yourself. This is not difficult to do if there are hosts on your site. First, wait for the flowers to bloom and be pollinated by insects. And already at the end of August - beginning of September, brown boxes with seeds appear on the plant. All that remains is to collect them and dry them at a temperature of no more than +30ºС. Dried seeds can be stored until April-May next year in a dry place.
Seedlings take the form of a full-fledged bush around the fourth year. Growing from seeds has its advantages.
- Purchased seeds are not cheap, and grown seedlings will cost you even more.
- By growing seedlings from seeds at home in a pot, you can prepare them for transplantation in advance, harden them and carry out disease prevention in time.
How to sow hosta seeds correctly, watch in a short video.
Reproduction. Hosta planting methods
The most common ways to propagate hosta are: dividing the bush and cuttings. Growing from seeds is advisable only in two cases, which are described below.
What should be the distance between hostas (of different varieties) when planting? By and large, it all depends on the diameter of the adult specimen. The distance is half the specified diameter.
First you need to prepare the landing site. What do hosts like? Fertile soil. As a fertilizer when planting, first spread organic matter (rotted manure, compost, leaf soil, peat, etc.) 10 cm thick. Dig it to a depth of 30 cm.
The roots grow wider. The larger the area of the area being dug, the easier and faster rooting occurs. It is also good if the area is raised above the soil surface.
Dividing the bush
It is not recommended to divide and replant young specimens. They reach full decorativeness at 4-8 years. By dividing and replanting before this time, the opportunity to fully admire the varietal characteristics is constantly postponed. It is not recommended to replant adult specimens unless absolutely necessary.
The division procedure is most easily tolerated in adulthood - 4 years. Dividing and replanting young bushes can temporarily inhibit growth, although not in all cases.
Young plants propagated by the modern invitro method may practically not develop during the first 2 years after planting.
The optimal time when it is best to transplant to another place is in the spring (April-May) and at the end of summer (late August-September). For experienced gardeners, replanting in summer is also not a problem.
To plant the rhizome as painlessly as possible, it is better to use a pitchfork. In the spring, as soon as the undeveloped cones of leaf rosettes appear from under the ground, you can get down to business.
- Carefully dig out the curtain.
- Stick two forks in the middle.
Take them by the handles (holders) and spread them as wide as possible. This method of separation is more gentle (compared to cutting with a shovel or knife). The roots are mostly unraveled, to a lesser extent are torn, and injury is minimized.
If you need to separate part of the bush (without digging it up completely), you need to cut the desired section in the shape of a triangle. Moreover, the sharp part of the corner should be directed outward! The blooming curtains will cover the void, so the shape will not be particularly damaged. The resulting void should be filled with fertile soil.
Is it possible to replant the hosta in June (July, August)? If there is a need for this, it is possible. However, to facilitate the establishment, some effort will be required.
- Before digging, water the mother plant thoroughly.
- Prepare a nutrient pit and pour it generously.
- Plant the division, making sure that all the roots are covered with soil.
- Trim leaves by half (to reduce evaporation).
- Shade for the first time (even if planted in partial shade).
- Do not allow the soil to dry out.
Video: recommendations for dividing and replanting hostas in the fall
Cuttings
Propagation by cuttings can be relevant when, during the division of a bush, several shoots break off without roots, but with a piece of rhizome - the so-called “heel”. Such shoots can be easily rooted.
Step-by-step guide on how to propagate from cuttings (leaf):
- Cut the leaves by about half.
- Plant it in a greenhouse or in the shade (by building an impromptu greenhouse, for example, from a plastic bottle).
- Monitor carefully for two weeks to prevent the soil from drying out.
You can try separating several rosettes without digging up the plant. To do this, you will have to lightly dig up the ground and cut out a rosette, trying to capture a piece of the rhizome. Since it is not always possible to complete this procedure successfully, actions should be unhurried and careful.
Seeds
Hosta grown from seeds, as a rule, does not retain varietal characteristics. This method is applicable in two cases:
- for propagation of slowly growing species (wild);
- relevant for gardeners who have a passion for breeding, since varietal and hybrid specimens grown from seeds can be very unpredictable and varied.
@hostaseedgrowers.com
Growing from seeds requires mandatory stratification for 4 months. Since it is quite difficult to correctly implement this condition at home, a simpler solution is to plant seeds directly into the ground before winter. Further care for sprouted seedlings is no different from usual.
Seedlings develop very slowly. The final decorative effect is achieved only at 4-5 years of age.
Caring for hosta in the open ground
In conclusion, all that remains is to add that when growing hosta in open ground in the garden, there is a high probability that slugs will choose it. After all, these pests love to live where it is humid. And this is exactly the environment in which hosts prefer to grow. Signs of their presence can be seen by the holes in the leaves. There are many folk remedies for fighting slugs. Find out how to deal with them by following the link. One way is beer traps. This drink is poured into small flat containers and the containers with beer are placed between the bushes. Slugs don't keep you waiting for the feast. All you have to do then is collect and destroy the pests.
Another misfortune is illness. Although the host is almost susceptible to diseases. However, the most possible ones may be the following.
- Root collar rot . The most dangerous disease. A diseased hosta stops growing, the leaves begin to rot and die. Such a bush needs to be dug up urgently, the affected areas should be cut out with a sharp knife, the sections should be sprinkled with any fungicide, and the plant should be transplanted to another place.
- Viral diseases . They rarely get sick with them. Round spots appear on the leaves. Gardeners do not always pay attention to this, since the affected leaves are not much different from healthy ones. It is practically impossible to cure the disease, so the plants must be immediately dug up and burned.
- Phyllosticosis is a fungal disease that affects weakened flowers or those damaged by frost. Yellowish-brown spots appear on the leaves, gradually merging with each other. Later, the spots become covered with a grayish coating from sporulation of the fungus. Then the spots crack and finally fall out. The infected bush must be urgently removed and burned. It is also necessary to reduce watering of other hostas and spray them with fungicide solutions.
- Gray rot (mold) . First, the edges of the leaves are affected; they seem to rot. As the leaf progresses, it becomes affected and rots completely. In a short period of time, the plant can rot completely. Therefore, in case of high humidity and frequent rains, it is necessary to spray the bushes with Bordeaux mixture or Topaz for preventive purposes. If the plant is severely affected, it needs to be dug up and destroyed.
Dear readers, if you have never grown hostas before, I hope this guide will help you in the initial stages of growing it. Despite the fact that a lot has been written about growing and caring, growing a shade-loving beauty is still quite simple.
I wish you success!
Hosta diseases and pests
Hosta rarely gets sick, but one of the most characteristic ailments for it is phyllostictosis. Yellow-brown spots appear on the leaves. Affected plants must be burned and the soil must be disinfected. If you notice gray rot or sclerotinia on the leaves, apply fungicides.
Hosta phyllosticosis
The pests that make big holes in the beautiful hosta foliage are slugs. To scare them away, mulch the soil with something hard: crushed stone or broken shells. Beer lures also help. Place containers with this drink around the bushes, and a day later, select slugs from them. To combat insects (caterpillars, grasshoppers), use insecticides.