Clematis or clematis are loved by many gardeners. These vines gained their popularity for their beautiful flowers, leaves, lush bushes and abundant flowering from mid-summer until frost. With the help of herbaceous climbing plants, you can decorate gazebos and verandas, fences and unsightly buildings. Garden structures that can be decorated with just one clematis stem look luxurious. However, these plants must be properly cared for, paying special attention to preparing for winter. When caring for clematis in the fall, be sure to till the soil, trim the vines and cover them before the winter cold. Our article, cutting diagrams and video clips will help you carry out these activities correctly. We will also tell you in detail about autumn transplantation and propagation of clematis by layering and cuttings.
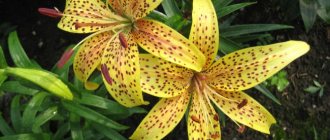
Photo of clematis flower
We cultivate and insulate the soil
To prevent clematis from being affected by fungal diseases next year, the soil is treated in late autumn with 0.2% foundationazole, 1% solution of copper sulfate or potassium permanganate.
When frosts set at -5...-7 degrees, the soil is dug up and insulated. It is necessary to insulate the soil precisely after the onset of sub-zero temperatures because at this time water will not accumulate on the surface of the soil.
This is the basic rule when caring for clematis in the fall - preparing for winter. Otherwise, if the upper layers of the substrate become waterlogged, the plant may die. This is explained by the fact that the soil, wet on a warm day, freezes at night, turns into ice and literally tears the roots apart.
Pruning rules
Clematis pruning in accordance with the rules described above is carried out starting from the third year of the growing season. Young annual seedlings of all groups are pruned equally. In autumn, before the onset of persistent cold weather, the shoots are cut off completely, leaving one bud above the ground, which stimulates the awakening of dormant buds in the root part of the flower and increases the number of lashes. If the next year the plant develops poorly, the same severe pruning can be done in the fall after the second year of growing season.
To enhance the branching of shoots, after the annual growth begins to grow, usually in early summer, they begin to be pinched. Varieties of pruning groups 1 and 2 are pinched for the first time at a height of 20-30 cm from the ground, then when the lashes reach 50-60 cm, and for the last time after the bush has grown to 1-1.5 meters. In clematis of the 3rd pruning group, the first pinch is carried out at a height of 10-15 cm from the soil surface, the second - as the shoots grow to 20-30 cm, the final - at a height of 40 to 50 cm.
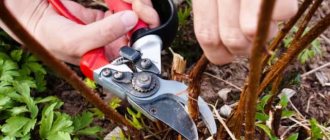
To trim shoots, use a sharpened pruner or garden knife, which is disinfected each time after moving to the next bush, which avoids the transmission of infectious diseases from one plant to another. The cut is made 5-7 cm above the nearest bud; it should be oblique; in this case, water does not linger or accumulate on the cut ends, and they are less susceptible to various rots.
Some varieties require regular thinning pruning. A well-developed bush should have about ten to fifteen vines, however, in clematis with a high shoot-forming ability, their number can be significantly higher, which causes excessive thickening of the plantings. In this case, it is necessary in the fall to regularly remove all weak, poorly developed shoots, bringing their number to the optimum, which will help the plant look more decorative and form many large, intensely colored flowers.
Finally, all varieties, without exception, require sanitary pruning, during which the bushes are carefully inspected and, if branches affected by diseases or pests are found, they are completely removed and then immediately burned.
When to prune clematis?
When caring for most plants, pruning is required, which is especially necessary for heat-loving clematis. This procedure allows you to beautifully design the shrub and fully develop the root system, resulting in abundant flowering. Pruning is divided into the following types:
- Formative - to improve flowering and increase branch growth.
- Sanitary - to remove dried, broken and diseased shoots that interfere with the development of the plant.
- Autumn pruning protects the crop from freezing and promotes better wintering.
Sanitary and formative pruning is carried out in the spring. In autumn, in preparation for winter, clematis are pruned in front of the shelter. The timing of this procedure depends on weather conditions.
When to prune clematis for the winter:
- in Siberia and the Urals - in early October, when frosts begin;
- in the Moscow region and other regions of the middle zone - at the end of October;
- in the south of the country - in November.
Clematis: planting and care in open ground for beginners
In this article I want to introduce you in more detail to my experience of growing clematis in the near Moscow region. I’m going to pay the most attention to small subtleties and tricks that major clematis experts don’t always write about.
I purchased my first clematis in the early nineties of the last century in Kislovodsk and I still rejoice at every newly acquired variety.
Choosing a landing site.
— Clematis loves a lot of light, so it needs to be given a sunny place. - This plant is tall, and so that the shoots do not break or get tangled, damaging the vine and large flowers, you need to find the most protected place from the wind. — In very wet soil, where water stagnates for a long time, clematis can get sick. Therefore, in such cases, they (clematis) should be planted on hills or ridges. Selection of varieties
When choosing varieties, gardeners usually look at the clematis pruning group.
First group. This group includes clematis blooming on last year's shoots. Of the varieties, these are princelings, forming woody vines 2-5 meters long. They do not need to be covered, removed from the support or trimmed. We have one such clematis “Pink Flamingo” that tolerates shaded areas very well. Second group. Clematis of this group bloom abundantly and early (June) on last year's shoots. Often gardeners refuse this group of clematis, considering them difficult to care for and especially difficult to cover. And this is very in vain, since usually the flowers of this group are the most beautiful, large (20 cm) and double. There is no need to cover the entire vine for the winter. It is enough to leave 50-60cm, cut off the leaves, put it on a spruce branch, cover it with another and dust it with ash. The second flowering begins in July-August on the shoots of the current year. Third group. This includes clematis, in which the main flowering occurs on the shoots of the current year in July - September. Before sheltering for the winter, all shoots are cut to 2-4 lower nodes. In this case there are no problems with shelter. In warm winters, if you save 50-60cm of last year's shoots, they will bloom 2-3 weeks earlier.
Tip: In the fall, we leave 50-60 cm of vines on all clematis (except for the first group) and cover them with spruce branches (see above). If there are live buds on the shoots in the spring, tie them to a support and straighten them so that the bush is decorative. Old dry shoots should be cut off and the center of the bush should be powdered with ash.
Thus, DO NOT FOCUS ON THE CUTTING GROUP.
When is the best time to plant
Clematis with a closed root system can be planted throughout the growing season. Our annuals can be planted until September 15, since they were all cuttings in the ground.
From my experience, I do not recommend planting clematis grown in a greenhouse later than August 20-25, as they do not have time to acclimatize before frost. I am very sorry when flower growers are disappointed in such a wonderful culture as clematis.
Landing
The distance between clematis should be at least 1.2 m, better than 1.5 m. In the Moscow region, the soil is clayey and for each seedling you need to dig a separate hole measuring 70x70x70cm. On wet soils, it is necessary to place drainage (stones, sand) at the bottom of the hole. Fill the hole with a mixture of peat, soil from the hole and sand (1:2:2:1) with the addition of complex mineral fertilizer (100-150g), ash (2-3 tbsp.), and dolomite (150-200g). At the bottom of the hole, make a mound of prepared soil and carefully spread the clematis roots over it. When planting, the growth point should be deepened below the edges of the hole in young seedlings by 5-7 cm. In adults, 8-10 cm. Sprinkle the middle of the seedling with clean sand with the addition of ash and crushed charcoal. Having filled the hole, make a hole for watering 15-20 cm from the shoot and water until the hole is completely saturated with water. If the shoot is still small and has not become lignified, we do not sprinkle it to the top, but leave it in the hole for now, and sprinkle it to the top as it grows. Immediately after planting, shading must be installed.
Supports
Supports must be installed immediately after planting to avoid damaging the root system in the future. We install supports with a height of 2.2-2.4 m. When the shoots grow to this height, they fall down and bloom in such conditions. According to our observations, there are more flowers. In addition, the bush area where there are no flowers is closed. The diameter of the stick to which the shoot clings should not be more than 2 cm. As the vine grows, in order to get a more decorative bush, the shoot needs to be properly directed.
Advice: IF THE PLANTED CLEMATIS IS MISSING, DO NOT PLANT ANYTHING IN THIS PLACE, AS IT MAY COME OUT IN A YEAR OR MORE. We had such clematis grow in 5-6 years, and they were already large bushes.
Pruning and pinching
Before planting, a purchased young seedling needs to be pinched for the first time (up to 2-4 pairs of lower leaves), and a second time in mid-summer for half of the shoot. This pruning stimulates the development of the root system and is the key to a strong plant in the future. Some varieties of clematis produce few shoots (for example, “VICTORIA”). In such cases, pruning must be done several times. After pruning, two shoots grow in the axils of the node (where there are 2 leaves), which bloom well later.
Care
Feeding The large green mass of clematis-clematis requires a lot of nutrition. During the entire growing season we do three feedings. Before fertilizing, water the plants with water. We give the first feeding in April-May with nitrogen (ammonium nitrate 20g per 10 liters of water) and mullein 1:10. We give the second feeding in June at the beginning of flowering. For it, you can use any complex fertilizer 40g per bucket of water and also organic matter (manure, herbal infusion). Third feeding - August, September. At this time, urea cannot be used, and we apply “autumn” fertilizer. Add wood ash to the center of the bush. Throughout the growing season, we occasionally water it with DOLOMITE MILK (5 tablespoons per 10 liters of water). During the same period, it is necessary to provide the plants with microelements such as boron and manganese. We make a weak solution of POTASSIUM MANganese acid (2-3g per 10 liters of water) and BORIC ACID (1-2g per 10 liters of water) and water the plants twice a season.
Watering
Clematis clematis naturally grows in humid forests, and watering is very important for it. At the same time, fungal spores multiply in moist, warm soil, causing a dangerous clematis disease—WILT. To avoid this, you need to first: do not pour water into the center of the bush. Second: shade (especially in the sun in hot weather) the root system. To do this, for the purpose of shading, decorative flowers with a small root system (awl-shaped phlox, calendula, etc.) should be planted near the bush. Third: there should be no rotting remains of weeds and other plants near the bush.
Shelter for the winter
All clematis we grow are frost-resistant and therefore do not require shelter. In the fall, after watering and weeding, we dust the bushes with ash and add peat. We try to be sure to put spruce branches (described earlier), as this saves the root system from damage by MICE. In colder open areas, it may be necessary to strengthen the shelter, but at the same time, it is impossible to cover too much, as this leads to damping off of the plants. In spring, the cover must be removed gradually so that the buds are not spoiled by spring frosts and bright sun. This is especially true for buds that will bloom on last year’s shoots. After loosening the soil, water the bush with lime milk (100-150 g of lime or dolomite per 10 liters of water).
← How is our planting material different? Love ASTRANCIA! →
How to trim correctly
How to prune clematis depends on the variety of vines, which are divided into three groups.
Pruning clematis group 1
Clematis pruning scheme of the first group
The first group includes the following varieties:
- Vadas Primrose;
- Joan of Arc;
- Zhakmani Superba;
- Carmen Rose;
- Floralia;
- Rosie Pegoude.
They bloom on the shoots of the previous year, so they tolerate wintering well. They do not need to be removed from the supports, but simply hilled up.
You will be interested to know: Feeding petunia for growth and abundant flowering: when and how to feed petunia with folk remedies and fertilizers
Lianas of this group should be trimmed minimally. The branches are simply shortened to a height of one to one and a half meters, and only underdeveloped shoots are completely removed.
Trimming 2 groups
Scheme for pruning clematis of the second group
This group includes clematis, on which flowers form in early summer on last year's shoots, and by autumn - on this year's branches.
Varieties of the second group:
- The president;
- Lord Neville;
- Ivan Olsson;
- Barbara Dibley;
- Barbara Jacqueman;
- Cassiopeia;
- Valge Daam;
- Anna German.
They need light pruning, which is selected individually for each variety. In the first autumn after planting, young bushes should be pruned no higher than 30 cm above the ground, and for adult vines special technology is required. In any case, weak shoots are removed, and strong shoots are cut to a height of one meter, after which the branches are removed from the support and laid at the roots.
Trimming 3 groups
Scheme for pruning clematis of the third group.
Buds on the vines of this group are formed on the shoots of the current year. Such clematis require heavy pruning in preparation for winter. It is necessary to leave only 20-50 cm from the branches from the soil level. In this case, be sure to ensure that there are several pairs of buds left on each shoot.
Clematis varieties of the third group include:
- Mephistopheles;
- Luther Burbank;
- Forest Opera;
- Mercury;
- Melody;
- Viola;
- Tuchka;
- Roko-Colla;
- Romance;
- Cuba.
Clematis: outdoor care in late summer and autumn
It has already been said above that caring for clematis should be carried out taking into account certain rules. You will have to water the plant, loosen the soil, remove weeds, and apply fertilizer. In addition, you will need to prune the plant and carry out manipulations related to protecting the vine from pests and diseases. Before the arrival of winter, it is necessary to make a protective shelter that will prevent the clematis from dying.
Outdoor care
Let's look at all these features of plant care.
- Watering. As soon as summer ends, watering should be moderate. It is enough to water the plant once every 10-14 days. Water consumption – 10 l per 1 bush. If it rains frequently, the vine will have enough moisture. If you overdo it with watering, it may not survive the winter.
- Feeding clematis in August. At the end of summer, the vine needs potassium. Each of the bushes needs to be fed with superphosphate and potassium sulfate (0.5 tbsp each).
- Feeding clematis in the fall. If you do not apply phosphorus and potassium fertilizer at the end of summer, you will need to apply such fertilizer before mid-September. There is no need to fertilize in the future. At the end of September, cover the ground with a layer of wood ash. This way you will prevent the roots from rotting and the shoots from withering. Applying nitrogen-based fertilizer in the fall is strictly prohibited.
- Treatment for diseases. If the plant is healthy, there is no need to process it before winter. If there are signs of illness, after the plant sheds its leaves, treat the shoots and trunk circle with 3% Bordeaux mixture. Don't forget to prune the vine after flowering has finished.
How to cover for the winter
In the photo, a shelter for clematis for the winter.
Clematis calmly tolerates the first frosts, but you should not delay its preparation for winter. After pruning and tilling the soil, they begin another stage of caring for clematis - shelter:
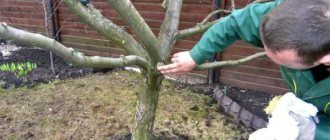
- Plants of group 1 usually tolerate cold well, so they are not removed from their supports. But the bed must be hilled up so that the roots do not freeze, especially if the winter has little snow. Hilling is carried out with dry soil to a height of 40 centimeters.
- The vines blooming on the shoots of last year and this year must be removed from the supports. First, a bed with clematis is hilled to a height of 40 centimeters, after which the branches are removed from the supports, unraveled, wrapped in a ring and placed at the roots. The shoots are first sprinkled with dry leaves, and then with agrofibre, lutrasil or other non-woven material.
- Clematis, on which flowering occurs on this year's shoots, are pruned heavily, so only the roots are insulated. They must be hilled up and covered first with peat, then with sawdust and earth. All types of insulation must be dry. The mound is made about 50 cm high. On top it can be covered with a wooden box or film, which is secured with boards or bricks.
In spring, it is not recommended to remove all coverings at once. The plant must acclimatize, for which the layers of insulation are removed gradually.
Experienced gardeners advise that before covering clematis in the fall, remove all leaves from the remaining shoots. Pests and viruses may remain on them, which can easily survive the winter on a covered plant and begin to spread in the spring.
How to determine which group of clematis
How can you determine what variety you have if you did not check this with the seller when purchasing, and you did not have a label when purchasing your clematis seedling. How can you find out? Let’s say you don’t know how to prune your clematis. You cut these long stems by about one and a half meters, even leave them by a meter, put them down. And next year you will see how its buds will awaken, where its inflorescences will open, and you will already conclude how your clematis blooms on the shoots of which year. And next year you will know how to cover it correctly.
Well, this Hayley is a hybrid, you don’t need to do any such trouble with him. I simply cut off all its stems at the root, and there is no more hassle with it. I didn’t even cover it that year, and it overwintered just fine with me. Well, you can also, as I just told you, put spruce branches on it so that its branches are more under the snow. We cover it with the same birch branches; I didn’t even cover it with spunbond. The most important covering material for clematis, and indeed for all plants, is snow. Therefore, when the first snow falls, come to the garden, throw snow from the paths onto the clematis and everything will be fine with you.
Of course, remove the support for clematis for the winter so that it does not stand under precipitation. And in the spring, when the very first shoots appear, you will work hard and guide them, tie them with ropes, and it will quickly crawl on its own. Clematis clings to most varieties with its leaves, and you will again have such a beautiful wall of greenery and flowers.
Take care of your clematis, love them and you will have beauty in your garden.
Autumn replanting - tips and videos
Transplanting clematis in the fall to another place is necessary in the following cases:
- For rejuvenating old bushes.
- To change the location if planting in the spring was made in an unsuitable place.
- When changing the landscape design of the garden.
- If the vine begins to fade, despite the fact that all care rules have been followed. The cause of wilting may be fungal diseases that occur when the soil is waterlogged. In this case, it is necessary to plant the bush in a new place and pre-treat the roots with fungicides. Another reason for wilting is a very overgrown plant, which needs to be transplanted to another bed, where there will be more space for clematis.
You will be interested to know: When and how to plant fragrant tobacco, planting and care in open ground, photo
Only in cases of extreme necessity are hybrid varieties and first-year plants replanted.
When to replant
Photo of clematis in the garden
The timing of transplanting clematis to a new location in the fall depends on the region in which the vine grows. It should be borne in mind that the plant will need about a month to adapt and take root. The clematis must have time to take root before the first frost, which occurs at different times in each region.
Experienced gardeners recommend planting clematis in the fall, but some of them advise doing it in the spring, after the soil has warmed up.
How to transplant correctly
If the clematis are still young, then replanting them is quite simple. It is enough to dig up their trunk circle to a depth of a couple of bayonets, extract the roots along with a lump of earth and plant them in a previously prepared hole in a new bed. Before planting, the root system should be inspected for rot and damage. Rotten roots are cut off and sprinkled with crushed charcoal.
It is much more difficult to replant overgrown adult plants, since they have a branched root system. Therefore, a bush with a large radius is dug up. But even in this case, some part of the roots will have to be cut off.
Preparing the site
To plant clematis, you need to choose a site that meets the following criteria:
- Good lighting.
- A place where there is no nearby groundwater and moisture does not collect in the soil. Clematis roots do not like waterlogged soil. They begin to rot even with short-term stagnation of water, which is detrimental to the bush.
- The site should be as windless as possible, otherwise the thin stems of clematis may break under the influence of the wind.
- The soil in the flowerbed can be any, but with an acidity within 6.0 pH.
At the site chosen for planting, holes are made with dimensions such that the roots enter the hole, and the plant can be buried at least 15 cm. If drainage is placed in the hole, then it is made deeper.
The distance between the holes should be about one meter. For varieties of clematis that bloom with small buds, a distance of 2.5 meters is made between the holes.
After the shoot is planted and sprinkled with a nutrient mixture, it needs to be trimmed so that it is convenient to cover it in the fall. A support is immediately installed near the vine, the trunk circle is mulched and watered. After transplantation, clematis requires the same care as other plants of this species.
VIDEO: HOW TO CORRECTLY TRANSPLANT CLEMATIS AND DIVIDE THE PLANT WHEN TRANSPLANTING
Planting clematis in open ground in autumn
The best time to plant clematis is spring or autumn. If you decide to do this job after the end of summer, try not to delay and complete all work before the first frost arrives. The seedling will have the opportunity to take root. This should not be done in advance, otherwise the vine will begin to actively grow, which will lead to its death in winter.
Planting clematis in open ground in autumn
In order for the plant to please with beautiful flowering, it needs to be provided with proper care. Pay special attention to the landing site. Liana does not tolerate being frequently moved from one place to another. It can remain in one place for several decades.
It is not recommended to plant it in an area that is too sunny or windy or where there is a drainpipe and there is a constant accumulation of water. It is undesirable for it to be located near an iron fence; on a hot day, the metal will heat up, which will have a detrimental effect on the plant. Experienced flower growers recommend planting the vine on a gazebo, wooden fence, or decorative arch.
You can also make a beautiful trellis. Keep in mind that the soil in the place where the plant will be located should not be too acidic. As for the occurrence of groundwater, a depth of at least 1.2 m is approved. It is best to plant the vine on a small hill. The dimensions of the hole for this plant are 50x50x50 cm. If the roots are long enough, it can be made deeper by 10-20 cm.
Place the seedlings at a distance of 1 m. Make a mixture of humus, peat, turf soil, and sand. Take all these components in equal proportions. The mixture can be supplemented with complex mineral fertilizer (150 g) and wood ash (150 g). Before you start planting, inspect the roots; they may need to be straightened out a little. If they are too long, shorten them by a third.
Place seedlings at a distance of 1 m
Deepen the seedling so that the soil completely covers the root collar and the first two buds. In this way, the plant will be stronger in terms of health and will begin to actively grow over time. Place a wooden peg nearby. Tie the plant to the fixture. Do not untie until it is completely rooted. Don't forget about abundant watering.
During the first 2-3 years, you should not expect gorgeous flowering from clematis. Do not rush to look for another place for the seedling, do not treat it with growth stimulants. It will delight you with its beautiful flowers and leaves by the age of 3-4 years. By this time he will have time to take root and get stronger.
Propagation of clematis in autumn and spring
Clematis can be propagated in several ways:
- cuttings;
- layering.
Green cuttings in spring
Cuttings of clematis are best done in the spring during the budding period, when the vine has not yet bloomed and the shoots have a lot of strength. The side branches grown after pruning are used for cuttings. The shoot is cut into pieces, each of which should have 1-2 nodes. The upper cut should be 2 cm higher than the node. The lower one is made at an angle of 45 degrees, and the cuttings are placed in a container with a root formation stimulator dissolved in water. You can use Zircon or Epin.
You will be interested to know: Picking marigold seedlings: when and how to pick correctly
Before planting in the ground, the leaves in sections are cut in half. The substrate for rooting cuttings should always be approximately 20-30% moist. To achieve this, it is made of two layers:
- first, a mixture of peat and sand is poured into the container in a layer of 15-20 cm;
- A layer of sand of approximately 6-8 cm is used as the top layer.
A mixture of crushed sphagnum moss and river sand retains moisture well and allows air to pass through.
The selected soil is watered with a solution of potassium permanganate and placed in a container. A cutting is planted in it, the node of which is placed 1 cm into the soil. It is from this node that roots will eventually begin to grow. It is best to plant each cutting in a separate pot. But, if the segments are planted in one container, then the distance between them should be about 5 cm.
Caring for planted segments involves maintaining the air temperature in the room within +18...+20 degrees. For better rooting, they need high air humidity, so the leaves are sprayed every day.
Propagation by cuttings in autumn: tips and videos
During autumn pruning, you can select suitable clematis cuttings and save them until spring. In the fall, it is better not to plant them in the ground, since the development of the plant stops at this time.
Preparation of cuttings:
- Cut the shoot into pieces and from the middle part select those that have leaves and 1-2 nodes on the sides.
- There should be 2-3 cm left from the bottom to the knot, and 1-2 cm from the top.
- The leaves are reduced by half, and the stalk is cut at an angle.
- Before planting, the segment is treated according to the instructions with Kornevin, Heterouxin or another growth stimulant.
- For the development of the root system, a substrate is prepared consisting of sand and humus or peat (2:1).
- Each cutting is placed in a separate container so that the knot is half above the ground.
- The containers are kept in a room with an air temperature within +25 degrees.
When caring for cuttings, it is necessary to keep the soil moist and spray the bushes twice a day.
Young clematis obtained after autumn cuttings should be stored in a basement or cellar until spring.
WATCH THE VIDEO - HOW TO PROPAGATE CLEMATIS BY CUTTINGS IN AUTUMN
Transplanting clematis: when is the best time to carry out the procedure?
If you do not have experience in growing clematis, the question may be relevant to you regarding its transplantation. It is recommended to do this at the end of summer or early September. The best time in spring is late April or early May.
Transplanting clematis
It is important to have time to replant clematis in the fall before the first frost. If the procedure is not carried out on time, there is a risk that the seedling will not take root and will die. As a rule, clematis is transplanted to a new place if the previous one is not suitable for it. The liana is also replanted if it gets old.
If there is a need for this due to illness, the new place will need to be treated with Trichoflor solution (5 g per 10 liters of water). When all work related to planting is completed, mulch the soil with wood ash.
If you decide to replant clematis in the fall, you need to carry out a number of additional manipulations. First, cut it off, and then dig around the bush with 1-2 shovels. Remove along with the earthen lump. Shake off excess soil and divide them into sections of 4-6 stems. For this procedure you will need a garden saw or hatchet. Use pruning shears to shorten the roots. Make sure that the roots are not dry during transplantation. Once you finish it, water the plant.
Keep in mind that replanting adult clematis, no matter what pruning group it belongs to, can be done without dividing. If the plant is more than 6-7 years old, division will be inevitable. By this period, the roots become strong and long, so cutting them will not be so easy. Take your time, otherwise you risk damaging the root system.
Pruning methods depending on the type of plant
The main role in pruning is played by features associated with the formation of buds on the vines of the bush and further flowering.
These flowers are divided into three groups:
- the formation of flowers occurs on sprouts grown last year: Cardinal Rouge, Hegley Hybrid, Princes and others;
- buds are formed on stems that grew last season, from May to mid-July, and after that buds formed on new stems begin to bloom: Minister, Flower Ball, Fair Rosamund, Dawn, President;
- the formation of buds occurs on the vines grown in the new season: Jacquemant, Vititsella, Victory Salute, Ville de Lyon, Gypsy Queen, Cosmic Melody, Tuchka
Bushes belonging to the first and second groups must be trimmed with great care. It is necessary to leave the strong lashes that have grown this year. Flower buds will appear on them next summer. The stems of these plants are cut, leaving a height of 110-120 centimeters.
At the same time, you need to carry out sanitary pruning, removing dried, broken and damaged lashes. These garden flowers do not shed dried leaves on their own, so they need to be cut off with scissors during autumn pruning.
Plants that are included in the third group must be almost completely pruned, leaving shoots 18-20 centimeters in length, which corresponds to 2-3 buds. In the spring, new shoots will begin to grow from them.
You can propagate clematis in the fall by dividing the bush.
Over time, clematis grow and age. Signs of this include slow growth, poor flowering, and susceptibility to disease.
To rejuvenate clematis, they are divided, while receiving additional planting material; from a 5-7 year old bush, you can get up to 10 young clematis. In the southern regions, bushes are divided at the age of 5-6 years, both in spring and autumn.
In central Russia, 7-8 year old bushes are divided, preferably in the spring. It is possible in the fall, but not later than a month and a half before stable frosts (end of August - first ten days of September).
Divisions of very old bushes, over 10 years old, take root very poorly, so a year before dividing the bush, the base must be covered with fertile soil (12-15 cm) so that young roots can form.
Clematis is cut, dug up, preserving the roots as much as possible (they are very sensitive in clematis) and go into the soil to a depth of more than a meter. Gently shake off, rinse with water and divide, you can use a sharp knife.
Large clematis itself tells you how to divide it, but only for experienced clematis growers. Beginners can be guided by a simple rule: each division should have one, or preferably several, buds at the base of the shoot.
When dividing clematis in autumn, I plant the divisions in tall containers, which overwinter underground at above-zero temperatures.
In the spring, you can plant clematis cuttings in the same place, but you need to replace the soil with fresh soil and disinfect it.
How to care for clematis in winter
Provided that all pruning and insulation measures were carried out in a timely manner and correctly, they will not need to be taken care of during the winter period. But in case of a cold and little snow winter, it is necessary to shovel snow onto the bushes.
In warm winters, you need to check whether the bushes are flooded with water. If such a situation arises, you need to put something under the shoots, maybe boards or pieces of foam, which will protect them from falling into the ice.
Along with this, there is a possibility that small rodents - mice - will live under the shelter. If traces of their appearance appear, you need to scatter the poison. These pests can chew off the flower sprouts.
Clematis: planting and care in autumn
Author: Natalya February 19, 2021 Category: Garden plants
When autumn comes, the main task of any gardener is to prepare plants for winter. Lovers of the flowering clematis vine have many questions: what to do with clematis in the fall, that is, what measures need to be taken to prepare it for winter, is it possible to plant clematis in the fall or is it better to do it in the spring, how to plant clematis in the fall, how to care for it after planting, when to replant clematis - in autumn or spring... There are a lot of questions, so we decided to post an article on the site in which you will find answers to your questions.
Recommendations for pruning clematis for the winter for beginners
Before planning fall pruning, it is important to consider the flower group and timing. Beginner gardeners are advised to pay attention to the advice of experienced gardeners:
- First and second year clematis need to be pruned for winter every fall, regardless of their belonging to one group or another.
- In herbaceous clematis (Texas, straight, Manchurian varieties) and semi-shrub flowers (for example, hogweed and whole-leaved), pruning of dead shoots is also planned before winter. Although they can be removed in early spring, withered shoots do not prevent the plant from overwintering.
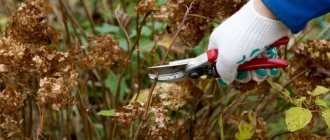
- It is most convenient to do pruning with pruning shears, and it is better to work with gloves. The blades should be sharpened in advance and treated with a weak solution of potassium permanganate or other antiseptic.
- The cut areas are also treated with an antiseptic or sprinkled with charcoal powder and activated carbon.
- Many varieties of clematis are winter-hardy, but in Siberia, the Urals and other regions with cold winters, it is better to remove them from their support and cover them with agrofibre, first sprinkled with sawdust and dry leaves.
- Fallen leaves, petals, and cut branches should be immediately taken as far as possible and burned. Pests often overwinter under the bark, become more active in the spring and can infect the entire garden.
- Removing old bushes from their support can be difficult. Therefore, it is better to tie them to the trellis only on one side - this is quite enough. Also, there is no need to braid the shoots between the trellises - otherwise you will not be able to remove them without injury.