Loading…
Loading…
When Uzambara violets appear on the windowsill, the gardener definitely has a desire to expand the collection with other varieties or get new rosettes from existing ones. Most often, at home, violets are propagated by leaves cut from an adult plant of their choice.
This is the simplest and most common way of growing young rosettes, which will be easy to master even for beginners who have only recently become interested in such an amazing crop as Saintpaulia.
Favorable times for the propagation of violets are the spring and summer months, when the plants have enough warmth and light. But if necessary, for example, if planting violets with leaves is the only way to save a rare variety, then an experienced gardener can carry out his plans even during short daylight hours.
Features of leaf propagation
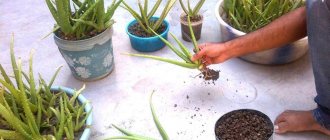
In most cases, this method is used at home. Propagating violets by leaf is the easiest, most successful way. During the period of active growing season, which occurs in spring, in an adult plant from 3 or 2 rows of rosettes, which are located under the peduncle, it is necessary to cut off the leaves of middle age, and its petiole should be from 2 to 5 cm in length. If the cutting is longer, then the excess part must be cut off, leaving an oblique cut. The cut cuttings need to be dried in the fresh air for half an hour.
Propagation of violets by leaf
Propagation of violets by leaf is the simplest, most successful and, therefore, most often used method at home. In the spring, during the active growing season, a middle-aged leaf with a petiole 2 to 5 cm in length is cut from an adult violet from the second or third row of the rosette (under the peduncle). If the cutting is long, cut off the excess with an oblique cut. For some time, about half an hour, the cut cuttings should air dry.
Leaves that are too young or too old are not suitable for propagation, as are the outer ones. Leaves from the center of the rosette are also not suitable, because they have not yet acquired enough strength and nutrients. The leaf should be without defects or damage, juicy, bright green.
You can root the selected leaf or its cuttings both in water and in the substrate. Do not use all kinds of preparations, so-called rooting accelerators, to root violets. They often do harm than good, since violets have a very delicate tissue structure, and the use of chemicals can cause burns and subsequent rotting. To prevent fungal infections, treat the cut of the cutting with crushed activated carbon.
How to root a leaf in water
If you decide to root a violet leaf in water, do it this way. Pour settled water at room temperature to a depth of 1 cm into a glass, preferably a dark one with a narrow neck. You will have to maintain the water level in the glass at 1 cm throughout the entire rooting period (top up as it evaporates).
After the roots appear, you should plant the violet cuttings in a small pot with good drainage and light, loose soil. The seedling needs to be watered frequently so that the substrate does not dry out. You can make a small greenhouse using plastic film. After a month or so, violet babies will appear at the end of the cutting - tiny rosettes of leaves that are ready for planting in normal soil (for Saintpaulias or indoor violets).
How to root a leaf in the ground
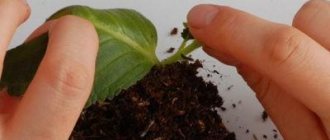
If you decide to root the violet leaf directly in the substrate (it is better to use sphagnum moss cut into pieces), do it this way. Treat the cut, slightly air-dried cuttings with crushed activated carbon and plant at an angle of 45 degrees. to a depth of 1 - 2 cm into the moistened substrate, which fills a plastic cup. There should be a drainage hole and a layer of expanded clay or foam at the bottom of the cup. Place this cup in another one, used as a tray. There you will pour warm, settled water to moisten the substrate.
Cover the composition with the cuttings with a plastic bag with holes made in it. This is done to remove condensation from the mini-greenhouse. If you use a transparent plastic container with a lid, then, if necessary, the container will need to be ventilated and the substrate moistened. Choose a place for the greenhouse that is bright and warm. When small leaves of new rosettes appear from the substrate at the end of the cutting, you will understand that rooting has been successful and the seedling is ready to be transplanted into its own small pot with soil suitable for violets.
The rooting of the violet was successful
If several babies hatch at the rooting site, and this happens when you have chosen a strong cutting, replant the babies one by one. The best option for further transplanting each child is to wait until it acquires two or three leaves, is about 3–5 cm in diameter and gains strength. After this, you can separate the violet baby along with its roots from the mother leaf and plant it in the ground.
This may be interesting: Oxalis (Oxalis) - types and varieties
There are two ways to separate a baby from a cutting:
- Carefully remove the leaf cutting from the pot and shake off the soil from the roots. Using your hands, carefully separate each baby from the cutting and other babies. In this case, all children should be seated in separate small cups 4 cm in diameter.
- Do not remove the leaf cutting from the pot, but cut off the grown baby, which has already formed roots, with a clean blade (sharp stationery knife) and plant it in a separate pot with loose soil, which should contain sphagnum moss and vermiculite. Do not touch the remaining children - let them continue to develop on the mother's cuttings. When they grow up, you will also separate them from the cuttings and plant them in your own pot.
Make sure that when transplanting children, the growth point of the seedling is not buried. In about a month, or maybe more, your children will grow up so much that the size of their rosette will be three times the diameter of their pot. Now you need to transplant the young plants along with a lump of earth into their permanent pots according to all the rules for transplanting adult plants.
What to root in
How to propagate violet leaves at home? First of all, the selected leaf blade or cutting must be rooted. You can use water or substrate for this. In no case should you use various preparations that are designed to accelerate this action to root a plant. As a rule, such products only cause harm, but no benefit, since the tissue structure of violets is too delicate, and the use of any chemicals can cause burns, as well as subsequent rotting. In order to prevent the development of a fungal infection, a cut of a leaf cutting must be treated with crushed activated carbon.
How to propagate violets by leaves, which leaves are suitable for planting
If you decide to increase the number of violets in your house, you will have to learn the basics of growing them. Propagating violet leaves is not difficult at all. However, it is necessary to carefully select planting material. The final result depends on this.
Use the following selection rules:
- We only take a completely healthy plant as a “donor”.
- The lower leaves are not used to obtain planting material. These areas contain old greenery. When rooted, it does not form new shoots for a long time.
- To avoid damaging the center of flower growth, do not cut off the leaves located in the middle of the rosette. A careless movement can ruin the main flower.
- The best rooting material is obtained from the second or third row from the bottom. The leaves quickly take root and form many children.
Sheet plates with damage, scratches and all kinds of stains are not suitable.
Select the most resilient and attractive-looking specimens.
The leaf with the stem is cut with a knife or carefully pinched off as close to the base as possible. A stump left by chance can rot. Try not to damage the plant.
You can purchase material at flower markets or order by mail. However, you cannot be sure of the quality and freshness.
Rooting in water
Speaking about how to propagate violet leaves at home by rooting in water, this action implies compliance with certain rules. First of all, you need to fill the glass with liquid. It is better to choose a dark-colored container with a narrow neck. The water should be at room temperature, settled, and poured to the one centimeter mark. This level must be maintained throughout the rooting of the leaf blade. As the liquid evaporates, you will have to add more.
When the first roots appear, the cutting must be transplanted into a small pot, which should have good drainage and the soil in the container should be loose and light. When propagating violets, the seedling must be watered quite often so that the soil in the pot does not dry out. Using plastic film you can make a small greenhouse. After about a month, violet babies should form at the tip of the cutting, which are small rosettes of leaves that are ready for planting in special soil intended for indoor violets or Saintpaulias.
How to choose a leaf for rooting violets?
The correct choice of leaf directly determines whether propagation will be successful or not. If the leaf is weak and diseased, then it is very difficult to get healthy offspring from it and it will most likely die even before the roots appear.
Important!
For successful rooting of violets, take healthy and strong leaves.
Rooting sheet
The choice of planting material should be based on the following rules:
- For propagation, violets do not take leaves from the bottom row. They are the oldest there. They are weakened enough and are not able to produce full-fledged offspring. It is difficult to get children from them. In many cases, these sheets are contaminated with bacteria or fungal infection.
- Leaves from the center of the rosette are also not suitable for propagation. When cutting, there is a possibility of damaging the growing point of the flower, which may cause the violet to die. These leaves are also quite young and will not produce full-fledged offspring.
- The best option is a cutting of 2-3 rows of rosettes. It should be well developed and quite elastic. No damage, rotting or burns. Its color should be rich and uniform. Pale leaves and those that are unevenly colored are not capable of producing full-fledged offspring.
- When propagating varieties with variegated leaves, follow those leaves with the least contrasting spots. The non-chlorophyll part of the variegated leaf contains a minimum of veins. Therefore, the probability of obtaining offspring from such leaves is minimal.
On a note!!!
The most suitable for propagation is the leaf located directly under the peduncle. The supply of nutrients in such material is maximum.
Rooting in the ground
Leaf blades can be rooted immediately in the substrate. How to prepare soil for violets for rooting? For these purposes, it is best to use sphagnum moss, which is cut into small pieces. The cutting, which has been slightly air-dried, should be treated with activated crushed carbon, after which it is planted in moss at an angle of 45 degrees. The substrate must be moist. The cuttings are planted to a depth of a maximum of 2 cm. And in what pots should violets be planted? Regular plastic cups are suitable for this action.
There must be drainage holes at the bottom of the plastic cup, as well as a layer of foam or expanded clay. After that, it is placed in another, which is used as a pallet. It is necessary to pour water into it in order to moisten the substrate. The liquid should be settled and at room temperature.
After this, the cutting must be covered with plastic film with holes made in it so that condensation is removed from the mini-greenhouse. If a transparent plastic container with a lid is used, it must be ventilated if necessary. In this case, the substrate is moistened. The greenhouse is removed to a bright, warm room. If small leaves of new rosettes form from the substrate at the tip of the cutting, this is a sign that the rooting of the violet was successful. After which the seedling can be transplanted into a small pot with soil, which is designed specifically for growing violets.
If several children are formed at the rooting site at once, then they must be replanted one by one. However, in this case, you should wait until each child has 2-3 leaves. In this case, the diameter of each should be about 5 cm. Then it is separated along with the roots from the mother leaf and planted in the ground.
Selecting soil for rooting
How many people - so many opinions. Everyone chooses the substrate for propagating violets that is closer to them. It could be :
- Composite soil based on leaf humus and peat;
- Peat tablet;
- Sphagnum moss;
- Perlite;
- Hydrogel.
For violets you need to choose the right soil.
In all of the above substrates, Saintpaulia cuttings take root well , but the last three have a significant drawback: after the roots appear, the leaves will have to be replanted in the ground. And this:
- Damage to the root system;
- As a consequence, an increase in time for adaptation and the appearance of young growths;
- The roots grow to the moss. In order not to damage the roots, you have to plant the leaf in the ground along with the moss, and this poses a certain risk of flooding the plant, since the moss takes a very long time to dry out.
Experienced violet breeders prefer :
- Peat tablets;
- Or composite soil.
The advantage when rooting violets is that after the roots appear, the leaf does not need to be replanted anywhere until the young shoots grow up and it’s time to plant them in different cups.
We have already figured out step by step how to plant a leaf directly into the ground. And then you should properly care for the plant.
Important! The time from planting a leaf to the start of Saintpaulia flowering is reduced.
Separation of the baby from the mother's leaf
There are two ways to do this, so let's look at them:
- The leaf cutting must be carefully removed from the pot and the substrate must be shaken off the roots. Carefully separate each child from this cutting with your hands, which are then placed in small individual cups, 4 cm in diameter.
- You don’t have to remove the leaf cutting from the pot, but the grown baby, which has formed roots, is cut off with a clean blade. Next, it is planted in a separate container with loose soil, which must necessarily contain vermiculite and sphagnum moss. There is no need to touch the other children; they must develop independently on the mother plant. When they grow, they are separated from the cuttings in the same way and planted in a pot.
It is necessary to ensure that during transplantation of children the growth point of the seedling is not ruined. After one month, they will grow to such a size that the diameter of the rosette will exceed the diameter of the pot several times. Now the plants are transplanted together with the earthen ball to a permanent place in the pot, following all the rules for transplanting adult violets.
Propagation by a piece of leaf
Propagation of violets by dividing a leaf can also be done using a piece of a leaf plate. To do this, you will need a small, but definitely healthy part of the leaf. Any vein present on the leaf plate can give birth to babies. Quarters, halves, and in some cases even fragments of cuttings that have only one square centimeter of leaf take root very well. In this case, babies appear from all the veins that are in the substrate. They grow much more slowly, so this method is used only in cases where it is not possible to root a healthy whole leaf with a cutting.
How to root a violet using a piece of leaf? To do this, you need to cut out a healthy fragment of the leaf plate so that the piece has a vein, not necessarily a central one, even a side one will do.
How to cut a sheet correctly
During this method of propagating violets by leaf, it is necessary to correctly cut out a fragment of the leaf plate. The main condition is that the sheet is cut with a very sharp and clean blade. You can also use a utility knife for this. If there was rot on the leaf plate, then the blades after the cuts must be disinfected, for example, dipped in a glass with manganese solution or wiped with alcohol. If possible, all cut lines should be made with minimal damage to the veins on the sides.
The entire leaf must be divided into segments, after which each one is planted in a mini-greenhouse.
In this case, each sheet plate can be cut in such a way as to first cut out the central core, and then cut each half of the sheet plate into 3 more parts. You should pay attention to the fact that all fragments have a lateral vein that runs from the central to the edge of the leaf plate.
You can also cut 2-3 strips from the healthy part of the leaf blade, each of which should have 2 veins. There is a high probability that children are formed from each such vein from the leaf.
Propagation of violets using a leaf fragment
If you ordered some unusual variety of violet on the Internet, and the leaves arrived in the mail in a deplorable condition - frozen, rotten, broken in half, the stem rotted or broken off - do not be upset. After all, even a small but healthy part of the leaf is suitable for propagation. Every vein can give you children. Halves, quarters and even fragments of cuttings with one sq. take root well and produce offspring. cm leaf plate. Babies can appear from all the veins found in the substrate. They are, however, smaller and weaker than those children obtained in a different way. And they grow a little slower. Therefore, this method is used only when it is not possible to root a whole healthy leaf with a cutting, when you have no choice, and you are afraid of losing a rare variety that is special to you.
If you only have a rotten leaf, try to cut out the rotten area with a clean blade, touching the healthy part of the leaf. Wash the leaf in a solution of potassium permanganate to stop the rotting process. Now cut out fragments from the healthy part of the leaf blade so that the piece remains with a vein, albeit not a central one, but a lateral one, but this will be one of the conditions for successful rooting. It happens that leaf blades without cuttings, planted in this way, produce babies faster, and their number is greater.
How to cut out sheet fragments correctly
The main thing is to cut the violet leaf with a very clean and sharp blade or stationery knife. If there was rot on the leaf blade, the blade should be disinfected after each cut (for example, dipped in a glass with manganese or wiped with alcohol). All lines should, if possible, be carried out with minimal damage to the lateral veins.
This may be interesting: Diseases and pests of Impatiens
You can divide the entire leaf into segments and plant each segment in a mini-greenhouse. Each segment will produce its own children - rosettes of leaves.
You can cut each leaf so that you first cut out the central vein, and then cut each half of the leaf into three parts. Each piece should have a side vein running from the central vein to the edge of the leaf.
You can cut two or three strips from the healthiest part of the leaf, each with two veins. There is a high probability that babies will appear from each vein of the leaf.
A fragment cut along the veins from the upper third of the leaf also takes root quickly and successfully. In this case, each vein forms a daughter rosette, and their total number is greater.
If the variety has wavy edges, simply trim the excess curls in a circle and then work with the flat surface of the leaf as needed
You can cut the sheet in half. Place the top part of the fragment along the cut into the substrate. The lower half of the leaf can be rooted in turn - you will have more children from one leaf.
If your cutting is rotten, cut it to the healthy part of the leaf so that from the central vein you get a homemade small cutting - a stalk, about 1 cm in length. You will root it in the substrate.
No matter how you cut your leaf, after this operation you need to leave all the fragments in the air alone for 15 - 20 minutes so that the sections are covered with film, and only then you can start planting them in the ground.
- prepare a weak solution of pink potassium permanganate, dip the fragments prepared for planting into it for 20 minutes;
- remove from the solution and thoroughly dip the edges of the cuts into crushed activated carbon;
- Dry for 10 - 15 minutes, and only after that place each fragment in an individual greenhouse.
As a greenhouse for future violets, you can use two 50 ml and one 100 ml cups with different bottom areas. In one, with drainage holes, with foam plastic as drainage and sphagnum moss as a substrate, the fragment will take root; use the second 50 ml glass as a tray, in which there will always be water. (There should be space between the cups for this water). You can cover these cups with a large 100 ml glass to create a mini-greenhouse. Don't forget to ventilate it occasionally to remove excess condensation. To make babies appear faster, we recommend lighting the greenhouse.
Rooting leaf pieces
Whatever method is used to cut the leaf plate, after this operation it is necessary to leave these fragments in the fresh air for 20 minutes. Thus, the sections will be covered with film, after which you can proceed directly to planting them in the substrate.
To do this, you need to prepare a weak manganese solution, into which the fragments prepared for planting are dipped for 20 minutes. After this time, the leaves are removed from the solution and well enveloped with the edges of the sections in crushed activated carbon. After this action, the fragments must be dried for a quarter of an hour, and then each piece must be placed in a separate greenhouse.
Greenhouse for leaf rooting
In order for the propagation of Saintpaulia by leaves to be successful, it is necessary to properly build a greenhouse. To make it you will need a plastic cup with a volume of 100 ml and two 50 ml each. In this case, you should pay attention to the fact that these containers should have different bottom areas. In one cup, with drainage holes, as well as sphagnum moss as a substrate and polystyrene foam as drainage, a piece of leaf will take root. Another 50 ml cup is used as a tray where water will constantly flow. Between containers you need to leave space for liquid.
These cups are covered with another, the volume of which is 100 ml. Thus, a mini-greenhouse is created. This greenhouse must be ventilated periodically to remove all excess condensation.
Reproduction using stepsons
Sometimes, due to the large amount of nitrogen contained in the substrate, small shoots form in the axils of the leaves of the plant. They are the stepsons of the violet, and are also called daughter rosettes. These stepsons only spoil the appearance of the flower, so in most cases they are simply removed.
However, daughter rosettes can also be used for propagation. To do this, you need to wait for several leaves to form on the left stepson. When the daughter rosette looks like a baby, it can be cut off from the mother plant and rooted in a moist and loose substrate. Any container with a lid will do.
When the young rosette begins to grow, it should be transplanted into a large pot according to all the rules. Basically, this process takes no more than 2 months. As a result, a new violet appears.
Violet propagation using root shoots
Sometimes, adult violets, growing, form basal rosettes. Often, these children interfere with the development of the mother’s bush. In such cases, they should be separated and transplanted into separate pots (or simply removed). It is best to carry out the procedure for separating daughter rosettes in the summer - then the mother plant will be able to restore its strength and prepare for the coming of winter.
So, you decided to propagate your violet with the help of children. To do this, proceed as follows:
- Carefully dig out the daughter rosette (baby) from the ground with some sharp, clean object. Try not to damage the mother bush.
- If the baby has few roots but a lot of leaves, remove some of the leaves to make rooting easier.
- Place the baby in a small (5x5) pot with loose substrate, similar in composition to the soil in the mother pot.
- Moisten the soil moderately.
- Cover the pot with a jar or polyethylene to create a microclimate.
- Place the mini-greenhouse in a warm place with plenty of diffused light.
- Ventilate Saintpaulia every day and moisten the soil if necessary.
After a week or two, the shelter can be removed, the baby should strengthen herself and begin an independent life.
Reproduction using peduncles
Considering the step-by-step propagation of violets by leaf, the method of propagation using a peduncle should also be mentioned. As a rule, this method is mainly used by breeders or experienced gardeners.
To do this, you need to select a flower that has already faded or blossomed on the mother plant, which has large stipules. Buds are not used for this. The peduncle should be trimmed with a clean, sharp knife or blade. It must be dried for a quarter of an hour in the open air, and the cut must be treated with crushed activated carbon. It is best to root the peduncle in a greenhouse, as it requires high air humidity.
It is recommended to use a mixture of perlite and sphagnum moss as a substrate. When the peduncle takes root, a young rosette should appear near the young stipule. You should wait a little longer until it develops sufficiently. After this, the young rosette is transplanted into a pot with a substrate designed specifically for Saintpaulias.
Advice from flower growers
Experienced flower growers recommend being patient. Since there are varieties of violets that can form roots for up to 2-3 months. Their leaves are in no hurry to form children, and the reproduction procedure takes up to 6 months. Despite the leaf, it is impossible to stimulate it with fertilizing; from an excess of nutrients, it will begin to actively grow on its own and will not produce offspring.
Violets
For all methods except rooting in water, the cut must be dried for 15-20 minutes before placing the cutting in the substrate. This postulate of experienced flower growers is ignored by many, which leads to failures in the propagation of violets. However, you cannot immediately place the “open wound” of the cutting into the soil. After drying the cut, the sap stops. If the cut is not dried, the cutting will begin to rot.
During rooting, the edge of the leaf often begins to rot. This process cannot be ignored, since decay will subsequently spread to the entire leaf and spread to the cutting. The rotten parts of the leaf must be cut off and treated with activated charcoal or charcoal.