Author: Natalya Category: Garden plants Published: April 26, 2016Republished: February 27, 2019Last edits: January 6, 2021
- How to grow Jerusalem artichoke
- Jerusalem artichoke diseases
- Medicinal properties of Jerusalem artichoke
plant (lat. Helianthus tuberosus) , or tuberiferous sunflower , is a species of herbaceous plants of the Sunflower genus of the Asteraceae family. Jerusalem artichoke is also known to the world as Jerusalem artichoke, bulba, earthen pear or barabola. The word “Jerusalem” comes from the name of a tribe of Indians who lived in the territory of modern Brazil – Tupinamoas. Jerusalem artichoke was naturalized in Chile. The earthen pear came to Europe through England and France in the 16th century, and from the second half of the 19th century it began to be widely grown as a fodder and food crop. In the wild, Jerusalem artichoke can still be found in North America along roads and in vacant lots, and in cultivation it grows all over the world, and in many countries, for example, Japan, Switzerland and Australia, it is considered a weed because it is unpretentious and frost-resistant , productivity and adaptability to any conditions.
Planting and caring for Jerusalem artichoke
- Planting: planting tubers in the ground before winter, 2-3 weeks before frost.
- Lighting: bright sunlight.
- Soil: any neutral or slightly alkaline (6.0-7.5 pH), except for saline soils and very heavy soils.
- Watering: only during periods of prolonged drought. Water consumption is 10-15 liters for each plant.
- Feeding: mineral fertilizers - annually in the spring, organic fertilizers - once every 2-3 years in the fall.
- Reproduction: usually by tubers or their parts with eyes, much less often the seed method is used.
- Pests: slugs, mole crickets, wireworms.
- Diseases: white rot, alternaria or powdery mildew.
Read more about growing Jerusalem artichoke below.
How to propagate Jerusalem artichoke in late autumn
In addition to tuberous propagation, the following method is used to propagate the crop:
- In the fall, when harvesting, large vegetables are sent for storage.
- Medium-sized root crops are planted in the garden bed.
- A few egg-sized pieces are left in the hole.
- Small ones are completely removed.
Next year, Jerusalem artichoke will produce a harvest in the new and old places.
In the fall, you can propagate the crop by dividing the bush (when thinning dense plantings).
Algorithm of actions:
- Water the bush abundantly.
- Select an area of thickets with well-developed central stems.
- They dig in from all sides.
- Removed from the soil with the root ball.
- Trim off excess roots and shoots.
- Divide the bush into several parts.
- Moved to another place.
After planting, the stems are cut off and the plant is hilled up.
Jerusalem artichoke plant - description
The Jerusalem artichoke is distinguished by a powerful root system, on the underground stolons of which edible tubers of yellow, red, purple or white color are formed, reminiscent of ginger root in appearance and cabbage stalk or turnip in taste. The stem of Jerusalem artichoke is pubescent with short villi, strong and straight, reaching a height of 40 to 300 cm, the stem branches at the top. Jerusalem artichoke leaves are petiolate, pubescent, serrate-toothed. The lower leaves are opposite, cordate-ovate, the upper leaves are alternate, lanceolate or oblong-ovate. Basket flowers up to 10 cm in diameter consist of central tubular bisexual yellow flowers and 10-15 sterile false-lingulate marginal golden-yellow flowers. The fruit of the Jerusalem artichoke is an achene, ripening from August to September.
The earthen pear is cultivated on an industrial scale mainly in America, Russia and Asia, but Jerusalem artichoke has been grown in the country for many decades as a food product with medicinal properties. In terms of chemical composition, the plant resembles potatoes, but in nutritional value it surpasses such a valuable vegetable as beets. Its tubers can be consumed raw, as well as fried, boiled and stewed. Even compotes and tea are prepared from them.
Interesting about Jerusalem artichoke
Do you know where this wonderful vegetable came from? Its homeland is Chile, and the earthen pear received its name from a small tribe of Indians. The miracle plant was brought to Europe about 500 years ago. You can also find it in the wild, especially in warm, hot countries.
Believe it or not, in some countries Jerusalem artichoke is considered a weed because it does not require special growing and care conditions. Ground pears are often grown for animal feed, but people are also happy to use the tasty tubers in cooking, because it is very useful.
Jerusalem artichoke fruits are large tubers. The stems are often used to make silage, because under favorable conditions they can grow up to three meters in height! Can you imagine a plantation with such giants?
Planting Jerusalem artichoke in open ground
When to plant Jerusalem artichoke in the ground
Jerusalem artichoke is grown both in open ground and in containers. Jerusalem artichoke is planted in open ground before winter, 2-3 weeks before the onset of persistent cold weather, or in spring, when the soil has warmed up sufficiently. In the fall, whole tubers are planted in the ground, and in the spring, when planting, they can be divided into several parts. Choose a well-lit area for the Jerusalem artichoke, where it will not shade other plants, since its stems reach a height of 3 m. It would be best to plant Jerusalem artichoke along the perimeter of the garden or along the fence.
- Cocklebur: cultivation, properties, types and varieties
Soil for Jerusalem artichoke
The soil for Jerusalem artichoke should be slightly alkaline or neutral - pH within 6.0-7.5 units. The crop is not picky about the composition of the soil; it grows well on any soil, except for very heavy soils and saline soils. For pre-winter planting, the site is prepared in two to three weeks, but even if you decide to plant Jerusalem artichoke in the spring, you still need to prepare the site for it in the fall.
The soil is dug up to the depth of a spade with the addition of compost. If you plant Jerusalem artichokes in the spring, do not break up large clods of earth for the winter. Do this before spring. Phosphorus-potassium fertilizers must be applied during planting.
After which you can plant Jerusalem artichoke
The best predecessors for Jerusalem artichoke are potatoes, cabbage and cucumbers.
How to plant Jerusalem artichoke
At the end of April or beginning of May, select small, neat Jerusalem artichoke tubers for planting, the size of a chicken egg, soak them in a Zircon solution at the rate of 1 ml of the drug per 1 liter of water, and then plant them at a distance of 40 cm from each other in a trench 12-15 deep cm. The row spacing should be 60-70 cm. Mix the soil removed from the furrow with bone meal, then fill the trench with this mixture.
How to plant an earthen pear correctly?
As planting material, you should choose small tubers, the size of an average chicken egg, and always have a regular round or slightly elongated shape. The fact is that the resulting harvest will correspond to the selected root crops - plant shapeless ones, and you will get the same ones by the end of the next growing season. If the site has already been used previously for other crops, choose a place where potatoes, cabbage or cucumbers grew - these are the most suitable plants as predecessors.
If the plot has not been used, you can loosen the compacted soil with a walk-behind tractor, more than once, so that the clods of earth are small enough (it is better to go through the plot with a plow three times).
Loosening the plot for planting
To ensure that the root system of each plant does not interfere with the neighboring one, you need to make fairly wide row spacing, so we form the beds with a gap of about 80 centimeters between them. The height can be arbitrary, up to the pouring of large shafts according to the principle of permaculture, the technique of which was developed by farmer Sepp Holzer. A shallow groove within 10–12 centimeters is prepared along the crest of each row (in spring the depth is made smaller, about 6–10 centimeters). Fertilizer is not required, since compost was previously added to the soil; it contains enough organic matter and mineral elements. It is noteworthy that in arid regions it is better to make the ridges flat and plant Jerusalem artichokes in the middle of their slopes, or almost between the rows.
Immediately before planting, we take the tubers and place them for a short time, literally for a few seconds, in Immunocytophyte, a fairly well-known growth stimulator. The preparation of the product is very simple - just dissolve 1 tablet in 170 milliliters of water. If the Jerusalem artichoke is slightly dry and its skin is wrinkled, be sure to place the planting material in a shallow tray of water, covering the top with damp gauze, for several hours. Only then can you start treating with a growth stimulator. We place the tubers in the soil at intervals of 30–40 centimeters in an already prepared groove and immediately sprinkle them with soil so that a layer of about 12 centimeters forms on top; for this it is better to use a rake.
You should remember a few more subtleties in caring for Jerusalem artichokes. Jerusalem artichoke stems sometimes stretch up to 2 meters, which means they can be easily broken by the wind. To prevent this from happening, choose a place for the plot under the protection of a garden or wall so that it is not blown through. Also, when forming ridges along them, it is advisable to immediately dig slats, between which cords will be stretched in the future as the green mass grows. This will help protect the stems from breaking in the event that a heavy wind suddenly begins, from which the shelter will not protect. In general, the distance between individual plants depends on the length of the growing season - the more sunny days, the stronger the root system will develop and the longer the gap between plantings should be.
Growing Jerusalem artichoke
How to grow Jerusalem artichoke
Caring for Jerusalem artichoke is very simple. During the first time after planting, necessary care measures include loosening the soil and weeding the area to remove weeds. When the seedlings grow to a height of 30 cm, they are hilled up with garden compost and continue to do this for the entire period as needed, and when they grow to 1 m, poles are installed at both ends of the row, a wire in a plastic winding is pulled horizontally between them and tied to Place the plants on top so they don't break in the wind.
When the Jerusalem artichoke begins to set buds, it is better to remove them so that the plant does not waste energy on flowering and fruiting. For the same purpose, plants that are too elongated are shortened to 1.5-2 m.
Watering Jerusalem artichoke
carried out only during periods of prolonged drought - from 10 to 15 liters for each bush. If the summer is rainy, you don’t have to worry about watering the Jerusalem artichoke at all - natural rainfall will be enough for it.
Feeding Jerusalem artichoke
Growing Jerusalem artichoke involves adding fertilizing to the soil. In the spring, when loosening the site, fertilizer granules containing nitrogen and potassium are added to the soil. During the budding period, it is better to use fertilizers in liquid form. In mid-summer, for example, it is a good idea to fertilize Jerusalem artichoke with a solution of seaweed or an infusion of green manure. Mineral fertilizers are applied to the soil annually, and organic fertilizers – once every 2-3 years.
Reproduction of Jerusalem artichoke
Most often, Jerusalem artichoke is propagated vegetatively - by tubers, their parts or eyes, and we told you about this method. But Jerusalem artichoke can also be grown from seeds, however, generative propagation of Jerusalem artichoke is too painstaking and thankless work that requires special knowledge, and let breeders do this. In addition, Jerusalem artichoke from seeds will take much longer than Jerusalem artichoke from tubers.
Jerusalem artichoke at home
Readers ask whether Jerusalem artichoke can be grown at home. It can be planted in large containers or boxes with drainage. Caring for Jerusalem artichoke in a container is no different from caring for it in open ground; the only difference is regular watering of the soil.
We grow Jerusalem artichoke correctly
How to grow Jerusalem artichoke correctly in our recommendations!
If anyone has not yet heard of Jerusalem artichoke (earthen pear), it is a universal food and ornamental plant. Its yellow inflorescences - baskets bloom in September - October. Therefore, in late autumn it is an excellent honey plant.
Jerusalem artichoke is a tall perennial, somewhat similar to sunflower. Unlike sunflower, it has underground shoots, on which potato-type tubers are formed. This plant can grow in one place for up to 40 years. But there will be a good harvest only in the first three to four years.
The tubers freeze in winter and are stored in the ground; in the spring you can eat them, the taste will be even better. Reproduction is vegetative, since the seeds have time to ripen only in the south. What is the plant useful for?
Jerusalem artichoke has a sweetish, delicate, pleasant taste. Tubers contain little fiber and do not accumulate nitrates and harmful substances. The culture is not affected by late blight and the Colorado potato beetle.
Insulin, macro- and microelements, vitamins C and B (twice more than in potatoes) and iron salts (three times more than in potatoes) are contained in inconspicuous-looking tubers. The medicinal properties of Jerusalem artichoke tubers have a positive effect on the regulation of metabolism in obesity, atherosclerosis, and gout. Preparations from
Jerusalem artichoke is used in the treatment of the nervous system, urolithiasis, and for the prevention of heart attack.
Mature plants
Jerusalem artichoke drowns out weeds: wheatgrass, sow thistle, nettle. You can place plants along the fence, as well as along the edges of the site - they can protect the plantings of heat-loving squash, zucchini and cucumbers from the wind.
Planting Jerusalem artichoke
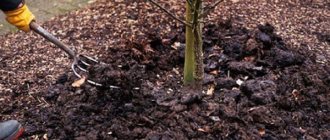
In the fall, dig up the soil using a spade and add compost or humus up to 10 grams. per sq. meter. And also 40 grams of phosphorus and 30 grams of potassium fertilizers (per square meter). In the spring, loosen the soil to a depth of 20 cm and sprinkle 1 tablespoon of nitrogen fertilizer per square meter. meter.
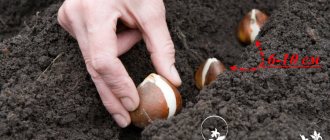
Plant tubers in early spring or autumn, at the end of September. Soak the tubers with intact eyes in a solution of microelements; keep the cut ones in a solution of strong potassium permanganate for about fifteen minutes.
Place the planting material in holes up to 18 cm deep. Place the holes 50 cm apart and the rows 60–70 cm apart.
The sprouts will appear in two weeks and will slowly begin to grow. Seedlings are not afraid of frosts down to 4 degrees Celsius. The plant is drought-resistant and light-loving, moisture-loving, but does not like low places where water stagnates in the spring.
Caring for Jerusalem artichoke
When shoots appear, remove all weeds and last year's growth
Jerusalem artichoke. Periodically loosen the rows. When the plant height is 20 cm, carry out the first hilling; when the plant height is 50 cm, carry out the second hilling.
Secure the stems to a wire trellis or stakes. Water deeply once every two weeks, then loosen the soil shallowly to remove soil crust.
You can feed by alternating mineral fertilizers with organic ones, also once every two weeks. Organic fertilizers - infusion of fermented grass, a solution of mullein or chicken manure with water in a ratio of 1:15.
Intensive growth of tubers begins in September and continues until November
The tubers are not buried deep, so loosen them carefully so as not to damage them
Harvest
Start cleaning in early October. You can select the largest tubers, wash them, dry them and store them in boxes with layers of sphagnum moss. Or in boxes with wet sand at zero temperature.
Undug tubers will meanwhile grow and accumulate nutrients (when the tops freeze). It's not scary if they go under the snow. In the spring, dig them up and plant the strongest and healthiest ones again.
You can cut the tubers into slices, dry them and eat them with milk, coffee, tea, or add to compote.
If you want to plant another crop in place of Jerusalem artichoke, it is better to choose everything, even small tubers, and remove the shoots during the year
Jerusalem artichoke.
Another secret
To prevent the plant's roots from growing wider, dig old slate around the perimeter of the hole to a depth of 50 cm.
What else interesting to read on the site:
Planting cherries.
Sidewalk paths on the site
Planning a summer cottage
Proper care of tomato seedlings
Advantages of greenhouses made of cellular polycarbonate
How to install a sewer system.
Pests and diseases of Jerusalem artichoke
Jerusalem artichoke diseases
With almost absolute resistance to disease, Jerusalem artichoke can sometimes be affected by white rot, Alternaria blight or powdery mildew.
White rot, or sclerotinia, forms a moldy felt coating on the stems of the plant, causing them to become sick and eventually become covered from the inside with black growths. Infection occurs through the soil. Temperature changes with high air humidity contribute to the development of the disease. Sick plants should be immediately removed from the site and burned.
Alternaria blight is a widespread disease that affects all above-ground parts of the plant. It can be diagnosed by dark brown or lighter spots with a yellowish border on the leaves. As the disease progresses, the spots grow between the veins of the leaf blade, and the petioles dry out along with the leaves. The most effective method of combating the disease is to treat plants with fungicides at temperatures above 18 ºC. Sometimes one session is enough, but it is better to carry out two sprayings with an interval of 10-12 days.
- Use of mustard against pests
Powdery mildew appears on Jerusalem artichoke in the second half of the growing season as a loose white coating on the upper side of the leaves. Over time, the plaque becomes pinkish or turns brown, and the affected leaves become brittle and brittle. Hot weather with sharp fluctuations in humidity and air temperature, as well as excess nitrogen, contributes to the development of the disease. Good results are obtained by treating the leaves of Jerusalem artichoke with fungicides - preparations such as Topaz, Bayleton, Quadris, Skor, Tilt, Zato, Topsin and the like.
Jerusalem artichoke pests
Jerusalem artichokes are damaged by slugs, mole crickets living in the soil, as well as the larvae of some insects. To protect plants from slugs, special anti-slug granules are laid out around the site. If you know that there are pests on the site such as cutworms, chafers or mole crickets, before planting the Jerusalem artichoke in the ground for digging, add Diazonon or Foxim.
When to plant Jerusalem artichoke - autumn or spring?
As stated earlier, it is usually recommended to plant the ground pear in an open area in the spring. However, complete thawing of the soil in some regions occurs quite late. As a result, by autumn the root crops will be either too small or unripe, which will greatly affect the taste. And Jerusalem artichoke takes about 120 days before it can be harvested. Therefore, if in your area spring begins quite late, and warm days finally give way to night frosts only towards the end of April, it is better to plant tubers in the fall.
Planting an earthen pear
The optimal period for this is from early to mid-October, that is, as close to frost as possible. If the cold hits the Jerusalem artichoke, it will not harm it; in the spring, rooting will immediately enter the active phase as soon as the soil warms up. One of the advantages of planting in the fall is that practically no watering is required, although after the tubers have hit the ground, it is advisable to moisten the beds. If frosts occur only after a week, the first roots will begin to go deep into the soil, which will ensure the plant more quickly adapts to the existing growing conditions. The main thing is that shoots do not appear before the cold weather, which is why a time is chosen that is as close as possible to a stable decrease in temperature.
Another advantage of such planting dates is that field mice no longer dig tunnels in the frozen ground, and moles go into hibernation, which makes it more likely that the tubers will overwinter without loss. The only thing that can still harm Jerusalem artichoke is disease (pests during this period have already found shelter from frost). We will talk about the fight against diseases separately. Ground pear tubers placed in the soil can withstand severe frosts down to -30 degrees without harm, unlike shoots that die already at -5.
Cleaning and storing Jerusalem artichoke
Jerusalem artichoke tubers ripen for at least 120 days. It makes no sense to harvest them ahead of schedule, since tubers dug up too early will no longer ripen to the required quality. They dig up Jerusalem artichokes in the spring, before the ground warms up, or in the fall, as soon as the soil begins to freeze. Jerusalem artichoke tubers can easily tolerate frosts down to -40 ºC in the soil if you cover the area with dry soil or snow for the winter. It is best to dig up in the fall as many tubers as you can eat during the winter, and the rest can be dug up in the spring - during the period of vitamin deficiency they will be very useful.
The main thing is not to forget to remove them before the weather warms up, otherwise the tubers will sprout and Jerusalem artichoke will turn from a healthy and tasty vegetable into a weed.
Jerusalem artichoke is stored in the same way as root vegetables are stored - in a box with sand. Before storing Jerusalem artichoke in the cellar, the dug up tubers are first washed and dried well. If you don’t have a cellar, place the box on a loggia or insulated balcony. A small amount of tubers can be kept in the vegetable drawer of the refrigerator.
Jerusalem artichoke treatment and recipes
In folk medicine, there are a huge number of recipes for treating Jerusalem artichoke. For example, a decoction of Jerusalem artichoke leaves is used in the form of lotions as a rejuvenating effect, increasing skin elasticity and improving the regeneration of epidermal cells.
Jerusalem artichoke leaves are collected before flowering; they contain inulin and tannins, which promote cell regeneration and normalize cellular “respiration” of the skin.
The collected leaves are brewed with boiling water and allowed to brew for an hour, or the juice is extracted, the concentration of nutrients in which is several times higher than the concentration in decoctions. Jerusalem artichoke juice is used to treat ulcers, non-allergic dermatitis, erythema and other skin diseases.
For diabetes mellitus, Jerusalem artichoke is consumed fresh and in the form of salads. Root vegetables are washed well, chopped, seasoned with vegetable or olive oil and consumed as a supplement to the diet; if desired, greens, white cabbage and other vegetables can be added to Jerusalem artichoke. For diabetes, it is recommended to consume Jerusalem artichoke raw and eat 60 grams of root vegetables daily on an empty stomach.
To improve the functioning of the pancreas, in case of vegetative-vascular dystonia, it is useful to use a decoction of Jerusalem artichoke. To do this, 200 grams of peeled and crushed tubers need to be poured with a liter of purified water and brought to a boil until the fruit has a soft consistency. The resulting decoction should steep and cool; it should be taken in a glass on an empty stomach, once a day.
For immunodeficiency, use a vitamin infusion from the leaves, flowers and stems of Jerusalem artichoke. During the flowering of the plant, cut off the required number of upper leaves, flowers and stems, chop and pour boiling water, leave for two hours and drink a glass a day for two weeks, then take a break and resume the procedure after a month.
To ensure that the required amount of Jerusalem artichoke leaves and flowers is always on hand, they are dried and stored in fabric bags until needed. If the taste of the decoction of Jerusalem artichoke leaves is bitter, you can add raspberry jam, maple syrup, honey, vanilla, cinnamon or herbal tea.
Jerusalem artichoke tuber juice will help with digestive disorders; to do this, grind the root vegetable with a blender and squeeze out the juice, you can pass the tubers through a juicer, or you can grate them, the effect is the same. Take the resulting juice one tablespoon on an empty stomach; store in the refrigerator for up to three days.
Jerusalem artichoke is without a doubt not only a useful plant, but also an excellent alternative to garden flowers.
Jerusalem artichoke varieties
The main task of breeders today is to develop varieties of Jerusalem artichoke with the most compact placement of tubers in the soil, since the root system with the nodules formed on it grows both in breadth and depth. And in this matter, scientists have undoubted success. Another priority in breeding work is to increase the thickness of the stem for forage plant varieties. Well, the third important task is to develop zoned varieties of Jerusalem artichoke.
The varieties of Jerusalem artichoke existing today are divided into fodder and tuber varieties. Forage varieties produce a harvest of green mass, but produce few tubers. It is these varieties that are grown on an industrial scale. In turn, both tuberous and fodder varieties are divided into early-ripening and late-ripening according to their ripening time. We offer you an introduction to some varieties of Jerusalem artichoke, among which you can choose one for yourself.
- Interest - productive, intensive in growth, demanding of moisture, heat-resistant and winter-hardy late-ripening variety with powerful erect stems of medium branching, large, rough dark green leaves and smooth white tubers with deep eyes. Recommended for industrial cultivation in warm areas.
- Leningradsky is a late-ripening, high-yielding bush-shaped variety with dark green stems, oval green leaves and medium-sized elongated white tubers, which are perfectly stored in the ground until spring. This variety is suitable for cultivation in the northwestern region.
- Volzhsky 2 is a drought-resistant and winter-hardy tall plant with a compact root system, a rounded stem, slightly pubescent green leaves and white pear-shaped tubers with light purple fragments.
- Skorospelka is an undemanding frost-resistant early-ripening variety with a compact root system, heart-shaped leaves with large teeth cut along the edges, a well-branched stem and smooth, rounded white tubers.
- Pasko is a high-yielding late-ripening tuberous bushy and tall variety with weakly branching stems, large leaves and white round tubers weighing up to 80 g.
- Solnechny is a high-yielding, late-ripening tuberous variety suitable for growing in any area. Plants of this variety have moderate bushiness, highly branched stems, large leaves and elongated elliptical-shaped white tubers of medium size weighing up to 60 g.
- Nakhodka is a productive late-ripening variety with a weakly branched stem, large, asymmetrically arranged leaves, a compact root system and pear-shaped white tubers with pink veins around the eyes. Designed for cultivation in the southern regions.
In addition to those described, the following varieties of Jerusalem artichoke are popular: White, Patat, Veretenovidny, Vadim, Krasny, Omsky White and North Caucasian.
Ideal conditions for Jerusalem artichoke
This plant is commonly known as ground pear.
Some people know it as Jerusalem artichoke. However, few people know that this is a sunflower, only a tuberous one. Moreover, there are hybrids of Jerusalem artichoke and sunflower, which have a large characteristic inflorescence with yellow petals at the top of the stem, although its diameter does not exceed 6-7 centimeters. Ground pear
But hybrids, despite their highest productivity, have certain disadvantages, so it is better to grow the original form, that is, the earthen pear itself. Regardless of the latitude of your region, you should choose a sunny, open place for planting. You can sit next to the fence, this will provide a few extra degrees of heating in the middle or cold zone. It should be remembered that Jerusalem artichoke can grow from unharvested tubers, like a weed, throwing out several shoots at once from one root thickening. Therefore, it is recommended that the plot in which you are planning to plant this plant be limited by a border immersed in the ground by 0.4-0.5 meters.
In the southern regions, experts recommend planting Jerusalem artichokes in the fall, and in the north - in the spring. However, one should take into account the fact that early spring frosts in the middle zone can greatly shorten the growing season. Therefore, experienced gardeners still prefer to plant before winter, so that seedlings begin earlier in the spring. This option does not exclude rooting at the beginning of the warm period. At the same time, it is very important to properly prepare the soil, which we will talk about later.
Properties of Jerusalem artichoke - harm and benefit
Medicinal properties of Jerusalem artichoke
When studying the composition of Jerusalem artichoke, scientists were surprised by the variety of minerals and vitamins it contains. In terms of the amount of iron in tubers, for example, the plant significantly exceeds such useful plants as carrots, turnips and beets, and 1 kg of Jerusalem artichoke contains 60-70 mg of carotene. What is included in the composition of Jerusalem artichoke? Potassium and calcium, chromium and fluorine, magnesium and manganese, silicon and sodium, vitamins B1, B2, B6, B7, C, PP, as well as fiber, pectin, fats, proteins, organic acids, natural analogue of insulin inulin and amino acids arginine, valine, leicine and lysine.
Jerusalem artichoke helps with urolithiasis, gout, salt deposits, obesity and anemia. A decoction of it lowers sugar levels and normalizes the functioning of the pancreas. Eating Jerusalem artichoke tubers is simply necessary for residents of large cities with unfavorable environmental conditions, since due to the fiber and inulin they contain, it removes heavy metal salts, radionuclides, toxins and excess cholesterol from the body.
Jerusalem artichoke is recommended for consumption:
- for the prevention of diabetes;
- for diseases of the gastrointestinal tract;
- to lower blood pressure;
- to remove toxins from the body;
- to increase the level of hemoglobin in the blood;
- to protect against viral infections.
In terms of carbohydrate content, Jerusalem artichoke is superior to sugar cane and beets. Jerusalem artichoke tubers are most useful immediately after harvesting, since during storage, as a result of hydrolysis, part of the inulin is converted into fructose. However, there is nothing harmful in this, especially for diabetics, for whom fructose replaces sugar.
Jerusalem artichoke can relieve nausea, stop vomiting, neutralize high acidity, and eliminate the bitter taste in the mouth. It is used during pregnancy to enrich the body of the mother and fetus with useful substances. Eating Jerusalem artichoke tubers in parallel with drug treatment of diseases promotes faster recovery, including by increasing immunity and by removing toxins from the body.
Drinking Jerusalem artichoke juice reduces the increased acidity of gastric juice, eliminates headaches due to high blood pressure, promotes the healing of wounds and ulcers, and alleviates the condition of polyarthritis, diseases of the stomach and duodenum. Drink it 50 g three times a day 15 minutes before meals.
- Tomatoes in a greenhouse: planting, care, difficulties
Jerusalem artichoke is also in demand in cosmetology: it can be used to relieve inflammation or irritation of the skin, smooth out wrinkles, and cleanse pores. To eliminate sagging skin, you need to wipe your face and neck with Jerusalem artichoke juice at night. Oily skin is treated with a mask of grated Jerusalem artichoke with the addition of half a teaspoon of honey. Dry skin can be soaked by adding half a teaspoon of olive oil to the described face mask composition. The mask is washed off after 20 minutes with warm green tea, and after another 10 minutes, wipe the skin with a piece of ice. Cosmetic course – 20 procedures.
Jerusalem artichoke - contraindications
Jerusalem artichoke has no contraindications, unless you have an individual intolerance to this product. Eating Jerusalem artichoke raw can cause flatulence, but after a while the intestines will get used to it and you will stop experiencing discomfort. If addiction does not occur, you can eat Jerusalem artichoke stewed or boiled. And, of course, do not try to eat all the tubers at once - any product can cause discomfort if you overeat.
The best varieties for growing in the country
Until recently, I believed that Jerusalem artichoke has no varieties, and it grows the same for everyone. But after I saw a purple miracle among my friends, I began to collect information about this miracle of nature, and learned that there are many varieties, and every year breeders add something new to the huge list.
The following varieties are well grown in our country:
- Sunny (late high-yielding variety, tubers grow a little more than 50 grams);
- Early ripening (early ripening of the crop, large white tubers);
- Nakhodka (late variety, recommended for cultivation only in warm regions);
- Leningradskiy (medium-yielding variety, the tubers are remarkably stored all winter in the soil, without requiring digging);
- Interest (an extremely undemanding variety in terms of conditions, the tubers grow large and tasty);
- Pasko (late variety with large tubers).
You can try to grow at least one of these varieties, I can guarantee that it will certainly take root on your site.
Inulin in Jerusalem artichoke
Companies producing dietary supplements produce preparations containing inulin, usually based on Jerusalem artichoke. But not only this plant can provide the necessary polysaccharide. Chicory contains the same amount, the same 14%, leek up to 10%, garlic up to 16%, dandelion up to 12%, elecampane roots up to 44%.
It can be argued that elecampane roots per hectare can be collected for one cup of drink. True, although not entirely true. Inulin is found in many vegetables and herbs. People are just used to eating buns, cookies, and meat. And you need to have a diet based on plant products. Instead of tea and coffee, drink a chicory drink and a barley drink, instead of rice, eat barley porridge for lunch, instead of a piece of sieve, a piece of rye. Bean blades are good at reducing glucose levels; you just need to brew tea from them.
That is, it is easier to grow in the garden and use all year round. Or buy it at the grocery store. And for autumn you can arrange variety, have a dozen bushes. Until you get tired of washing!
Some useful tips from experienced gardeners on growing earthen pears
Jerusalem artichoke is unpretentious and easily grows in any soil, provided there is sufficient permeability to oxygen and moisture. The lack of humus in the soil can be compensated for by proper fertilizing. But if you plant tubers in dense, poorly aerated black soil, even an abundance of food will not help you get a good harvest.
Tubers are planted in the ground in the spring, when the soil warms up to 16–18 °C. However, before planting Jerusalem artichoke, it is important to prepare the beds. They have been doing this since autumn:
- digging up the area reserved for culture to the depth of a bayonet;
- choosing rhizomes of perennial weeds;
- adding fertilizers to the soil, for example, manure, which will rot over the winter and become a good feed for Jerusalem artichoke.
It is not necessary to break the clods and level the ridges, since the main work will be done in the spring. The planting date for Jerusalem artichoke in most regions is the second half of April or the first days of May.
Before planting Jerusalem artichoke in the spring, you need to select healthy large tubers without signs of disease or pest damage. The better the quality of the planting material, the sooner it will produce strong shoots, and in the fall the summer resident will be able to reap a healthy harvest. If there are not many large, even tubers, the existing ones can be cut so that each part has a clearly visible healthy eye. In this case, the cut areas are dried and sprinkled with crushed coal.
Before planting, the beds are dug up again, loosened and leveled, marking rows at least 70 cm wide. Planting material is embedded to a depth of 15 cm. In this case, tubers should fall into the holes or trenches at a distance of 30 to 50 cm.
In warm weather, while maintaining soil moisture, young green stems will soon rise above the beds, revealing heart-shaped, pointed leaves.
In the first half of summer, when plants are actively growing green mass, nitrogen-dominated compounds are applied to them, and closer to July they switch to potassium-phosphorus fertilizers. Watering is regulated depending on the weather, air temperature and condition of the bushes:
- With excess moisture and frequent planting, Jerusalem artichoke can be affected by various types of rot and slugs.
- Lack of water leads to inhibition of metabolic processes, slower growth, and the formation of small, highly branched tubers. During drought, the plant's root system is more likely to suffer from soil pests.
Jerusalem artichoke plants that have grown to a meter in height, in the photo, should be tied to strong supports. To do this, the plantings are divided into bushes, fenced with wire and attached to vertical posts. You can also use ready-made supports for fruit bushes.
Repeated hilling in mid-summer will help further increase the yield. Another important measure that allows all the plant’s forces to concentrate on the formation of tubers is cutting off the buds. Flowering and subsequent ripening of Jerusalem artichoke seeds inhibit the growth of tubers, so the buds can be painlessly removed or the bushes can be completely trimmed to a height of 1.5 meters.
Until recently, I believed that Jerusalem artichoke has no varieties, and it grows the same for everyone. But after I saw a purple miracle among my friends, I began to collect information about this miracle of nature, and learned that there are many varieties, and every year breeders add something new to the huge list.
We suggest you read: How to get rid of aphids in a greenhouse
The following varieties are well grown in our country:
- Sunny (late high-yielding variety, tubers grow a little more than 50 grams);
- Early ripening (early ripening of the crop, large white tubers);
- Nakhodka (late variety, recommended for cultivation only in warm regions);
- Leningradskiy (medium-yielding variety, the tubers are remarkably stored all winter in the soil, without requiring digging);
- Interest (an extremely undemanding variety in terms of conditions, the tubers grow large and tasty);
- Pasko (late variety with large tubers).
Jerusalem artichoke blooms beautifully and may well decorate your garden
Food use is not the only advantage of Jerusalem artichoke. Its medicinal properties are the reason why summer residents plant plants on their plots that can serve as a hedge almost three meters high, woven from thick stems that become lignified by the end of summer. Sunny flowers on the tops, as a decoration for a landscape-style garden, are just a visual bonus. The main value is the healing effect on the human body.
According to the combination of chemical elements, Jerusalem artichoke tubers are close to potatoes, and in a frozen state they taste like sweet potatoes. It contains vitamin C and carotene, mineral salts, fructose, vitamin B1, which is responsible for the performance of the human heart and the balance of the nervous system.
In addition, Jerusalem artichoke used in food, actively helping to cleanse body cells, is able to remove heavy metal salts, toxins, and chemical compounds from the body that fill the air of big cities. Anemia, heart and vascular diseases, obesity - for these diseases, experts recommend the inclusion of Jerusalem artichoke, which contains potassium, calcium, magnesium and iron, in the daily diet.
Jerusalem artichoke makes wonderful pancakes
Those who, due to necessity, need to monitor their sugar levels during diabetes or systematically take care of their health should plant Jerusalem artichokes in the garden part of the hacienda, because. Growing this care-free plant in your dacha is one of the easiest vegetable growing processes.
You should not plant Jerusalem artichoke where low-growing crops grow, or in the center of the garden plot. A tall plant will:
- shade smaller “neighbors”
- take nutrients from nearby growing vegetables
- obscure the perspective view into the depths of the site
- suffer without the protection of a fence or other enclosing structure (its stems tend to lie down and break under gusts of wind)
The best place for placing tall Jerusalem artichoke, growing and caring for it is along the fences enclosing the area on the leeward side. In this case:
- the monotony of the fence cloth is brightened up by embossed green curtains with bright colors
- the plant will not interfere with the growth of other “residents” of the garden
- Next to the fence posts, it is easy to provide supports for tying up tall Jerusalem artichoke stems so that they do not break.
Jerusalem artichoke is easy to grow, compared to other crops with virtually no worries! Although, there are still requirements if you want to get not just a harvest of tubers, but a very good harvest.
The place for Jerusalem artichoke is sufficiently illuminated, it can be in light partial shade, it also grows next to fruit trees, it is not shy about either apple or plum trees, the main thing is that the soil is sufficiently loose and drained. Grows well on peat soil or light loam. Acidity prefers a close to neutral or slightly acidic pH of 6.5-7. Jerusalem artichoke does not tolerate heavy clay soils!
Landing
Jerusalem artichokes are planted in early spring - from the end of April, or in early May or autumn. Plant in rows at a distance of 60-70 cm, in increments of 40-50 cm. Place bamboo or wooden sticks for garter at a distance of 10-15 cm from the tubers.
If the soil is poor, or crops that consume a lot of food were previously grown on the site, then the land needs to be improved. For example, for 1 sq. m of soil, add 7-8 kg of humus, to which add 20 g of ammonium nitrate, 20 g of potassium sulfate, 30-40 g of superphosphate and 400 g of dolomite flour. Or in each hole 1 tablespoon of ash, 1 teaspoon of nitrophoska and 1 teaspoon of superphosphate.
Take small tubers for planting, about 5-6 cm long. You can cut one large tuber into pieces (sprinkle the cuts with charcoal), but each piece must have at least three eyes. They are planted at a depth depending on the season: in spring 8-9 cm, in autumn 12-15 cm.
Next to Jerusalem artichoke, legumes (beans, peas), cabbage, radishes, turnips, onions (all types), eggplants, and berry bushes - currants, gooseberries - are excellent neighbors.
Do not plant parsley and celery next to Jerusalem artichokes; it is not advisable to plant potatoes and tomatoes next to them.
After Jerusalem artichoke, it is best to plant wild strawberries or strawberries in this place. Although after harvesting, some of the tubers still remain in the soil and germinate, therefore, with small crops, Jerusalem artichoke is grown outside of crop rotation. Still, it is better not to grow it in one place for more than 5 years.
Jerusalem artichoke has few pests and, compared to vegetables, few diseases. Most of all, it can suffer from powdery mildew. If it gets into your garden, rest assured that Jerusalem artichoke will not bypass it. Control measures, as on other plants, are spraying with fungicides. Remove particularly affected leaves mercilessly.
Growing problems can also arise in the garden due to the fault of Jerusalem artichoke - on favorable soils (especially peat or light loams), it grows quite aggressively and tends to overwhelm other crops. Therefore, do not plant Jerusalem artichoke in an area where you would like to grow berries or vegetables in the future, or control its growth by digging out shoots that make their way beyond the intended area.
Jerusalem artichoke can be grown at home from seeds or eyes. But the plant is then necessarily planted in a summer cottage. The seed planting method is very complex. It is used mainly by experienced breeders, as this requires certain skills.
Tasting Jerusalem artichoke
It took a long time to wash - apparently, the Creator did not expect that anyone would come up with such an idea. You can’t peel them like potatoes either, they are too clumsy, you can throw everything into waste. I struggled with the toothbrush and toothpicks, but I was able to prepare the salad. I realized that I was wasting my time.
Then more cooking soap. The result was something bluish, watery and tasteless. This taste is quite remotely what fodder potatoes have when they are young, when they have not yet gained starch. Everything is so sticky and uncertain. The family refused such food.
But two bushes remained to wait for spring. And the boss said that in the fall it’s better not to eat, but in the spring, when the snow melts and the earth warms up, that you can sow radishes, you can dig up Jerusalem artichoke tubers. Then they are very tasty, crispy, slightly bitter, not sharply reminiscent of radishes.
We tried it in the spring and didn’t like it. But there was still one bush left in the garden.
I grew Jerusalem artichoke in those years when no one knew about its benefits. They didn’t know about inulin. Now I think that you can force yourself to eat such food only if you know its great benefits.
Then, when we moved to the village, our animals, who were immediately adopted, were brought the last bush from the garden, everything was brought - both tops and tubers. The piglets ate the underground part willingly, chewed the leaves, and discarded the stems. We drew conclusions and planted two bushes in the new garden. For several years, no more than two plants were grown; these were “candy” for pigs at the end of October.
How to replant Jerusalem artichoke in summer
In the summer, the Jerusalem artichoke blooms, the old tubers begin to grow and release juices to the young shoots. The new ones have not yet formed or matured and cannot grow on their own, so it is better to replant in the fall or spring. But if such a need arises: for example, you need to change a fence or build something in the place where your Jerusalem artichoke has grown, you will have to experiment.
Replanting Jerusalem artichokes in summer is difficult and undesirable: it is not enough to just transfer the tubers; you need to preserve the roots and some of the shoots
It is better not to divide perennial plantings of Jerusalem artichoke into individual plants with one stem, but to replant them with agglomerates - rhizomes fused together with several stems.
- The day before transplanting, water the Jerusalem artichoke well.
- Select a section of Jerusalem artichoke thickets with a diameter of 30–50 cm; the shoots that you would like to preserve should be located in the center.
- Cut off all shoots, leaving stumps with leaves and shoots 30–50 cm high.
- Dig with a shovel from all sides.
- Lift it from the ground and carefully move it along with the lump to a new place.
The outermost tubers and stolons, of course, will break off and crumble, so some shoots will die. But the roots and tubers in the center of the massif will remain intact and can take root.
Young seedlings with 1–2 stems, located at a distance from each other, are much easier to transplant:
- Dig up a seedling with a lump of earth and plant it in the right place. Make sure that the tuber that gives strength to the sprout does not fall off.
- Shorten the above-ground part by half so that the leaves do not evaporate a lot of moisture.
- Until new leaves and shoots appear, take care of the transplanted plants, water and weed out the weeds.
In the fall of this year, it is better not to touch the tubers, since due to replanting the plants lag behind in development. Postpone harvest until next year.
Video: transplanting Jerusalem artichoke seedlings and further care
Planting Jerusalem artichokes is as easy as planting potatoes. But this is a tall crop, so when choosing a location, take into account the future planting height. The best times are early spring and autumn (after flowering ends). Planting material is tubers that can be cut into pieces. if they are too large. In the summer, when the growing season is underway, new buds are formed; it is not advisable to replant the Jerusalem artichoke.
Timing and technology of planting Jerusalem artichoke
Traditionally, Jerusalem artichokes are planted in early spring and autumn. Botanical seeds (from flowers) do not have time to ripen in most of Russia. Therefore, the crop is propagated by tubers or their parts: large ones can be cut, and small ones can be laid out 2-3 per hole.
Jerusalem artichoke is planted like potatoes: in holes or furrows
Jerusalem artichoke tubers have a very thin cork layer, and according to some scientists, there is none at all. This means that the tubers are poorly protected from drying out and mechanical damage. Therefore, the best planting option is to dig up the tubers and plant them immediately. If you had to buy seeds, and during transportation and storage they became flabby, then the problem can be easily eliminated by soaking in plain water for 3-4 hours.
It is better to plant Jerusalem artichoke tubers immediately after digging them out of the ground, since they dry out very quickly
Planting Jerusalem artichoke in spring
In spring, plant an earthen pear as soon as the ground thaws and dries or later, at the same time as the potatoes. Several planting schemes are offered: 70x70 cm, 40x70 cm. But if the earthen pear is not needed on an industrial scale, for sale or for livestock feed, but is planted for personal consumption, then it is usually planted in one row with a distance between holes of 50 cm. Planting depth - 8–10 cm.
You can fertilize the site in advance by adding 1-2 buckets of humus and 300 g of wood ash for each square meter of the bed. If there is little organic matter and you don’t want to spend it in large quantities on an unpretentious crop, then add a couple of handfuls of humus and 1 tbsp into the hole. l. ash. Organomineral mixtures for potatoes, for example, Gumi-Omi, are also suitable.
Video: how professionals plant Jerusalem artichokes
The advantage of planting in early spring is that the soil is still moist and there is no need to water the holes. The tubers will have enough moisture to grow roots, and then they will begin to obtain water for themselves. Mark the holes with pegs so as not to trample the seedlings and in case of dry weather, still water them.
To prevent Jerusalem artichoke from growing and taking over the surrounding area, dig a trench along the plantings and lay roofing material or film in it.
Autumn planting of Jerusalem artichoke
Planting in the fall is different in that the seed tubers are not cut. They are planted a little deeper - 10-12 cm - and at such a time that the Jerusalem artichoke has time to take root before the arrival of frosts that bind the soil. In the middle zone, this happens at the end of September, which means you can plant from the beginning of the month.
If you already have bushes growing and you want to propagate them or move them to another place, then wait until the end of flowering. Withered flowers serve as a sign of the end of the growing season. All juices are used to ripen the tubers and prepare them for winter. You can dig up planting material and plant it. And for food it is better to collect Jerusalem artichokes in early spring. All autumn until the very frost, the tubers accumulate useful substances, taking them from the tops, and in the spring they do not yet have time to expend their energy on the formation of new shoots.
In autumn, Jerusalem artichoke shoots can be cut, the bush can be dug up and tubers can be collected for planting.
If you do not want Jerusalem artichoke to turn into a weed, then every spring or autumn carefully select all tubers from the ground, even the size of peas. Fertilize the holes and plant them again one tuber at a time. An earthen pear can grow in one place for 30–40 years.
Planting methods
- Rassadny. Using this method, you can get the harvest much earlier. In a nursery, the plant is most protected from pests, and a rich harvest of an irreplaceable plant will not keep the owner waiting.
- Seedless. For this method you do not need to build additional structures. However, a timely and rich harvest is not guaranteed; your plans may be disrupted by Mother Nature.
- Seminal. This method is more suitable for experimental breeders, but for amateur gardeners it will be a burden.
- Tubers. This is the most common method among gardeners. You do not need to create any additional conditions; the plant itself quickly takes root and produces the long-awaited harvest.
Where to plant Jerusalem artichoke?
This plant is quite unpretentious to the soil. It will develop well if sufficient oxygen and moisture enter the soil. If there is not enough humus in the soil, it is not a problem. It can be easily compensated for by properly selected fertilizers.
You should not plant Jerusalem artichokes in dense black soil, where little oxygen will flow. In this case, even if there is sufficient nutrition, the plant will not bring a rich harvest. The soil should be well ventilated so that moisture does not stagnate.
Choose an open area where sunlight penetrates well. And its preparation for planting should begin in the fall, because planting Jerusalem artichokes in the spring is much simpler and easier if the beds are ready.
Some useful tips from experienced gardeners on growing earthen pears
- Rassadny. It allows you to increase the growing season of the plant by almost a month, that is, in this way you can get the harvest much earlier. In a nursery, it is easier to protect the plant from pests. This method is most often used in large production. It will be indispensable for temperate climates.
- Seedless. This method takes much less effort and time. There is no need to build a greenhouse or other covering structure for it. The disadvantage is that the seedless method does not guarantee timely and friendly shoots.
- Seminal. Quite a difficult method for amateur gardeners. It is more suitable for breeders to obtain new species.
- Tubers. Basically, Jerusalem artichokes are planted using this method. It does not require any special conditions; the plant takes root very quickly and without much hassle.
Large Jerusalem artichoke bushes, planted for several years, require periodic feeding and watering in dry, warm weather.
Young planted bushes also need to be weeded. When Jerusalem artichoke grows, it clogs the neighboring vegetation; when planted in a garden, it can be invasive - the stolons of rhizomes spread underground and germinate in neighboring areas.
In the spring, with the appearance of young shoots, the soil around the Jerusalem artichoke needs to be weeded and loosened to improve the breathing of the roots. When the shoots grow (at the end of May), the bushes need to be hilled. Place slug traps on the ground near the bushes.
As the stems grow, if the area is sunny and open to the wind, the bushes will eventually need support. You can drive a pole next to the bush and tie the stems with jute.
When flowering begins, Jerusalem artichoke is a beautiful flower garden, but the inflorescences take up quite a lot of nutrients, so if decorating the garden is not important, cut off the inflorescences, leaving the stems approximately 1.5-1.8 m long.
In hot weather, plants need to be watered more often - the huge leaf mass evaporates a lot of water, although Jerusalem artichoke is drought-resistant and tolerates dry periods well. If you only visit the garden on weekends, mulch the soil around the plants with straw - this allows the soil to breathe, but protects against moisture evaporating too quickly.
Over the entire summer season, you can hill up Jerusalem artichoke bushes with compost several times (3-5 times). If it is planted in a nesting manner over a large area, you need to loosen the rows once a month.
Fertilize once a month with a complex fertilizer with micro and macroelements, the optimal formula for fertilizer with an NPK ratio of 10-10-10. Jerusalem artichoke does not like excess nitrogen!
In the fall - in October, not earlier, you can harvest by carefully digging up the ground with a pitchfork. The skin of the tubers is thin and easily damaged, try not to damage it.
What else is Jerusalem artichoke useful for? Harvesting begins with the onset of frost, when almost all garden vegetables have already been collected, stored or processed. So the summer resident has the opportunity to pay attention to him. Dug up tubers do not last long, quickly lose moisture and shrink. They will last no more than a month in the refrigerator, but you can continue step-by-step cleaning until the ground is completely frozen.
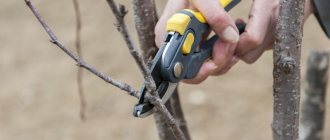
The second stage of harvesting can be carried out in the spring. For specimens remaining in the ground, in late autumn the stems should be cut to a height of 15 cm in order to accurately determine the place where the “treasure” is buried with the onset of warm weather. It is better to cover the ground with branches, straw, dry stems, and with snowfall, further increase the snow cover.
If you want to get more Jerusalem artichoke with limited planting, then the yield of tubers can be increased by mowing the green mass to half its height in the middle of the growing season. The plant, having lost part of the stems, will send all the useful substances to feed the tubers on the stolons. When cutting stems in autumn, you need to take your time with it.
Necessary processes in caring for Jerusalem artichokes are weeding and frequent loosening of the soil. Weeds can choke out young friendly shoots, so don’t be lazy to regularly go to the garden. When the stems grow to half a meter, hill up the plants using compost. I want to upset you a little - you will have to hill up periodically, as the Jerusalem artichoke grows.
When the stems reach your height, string long twine or wire near the rows, attaching them to the posts. The plant will have to be tied to such supports, otherwise strong winds may break the shoots. This is recommended by experienced breeders, but I do it simpler - I constantly shorten the stems, armed with a sharp knife. Juicy greens are used as food for domestic animals, and the plant does not have to expend energy for the growth of shoots, giving everything into tubers.
In summer, small yellow flowers bloom on the tops of Jerusalem artichoke, which also take a lot of energy from the plant. Remove them immediately, which will also help increase the yield. In the photo you can see an earthen pear during the flowering period.
We invite you to read: Planting cherries in the fall: rules and step-by-step instructions
How to choose the right tubers and seeds?
To grow Jerusalem artichoke, the soil on your site can be any. Only swampy and saline areas are excluded, which are generally unsuitable for gardening. The culture grows well on rocky, clayey, sandy soils. But the yield doubles, the tubers become larger if the seed material falls into loose and fertilized soil.
Jerusalem artichoke tubers look like potatoes and taste like sweet cabbage stalks or turnips
The plant is also not demanding of a place under the sun; it makes its way to it on its own. In a well-lit area, bushes grow 1.5–2 m high, and in the shade - 4–5 m. When choosing a place for planting, focus only on your needs, because tall bushes can cast a strong shadow on other crops or on the windows of the house.
If Jerusalem artichoke is planted in the shade of a fence or building, it will stretch until its flowers are in the sun
We invite you to read: Health benefits of coconut milk
Traditionally, Jerusalem artichokes are planted along the fence or even behind it, along the perimeter of the site. Then every season your garden will be hidden from prying eyes by a hedge made of earthen pear. Just as the shoots reach for the sun, the roots penetrate deep in search of water, so there is no need to water this wonderful crop, especially in regions with frequent rain.
Whatever method is chosen for planting, it must be taken into account that the planting material must be healthy, free from diseases and pests:
- various types of root rot;
- nematodes;
- aphids.
Tubers need to be chosen even, not large. The ideal size of tubers for planting is the size of a chicken egg. If the tuber is large, it can be cut into several parts. The only condition is that each part must have at least three eyes. The cuts must be treated with charcoal.
How Jerusalem artichoke got into my garden
Once upon a time, my boss (the chief engineer of a large plant) was a man who liked to work on his land; at that time we called it gardens. What a garden it is! Only 4 acres. His site was a collection of curiosities. It was he who introduced me to Eschscholzia, to unknown varieties of tomatoes, and introduced Jerusalem artichoke to me.
He brought 3 nodules in the spring and told me how to arrange them in the garden. There was nothing special about it, just a little deeper and sparser in the row than potatoes. And don’t forget to water the first time. Do not plant in the middle of the garden, only near the fence, so that the huge trunks do not shade the vegetables. I needed that Jerusalem artichoke, like... you know. But I couldn’t offend my boss, so I followed all the recommendations and pushed exotic potatoes into the ground. I'm waiting for the harvest.
Recommendations for gardeners on how to properly plant Jerusalem artichokes in spring
Jerusalem artichoke, or tuberous sunflower, or earthen pear, or Jerusalem artichoke, is the same perennial plant of the Sunflower genus of the Asteraceae family, known for its beneficial properties.
You will learn how to properly plant such an unusual plant, when and what to do, so that you can later collect these wonderful fruits in your dacha. The article will also talk in detail about the choice of tubers and planting methods.