Is it possible to propagate plums from cuttings in summer?
Experienced gardeners prefer to carry out plum cuttings in the summer, considering this method the most reliable due to stable results, high survival rate of plantings and preservation of varietal qualities. Most often, propagation is carried out by lignified cuttings, the harvesting of which is planned for the fall and involves their storage until spring.
Summer plum cuttings
Green cuttings, which are carried out in the summer, were previously used exclusively for industrial purposes, but now amateurs are also interested in this method. It involves the use of summer soft cuttings that have not yet lignified.
Advantages and disadvantages of summer cuttings
Among the positive qualities are:
- acceleration of the growing process;
- high survival rate as a result;
- preservation of varietal qualities;
- no need to organize winter storage of future planting material.
There are also disadvantages to summer cuttings:
- the method is not suitable for all varieties, but only for those that form a lot of root shoots;
- the need to create conditions for normal rooting of the material;
- financial expenses in connection with the purchase of additional funds.
If you choose this option for propagating plums and comply with all the requirements, the seedling will successfully take root and produce a good harvest in just 4 years.
Pros and cons of cuttings in summer
Basic rules for taking cuttings
To preserve the cuttings for subsequent grafting, it is necessary to carry out proper preparation.
It is important to understand that this procedure is very responsible, so some preparation will be required. A cutting is a small part of a twig that can revive life in a full-fledged fruit tree. At the same time, the resulting plant will retain all the characteristics of the mother culture.
The first thing a gardener needs to know is that preparing cuttings for grafting in spring or autumn should only be done from proven, reliable trees, making sure of their yield and varietal characteristics.
Next you need to take the advice of experienced gardeners:
- It is advisable to use annual shoots;
- make cuts from the outer sides of the crown;
- choose only strong and fully developed shoots;
- Cut off shoots from apple trees from the south.
Properly prepared cuttings are perfectly preserved, which means the grafting procedure will take place without problems.
Optimal timing
Green cuttings should be pruned at the time of greatest activity, in the stage of intensive growth and vegetation, which begins in June.
Favorable days
Russian yellow gooseberry - advantages and disadvantages
Harvesting cuttings is carried out from the beginning of June to mid-July in areas with moderate climatic conditions. A visual sign to begin the procedure is the appearance of redness at the base of young growing shoots.
Note! It is preferable to prune early in the morning before the heat sets in or on a cloudy day to maximize moisture retention in the cuttings.
When to take cuttings
Cuttings for grafting can be prepared three times a year:
- in the fall (after leaf fall ends and stable cold weather sets in), cuttings are prepared for grafting cherries, plums, apricots and other stone fruits;
- in winter (late February - March) cuttings of apple, pear and other pome crops are harvested;
- in the summer (at any time) green cuttings are prepared for rooting, grafting and propagation of bushes and trees, which are not stored, but used in the coming days.
In winter, cuttings can be cut only after the frosts have passed, since at temperatures below –10°C the wood becomes fragile and the mother plant can be injured.
Flight preparation of cuttings for rooting
Most berry bushes reproduce well by rooting cuttings, so if you see a curious variety from someone you know, you don’t have to look for the same one in the store - just ask for a twig and work on it a little.
Actinidia is cut immediately after flowering (late May - early June), cutting branches from the top of the shoot so that each has 2-3 buds. The cuttings are planted in a substrate under cover, which is removed no earlier than mid-August. After wintering, the plant can be planted in a permanent place.
Grapes are propagated from cuttings during autumn pruning (September-October), cutting cuttings from the middle part of the fruit-bearing vine. Cuttings with 3-4 developed buds are stored all winter, at the end of February they are placed in water to awaken, and then planted in a substrate.
Blueberries can be propagated from woody and semi-woody cuttings. In the first case, they are harvested at the end of winter - beginning of spring, and from April they are germinated in a greenhouse in a special soil, after dipping the lower sections in powder for rooting. In the second case, cuttings are harvested at the end of June - July and rooted immediately.
Gooseberries are cut from the first half of July, when the growth of the bush slows down. The branches are cut up to 20 cm long (with 8-10 internodes) and immersed in Heteroauxin for 8 hours. Then they are rooted in a light substrate under cover, buried by 2 cm. Gooseberries also take cuttings well with semi-lignified (combined) shoots, but in a dormant state it is pointless to harvest its cuttings - they will not take root.
Currants can also be propagated by both green and woody cuttings. In the first case, you will need a greenhouse, and in the second, you can do without it. Lignified currant cuttings are harvested in February-March. Their length should be about 15-20 cm, and their thickness should be at least 6 mm. After 12 hours in Heteroauxin or Kornevin, the cuttings are rooted in nutrient soil, mulched and left - planting can be done in April or September.
Rooting lignified cuttings
If you decide to root green cuttings, harvest them when the length of the annual growth is 10-12 cm. Soak in the root formation stimulator for 12 hours and plant in a greenhouse or greenhouse, and then spray the plantings 3-4 times daily and maintain the temperature in the shelter at below 25°C during the day and 16°C at night.
Suitable plum varieties
Simirenko apples - description, features, advantages and disadvantages of the variety
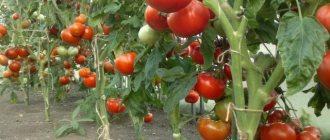
Plum cuttings are not suitable for all varieties of fruit crops. It is best to root those crops that are prone to abundant formation of a dense root system. Varieties suitable for this propagation method:
- Hungarian;
- Violet;
- Red dessert;
- Renklod Tambov;
- Red early ripening;
- Memory of Timiryazev;
- Volga beauty.
The results of the work done will be influenced by the age, condition and type of trees, the quality and timing of collecting cuttings, so all stages should be treated responsibly.
Is it possible to graft a pear onto a pear - choosing a rootstock
The best way is to graft a pear onto a pear. The following varieties can be selected as rootstocks:
- Wild forest pear - it is more resistant to frost and drought. Seedlings are grown with picking. In general, the compatibility of wild varieties with cultivated ones is normal.
- The Ussuri pear is the most winter-hardy, but it cannot grow at all on alkaline soils. Drought resistance is normal, but lower than that of wild forest pear. It is used as a rootstock in the regions of the Urals and Siberia (not used in the middle zone).
- Seedlings of cultivated varieties are used much less frequently, although their use is also acceptable. For example, in the middle zone you can use the Tonkovetka variety.
Also, quince and some other trees and shrubs can be used as a rootstock - they all have their advantages and disadvantages, and are described in a separate article.
Selection and preparation of cuttings
When choosing summer cuttings for further rooting, you should pay attention to the following features:
- diameter more than 7 mm,
- length - 10-15 cm;
- optimal age - 1 year;
- the presence of 2-4 green leaves or buds.
Propagation of pears by cuttings - at home in summer
Only strong, durable growths can take root. If such material is not available, make rejuvenating pruning of the fruit tree and prepare cuttings for next year.
Important! It is not recommended to use thin samples, as they dry out quickly even before merging with the rootstock.
Selection of planting material
Preparation of the cuttings takes place in several stages:
- Select a shoot 40-50 cm long, without signs of disease and yellow leaves, and mark the place of pruning.
- Make a lower cut at an angle of 45 degrees to increase the area for absorption of nutrients during the rooting period.
- The top cut is straight, to prevent evaporation, make it directly above the leaf.
- Remove all excess leaves, leaving only one at the top for photosynthesis.
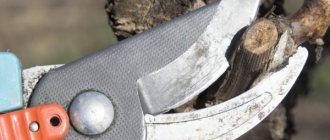
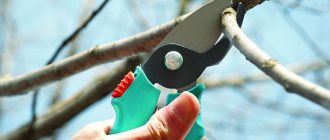
Important! Before the procedure, acquire high-quality tools, since you can propagate plums from cuttings only with a sharp knife.
Preparing the cuttings
Rooting methods
There are several effective ways to root cuttings at home:
- Place samples in the soil, create greenhouse conditions by stretching plastic film. Root formation is possible at optimal temperature and humidity levels.
- Place the cuttings in small pots with soil, provide a plastic cover, and place containers of water between the containers to prevent the soil from drying out quickly.
Many people are interested in how to root a plum branch. To do this, you can create a greenhouse effect in a bag of sphagnum moss by periodically moistening the moss. In such an environment, aerial roots are formed, after which the cuttings are separated and transplanted into open ground.
Important! If all standards are followed, the roots will form in 15-30 days.
Is it possible to grow a plum from shoots and will it bear fruit?
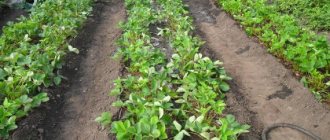
Propagating plums by root shoots is quite effective. Because on the roots there are dormant buds, which under certain conditions can form a full-fledged shoot.
Most gardeners are concerned about whether it is necessary to graft a plum grown from the root. Sometimes young trees from root shoots produce small and tasteless fruits; to avoid this, you need to be grafted. For abundant fruiting, it is important to select a promising sprout from among those that are located further from the target and at the end of the growing season, separate it from the mother tree, moving it to a place prepared in advance.
Basic methods of storing cuttings
Now we need to look in detail at how to store cuttings for grafting. There are several methods, each gardener uses the one that is more accessible to him. It is worth familiarizing yourself with the most popular ones and choosing the appropriate option for yourself.
In a refrigerator
To store cuttings in the refrigerator you will need several plastic bags, paper and plain cloth. If there are few shoots, then it is enough to tie them in bunches, put them in several bags and leave them in the refrigerator at a temperature not exceeding 2°C. In this case, storage in the freezer will lead to the death of the cuttings; they should be chilled, not frozen. Often they are first placed in clean cloth or paper and then in bags.
For these purposes, the lower section of the refrigerator is used, where vegetables are stored. The temperature in this compartment is not higher than 4°C, so the cuttings will remain in the desired condition until mid-February, and then the buds will begin to germinate, especially for stone fruit crops.
In the cellar
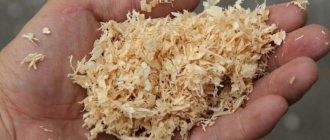
One of the oldest ways to store grafting material is in the cellar. Here, gardeners need to choose how best to store cuttings for grafting, since there are several options. Many people use burlap or other coarse fabric, sand or sawdust, but some prefer more complex materials, such as peat or moss, which are periodically moistened.
If it is possible to use sawdust, then you first need to thoroughly moisten it, and then place the cuttings in it with the cuts down. They must first be placed in opaque bags, without tying them too tightly - the shoots must have access to air.
You can store the material in wet sand, but this will require wooden boxes. Bunches of shoots are placed in boxes with holes for access to fresh air, and sprinkled with wet sand on top. How can you determine the level of humidity required for storage using this method? There is a simple way to do this. You need to pick up sand in your hand and squeeze it tightly. If moisture is felt, but water does not drip, then the humidity is suitable. The temperature in the cellar should be between 0 and 2°C. This mode is suitable for cuttings, and for other vegetable crops, and other stocks. As for the air humidity in the cellar, it should be in the range of 60-70%.
On the street
Storing cuttings outside has two options: in the snow and in sawdust. For those gardeners who live in regions with good snow cover, this is the best option. Usually, to do this, gardeners dig a trench of a suitable size to a depth of 30-40 cm in advance, line it with coniferous branches, then place the material there, covering it with spruce branches. Then it is sprinkled with earth, sawdust, and straw. The thickness of the snow cover should be at least half a meter throughout the winter. Many people do not dig a hole, keeping the packaged cuttings under a layer of snow of at least half a meter. To avoid melting, sawdust or a layer of straw is poured onto it.
For those regions that are subject to prolonged thaws, storing shoots in sawdust is recommended. Usually, the northern side of the house is chosen for this; the prepared cuttings are placed on wet sawdust. Sawdust is also poured on top, in a layer of at least 15 cm. When it freezes, a layer of dry sawdust (40 cm) is poured. Next, everything is covered with film. It is believed that sawdust is the best way to preserve apple tree cuttings for subsequent grafting.
Other storage methods
Gardeners have found other ways to store grafting material that are no less successful. These include storage in a plastic bottle, food container, and even in a net on a tree outside the window. A good way to preserve sprouts is in fresh potatoes. To do this, the cuttings are inserted into the tuber in sections. They are stored this way until spring.
Planting ready-made cuttings
Instructions for the landing process:
- Select and prepare high-quality cuttings.
- Warm up the greenhouse to 25-30 degrees, water generously and fertilize the soil.
- Treat the lower part of the sprout with a means to stimulate root growth.
- Plant at a slope of 45 degrees to a depth of 3 cm. Maintain a distance of 5 cm between rows.
- Install the arches and lay the covering material.
Important! Plant green cuttings immediately after cutting. Lignified last year's specimens must be pre-soaked after storage.
Proper planting of cuttings
General vaccination scheme
The general rules for grafting pears are as follows:
- For early varieties (Krasulya, Maria, Iyulskaya, Lada), take a cutting from an early tree. Carry out the operation at the top of the culture.
- If a mid-season variety is used as a scion (Severyanka, Pamyati Yakovlev, Moskvichka), make the grafts on the central branches.
- Transplantation is done in the lower part of the rootstock during winter fruiting.
- The shoots for the procedure are cut from annual shoots at the top of the tree and strictly on the south side. Use cuttings with developed buds - in late September or early October.
- Store planting material at a temperature of +5 °C in the refrigerator or cellar, optimally on the bottom shelf. Pre-wrap the branches in plastic wrap.
The order of work depends on the grafting method.
To graft a pear, you will need the following set of tools - a sharp knife and a hacksaw. Coat the cut areas with varnish.
Breeding Features
All breeding methods are effective in accordance with the type of fruit crop and the region of cultivation.
Depending on the type of plum
If you have a mother tree of suitable age and size with a well-formed root system, propagation by cuttings will be successful. If the tree does not meet the standards, it is better to give preference to the root shoot method or layering.
Depending on the region
Before starting the process, you should find out how the plum tree propagates depending on the region. Suitable climate for rooting summer cuttings in temperate zones.
Reproduction by root shoots
Most varieties of plums are capable of forming root shoots, which gardeners use as planting material.
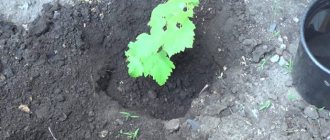
Planting can be done in the spring before the buds open or in the fall a month before the onset of frost. In regions with a short summer period, it is advisable to carry out propagation work by shoots in early spring so that the plant has time to take root well and ripen.
Will the plum shoots bear fruit?
Only a plum tree that has its own roots can be propagated by root shoots - only in this case will the new tree fully retain the characteristics of the mother plant.
If the tree is grafted, then all the shoots will duplicate the characteristics of the variety that was used as a rootstock. Therefore, you should resort to this method of propagation only if the plum is rooted.
Work technology
- For propagation, strong two-year-old shoots are chosen, growing at a distance of 2-3 meters from the trunk of the mother tree. It is desirable that the selected specimens be located behind the projection of the plum crown.
- The plant is dug in from all sides and cut off from the mother rhizome, leaving root sections 15-20 cm long.
- The damaged root of both the seedling and the adult tree is treated with garden varnish to prevent the risk of disease development.
- Prepare a planting hole - select soil from it and replace it with a nutrient substrate of compost, river sand, turf soil in a proportional ratio of 2: 1: 2.
- In areas with heavy clay soils, a drainage layer is placed at the base of the pit and only then it is filled with nutrient substrate.
- When planting a seedling, carefully monitor the depth of the trunk. The root collar of the plant should be at ground level. If it is buried, the tree will become sick and develop slowly.
- To fix the seedling, place a peg in the hole and tie a plum to it.
Further care
A plant in a greenhouse requires care and attention, which includes certain agricultural techniques:
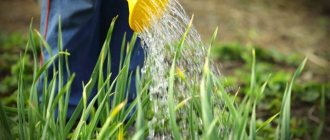
- watering and spraying 2-3 times a day;
- daily ventilation to prevent condensation from forming and the process of rotting to begin;
- one-time mineral fertilizing;
- preventive spraying with antifungal and antibacterial agents.
For the winter, mulch the soil and cover with geotextiles. Planting in open ground should only be done next spring.
Caring for a young plant
Rooting cuttings
Propagation of plums by air and ground layering, unlike cuttings, does not require constant “intervention” in the rooting process, which means it is ideal for those summer residents who come to their plot only from time to time.
Air layering
To achieve a good result, it is necessary to begin rooting the cuttings on time. The best time is spring, a week before the plum blossoms. During this period, intensive movement of sap occurs, and you can easily separate the bark from the shoots without damaging the wood.
To form air layering you will need:
- sharp knife;
- insulating tape;
- dark, dense polyethylene film;
- root formation stimulator;
- sphagnum moss.
You should not despair if you do not have the opportunity to purchase sphagnum moss - you can replace it with coconut fiber or a substrate consisting of coarse river sand and turf soil with the addition of perlite.
- For rooting, choose healthy, well-developed shoots from last year. You can give preference to two-year and even three-year-old branches, but in this case there is a risk that the power of the root system formed over the summer will not be enough to fully root and nourish the new seedling.
- At the base of the shoot, make two parallel cuts, at a distance of 10-15 mm from each other, and carefully remove the layer of bark between them, being careful not to damage the wood.
- To increase the area of root formation, 2-3 more vertical furrows are cut above the annular cut, and to prevent “healing of the tree”, thin chips or matches are placed under the incisions.
- The sections are treated with a root formation stimulator and wrapped in a layer of moist sphagnum.
- A layer of plastic film is placed around the moss, which is carefully fixed with electrical tape, above and below the incision site. So roots form much more intensively in complete darkness; it is better to give preference to black, opaque films.
- During the summer you will only need to water the moss occasionally to keep it moist. This can be done with a medical syringe, injecting water through punctures in the film.
- A month before the onset of frost, the shoot is separated from the mother plant and planted in a growing area. To prevent the seedling from freezing, it is carefully insulated.
Ground layering
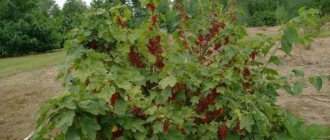
Plums formed by a bush or having low-lying branches are suitable for rooting in this way.
To form ground branches you will need:
- sharp knife;
- root formation stimulator;
- hairpin or thick wire;
- substrate made of river sand and peat.
The work order consists of the following steps:
- On a selected branch of last year's growth, make several shallow cuts in the bark and insert matches or wood chips under it.
- Treat the incision sites with a root formation stimulator.
- In the place of future rooting, select soil and replace it with loose substrate.
- Bend the shoot to the ground, place it in a groove 4-5 cm deep, and press it to the ground with a wire or pin.
- The top of the branch, 10-20 cm long, should be above the soil surface. If it spreads along the ground, then it is raised and fixed with a peg and rope.
- The rooting area is watered. To prevent the soil from drying out in this place, it is covered with a film or thoroughly mulched.
- Separation of the seedling from the mother plant is carried out in the fall 30-40 days before the onset of frost or in early spring.
Propagation secrets and gardening tips
Many gardeners, who have repeatedly completed all the processes of propagating fruit trees, know how to cut plums in the summer, and are confident that a positive result is possible only if the following rules are observed:
- You can root the branches at home and in greenhouse conditions. For greater efficiency, use a root growth stimulator.
- In autumn, watering stops.
- In winter, it is important to harden summer cuttings.
- There is no need to waste time rooting weak cuttings; it is better to postpone the procedure until next year.
- If it was not possible to propagate plum trees using cuttings in the summer season, it is worth trying spring rooting of lignified specimens, which will have more time to adapt and prepare for winter.
Experts are confident that in order to obtain high-quality seedlings, it is necessary to create optimal conditions and a healthy mother tree aged from 3 to 10 years.
Nuances of plum cuttings
Knowing how to propagate plum trees correctly at home, you can get many high-quality seedlings and fill your garden with your favorite fruit trees. Compliance with the rules for caring for a young plant will contribute to rapid rooting, rapid development and fruiting.
How to store cuttings for grafting, following the general rules
So, the cuttings were cut correctly, the deadlines were met. Now it is important to keep them in this state, that is, in a dormant state.
The gardener faces the following tasks:
- prevent damage to cuttings;
- eliminate the risk of freezing;
- maintain a state of rest;
- prevent drying.
In addition, it is necessary to ensure that mice and rodents do not have access to the cuttings.
You should not rely on your memory, especially if there are a lot of cuttings. They need to be tied into bundles, sorted by variety, and a label with an inscription made in waterproof ink attached to each.
Tree care after grafting
After the vaccinations are made, in order to protect them from overheating, the places should be protected with a paper bag or plastic.
- When the buds begin to grow, the top of the protective cap needs to be cut off.
- If several shoots appear from the grafting site, you need to wait until they grow to a size of 20 cm and leave the strongest ones. If there are several identical in terms of growth strength, then the top one.
- If growth is very rapid, it is necessary to monitor the condition of the strapping and gradually loosen it. If the growth of grafted shoots is very intense, then several cuts are made in the wood on the bark of the graft.
- A grafted tree near the rootstock produces a large amount of shoots. It needs to be removed.
- In summer you need to use fertilizers with nitrogen and add a lot of moisture. In the event of a fungal infection in the garden, it is necessary to take measures aimed at protection.
- The pear grafting band is removed only in the second year. Then you can expect the first flowers. But you should not leave the ovaries on fragile branches, they will only drain all the strength.
Pears: garden favorites.