Traditional technology
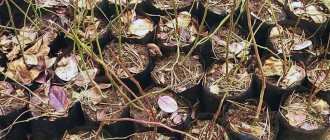
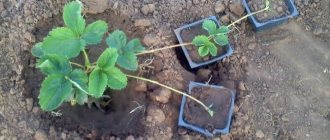
Traditionally, when planting strawberry plantations, freshly dug seedlings are used, which are planted in the fall (late August and September) or spring (April-May). Autumn planting is preferred due to the high humidity and moderate temperatures characteristic of this time of year. When planting strawberry plantings in the fall, a minimum amount of water is used, which is applied locally.
Seedlings are planted in the fall as early as possible so that they have time to take root in a new place and safely overwinter. In autumn, plants spend a lot of energy on the formation of a new root system, and this weakens the formation of generative buds. Therefore, it is not always possible to get a harvest the next year after planting.
Gardeners also practice spring planting of strawberries with local watering, although its effectiveness directly depends on weather conditions: if after planting the weather is hot for several days, the plants “fall out” of the planting holes due to drying out of the soil.
In the spring, well-developed planting material with a large number of generative buds is planted, but the stress they receive during spring planting, combined with moisture deficiency, reduces the possibility of obtaining a high yield in the year of planting.
Another disadvantage is that the time for spring planting is very limited and, in addition to establishing a strawberry plantation, it is necessary to carry out other fairly large-scale agricultural work.
How to plant strawberries or reveal the secrets of a rich harvest
What you need to get a rich harvest
First, let's figure out how strawberries differ from wild strawberries. Strawberry bushes are taller, the leaves are wrinkled, and the flower stalks rise above the light-colored leaves. The berries are smaller than strawberries. Gardeners often call garden strawberries strawberries. The technology of planting and growing is absolutely the same, so in our article we will not pay attention to the difference between crops. Whatever you call this sweet, juicy berry, its taste will not change.
Rules for success:
- High-quality planting material.
- Properly organized planting area.
- Proper landing.
- Varieties of strawberries (small-fruited, large-fruited, remontant - continuously bear fruit all spring, summer and autumn);
- The best predecessors: garlic, onion, dill, petunias, marigolds. The berries are returned to their old place after 5 years. If there is little food, the first collection is the largest, then the smaller ones.
Planting material can be obtained in several ways:
- buy;
- grow it yourself from seeds;
- take mustaches from other bushes;
- dividing the bush (if the variety does not produce a mustache).
Here you need to decide on the timing of planting. The berries are planted in autumn, spring and summer. When is the best time to plant strawberries? We think it is better to plant it in May, mid-July - early August. During these periods it is not very hot, the seedlings take root well and produce a good harvest the next year. All you need to do is water and feed the plants.
If we buy seedlings, then we give preference to plants with a closed root system, that is, in cups. It should be an annual seedling with roots at least 5 cm long and 2-3 well-developed leaves. If there are flower stalks on the bush, it is better to remove them so as not to deplete the plant. The goal is to get a large, strong bush in the first year, and only then a harvest.
Growing strawberries from seeds
Good varieties: Baron Solemacher, Yellow Miracle, Fresco, Sashenka, Moscow Delicacy. Strawberry seeds germinate only in light. With artificial supplementary lighting, you can start sowing seeds in January. They are usually sown in March, when the day length increases. Spread it on the surface of the soil without sprinkling it with anything. It is convenient to sow in transparent food containers with a lid. It turns out to be a mini-greenhouse. Seeds can germinate for a month, sometimes a month and a half. To stimulate germination, it is recommended to spray the seeds with a solution of HB-101 (1 drop per liter of water). Water the soil with the same solution.
Additional lighting for seeds can and should be done using a table lamp. A conventional incandescent light bulb is replaced with an energy-saving cold-glow one.
The table lamp is placed at a height of 15 cm above the bowl or container with seeds and is illuminated for 12, or better yet, 14-16 hours a day.
We must warn you that on a cold windowsill the seeds are in no hurry to germinate and die in the ground. To do this, create a “warm” window sill - pieces of foam plastic are placed under the containers.
Large-fruited varieties can be sown in peat tablets. There are usually 5-10 seeds in a bag, so the tablets won’t take up much space. The tablets are soaked in water or a solution of the drug HB-101, diluting a drop per liter of water. They are also placed in a bowl under a film, creating greenhouse conditions.
When cotyledon leaves appear, you cannot immediately open the mini-greenhouse - the sprouts will fall and die. There was a certain humidity in the container under the lid, but the apartment air was dry - the leaves could not cope with the evaporation of moisture and dried out. The film (cover) is removed only when real leaves appear. Open gradually over several days so that the sprouts get used to the low humidity of the surrounding air. Drops of condensation from the lid must be removed daily.
Site preparation
Before planting strawberries, prepare the place. The area for strawberries is set aside in a sunny, ventilated place. There are traditional and natural agricultural techniques for growing crops. Traditional planting (regular) involves growing strawberries and obtaining the maximum yield in one area for 3-4 years. The bush bears fruit until it completely exhausts its strength. Then we usually say “the berry has degenerated” and almost completely renew the strawberry by replanting it in another place. Natural agricultural technology allows you to obtain a full harvest for up to 7-8 years in one place due to constant fertilizing and special care.
According to tradition, they are planted in ribbons of two rows with a distance between rows of 30 cm, between ribbons 60 cm, keeping a distance of 15-25 cm between the berry bushes. Or in beds 100 cm wide, the bushes are planted in a checkerboard pattern every 50 cm, leaving a gap of 50 cm between the rows .
Natural agricultural technology involves a slightly different planting pattern. The beds are made 50 cm wide. The bushes are planted in one row every 50 cm. The gap between the rows is 50 cm. Yes, no matter what method you choose, place the beds from north to south. At first it seems that there is a lot of space left for seedlings. But remember, the berry will grow in one area for 5-8 years, the bush will grow and occupy all the free space.
The area is cleared of weeds. Add rotted organic matter at the rate of 3 buckets/m2. You can add organic matter directly into the wells. Pits measuring 25x25 cm and the same depth are dripping. The wells are filled with the mixture:
- compost bucket;
- a bucket of horse manure (rotted);
- a bucket of soil from the garden bed;
- 2 cups of ash.
Instead of manure, you can take a bucket of compost mixed with 2 liters of vermicompost.
How to plant strawberries correctly
If seedlings:
- in a plastic pot - spilled an hour before planting;
- in a peat tablet - immerse in water for 30 seconds;
- open root system - kept for 10 hours in a solution of HB-101 (3 drops per liter of water).
The length of the roots is left to 10 cm, the excess is cut off. If you have seedlings with a closed root system, then you can plant them throughout the summer. Seedlings with an open root system are planted in spring and August.
Although strawberries are the most common berry on plantations, many gardeners make mistakes when planting them. At the bottom of the planting hole we make a mound and place the plant on it. Make sure that the roots do not bend. As a rule, this happens when they are too long. In this case, we boldly cut off the excess with pruning shears, shortening the roots to a length of 10 cm. We also make sure that the roots do not bend upward, which is also wrong. Ideally, they should go straight down the mound.
Another important point. Many people deepen the plant too much. With deep planting, the central bud (heart) is below the soil level. This should not be allowed under any circumstances, as the heart will begin to rot and rot. The plant will most likely die. In the case of small planting, the seedlings are also doomed to rapid death, as the heart dries out. The central bud should barely protrude above the soil level. After planting, the seedlings are watered abundantly, plus 0.5 liters of HB-101 solution (93 drops per liter of water) is poured under each bush.
Next, the strawberries are mulched with compost and covered with the thinnest covering material No. 17 (2 layers) or No. 30 for two weeks. It is simply thrown over plants without arcs. Why cover? The root system has not yet started. The leaves evaporate moisture, but the roots cannot yet deliver water from the soil to them. Plants may dry out. A greenhouse effect is created under the covering material, and seedlings take root better.
The question is often asked what materials can be used as mulch. You can take grass, hay, straw, pine branches, rotted sawdust, rotted compost. The thickness of the compost layer should be 5-6 cm. The thickness of the layer of hay, straw, dry grass should be 10 cm. Mulch is added every month throughout the season.
Methods for planting strawberries
We have decided on the varieties, everything is clear with the planting schemes, and we have chosen the dates. Now let's talk about different ways to grow garden strawberries.
Planting with mulch film
We lay agrofibre. We place the corners of the mulching film in the holes and sprinkle earth around the perimeter. After we have laid the agrofiber, we begin planting strawberries. We make a small cross-shaped cut just enough to barely push the roots through. Then, with our hands under the film, we tear a small hole and lay the roots of the seedling. Fill with compost and water.
If you make a big cut, weeds will come out and draw all the moisture from the soil. Large seedlings should not be planted under mulching film. Attention, if you decide to plant berries this way, you must provide the plant with food for 4 years in advance. To do this, add 2-3 buckets of rotted compost per square meter.
Planting strawberries on a straw mattress
We will tell you an interesting way of planting garden strawberries on pea straw. After the pea crop is harvested, the tops are dug into the soil to form a straw mattress. The soil is watered with nitrogen fertilizers. Nitrogen ensures good compatibility of pea tops. After about 3 weeks, strawberries are planted in this place. A high quality mustache is important. A large mustache produces large berries the next year. The larger the planting material, the taller the plants will be and the thicker the flower stalks.
Strawberry seedlings are planted at a distance of 40 cm from each other. The row spaces are not dug up, but cleared of weeds. You can plant directly from the edge of the bed, so that in the future the plant can use the soil between the rows. 3-4 rows of berries are placed on the garden bed. The width of the bed is calculated so that on each side you can easily reach the middle for caring for the plantings.
After planting, water the soil well to create dirt. It’s not for nothing that there is a proverb about strawberries: “If you plant them in the mud, you will be a prince.”
Antennae often have underdeveloped roots. The next day after planting, the seedlings may wilt in the sun. To make the rooting process a little easier for them, the ground around them is sprinkled with hay for the next 3-4 days for shading. You can remove the hay later, or you can add more, to create a nice thick layer of mulch.
Pyramid bed
Beds located upwards and taking up little space are relevant for small summer cottages. To organize a pyramid bed, you need 4 wooden bottomless boxes and a piece of pipe with a diameter of 40 mm and a length of 2-2.5 meters. You can make the boxes yourself.
The pipe is secured and holes are drilled along the entire length of the pipe using an electric drill. They are needed for watering the pyramid beds. There is no need to make large holes; they can become clogged with soil. Water will find any hole anyway.
Choose a place for the pyramid and drive the pipe to a depth of 80-90 cm so that it holds tightly. By the way, no holes are made in the part of the pipe that will be underground.
Then they take the largest box and put it on top of the pipe so that it runs exactly in the center, and we fix it in the ground. The box can be buried or propped open with pegs: drive stakes into each corner from the inside of the box.
Next, pour good fertile soil into the box, filling it to the brim and compacting it moderately. So all the remaining boxes are strung on the pipe. On each subsequent one a smaller box is placed. Four to five tiers will be enough to maintain the stability of the pyramid and avoid problems with watering, caring for berries, and harvesting.
In addition, you need to make sure that there is free space for strawberry seedlings. There should be a piece of pipe sticking out above the last tier. It is easy to water the plants from above through the pipe by inserting a hose. Opposite each tier there are necessarily holes through which the soil will be moistened.
Your berry will grow no worse than in an ordinary garden bed. In summer, the bushes will bloom and the pyramid will turn into a pink and white flowerbed, pleasing to the eye.
If you follow all the rules, the plants planted for you will take root well, take root, and you will be guaranteed an excellent strawberry harvest. By the way, don’t forget that strawberries are recognized as one of the most delicious and healthy berries in the world!
grounde.ru
If you decide to plant strawberries on your plot for the first time (more correctly, garden strawberries) or it’s time to update old, outdated berry beds, you should think about the method of planting strawberries.
How to plant strawberries correctly to get a good harvest? We offer you four effective ways to plant strawberries, which have long been proven among gardeners.
Frigo technology
Features of growing strawberries using the Frigo technology are as follows:
1. In the second half of November , seedlings are dug up to obtain planting material. This is due to the fact that when the temperature drops below +15 °C, metabolic activity decreases and carbohydrates flow into the rhizomes. Thus, lower temperatures and reduced daylight hours contribute to the differentiation of generative buds (formed in the plant, depending on the variety). At temperatures below +5 °C, plants go into a dormant state - the formation of generative buds and vegetative growth completely stop. It is during this period that the plants are dug up, cooled, sorted and leaves trimmed.
2. Seedlings are stored until next year in plastic bags in a refrigerator with a certain temperature (°C). Next year, from April to July, the material preserved in this way is used to plant new strawberry plantations.
3. Plants without leaves. Due to the lack of leaves, the plants take root much better compared to freshly dug up seedlings. The mobilization of the vital activity of plants that have been stored at low temperatures occurs quite quickly - the first leaves appear within a few days after planting. Such early and accelerated development, combined with the presence of increased reserves of nutrients in the rhizome, allows the formation of sufficient vegetative mass in a short time.
4. days - this is exactly how much time is required from the moment of planting to the start of fruiting of seedlings using the Frigo technology. It is this feature of seedlings that allows production to be planned and planting to be carried out over several periods to obtain off-season products.
Thanks to the Frigo technology, a kind of conveyor belt is created for obtaining fresh berry products - from May to early October. Cooling protects seedlings from early germination and significantly saves plant resources necessary for active growth and reduces the risk of frost damage. Uniform growth of seedlings after planting allows for timely and safe application of herbicides.
Preserving seedlings by snowing
Before storing by snowing, strawberries are prepared in advance. A month before storage, watering is reduced. 2 weeks before sheltering, it is completely stopped. Then the bushes are watered once, not allowing them to dry out. During this period, plants fall into suspended animation and all life processes slow down. Strawberries support life. Next, the following manipulations are carried out:
- Select a piece of land with a permanent snow cover of at least 15 cm.
- The dug up seedlings are transferred to this area.
- Then mulch the bed with straw.
- The top is covered with spunbond.
- Then a layer of snow 10 cm thick is laid.
- Repeat the layer of straw to prevent melting and retain heat.
See also
When and how to prune strawberries correctly, timing and step-by-step instructionsRead
Important! If it is not possible to move the seedlings to another place, they are left in the garden bed and snowed according to the instructions .
Classes of planting material
Strawberry productivity depends on the class of planting material. For plants grown with careful adherence to the Frigo technology, the main parameters of planting material (number of leaves, leaf surface area, height, number of generative shoots) should be several times higher than the development parameters of freshly dug up seedlings.
European quality standards divide strawberry seedlings into several classes, depending on the thickness of the plant neck:
- class A+ - thickness Plants have an average of 3 generative buds, which allows the formation of berries of normal size. The increased cost of such seedlings pays off by obtaining a harvest within the same year of planting;
- class A- - thickness These seedlings lay generative buds, which means that on one plant it is formed. In the first year of life, if the growing technology is followed, the plants produce a yield of about
- class B - thickness C of plants of this class, harvesting in the year of planting is not economically feasible, however, with repeated removal of flower stalks from such plants, plantings can be formed for the next year's harvest;
- class WB - grown plants. As a rule, they are obtained by transplanting the first rooted rosettes (late June - July) to a separate area with a high agricultural background. In the summer, the tendrils of such plants are removed several times, due to which they gain sufficient potential for differentiation of generative buds in the autumn).
WB class strawberry seedlings are very popular in Europe, despite the high price. To obtain seedlings of this class, plants are planted using a thickened method - up to 100 thousand seedlings per hectare.
Ready WB class strawberry seedlings are dug up late in the fall and stored using the Frigo technology at the appropriate temperature in plastic bags. Their yield per year of planting in production conditions, subject to technology, reaches
Planting strawberries with free-standing bushes
Strawberry rosettes are planted one at a time at a distance of 45-60 cm. To prevent the plants from intertwining, the tendrils are regularly removed, thereby allowing the bushes to develop intensively and bear fruit abundantly.
Disadvantages of the method : labor-intensive, requires frequent loosening of the soil, weed control, mulching and cutting off the mustache.
Advantages of the method : the berries are large due to the small number of bushes, each plant is ventilated, which reduces the likelihood of putrefactive diseases, planting material is saved.
Summary
All over the world, to supply fresh strawberries to the market year-round, day-neutral varieties are grown or seedlings grown using the Frigo technology are used.
Freezing seedlings is also justified in years with a dry autumn, when it is not possible to establish a young strawberry plantation in the optimal autumn months. When using planting material from new foreign varieties with low winter hardiness, seedlings grown using the Frigo technology are also taken.
In conclusion, it should be noted that when planting a strawberry plantation from seedlings obtained using the Frigo technology, the following conditions must be observed:
- firstly, for planting, purchase material of high quality classes, not lower than class B;
- secondly, use only seedlings grown from certified, elite, healthy material of high-yielding varieties, which are guaranteed to be stored at a temperature of °C and not defrosted during storage;
- thirdly, plant strawberry seedlings only in an area that is guaranteed to be provided with watering throughout the entire growing season.
Customers of our store are most often interested in: how and where to store seedlings and seedlings before planting? The weather often “pleases” us with surprises, for example, sudden frosts or a long winter, when it is simply impossible to plant plants. Is it possible to preserve crops without loss? Of course, you can, the main thing is to follow simple rules.
How to save seedlings with an open root system?
We send seedlings of fruit and berry crops, grapes, roses and other ornamental plants with roots packed in soil. The method of preserving such planting material depends on the duration.
How to preserve seedlings for 2-3 weeks
- Open the parcel and pierce the film covering the roots in several places.
- Feel the root ball; if it is not wet enough, water it.
- Transfer the culture to a cool place (up to 5˚C). This could be a loggia or veranda, a cellar or a garage.
These manipulations will give the weather time to “come to its senses” and preserve all the vitality of the plant. Holes in the film will allow the root system to breathe, and a fairly low temperature will delay their development. The main thing is not to forget to periodically moisten the earthen ball.
How to preserve seedlings for up to 2 months
This method is considered professional, so it will delay planting for a much longer period.
- Unpack the roots and inspect them; if they are too long, cut them (do not get carried away with shortening, it is optimal to leave 25-30 cm). It is also worth removing dry, frozen, rot-damaged areas, if any. Healthy roots when cut are white, while dried or frozen roots are brownish-brown. Attention! Trim the roots with a sharp knife - the pruning shears do not give a perfect cut and crush the roots.
- Take a large bucket or any other container, pour soil into it and dig in the root system of the crop. After planting, water. Remember that the soil should be slightly moist and do not allow it to overflow, since the roots are still dormant and “drink” water very little, and if there is excess moisture, they simply begin to rot.
- Place the seedling in a dark place (direct sun rays are not allowed) so that the plants develop less actively, the temperature should not be higher than 2-5˚C.
Selection and preparation of seedlings
An important factor when growing strawberries is choosing healthy seedlings.
Seedlings must meet basic quality criteria:
- fibrous root system up to 7 cm long;
- leaf blades are dark green, evenly colored, pubescent or leathery;
- rhizome is wet;
- horns with a thickness of 0.7 cm;
- the rhizome entwines an earthen ball (when purchasing seedlings with a closed root system);
- absence of dark and light inclusions, spots, rot and plaque on the leaves.
Further preparation of seedlings depends on the type (closed or open ground) and the chosen storage method. The general rule for all methods is treatment with fungicides. To disinfect plants from fungal infections, the bushes are treated with “Fitosporin” or another acceptable drug according to the instructions. It is also important to check the moisture of the root system. Do not store bushes with dried out rhizomes.
How to preserve plants with a closed root system?
Container crops do not require any special actions. All you have to do is put them in a semi-dark, cool room (you can even put them in a cellar) and they will patiently wait for planting for a month or two. Water the soil moderately, as overwatering can cause root rot and death of the entire plant. The amount of water and frequency of humidification depend on air humidity and room temperature (the drier and hotter, the more water is needed). Make sure the soil is constantly slightly moist.
How to preserve tubers and bulbs before planting?
We deliver bulbs and tubers in special perforated bags, so the planting material does not “suffocate” during transportation. If the parcel has already been received, and it is too early to plant crops, simply put the bulbs in the shipping package in the refrigerator, in a vegetable container. If you have already opened the package, then wrap the bulbs and tubers in newspaper and also put them in the refrigerator.
Important point! If the first shoots have already appeared on the planting material, it means that it cannot be stored. Plant the tubers in containers and place them in a cool place to stop development.
How to preserve perennial rhizomes?
If you receive rhizomes, but you won’t be able to plant them in the near future, just put them in the refrigerator or a cold room with a temperature of -1-3˚C. There they will be stored until planting. Important! Plants with thin roots, for example, phlox, cannot be stored for a long time - they dry out quickly enough and become unviable. It’s better to plant them in containers right away.
If planting had to be postponed because winter “suddenly” arrived, then you should do the following:
- Open the perforated packaging and remove the cultures. Remember, if it has been lying at a temperature above 20˚C, then it must be planted no later than 24 hours later. Any flower pot is suitable for this - as a rule, rhizomatous crops tolerate replanting well and will not die when moved to flower beds.
- Pour a small layer of peat into a small container, place a division on it and carefully straighten the roots. Sprinkle everything on top with peat, lightly compact and water.
- Place the plant in a dry room with a temperature no higher than 3˚C. Do not forget to periodically moisten the substrate.
- At the end of March, move the crops into the light; a balcony is perfect for this, just don’t put the plants on the floor - there’s too little light there. The best option is a shelf flush with the window or a stool. In April - May, crops can already be transplanted into flower beds.
Tips for Beginners
Experienced farmers advise paying special attention to root moisture. Beginners often neglect this rule. In no case should the rhizome be overdried - the plant may freeze or may not begin to grow when planted. During basement storage, professional agronomists try to control not only air humidity, but also its quality.
It is desirable that the air contains 2.5% oxygen and 5% carbon dioxide. Regardless of the choice of method, study the recommendations of agronomists and professional farmers. Adhering to technology and taking into account the nuances of the process, the gardener will successfully preserve strawberry seedlings until spring planting.
To get a full-fledged strawberry harvest, it is necessary to use seedlings for plantings, stored cold in cellars or refrigerators - in special microclimate conditions, which are artificially maintained in a certain mode. As a last resort, for spring planting, seedlings are simply buried in the ground.
Seedlings must first be prepared for long-term storage. Strawberries are prepared for winter storage from late summer - early autumn. To stop plant growth before digging, you should first reduce watering and then stop it altogether. But to prevent the plants from wilting, after 10-15 days they should be watered again with a small amount of water. The seedlings stop growing and almost all life processes in them are suspended. It is necessary to regularly monitor the condition of the plants, preventing them from overgrowing, but also not allowing them to die from lack of water. While in this semi-dormant state, plants retain their vitality. In healthy, strong plants, by autumn the leaves have thick, short petioles adjacent to the ground.
In the fall, strong, healthy rosettes are dug up along with the tendrils, old leaves are removed and soil is shaken off the roots. The plants are sorted, put into bunches and packed for storage. Rosettes with 3-4 leaves and thick, short petioles are stored with a root collar thickness of 6 mm and roots 5 cm long (longer roots are shortened, otherwise it will be difficult to straighten them when planting and they will begin to bend, and this will have a bad effect on growth and plant development). The bunches are placed in boxes of different sizes, covered with a lid and placed in cellars or refrigerators. In order for plant roots to be better preserved and not dry out or dry out, it is advisable to line the bottom of the box with damp moss.
A few more notes on harvesting seedlings. The seedlings should not be dry. You need to pay attention to this when preparing. If they are grafted, the roots are dipped into water to revive them. If it is not possible to immediately pack the harvested seedlings for storage as described here (for example, long-term transportation awaits), then be sure to sprinkle the roots with soil and water them from time to time, preventing the soil from becoming completely dry. Plants can be stored this way for several days.
How to preserve strawberry/frigo strawberry seedlings?
Under no circumstances should the resulting plants be placed in the refrigerator. Strawberries and frigo strawberries of class A+, according to technology, were stored in refrigerators and cannot be re-cooled. In order for crops to “survive” until planting, it is necessary:
- release the seedlings from the packaging material and let them lie at room temperature;
- plant in peat pots;
- place containers with plants in a cool room without access to sunlight (it is preferable to choose semi-dark rooms);
- periodically water the soil moderately (overwatering is many times more dangerous than underwatering);
- As soon as the weather allows, transplant the strawberries using the transshipment method to a permanent place.
How to store seedlings in winter until spring?
Strawberry seedlings are stored under certain conditions. The air temperature in the room is kept at +2 – +6°C. Humidity should be at least 90%. Optimal conditions are considered to be 2 times more carbon dioxide than oxygen. If the humidity in the room is low, then hang wet towels; if it is high, ventilate it. When the window is opened, the seedlings are insulated. Suitable for storage:
To store seedlings indoors, the bushes are transplanted into boxes. Prepare boxes with a double layer. The root area of each plant is covered with sawdust or moss in several layers. Periodically check the condition of the seedlings, water them if necessary and ventilate the room.
Many gardeners who do not have basements and time to monitor strawberries indoors. They leave it to winter in the garden. To do this, the bed is covered with insulation, pre-moistened and fed. Warm material is fixed on the bed, placing heavy objects along the edges to prevent the possibility of being blown away by the wind.
Important! If the storage conditions are not followed, the strawberries will freeze and die. .
Seedlings can be stored in the refrigerator for up to 7 months. Plants are placed in a plastic bag, without soil. Spray with water and place on the bottom shelf for storing vegetables. There the air temperature is constantly maintained at 1 – 2°C.
Constantly opening the refrigerator removes excess moisture.
The modern storage method using the Frigo method is gaining popularity. All leaves of the seedling are cut off and stored in the cold. This helps to select the strongest bushes, remove weak ones and get high yields. Such strawberries take root faster in open ground.
Coniferous plants
Coniferous plants are supplied in a container. Before planting in open ground, you can simply hold them in the window. But we recommend not placing them on southern windowsills, where the sun through the glass will burn the needles. It is better to choose northern windows for overexposure, where the conifers will feel comfortable.
Don’t worry if the weather gives you a “surprise”, just store your seedlings correctly, and then they will definitely survive until planting!
Strawberry! Perhaps the most beloved, most labor-intensive, and easiest to grow plant. From year to year, depending on the vagaries of our almost snowless winters, at least cover with a blanket, sometimes with such difficulty, new, rare varieties of strawberries. In the spring we discover with great disappointment that it did not survive the winter. Frozen out. So I, too, have experienced such bitter disappointments for many years. Until I started experimenting with how to preserve it until spring. I read a lot of information about frigo, this is when a plant is dug up and stored at a temperature from 0 to -4C.
I tried it in three versions.
1. I dug up and sorted the adult plant from the children. I cut off the old roots and leaves. Leaving 2-3 small ones.
2. Placed 50–80 pieces in transparent packaging bags. She closed it silently. Adults separately, children separately.
3. Placed them in grape baskets.
In the first option, I placed the boxes on a cold, unheated veranda. When persistent cold weather set in, it was insulated with polystyrene foam on all sides. The result is that the strawberries overwintered 100%.
Second option. In the basement, I put all the bags in an iron barrel and covered it with a lid. Result - 100%
Third option. In an unheated greenhouse, I placed boxes with bags of strawberries in three rows on polystyrene foam and covered them with foam plastic, because... The temperature difference in the greenhouse at night and during the day is significantly different. Result - 80% survived, only the packages in the top row of the box froze.
When spring has come, I take out bags of overwintered strawberries, soak them for 2 hours in a weak solution of potassium permanganate with the addition of root vegetables, plow them, dig them up, select weeds, fertilize them, and in a thickened planting we plant full-fledged roots in one garden bed and in another. All care is to periodically pull out emerging weeds.
The essence of this method is to preserve rare varieties and get rid of weeds, making seedlings healthier.
Yes, it’s labor-intensive to dig up and process! But you can adjust the timing of planting. Make the first one under the arches, the second planting at the beginning of May, and the third in the middle or end of May. The result is that there are no initial weeds, strawberries will delight you with a harvest for a longer time. I do not grow remontant varieties of strawberries. It is enough to have varieties of early, medium and late ripening. This is my experience and I have been using it for many years. Demidova Tatyana
Landing rules
The mustache is planted in two ways: in a pot and in open ground. The decision on the method is made by the gardener, taking into account the area of the plot and the possibilities of maintaining the seedling. For the pot method, the following steps are used:
- Choose the strongest strawberry tendril.
- Prepare the soil: mix it with organic fertilizer.
- Fill the container halfway.
- The shoot is placed in it without tearing it away from the mother tree.
- Water every day until roots form.
- After 10 days, the stem of attachment is slightly cut so that the new bush gets used to independent existence.
- 14 days after planting, the seedling is completely separated from the mother plant.
For planting in open ground, follow certain instructions:
- Pre-prepare the bed.
- Dig up the area, remove stones and weeds.
- Apply organic fertilizers.
- The mustache is trimmed, leaving a shoot 20 cm long and roots at least 15 mm.
- Dig holes 5 cm deep.
- Pour a small amount of water into each.
- Seedlings are planted to a depth of 5 cm.
- Water every day until rooting.
After rooting, manipulation can be carried out to increase the stamina and resistance of strawberries to unfavorable conditions. After such a procedure, the bushes will not be afraid of downpours, rain, hail, or sudden changes in temperature. They make beds in the “Norwegian style”. To do this, several procedures are carried out:
- The bed is equipped with high boards on all sides.
- Cover with transparent film.
- Leave a few cm on top for ventilation.
- Carefully monitor watering and loosening the soil.
This procedure helps seedlings take root better, increases their survival rate, and makes them strong and hardy.
