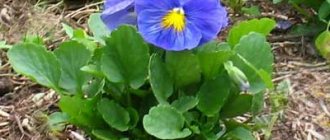
Pansies are incredibly beautiful flowers that can become a real decoration of the garden. They are quite unpretentious, quickly adapt to open ground, and get used to climatic conditions.
In order for the sprouts to be strong and healthy, it is necessary to plant the seedlings correctly and in a timely manner.
How to grow pansy seedlings? This is what this article is about.
Sowing time
When to plant pansy seedlings? The time for planting seedlings largely depends on when the pansies will be transplanted into open ground. Here two factors play a key role:
- Climatic conditions of the region. In central Russia, the temperature changes to positive from the end of March, so already at the end of April you can proceed to transplanting to open ground. In Siberia this time falls at the beginning of June.
- Moon calendar. Many years of experience of gardeners proves that plants planted in favorable conditions are healthier, stronger and less susceptible to disease. For each month there are certain favorable and unfavorable days.
Each package of seeds indicates the approximate time during which the seeds will germinate and become good sprouts suitable for replanting . Based on this figure, the climatic features of the region and the lunar calendar, an approximate time is selected.
When to sow pansies for seedlings? In warm regions - from mid-February, in areas with prevailing low temperatures - from mid-April
Features of propagation by seeds
Pansies can be propagated in various ways:
- seeds when sowing directly on the ground;
- vegetative method (stem division);
- seeds with preliminary preparation of seedlings.
All these methods are effective in certain climatic conditions and make it possible to fully transfer the characteristics of hybrids even when collecting seeds independently. Among them, the gardener needs to choose the one that is highly likely to produce a larger number of healthy plants.
Sowing seeds in greenhouse conditions is the simplest and most effective option for propagating pansies in our climate. It can be roughly divided into two stages: germination of flowers in greenhouse conditions and subsequent planting of seedlings on the ground. Each of these stages has its own characteristics, which will be discussed below.
Preparation and germination
If you plan to plant pansies in open ground by the end of spring, it is recommended to start working with seeds in February - early March. It is carried out as follows:
- A day before planting, the plants prepare the soil for pansies: select small flowerpots with a drainage hole, fill them with soil and spray it with potassium permanganate.
- The next day, the seeds of the plant are laid out on the soil, moistened generously, then covered with a special film or glass and the pot with them is placed in a dark, warm place.
- After 2 weeks, when the pansies sprout, move the container with it to the windowsill and make sure that the seedlings under the film are not steamed.
- A week after the sprouts appear, the plants are picked and transplanted into separate pots. After this, the plants are no longer covered with film.
You can learn how to grow Eustoma flowers by reading this article.
At the end of April it is necessary to begin hardening off the seedlings. To do this, flower pots are taken outside first for a few minutes, then the time spent in the open air is extended to several hours. As soon as stable warm weather sets in outside without frost on the ground, the flowers are transplanted into the garden bed. As a rule, this happens at the beginning or middle of summer.
Pansy seedlings
Timing and subtleties of planting in open ground
In June - early July, the plant is transplanted into open ground. If this procedure is carried out earlier, pansies may have a hard time surviving the winter and may not bloom in the spring. When you decide to plant ready-made seedlings in open ground, the gardener should follow these rules:
- plant plants at a distance of 20 cm or more from each other;
- transfer the seedling along with the root tuber of the soil (otherwise the pansies will have difficulty taking root on the site);
- immediately after moving the seedlings to the beds, water the flowers and apply fertilizer;
In the first year after planting, the gardener needs to ensure that the plants grow and develop quickly, but do not bloom. Normally, pansies should produce their buds in the spring of next year. If the first flowers begin to appear at the beginning of autumn, they should be picked to ensure normal growth of the plant.
How Eustoma is planted with seeds can be understood by reading this article.
You can learn how to grow Aubrieta from seeds by reading the article.
You can read how to plant and care for Morning Glory in this article here: https://2gazon.ru/ozelenenie/vertikalnoe-o/posadka-i-uxod-za-mnogoletnej-ipomeej.html
Variety selection
Pansies are herbaceous plants of small height - about 10-30 centimeters. They are annual or perennial, and depending on the time of planting, they bloom in spring or summer.
Pansies have the following botanical features:
- usually grow in small bushes;
- peduncles are smooth, have single buds;
- petals of various sizes;
- The color is also different, it can be from yellow to deep black.
There are complex patterns on the surface of the petals - a distinctive feature of pansies.
Depending on the botanical characteristics, varieties of pansies are distinguished. To date, there are about 400 of them.
Let's take a closer look at those that are most often used to decorate a garden.
Varieties of Pansies
Pansies are propagated by seeds for seedlings. The most commonly used varieties are:
- Vittroka is a perennial variety whose plants reach a height of 20-30 centimeters. The leaves are oval-shaped and bright green in color. The buds are large, reaching a diameter of 10 centimeters and have different colors: white, pink, dark red, purple, blue, light blue.
- Tricolor is a wild species. This variety is most often used in folk medicine to create infusions and decoctions. It is distinguished by small buds with a diameter of up to two centimeters in white, blue, purple or blue shades.
- Fragrant. As the name implies, this variety has a delicate and pleasant aroma. Plants reach a height of 15 centimeters and have small, up to two centimeters in diameter, purple or white buds. This type is often used in perfumery to produce esters.
- Horned is a perennial variety whose plants reach a height of 20-25 centimeters. It has flat, oval, elongated leaves of a rich emerald color. The flowers are small, up to 5 centimeters in diameter, and blue, cyan or violet in color. Hybrid varieties have also been developed, where red, yellow or white buds predominate.
- Williams is a variety obtained by crossing two others - horned and Wittrock. Refers to a biennial species. Plants reach a height of 30 centimeters, have leaves of regular shape and buds of various colors: yellow-burgundy, white-blue, yellow.
- Sororia or “moth viola” is a perennial variety, the plants reach a height of 30 centimeters, have small buds up to three centimeters of a delicate blue-violet hue.
- Spotted is distinguished by large buds with corrugated petals. This variety grows well in dark places with a lack of sunlight. The main difference between this variety is the presence of small spots on the petals.
It is necessary to choose a variety based on planting conditions: soil quality, abundance or lack of moisture and sunlight. Usually, recommendations are written on the packaging of the seeds.
How to plant seedlings
Seedlings begin to be planted in mid-February and continue until the end of April. As already mentioned, everything depends on specific climatic conditions and the lunar calendar. The following days are considered the most favorable:
- February: 7,8, 12, 14;
- March: 1, 2, 15, 16, 23, 28;
- April: only two days – 6 or 17;
- May: 8, 12, 15, 16, 17, 18.
And on the following days it is recommended to refuse planting:
- February: 2, 8, 9, 10, 16, 22, 23, 24, 25;
- March: 2, 8, 9, 10, 16, 23, 24, 25;
- April: 1, 7, 8, 9, 15, 22, 23, 24, 30;
- May: 6, 7, 8, 14, 21, 22, 23, 30.
In general, the rule is simple: do not plant anything during the full moon or new moon, as well as three days before and after.
Following this recommendation will allow you to grow healthy plants that will become a real decoration of the garden. But there are other tips.
Let's take a closer look at them.
Soil preparation
It is recommended to plant pansies in special soil, which has the required chemical composition, the required concentration of substances and fertilizers. When choosing a substrate, pay attention to the following parameters:
- chemical and acid composition. The soil should contain: deciduous and turf soil, compost, peat and river sand;
- genuine quality certificate;
- shelf life of the soil.
You can plant seedlings in ordinary plastic pots or special peat containers
Viola: planting and care at home
Viola at home develops best on open, sunny balconies. It’s worse on glazed balconies and loggias. Some gardeners manage to grow violas even on window sills, but in this case the window must be constantly open. Having plenty of light and fresh air is a must for growing any garden plant.
Viola develops well indoors in the presence of fresh air and plenty of light
Viola is planted at home in flower pots and balcony boxes. Ampel forms - in hanging baskets, flowerpots, tall flowerpots on a leg. Any container you choose should have drainage holes.
Ampel varieties of viola look impressive in hanging baskets
Since the roots of violas are prone to rotting, when planting, special attention should be paid to a good drainage layer. To do this, pour a layer of drainage material (expanded clay, brick shards, foam plastic) at least 2-3 cm thick onto the bottom of the selected container. Soil is poured on top - it must be loose, moisture-permeable and breathable.
Maintain a distance of 10-15 cm between the violas, otherwise strong specimens will oppress the weak and push them out of the composition
Viola seedlings are planted at a distance of 10-15 cm from each other, and at least 1-2 liters of soil must be allocated for each plant specimen.
When growing violas indoors, you need to ensure regular watering. On hot summer days, watering should be done 2 times a day - in the morning and in the evening.
The first fertilizing is applied 2 weeks after transplanting into the ground. Next, you need to fertilize the violas at home every week. Any mineral complex fertilizers for flowering plants are suitable for fertilization.
During hot days, a viola in a pot may lose its decorative appearance. Most often, the stems turn yellow and dry, the bush falls apart, flowering becomes less abundant, the flowers fade and decrease in size. Then the viola needs to be pruned. Usually it is shortened by half the length of the stems. But if the bush has already lost all decorative value, pruning can be done radically, leaving 5-6 cm from the branches (leaves must remain on them!). In just 2-2.5 weeks, the viola bush will grow with young shoots and bloom.
Pruning viola and subsequent flowering: “before and after” photos
Seed preparation
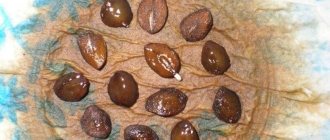
Seeds are usually purchased at gardening stores. They are produced in individual paper packages, which must be tightly sealed and free from defects and damage. The seeds inside must be whole and uniform, without spots, the smell of rot or other symptoms of disease.
If home-made seeds are used for planting, then before planting they are soaked overnight in a weak solution of potassium permanganate. It will help disinfect and remove harmful substances
Selection of capacity
As already mentioned, seedlings can be planted in various plastic containers. Ideal for:
- disposable cups;
- special containers for seedlings;
- one large container, but with subsequent planting of mature sprouts in individual containers;
- peat cups or tablets that decompose in the soil;
- trays.
The container must have drainage holes . If there are none, you need to make them yourself - just pierce the bottom.
Drawer with drainage grid
Planting scheme
The planting process is simple, and for everything to go well, it is recommended to adhere to the following scheme:
- Buy seeds and soil.
- Prepare containers for planting and make drainage holes in them.
- Fill the container with soil and water it with a solution of water and fungicides. This will prevent the occurrence of root system diseases or pest infestations.
- Bury the seeds into the soil 5-7 millimeters.
- Spray with water at room temperature from a spray bottle.
- Cover with cling film or polyethylene to create a greenhouse effect.
- Place containers in a warm place.
- Open the film every day so that the surface is ventilated and the seeds do not rot.
- After the first sprouts have appeared, they can be planted in individual containers, if initially the seedlings were in a common container. Usually within 2-3 weeks.
- Once every 4-5 weeks you can fertilize the seedlings.
If the weather in the region is predominantly cloudy, then ultraviolet lamps can be used as an additional light source.
How many days does it take for pansies to sprout?
The first shoots may appear in about a week. The better the care, the sooner they will sprout, since the seeds need sufficient moisture and sunlight. You can speed up seed germination by moving the tray to the south side, where there is more warmth and light.
How to plant pansies for seedlings: rules and methods
Container and soil mixture
You can sow and grow viola seedlings in any planting containers , these can be plastic and wooden boxes, cardboard and peat cups, disposable plastic cups, special trays and cassettes for seedlings, peat tablets. You can make your own containers, for example, by cutting off plastic bottles or milk cartons and other food containers.
When you think about choosing a soil, there are always exactly 2 options. Buy a ready-made mixture for flower seedlings in the store or make it yourself. There is no fundamental difference, everything depends on your time and capabilities.
To prepare a substrate for growing pansy seedlings with your own hands, you will need the following components in equal parts:
- turf land;
- humus;
- peat;
- sand.
Then the resulting soil mixture must be mixed well and preferably sifted. disinfect the soil by steaming it and spilling it with a fungicide (for example, Fitosporin ).
Do not forget! To successfully grow any seedlings, including violas, proper drainage is necessary.
Preparing seeds for sowing (processing)
To speed up seed germination and increase their resistance to disease, viola seeds are pre -treated with growth accelerators . The most popular means for soaking before sowing seedlings are “Zircon” and “Epin”.
Direct sowing
A step-by-step guide to planting viola seeds for seedlings at home in the traditional way is as follows:
- Moisten (for example, you can also sprinkle with a 1% solution of potassium permanganate or phytosporin to increase protection against rot and other dangerous diseases), and then lightly compact the soil in the planting container.
- Sow pansy seeds over the surface (some gardeners plant them in shallow, maximum 5 mm furrows, and then lightly sprinkle them with soil). Try to distribute the flower seeds as evenly as possible; for this, for example, use a small piece of white paper and slowly sow the seeds along the edge.
- Using a spray bottle, thoroughly moisten the crops again.
- Then cover with a lid or cover with plastic wrap. You can also put the container directly into the bag or put shoe covers on it.
- Place the container with the plantings in a dark and warm place where the air temperature averages 22 degrees.
Video: sowing viola seeds for seedlings and germination results
By the way! Viola can also be sown in snow . To do this, lay a small layer of snow on top of the soil and place the seeds on it. The snow will gradually melt and draw the seeds into the soil.
Growing and caring for seedlings
As already mentioned, the better the care of the seedlings, the faster the seeds will germinate and the healthier the sprout will be, the better it will adapt to open ground. The key care factors are the following:
| Temperature | In order for the seeds to germinate, it is necessary to create a sufficiently high temperature - about 22-25°C. That is why it is recommended to cover the container with film. After the first shoots have appeared, room temperature of 16-20°C is enough for the plant. |
| Lighting and supplementary lighting | Pansies require sufficient sunlight. If it is not enough, the sprouts must be illuminated with ultraviolet lamps. |
| Humidity and watering | Seeds and small sprouts must be regularly treated with warm water at room temperature from a spray bottle. |
| Feeding | As soon as 3-4 leaves appear from the seeds, you can feed the soil with nitrogen or phosphate supplements. To do this, use special low-concentration liquid additives, which can be found in a gardening store. Instructions for application are different for each composition; they are written on the bottle. |
| Picking seedlings | After the first 3-4 leaves appear, the seedlings need to be transplanted from a common tray into individual containers. |
| Pinching | After 8-10 petals appear, you can pinch the plant from the top. This will allow you to get more green mass. |
| Diseases and pests of seedlings, how to fight | Most often, pansies are susceptible to the following types of diseases:
|
Proper care will allow you to get beautiful pansies that will become a real decoration of your garden or local area.
How to care for pansy seedlings
Caring for viola seedlings after planting is a necessary stage of growing plants, which requires your time and effort. But it will help to grow strong and healthy seedlings. It is necessary to care for crops until germination using the following technology:
- After sowing, place the bowl in a warm, dark place . Temperature: +20-21°C .
- Water until shoots appear using a spray bottle . The soil should always be moderately moist.
- Ventilate every day by removing the covering material. to wipe off condensation every time .
By the way! With proper sowing and care, the first shoots will appear in about ten days.
After germination, care changes slightly:
- Remove the film or cover permanently.
- You need to move the seedlings to a well-lit place . Plants must receive light for at least 12 hours, so they need additional lighting (both before picking and after).
- should be reduced to 12-15 (but not more) degrees Celsius.
- Now you should water using a syringe or syringe. Apply moisture carefully so that it does not fall on the plants themselves. The soil should remain moderately moist at all times.
Planting in open ground: terms and rules
Planting seedlings in open ground requires various knowledge and skills from the gardener. It is important to do this correctly so as not to damage the root system, spoil or ruin the plant.
The easiest way to transplant is from peat cups or tablets. They just need to be placed in the ground and watered on top. Peat decomposes in the ground, so there is no need to remove sprouts from it.
It is more difficult to transplant from plastic trays and cups. Let's consider this issue in more detail.
Preparing seedlings
If the seedlings were transplanted correctly, the sprouts will quickly adapt to the new location and get used to the conditions of the area and climate. The first thing the preparation begins with is hardening the young shoots. This is a rather important stage, since it will prevent the death of seedlings from temperature changes.
About two weeks before the proposed transplantation, the seedlings should be taken outside for 3-4 hours, gradually increasing this time to 6-7 hours. It is recommended to leave it in a sunny, warm place
Also, two weeks before planting, young shoots can be fed. To do this, plant fertilizers, for example, liquid vermicompost, are added to the soil.
Selecting a location
Pansies love a warm place. At the same time, an abundance of sunlight can lead to the appearance of spots on the leaves and drying out of the plant. Therefore, the ideal place for a flower is partial shade, a place where it is mostly light in the morning and cloudy in the afternoon.
A place under other flowers, large in height, subshrubs and shrubs, and trees is well suited for planting.
As for the soil, it should be:
- nutritious;
- loose;
- breathable;
- drained.
In order to obtain soil suitable for planting, it is recommended to dig up the territory of the vegetable garden or garden, add charcoal and humus to the soil
If the site is dominated by heavy clay soils, then they dig up with the addition of sand, peat and mineral fertilizer, for example, nitroammofosk.
Landing technology
The technology for transplanting seedlings to open ground is as follows:
- Make holes at a distance of 20-30 centimeters.
- Put a small amount of vermicompost into each and mix it with the soil that is in the hole.
- Cut the glass and carefully remove the sprout along with the surrounding lump of earth.
- Place in the hole, cover with soil and press down.
- Water the planted plants with water.
After a few days, it is recommended to treat the soil surface with complex fertilizer. This will protect young shoots from diseases of the root system and pests
Caring for viola after planting seedlings
As practice shows, friendly shoots will begin to appear after 1 week or a week and a half. Now you need to move the container from a dark place to a sunny window (you can even directly to the south).
It is important that the soil of the seedlings is always slightly moist. Therefore, do not forget to water regularly .
Important! The soil must be kept moderately moist, since excess moisture leads to plant disease with blackleg .
After 6-7 days from the moment the first shoots form, the shelter will need to be removed , but first you need to start ventilating the soil gradually, increasing the duration over time.
Pansies require 15 hours (+-1 hour) of daylight ; accordingly, due to early sowing, it is recommended to supplement the young seedlings with phytolamps or ordinary LED lamps, otherwise they may stretch out too much.
Picking
The time for picking pansy seedlings comes when it has 2 true leaves.
Note! It must be admitted that viola easily takes root after almost any transplant, even not the most accurate one. Thus, young seedlings whose roots are slightly damaged during picking may initially slow down their development a little, but then begin to grow steadily. However, you need to approach the procedure with all responsibility!
If possible, try to plant viola seedlings into separate planting containers (pots, cups), or into a common container according to a 5 by 5 centimeter pattern.
The requirements for the soil do not change, except that this time steaming will not be required. However, it is recommended to add mineral fertilizer to the soil mixture, which can be nitrophoska or azofoska, at the rate of 2 tbsp. l. funds for 4 liters of land.
Important! The roots should be freely placed in the hole. They must not be bent when filling them. If, however, they do not fit, then they should be pinched.
Viola seedlings that have become too elongated should be buried down to the cotyledon leaves.
After transplanting, it is necessary to water. If after this the ground has settled excessively, then more soil should be added.
Video: picking a viola
That's all! Now you can again place the seedlings on the windowsill or any other bright place where the temperature will remain at 16 (+-1) degrees.
Once every 2 weeks, you can feed pansies with complex mineral fertilizers for seedlings, which include nitrogen, phosphorus and potassium.
When there are approximately 2 weeks left before planting, the viola seedlings should begin to be hardened , gradually taking them out into fresh air. Try to keep the pots out of direct sunlight, otherwise young and fragile leaves may get burned.
If you did everything correctly when planting and grew pansy seedlings at home according to the recommendations, then in the second half of May the violas will bloom and they can be planted in open ground or transplanted into hanging balcony containers, flower pots or a high flower bed.
Video: how to grow good viola seedlings
Flower care
After planting, it is necessary to carefully care for the young shoots so that they do not wither, but grow healthy and strong. It is recommended to do the following:
- water the pansies in a timely manner, but do not overwater them;
- after watering, it is recommended to slightly loosen the surface of the moisture;
- remove weeds in a timely manner;
- feed and fertilize once or twice a season;
- trim dead flowers, remove unhealthy parts of the plant.
As you can see, caring for pansies is not much different from caring for other plants. Therefore, the gardener will not have any problems.
Varietal and species diversity
There are a lot of folk signs that attribute many magical abilities to Pansies, as well as recipes. The healing properties have been confirmed in practice, but one can only guess about the mystical features.
All varieties are recognized as medicinal by official medicine and are used for the manufacture of drugs that regulate the functioning of the endocrine system. Pansies are used as a diuretic and cough medicine.
The flower is divided into 2 groups (conditionally) according to the structure and shape of the bud/petals:
- Diameter from 4 to 7 cm - small.
- Large varieties have flowers up to 10 cm in diameter.
The type and shape of Pansy petals does not affect the medicinal and decorative properties. But small-flowered varieties are best used for planting and decorating flower beds in the northern and central regions.
They safely tolerate temperature changes and frosts. In the southern regions, small-flowered Viola also grows well. The only point worth considering is that the flowers become smaller during flowering.
Additional classification of Pansies:
| Along the edge of the petal | By color palette |
| Smooth edging | Monochrome color |
| wavy edge | Two-color |
| Presence of contour blots/stripes |
