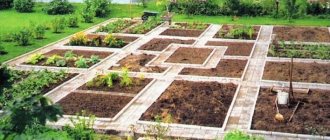
The modern gardener has very little time to work on his summer cottage. Many people only manage to get to the garden on weekends, since they are busy with their main job all week.
Naturally, it is especially important for such people to correctly allocate time and energy for working in their garden, in order to have time to get things done on the site, and it wouldn’t hurt to rest after a working week either. So is there a way to work less in the garden, while still getting good harvests? ? Is it possible to simplify some of the gardening work or omit it completely?
Galina Aleksandrovna Kizima, a gardener with 52 years of experience to date, took up the solution to this problem. Having once acquired her own plot of land, she, as they say, “threw headlong” into this new business for her. Having spent years studying the intricacies of gardening, she brought together the experience accumulated by many practicing gardeners. And she managed to find out a very important thing: the most labor-intensive work on the site can be significantly reduced. Let’s figure out how to achieve this and why this is not only possible, but also the only correct thing.
To begin with, let's understand the following:
In order to successfully engage in farming, while saving time and effort, you need to radically reconsider your attitude towards working on “six hundred square meters” and develop completely new principles for gardening.
Principle #1: DO NOT dig!
Let's first figure out why digging is harmful? There are at least 5 reasons why you shouldn't do this.
The first reason is this: we are accustomed to considering the earth as something like inanimate matter.
But soil is a very complex living organism, densely populated by microorganisms and lower animal organisms, for example, such as earthworms. And between them there are their own established laws of community life.
In the top layer of soil, at a depth of approximately 5-20 cm, live microfungi and bacteria that require oxygen to live. In the lower layer, at a depth of approximately 20-40 cm, live bacteria for which oxygen is harmful. They need carbon dioxide.
When digging to the depth of a spade bayonet, turning the layer over, we change the layers. And each type of microorganism finds itself in an unfavorable environment. Most of them die in this case.
Soil devoid of microorganisms becomes dead and loses fertility. After all, it is the very fertility of the soil that is created and maintained by the microorganisms and earthworms that inhabit the earth.
The soil will remain dead until its population is restored on each floor. In addition, the soil, losing its inhabitants, loses its structure along with them, and therefore collapses. Such soil is washed away by rains and carried away by winds.
The second reason why you should not dig and plow while turning over a layer of soil is the following: when digging up the soil, we disrupt all the microchannels through which moisture and air penetrate into the arable layer. As a result, neither moisture nor air enters the area of the sucking roots, and then the normal nutrition of the plants is disrupted.
Usually, during rains, such soil turns into a viscous substance, like plasticine, and after drying it turns into real reinforced concrete. The roots literally suffocate and the plant weakens. What a harvest there is.
How are these microchannels formed in the soil? The fact is that the root system of plants is huge. It not only goes deep (sometimes up to 5 meters), but also branches widely in all directions. And each of these roots is covered with hundreds of thousands of sucking hairs. As a result, every inch of earth is literally riddled with these hairs. When the above-ground part of the plant dies, soil microorganisms begin to eat the remains of the roots. As a result, microscopic channels are formed through which moisture penetrates into the soil. The soil absorbs moisture, and air rushes into the ground through the resulting voids-channels.
In addition, there are passages that worms make in the soil. And they also serve as channels for water and air, only larger ones. Through all these passages, the roots of the next generation of plants easily penetrate deep into the soil.
We are strongly recommended to dig up the soil in the fall. But in doing so, we completely disrupt the system of water and air exchange, replacing it with several large cracks. In the spring, when we dig again, we completely destroy the channels created by roots and bacteria. With such double processing, the entire complex soil system is destroyed, and the soil itself is caked. Sometimes (in dry times) so much so that you have to literally hammer it.
The third reason why you should not dig and plow is very simple: during autumn digging, we bring all the weed seeds from the surface into the soil, where they are stored until spring. And when we dig again in the spring, we bring overwintered weed seeds back to the surface, which immediately begin to germinate.
The fourth reason why the soil should not be dug up is this: usually after digging we leave the surface of the soil “bare”, and this leads to drying out and destruction of its topmost layer. In addition, weeds immediately begin to occupy the open space under the sun.
The soil should not be left bare. It should not be dug up, but covered on top with any mulching material.
The easiest way to do this is the way nature has long invented. It covers the ground with organic remains. In autumn - fallen leaves and the aboveground part of dead annuals. In spring - young green shoots.
Why is she doing this? In the fall, to return organic matter used up by plants to the soil and protect the surface root system from frost. In spring, to cover the surface from direct sunlight, protect the top layer from drying out and destruction.
The fifth reason is the following: when digging, the upper, most fertile part of the soil, containing humus, turns out to be scattered throughout the entire thickness of the dug layer. The humus seems to be washed away or smeared. And since there is already little of it in poor soils, the fertility of the top layer almost completely disappears. Over time, humus “floats” to the top layer. But when will this happen again? Humus should be protected and highly valued, and not destroyed by digging.
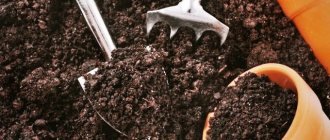
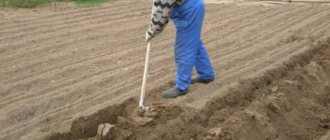
So what do you do with the soil if you can't dig it? But it can and should be loosened. Instead of a shovel, use a Fokin flat cutter. It has a pointed end that is used to make furrows. First along, then across, deepening it into the soil by about 5 cm. Then, with the flat part of the tool, lightly dig up the top layer. If necessary, rake.
By the way, a rake can also be used to loosen the top layer of soil. A hand cultivator is best suited for such surface cultivation of the soil. In addition to wheels that loosen the soil, it also has a cutting plate.
This work can be done with a sharpened hoe, a Strizh weeder , and other devices. There are quite a few of them on sale now.
The only requirement for such tools is that they must be very well sharpened. And don't believe in self-sharpening. The tool must be sharpened before each use, then the work will go quickly and easily. And make sure that the tools do not go deeper into the soil below 5 cm, and that they do not mix the layers. You can dig with a regular shovel, but only superficially.
Don't worry about the roots. They will find their way into deeper layers, penetrating microchannels left from the root system of previous plants.
So, you don’t need to dig, but loosen!
Galina Aleksandrovna KizimaA guide for a smart summer resident
From the author
I am a physicist by training, and therefore an amateur in biological science, but with extensive practical experience in growing anything and everything on a small piece of land, like every amateur gardener in our country. So the book was written by an amateur gardener for amateur gardeners like me.
For the first 30 years, my husband and I diligently did this hard work: we dug, and even twice a year - we dug in the spring, dug in the fall, added more and more fertilizers every year, endlessly watered and weeded, but what a paradox , the harvests were getting worse. The earth was on strike, it didn’t want to give birth to anything but weeds! And his age kept increasing, and this senseless hard labor became too much to bear. And here I was forced to think about why nature doesn’t plow, doesn’t dig, doesn’t add mineral water, only waters it with rain from time to time, but her soil, year after year, in any weather, invariably produces a stable harvest of large green mass. At the same time, the land not only does not become scarce, but constantly increases its fertility. But in our country this very fertility disappears right before our eyes over the years, as the famous song says, “no matter what they do, things don’t go well,” or rather, they go worse and worse. And then I began to look closely at nature, trying to understand what she doesn’t like so much about our activities on earth? It turned out that the main misfortune came to earth along with technological progress. As soon as we began to use technology in the fields that involves deep plowing the soil and turning the layer over, soils began to die everywhere all over the planet. It turned out that the soil cannot be dug deep, and even turning over the layers! It can only be loosened shallowly (about 5–7 cm)!
The surest way to destroy the natural fertility of the soil is to dig it!
It all started with this realization. And gradually, through endless experiments, meeting new people (and as you know, new –
this is a well-forgotten old thing) with trends in organic farming, I have developed my own way of working in the garden in accordance with nature, and not contrary to it. And I understood the main thing: you don’t need to get under nature’s feet, and she will do everything for you! Just don't bother her, that's all.
I have not made a discovery, all this has long been well known, individual people, such as Bolotov, Ovsinsky, Grachev, received fabulous harvests 150-200 years before you and me, using the principles of natural farming. Our predecessors Dokuchaev, Maltsev and contemporaries, both theorists and practitioners - farmers, Tarkhanov, Slishchinin, Kurdyumov, Bublik and many others, including foreign ones, brilliantly proved that agriculture is a profitable industry that produces stable harvests in any weather, if you work on the land in accordance with nature, and not contrary to it! So let us, dear amateur gardeners, switch to modern methods of running our small farm. By the way, this is a very exciting activity. And I also want to tell you that I do not at all believe that my recommendations are the absolute truth in the last instance. You may have your own view of all these problems, your own experience, and your result may be completely different. Let's just assume we're both right, dear reader, and act according to our own experiences and views. But, first of all, you should try at least some of what I offer you in this small book.
Good luck at your dacha!
Galina Aleksandrovna Kizima
Chapter first. DO NOT dig! DO NOT water! DO NOT weed!
That's it! Why so? How then to sow and plant? Let's first figure out how to apply these three main NOTs, listed in the title, and then in the following chapters, the curious will be able to find out why I consider these three NOTs to be fundamental for successful work on the site.
So, the soil should NOT be dug, but only loosened, and only 5-7 cm shallowly, primarily because it is a living organism and digging is destructive for it.
A shovel is NOT suitable for this, but only a ripper, any kind. This could be a manual cultivator with a cutting plate, a Strizh weeder, a Kuzmich shovel, a hoe, a hoe, or even better, a Fokin flat cutter, a Kuzmich shovel or any other tools, there are now many of them, those that do not turn over the layer of earth, but only loosen it. Then, when your soil becomes fertile and loose, a simple rake will be enough to prepare the soil for sowing and planting in the spring. You will only need a shovel for planting bushes and trees, and even then not on all types of soil.
The soil should NOT be watered, but mulched
.
You can use mown grass and weeds or peat in a layer of 8-10 cm. But since it is acidic, you need to add ash at the rate of a couple of glasses of ash per bucket of peat. When using lime, or better yet dolomite, one glass is enough.
For mulching, you can use ordinary newspapers folded in several layers (since modern newspapers are printed using a photo method, they do not contain printing ink containing lead). Mulch inhibits the growth of perennial weeds and prevents annual weeds from sowing seeds. In addition, it retains moisture in the soil, preventing it from evaporating from the surface (plants manage to take no more than 20–25% of water when watering; the rest is evaporated from the soil by the sun and dry air, especially in windy weather). At night, dew falls under any mulch due to the temperature difference on its upper and lower sides, and the soil absorbs this dew.
Why do I recommend mulching the soil under plantings with shaved weeds? Because they, however, like any plants and animals, including you and me, consist of 75–85% water and, rotting, give this water to the plantings under which you have placed them.
The best mulching material is shredded tree bark. This mulch has a number of excellent properties. It is not wetted, and therefore practically does not rot and therefore keeps the physico-chemical composition of the top layer of soil unchanged. It does not acidify the soil, which does not cake under its layer. It allows air and moisture to pass through well, but prevents its evaporation from the soil. Having a dark color, it warms up well during the day and retains heat for a long time at night.
No bark is not a problem, use what you have on hand. There is sawdust, let it sit for a year or two and mulch. There is a coniferous forest nearby - collect needles and use them, but do not forget to add ash or dolomite, lime, chalk to them, which is found in the bins, since the needles strongly acidify the soil. It is good to mulch with high-moor peat; it is only slightly inferior to bark mulch. But it also acidifies the soil, so you will have to add deoxidizers. You can mulch with non-woven covering materials (spunbond, lutrasil, etc.), but black ones. You can use sphagnum moss (from cranberry bogs), it is also bactericidal and will also kill harmful bacteria. But, under it, the soil is always 2–3 degrees colder than unsheltered soil, and 5–7 degrees colder than under a dark shelter. Therefore, in cold regions in a greenhouse where heat-loving plants grow, they should not mulch the soil. You can use cardboard and even simple newspapers, folded in several layers and glued together into a panel with ordinary tape. In a greenhouse, the soil can be mulched with crumpled newspapers. In the first, hottest weeks of spring, fallen leaves in autumn serve as mulch. So don’t rake them up in the spring for the sake of beauty and cleanliness. The awakened worms themselves will drag them into their holes and there they will process them into humus, not without the help of overwintered microorganisms. But plants growing on it also provide excellent cover for the soil. You, of course, have noticed that under woodlice the soil is always moist and loose. The root system is very shallow, it is not a competitor for cultivated plants, and therefore the common woodlice can well serve to protect the soil from drying out. Therefore, it is better to plant gardens with any low-growing plants with a shallow root system, which completely replaces mulching.
So, mulching the soil significantly reduces one of the most labor-intensive tasks - watering. In addition, it reduces weeding to some extent. And most importantly, it gives the plants a fresh lunch, not without the help of soil microorganisms, which quickly and efficiently process fresh organic matter into the healthiest food for plants, that is, they significantly save us from the tedious work of feeding plants, and also saving us money on the purchase of mineral water.
Plants are generally not as helpless as we imagine; in many ways, they can easily do without us and grow on their own. It is we who make them helpless and selfish with our excessive obsessive care, exactly like our spoiled children.
All garden crops can be divided into four groups. The first group includes those inhabitants of the beds who do not know how to obtain moisture and spend it uneconomically. These are cabbage, cucumber, lettuce, radishes. The second group includes those plants that do not obtain water well, but spend it sparingly. This group contains onions and garlic. The third group of plants produces water well, but spends it uneconomically. These plants include beets and rutabaga. And the last, largest and most adapted group knows how to get water well and spend it economically. These are peppers, tomatoes, eggplants, carrots, parsley, celery, zucchini, pumpkin, melon, watermelon.
Hence the watering norms. The plants that belong to the first group need regular watering the most. And those in the last group need moisture least of all. Generally speaking, you don't have to water them at all all summer if you do a few things when planting them in place. A separate chapter will be devoted to this.
Well, how can we do without weeding? Everything will be overgrown with weeds up to the chest!
DO NOT weed does not mean you don't have to fight weeds.
These are nature’s own children and she has awarded them incredible vitality, so that in the struggle for existence, weeds will prevail over nature’s stepchildren, imposed on it by us - cultivated plants.
To avoid weeding in the beds, after harvesting, without leaving the soil open for a day, you must immediately cover it with light-proof material. Non-woven covering materials black spunbond or lutrasil of the highest density are best suited for this purpose. It can be secured with poles, slate nails or staples made of wire, or at worst with stones so that it does not blow away in the wind. And leave the beds covered until the seedlings are planted or the seeds are sowed. This material will last you 7–8 years. But, if it is not there, then you can cover the beds with cardboard or newspapers folded in 5-6 layers, making sure that the wind does not tear them off the bed until spring. I do not recommend using roofing felt or black film as a mulching material, since air and moisture do not penetrate through such a covering. In the spring, the soil in the beds will be dry and you will have to water them thoroughly. Do you need this? Cardboard or newspapers get wet in the autumn rains and retain moisture in the top layer of soil. A light-proof layer on the soil surface will not allow perennial weeds to survive without light, and any mulch will prevent weed seeds from getting onto the soil and germinating. If you need to clear a place of perennial weeds, cover it with light-proof material for a couple of years and they will be finished.
In the spring, before sowing, water the beds with water directly over the shelter in the evening. If they are covered with cardboard, then remove it, water the soil and cover it with cardboard again. In the morning, remove the cover, loosen the soil shallowly, make seeding furrows with the edge of the board, without making large distances between the furrows, so as not to allow weeds to settle in the empty space.
When planting seedlings, make holes at a short distance from each other and try not to plant or sow monocultures in the same bed. Be sure to plant compatible plants together. They help each other survive. And in order to repel most pests, plant Tagetes (marigold) seedlings among vegetables and herbs (or sow their seeds at the same time as sowing the seeds of vegetables and herbs). But, since Tagetes seedlings do not tolerate spring frosts, all crops should be covered with white spunbond (or lutrasil, or acrylic), which is generally advisable for all plants, since the bed cannot be watered before the seedlings appear. Water can wash the seeds in an unknown direction or turn over the hatched ones, the tip of which, already oriented towards the center of the earth, will be directed upward, which will cause its death. In addition, the top layer of soil can dry out easily, especially in windy weather. The seeds that hatch in it will dry out and will not sprout. But watering from above over the fabric can and should be done in the evening if there is a danger of the soil drying out.
There is another, not at all labor-intensive way to push weeds out of the garden. In early spring, when there is still snow, but the sun begins to warm up well during the day, blacken the snow on top with ash or peat and cover the bed with transparent film. The blackened snow under her will quickly melt. Weeds will sprout from the heated top layer. As soon as they turn green, remove the film, loosen the soil and leave the beds open for a day. The weed seedlings will die, and you will cover the beds again with film. After a couple of weeks, weeds will sprout from the deeper layer of soil, which has been reached by heat, repeat the operation. Weed seedlings are vulnerable only at the time when their cotyledon leaves have opened, then they have only a thin central root and it is torn out of the soil, leaving no scraps of lateral roots on which there are dormant buds of renewal. Weeds are so difficult to control because they have the ability to regrow from the slightest fragment of roots.
When you have previously cleared the bed of weeds, you can sow the seeds of cultivated plants, but under no circumstances should you think about digging up the soil in the bed before sowing, because you will bring to the surface the weed seeds that lie in the lower layer of soil. The fact is that the entire thickness of the arable layer of soil (25–40 cm) is literally sown with them, but the seeds of most weeds can sprout only from the top layer from a depth of no more than 7 cm due to the limited length of the subcotyledon. They can be stored in the soil for centuries, waiting in the wings. All you can do is loosen the top layer of soil with a Fokin flat cutter or a regular rake. There is another good way to protect your beds from weeds. As soon as you have harvested the crop, immediately sow the free area thickly with white mustard. Its shoots appear quickly and it also grows quickly; before the autumn frosts, the bed will be overgrown with a dense green carpet, so leave it before winter. In the spring, do not dig up the bed under any circumstances, just make furrows for sowing by raking the remaining mustard to the sides, thus the soil between the rows with crops will immediately be mulched. White mustard, in my opinion, is the most suitable plant for this purpose, since it displaces weeds from the occupied area, improves the soil health by suppressing pathogenic microflora, and drives out not only wireworms but also nematodes from its territory. The above-ground part, killed by frost, gradually rotting, provides food to the planted plants. Some gardeners dig up mustard crops (winter rye, clover, buckwheat and other plants that improve soil fertility) with soil. I don’t do this, because I never dig the soil, so I use white mustard, since its shallow root system dies in winter, and by spring, breakfast is already ready in the soil for my plants from its rotten roots, and then the gradually rotting above-ground part will serve them not a bad lunch.
Perennial weeds with a powerful root system cannot be fought by weeding, since when you pull out the root, you leave in its place many scraps, from each of which a new plant will appear.
So, weeding is the surest way to reproduce them.
.
You can see this for yourself. Digging up one weed, pull it out, and cut the second one at the soil level. In a couple of weeks, instead of the first one, several of them will come out (from all the root fragments remaining in the ground), and only one will appear from the shaved one (from the same root that remained in the ground after shaving). Well, what do you want to do with them? Oppress! How is this possible? Yes, it’s simple - simply shave them off the face of the earth, that is, mow them down to the level of the soil. The fact is that most weeds (with the exception of grasses) are dicotyledonous plants. Their leaves, which supply nutrients for the existence and development of the root system, are located on the cuttings.
By cutting off the leaves, you deprive the roots of food, and during the growing season (that is, in the spring-summer period), not a single plant can go without leaves for a long time. The root system, not receiving food, begins to die, which causes the death of the entire plant. Therefore, your task is to prevent the leaves from nourishing the roots.
In spring, the supply of nutrients in the overwintered root system is large and it is capable of renewing the leaf apparatus 3–4 times from its reserves. But then these reserves run out and the plant dies. Therefore, if you cut off weeds regularly, not allowing them to grow above 10–12 cm, their root system will weaken and they will not appear again.
So, most importantly, don’t let the weeds grow up to your knees; you need to shave them off as soon as they reach 10–12 cm! Regularly!
If you let the weeds grow up to your knees, much less up to your chest, the roots will regain strength and all your work will go down the drain.
In the Northwest, weeds should be cut off May 10–15, then approximately every 10 days until June 20–25. And then there will be practically no more of them.
Now let's formulate the basic principles of successful farming on six acres.
1. Do not dig, but only loosen or only slightly dig up the soil superficially, without going deeper into it than 5-7 cm, both when loosening and when digging (if you do dig it).
2. Never leave the soil fallow (with an open surface, “bare”, without a single speck), that is, be sure to cover it from direct exposure to sunlight, which destroys the top layer, and for this the soil should be mulched. This will save you from constant watering, and will also prevent weeds from sowing the free space with their seeds.
3. Do not so much pull out weeds as prevent them from entering the beds. Those that do appear should be cut to the level of the soil, and not torn out of the ground. And leave them right there (or use them to mulch the soil in other beds and under perennials), and not drag them into compost heaps specially organized somewhere in the outskirts of the site.
4. Constantly throughout the summer add unrotted organic matter to the plants - food for the soil microflora, which will provide optimal nutrition to your plants throughout the season.
5. Practically do not use conventional mineral fertilizers (with minor exceptions).
6. Takes care of plant compatibility.
7. Use mixed compacting plantings.
8. Densely populate your beds - “in cramped conditions, but don’t be offended” (that is, intensively use the planting area, then there will be no living space left for weeds).
9. In the fall, do not take anything away from the beds and flower beds, as well as from under the plantings of perennials. On the contrary, in every possible way throw foliage, dead above-ground parts of plants, and mown grass under them. Leave erect annual plants to overwinter “standing”, since they will retain the snow, and when it melts in the spring, they will not allow the melt water to flow away to God knows where, but will contribute to the absorption of this water by the soil.
10. It is easier to prevent diseases than to cure plants from them later.
11. It is easier to prevent pests from entering your garden than to fight them.
12. Under no circumstances use pesticides on your property. Use only biological products and “old-fashioned” methods.
Now let's look at all these points in more detail.
Chapter two. Why is digging so harmful?
There are at least five reasons, and the first of them is as follows. We are accustomed to considering the earth to be inorganic matter, that is, nonliving matter, and we treat it accordingly. And soil is a very complex organic living organism with its own hierarchical structure, its own laws of coexistence, densely populated by microorganisms and lower animals, such as earthworms. In the top layer of soil at a depth of approximately 5-20 cm, the soil is inhabited by microfungi and bacteria - aerobes, that is, those lower organisms that require oxygen for their existence. In addition, this layer was chosen by earthworms. In the lower layer, at a depth of approximately 20–40 cm, there are anaerobic bacteria for which oxygen is harmful; they require carbon dioxide. When digging to the depth of a spade bayonet, turning the layer over, we swap these layers, and each type of microorganism finds itself in an unfavorable environment for itself. Most of them die in this case. It takes at least two to five years to restore the broken hierarchy. Soil devoid of microorganisms becomes dead and loses fertility, since this very soil fertility is created and maintained by the microorganisms and earthworms inhabiting the earth. And no amount of fertilizer application will help here until its population is restored on each floor. In addition, the soil, losing its inhabitants, loses its structure along with them, and therefore collapses. Such soil is washed away by rains and carried away by winds. At the end of the 19th century, the outstanding Russian scientist and soil scientist V.V. Dokuchaev opposed deep plowing of the land with turning over the layer. But, the age of technological progress came, which led to the appearance of tractors, and the process of widespread soil destruction began. The bright minds of humanity could not stop it. Therefore, at present we have what we have. Almost completely destroyed the most fertile lands on the entire planet and an inexorable decline in soil fertility, correspondingly a drop in yield from every square meter of cultivated area.
The second reason why you should not dig and plow by turning over a layer of earth is the following. When digging the soil, we disrupt all the microchannels through which moisture and air penetrate the arable layer. As a result, moisture and air do not enter the area of sucking roots, and normal plant nutrition is disrupted. Typically, during rains such soil turns into a viscous substance, like plasticine, and after drying it turns into “reinforced concrete.” The roots literally suffocate and the plant weakens. What a harvest there is. Plants “don’t care about fat, if only they could live.”
How are these microchannels formed in the soil?
The fact is that the root system of plants is huge. Not only can it go deep up to 2–5 m (in beets, for example, the central root can penetrate up to 3–4 meters deep), but it also branches in all directions and each of these roots is covered with hundreds of thousands of sucking hairs, the total length of which can reach 10 km!
As a result, every inch of earth is literally riddled with these hairs. When the above-ground part of the plant dies, soil microorganisms begin to eat the remains of the roots. As a result, microscopic channels are formed through which moisture penetrates, and after it is absorbed by the soil, air rushes into the soil through the channels. In addition, there are passages that worms make in the soil. And they also serve as channels for water and air, only larger ones. Through all these passages, the roots of the next generation of plants easily penetrate deep into the soil. We are strongly recommended to dig up the soil in the fall in order to destroy pests that have settled for the winter in the surface layer of soil, and also to ensure that moisture penetrates between the clods, freezes and expands the passages for spring water and air, which will rush through these cracks into the soil layer. Yes, of course, some of the pests die, but we completely disrupt the system of water and air exchange, replacing it with several large cracks. In the spring, when we dig again, we completely destroy the channels created by roots and bacteria. With such double digging, this entire complex system is destroyed, and the soil becomes so compacted in dry times that it has to be literally chiseled.
The third reason why you should not dig and plow is very simple. During autumn digging, we bring all the weed seeds from the surface into the soil, where they remain until spring. And when we dig again in the spring, we bring overwintered weed seeds back to the surface, which immediately begin to germinate.
The fourth reason why the soil should not be dug up is that usually after digging we leave the surface of the soil “bare”, and this leads to drying out and destruction of its topmost layer, in addition, “a holy place is never empty”, and Weeds will soon begin to take up their place in the sun. The soil should not be left bare. It must be covered on top with any mulching material. The easiest way to do this is to do it the way nature does it, that is, to cover the ground with organic residues. In autumn - fallen leaves and the aboveground part of dead annuals. In spring - young green shoots.
Why is she doing this? In the fall, to return organic matter used up by plants to the soil and to protect the surface root system from frost (where there is frost). In spring, to cover the surface from direct sunlight, protect the top layer from drying out and destruction.
The fifth reason is that when digging, the upper most fertile part of the soil, containing humus, turns out to be scattered throughout the entire thickness of the dug layer. Humus seems to be eroded or smeared, and since there is so little of it in poor soils, the fertility of the top layer practically decreases. Humus always “floats” to the top layer. But when will this happen? Humus should be protected and highly valued, and not destroyed by digging.
So, the earth is a living organism, and one cannot interfere in its life thoughtlessly and with impunity.
Soil fertility is created by the indigenous inhabitants of the earth - microorganisms and earthworms. They must be protected and constantly ensure that they have food - not rotted organic matter.
So, digging destroys soil fertility.
Chapter three. How to do without watering and simplify fertilizing?
Plants are not as helpless as we imagine. All garden crops can be divided into four groups. The first group includes those inhabitants of the beds who do not know how to obtain moisture and spend it uneconomically. These are cabbage, cucumber, lettuce, radishes. The second group includes those plants that do not obtain water well, but spend it sparingly. This group contains onions and garlic. The third group of plants produces water well, but spends it uneconomically. These plants include beets and rutabaga. And the last, largest and most adapted group knows how to get water well and spend it economically. These are peppers, tomatoes, carrots, parsley, zucchini, pumpkin, melon, watermelon. Hence the watering norms. Plants that belong to the first and third groups need regular watering the most. And those in the last group need moisture least of all. Generally speaking, you don't have to water them at all all summer if you do a few things when planting them in place.
Let's start with tomatoes
. Before planting seedlings, you need to make a hole, slightly larger than a lump of soil with roots. Add a dessert spoon of double granulated superphosphate. Gradually pour 4–5 liters of water into the hole. After this, plant the seedlings, water them, lightly plant them and mulch them well. That's all. No fertilizing or watering is required all summer long. Except during prolonged cold weather. At temperatures below twelve degrees Celsius for a week, the plant begins to experience severe starvation, since the root system does not work, so you should feed the plants by leaves. You can use a solution of any of the liquid preparations for feeding, containing all the nutrients the plants need. As a last resort, you can make a weak solution of azofoska (1 teaspoon per 5 liters of water). And spray the plants in the evening. Absorption takes approximately 3–4 hours, so it is important that there is no bright sun or rain during this time. Tomatoes have a powerful root system and it can go to great depths (up to two meters) in search of moisture. Usually, when picking tomato seedlings, it is recommended to pinch the central root by a third of its length. Pinching the root promotes its branching and, instead of growing deeper into the soil, the roots begin to grow wider, but at the same time they end up in the surface layer of the soil, and therefore become dependent, even if you mulch them. As soon as for some reason you cannot water them, when the top layer of soil dries out, the sucking hairs on the roots will dry out, and the tomato may drop its flowers and even ovaries. I do not recommend pinching the tomato root when picking, and therefore the seedlings are picked not in cups, but in film diapers. Roll up a cylinder from a small sheet of film (15x25 cm), and write the name of the variety in the upper left corner with a marker. Turn the film over to the other side. Place a tablespoon of prepared, moistened soil in the upper left corner of the diaper. Transfer the seedling to the soil so that the cotyledon leaves are on the edge of the film. Place another tablespoon of soil on top.
End of introductory fragment. Buy full version.
Principle #2: DO NOT weed!
How is this possible? Everything will be overgrown!
Not weeding does not mean that you don’t need to fight weeds. It is absolutely necessary to fight them, otherwise these native children of nature will simply displace our cultivated plants from the site.
So what should we do? But you need to cut off perennial weeds at the roots! And most importantly, this must be done systematically. Weeds should be cut at the age when this is easiest to do, that is, when their height is no more than 5-15 cm.
You can use the already familiar Fokina flat-cutter, or the Strizh weeder, or any other device. And cut the weeds off the face of the earth. The best results are achieved by a slight penetration into the soil of 2-3 cm.
You simply cut the weeds and immediately leave them on the soil.
What does this give?
- Firstly , weed suppression occurs. During the growing season, no plant can do without an above-ground part for a long time. Roots that do not receive their share from the work of chlorophyll in green leaves are doomed to death. Of course, new stems will immediately emerge from the buds on the roots. And you - again, to the root. Do not let them grow higher than 5-10 cm, otherwise the roots will have time to “come to their senses.” So, by making 3-4 cuttings per season, you will practically get rid of weeds.
Weed cuttings should not be composted. Leave them where they are. Why? Yes, because you mulch the soil with them, and its top layer does not dry out or collapse.
- Secondly , this layer of weeds, gradually rotting, returns fertility to the soil.
- Third , you eliminate the unnecessary work of carrying weeds into the compost.
- Fourthly , you get an even distribution of compost that has rotted over the past year over the area.
- Fifthly , the roots of the weeds left without the above-ground part will die. By rotting, they will provide additional nutrition to the roots of cultivated plantings. That is, you will additionally enrich the soil with humus exactly as it happens in nature.
You can, of course, not cut, but simply mow the weeds. But again, it is important to do this systematically, without letting them grow too tall.
Why shouldn't you weed? After all, if you weed systematically, then there won’t be any weeds either?
The difference is this: by cutting off the growing point underground, or mowing the above-ground part, you cause the same stem to grow again. One. And as soon as you dig up or pull out the weed, renewal buds will immediately awaken on all the fragments of the root system remaining in the soil. And this will provoke the growth of a whole horde of weeds instead of just one.
OK then. We have learned to fight perennial rhizomatous weeds. What about weed seeds in vegetable beds? Is there really no way to do this without weeding?
But no. It turns out that they can be greatly crowded out in garden beds. In any case, it is quite possible to do without tedious hours of weeding. To do this, you just need to grow weeds in the beds in advance. Yes Yes!
- In early spring, before the last snow melts, scatter ash or peat on the beds to lightly blacken the remaining snow. Then cover the beds with pieces of old film and place them on top of the poles so that the film does not lift up and be carried away by the wind.
- Under a layer of film, the blackened snow on the beds will quickly melt, the surface layer of soil will warm up, and weeds will quickly sprout from it. This will happen in about 10-12 days. If after two weeks you visit your plot and see that the weeds have sprung up, remove the film, loosen the top layer of soil and leave the beds open for a day. Young weed seedlings will die. At this time, the weed seedlings are still too weak, so they die from just loosening.
- After you loosen the first shoots of weeds, wait a day and cover the beds again with film. Leave the beds under the film for another 1-2 weeks.
- Arriving at the site for the second time, you will again see weed shoots under the film. These seeds sprouted from deeper layers of soil. Repeat the same operation again.
- After a day, you can sow cultivated seeds in the beds freed from weeds. At the same time, you must understand that such a bed is not dug up before sowing! Otherwise, you will again bring weed seeds from lower layers to the surface. And they will rise safely.
The work of pre-growing weeds in the garden is small and not at all difficult. You just have to do it on time.
So, weeding is the worst and most ineffective way to control weeds.
Text of the book “Vegetable garden and garden for the lazy. There will be a harvest!
Galina Kizima Garden and vegetable garden for the lazy. There will be a harvest!
Illustrations from the Shutterstock.com photo bank were used.
The book was previously published in the “Dacha accessible to everyone” series.
© Kizima G.A., text, 2017
© AST Publishing House LLC, © 2021, 2021, 2020
My advice to wisely lazy gardeners
It would be a good idea for all gardeners who have reached adulthood to become reasonably lazy. It should be remembered that we are not for the garden, but it is for us. We need to organize things in such a way that we not only work in the garden from dawn to dusk, but also have time to relax and admire our achievements, otherwise many people plant flowers, but during the entire season they cannot find even a minute to look at them. As they say, to work less, you need to think more. So, what can be offered for the intelligently lazy?
1. Plan your work in advance, highlighting the most urgent and important ones.
Everything must be done on time, then you will have time to do everything, and there will even be time left, because most of the work can be done in the fall after harvesting.
2. The most difficult job on the site is digging the ground.
Do not dig, but loosen; to do this, you need to make the soil in your area light and loose; if necessary, make it artificial. I already wrote about this in the book “As You Plant, So You Eat.”
3. Another equally labor-intensive job is weeding. Don't water.
Or use the advice of Dr. Mittleider: with a high concentration of mineral salts, weeds do not grow in his beds, but grow only on the earthen roll around the bed. To prevent this, the rollers fall apart as soon as the weeds emerge, and a day later they are raked around the beds again. You can edge the beds with boards, poles, and on the bed itself, pre-grow weeds under the film, and as soon as their shoots appear, remove the film, loosen the soil and leave the weeds for a day without shelter, as a result of which they will all die. After this, you can sow cultivated plants, but you cannot dig up such a bed, otherwise you will again bring weed seeds from a deeper layer of soil to the surface, and they will begin to grow again. In the spring, when sowing, sow the prepared bed as soon as you prepare the soil, without delaying this work for a minute, so as not to give the weeds the opportunity to overtake the cultivated plants.
To avoid weeding strawberries, plant them on black spunbond. In this case, no watering will be required, the berries will not suffer from gray rot, the mustache will not take root, and the processing of the bushes will be greatly simplified.
Do not water the weeds under berry bushes and trees, but only cut them at the soil level with a special weeder, or a sharpened shovel or a Fokin flat cutter and leave them right there under the plants. Firstly
, this is organic matter necessary for plants, and
secondly
, mulch, which protects the top layer of soil from drying out, which halves the amount of watering.
Thirdly
, there is no need to compost the weeds and then return the rotted compost back under the bushes - let them rot right on the spot naturally.
And fourthly
, a layer of mulch inhibits the growth of weeds, so they will grow less and less. Pour all the slops and water from the laundry one by one directly under the apple trees, and to prevent flies from appearing in the slops, cover them with cut weeds. And don’t be afraid of the pests that supposedly hibernate under the layer of this mulch - there are no less and no more of them than usual. There is no need to dig up the tree trunk circles. When treating your garden for pests in the fall, spray not only the plantings, but also the soil underneath them - the pests will die.
4. Another labor-intensive task is watering.
To prevent the seeds sown in the spring from drying out, they must be covered with film or double spunbond immediately after sowing and the film should be removed only after germination, and the spunbond should be left in one layer - then you won’t have to fight pests. Systematic watering is required only for young shoots of greens and vegetables in the spring, and starting from the moment the root crop or bulb sets, watering should be stopped altogether. Only cabbage and radishes need constant watering. Cucumbers can be immediately planted on a gel (Aquadon), which retains moisture in the soil, and then they can be watered once every two weeks. Many people believe that zucchini and pumpkins also need constant watering, like, say, cucumbers. And they are mistaken, because, unlike cucumbers, these crops are drought-resistant and need to be watered sparingly.
In greenhouses, it is best to organize drip irrigation; to do this, between every four plants you need to stick plastic two-liter bottles of water, from which, of course, you need to unscrew the caps and make holes with a hot nail along the side surface on the lower third of the bottle. This part of the bottle should be in the soil.
If the water flows out too quickly, you need to turn the bottle several times so that an earthen plug forms in the holes. Water will slowly seep into the root zone, and the roots will all gather near the drinking bowl in search of moisture. Such a root system is not afraid of drought, unlike a pampered one, which is always watered in excess, and therefore is in the upper layer and, naturally, easily dies at the slightest drought, so you have to carry water to the greenhouses all the time.
You can pour not water into these plastic drinkers, but a weak solution of mineral fertilizers, then the plants will constantly receive not only water, but also fertilizing. And you will have less work. You can lay hoses with small holes along the entire length of the bed and connect them to a container into which you will pour a weak fertilizing solution.
5. Another favorite activity you can avoid is pest and disease control.
Nobody attacks healthy plants, because they quickly synthesize protein, and there is more of it in the cell sap than carbohydrates, and pests, as you know, prefer sugar, that is, carbohydrates.
In weakened plants, protein synthesis is slow and carbohydrates predominate in the cell sap, which is what pests look for in order to feed. So try to keep the plants in your area healthy, help them, if necessary, strengthen their own immune system with the help of the latest drugs of biological origin.
Use good seeds of zoned varieties, plant varieties and hybrids that are resistant to common diseases, do not use pesticides - do not interfere with beneficial insects and birds to cope with pests themselves. And to strengthen the immune system of plants, spray your garden with Silk (or Novosil), Zircon, Epin-extra, Energen or Healthy Garden - this is good for plants and harmless to beneficial insects and birds, and your own liver.
6. You will need to add organic matter in the fall only to the beds, since it will accumulate under the bushes and trees over the summer.
You won’t have to remove fallen leaves - one less job, and mineral fertilizers can be applied in very small quantities and, moreover, once every three years, if you use the new
AVA
. So they avoided another labor-intensive task - transporting mineral fertilizers to the site every year.
7. Spring planting can be made easier by sticking the seeds onto toilet paper with starch in the winter.
In the spring, all that remains is to roll out the rolls on a moistened bed and sprinkle a layer of prepared soil on top - that’s all for sowing.
8. We age along with the garden, so try to organize your flower beds so that they do not require a lot of work from you.
Therefore, if you are no longer young, give up rocky and alpine hills, overly complex flower beds or overly whimsical flowers. Leave those that do not require constant care: astilbes, phlox, daisies, perennial bells and asters, hostas, lupins, daylilies, Siberian irises, peonies, lilies (best of all Asian hybrids), daffodils - this is the small assortment on which you can stop, and then it’s a matter of your taste to arrange them on the site so that they please the eye all summer.
You can generally limit yourself to a few conifers, ferns and a couple of bushes with decorative foliage. Of the annuals, it is also best to sow those that do not require growing seedlings: cornflowers, poppies, including eschscholzia, nemesia, matthiola, cosmos. Just sow them scattered in early spring on moist soil - and that’s it.
Work calendar for the whole year in the garden and vegetable garden
What, when and how to do in the garden
The calendar, addressed to amateur gardeners, lists by month the main work that needs to be done in the garden, vegetable garden, and flower garden throughout the year. But the weather, as you know, is a capricious lady, and for example, the onset of spring may shift two weeks earlier or later relative to the calendar date, so the deadlines for completing these works are indicated approximately. It is also important to take into account the difference in the timing of plant development in the south and north. Thus, the beginning of sap flow in plants in the south occurs, on average, a month and a half earlier than in the north, so you should not literally follow the calendar; it is much more important to carefully monitor the condition of the plants in your area and, taking into account local weather conditions, carry out the work recommended in the calendar on time.
As for the phenological timing between the beginning of flowering of coltsfoot and bird cherry, currant, and apple trees, they are surprisingly stable. Therefore, you can always quite accurately determine the beginning of flowering of, say, an apple tree in your region in any year by the beginning of coltsfoot flowering, since the relationships between the beginning of flowering of all crops are maintained from year to year and in all regions.
Notice the day when coltsfoot flowers bloom in your area. In 15–17 days, buds will begin to bloom on birch, mountain ash and currants. 28 days after the coltsfoot begins to bloom, the bird cherry will bloom, and after another week the gooseberry will bloom. 5 days after this, black currants bloom, followed a couple of days later by cherries and plums. The flowering of the apple tree of summer varieties will be delayed for another 3 days, and only after that, after 3–4 days, the strawberries will begin to bloom, and literally the next day the lilac will bloom. Red rowan will bloom another 2 days later, and from this point on the recurrent night frosts usually stop. True, for the North-West, this law can be violated, and frosts can occur even in the twenties of June. Raspberries are the last to bloom - 12–13 days after red rowan.
January
1. To prevent branches from breaking off under the weight of snow, shake it off the trees.
2. Trample the snow under young trees, if you have not tied them with fiberglass, so that in the loose snow mice cannot make passages to the trunks and gnaw the bark. You don't have to trample on old trees.
3. Rake snow on strawberries and raspberries, as well as on ornamental plantings that freeze above the snow cover, so that during thaws the berries and ornamental shrubs do not become bare and do not freeze during subsequent frosts.
4. Retain snow by raking snow into ridges across the slope.
5. Place bird food out of reach of mice. It is convenient to pour it into a bucket suspended under a canopy. Tie strips of unsalted lard onto the trunks of fruit trees for tits. They will get used to visiting your feeders, and at the same time they will clean the trees of pests hibernating in the forks of the branches.
6. Collect eggshells, onion and garlic peels, citrus peels, potato peelings, waste paper, and wood ash at home.
7. Read literature on gardening, take notes, attend lectures; draw up a plan for planting vegetables for this year, a plan for replanting and new plantings of trees and shrubs, and a general plan of the site.
8. Buy film for greenhouses, which is better durable, complete mineral fertilizers, organic fertilizers based on humates, for example Fitosporin. There are also good buoy fertilizers. Buy garden tools and machinery. You will also need deoxidizers, so it is better to use dolomite than lime. Because lime dissolves in water and is carried by it to the lower layers, and dolomite dissolves only in acidic soils. As soon as it deoxidizes the soil to neutral, it stops dissolving and lies in the soil until it acidifies again, since it does not dissolve in water and is not washed out of the arable layer of soil.
Protective equipment will also be required. I do not recommend using chemical poisons on your property, so as not to disturb the ecological balance of nature and not ruin your own health. It is better to use biological agents.
Folk weather signs in January
– If January is cold, then June will be dry and hot: don’t wait for mushrooms until autumn.
– If there are frequent snowfalls and blizzards in January, there will be frequent rains in July.
– In January there are a lot of frequent and long icicles, the harvest will be good.
Weather for tomorrow
– If white circles, pillars or false suns are visible around the setting sun, frost will last for several days.
– If there is a dim ring around the moon, there will be frost.
– If the moon shines brightly or the clear sky is strewn with bright stars, there will be frost.
– If the sun sets in a sparkling red fog, it will be frosty.
– If the trees are shrouded in fluffy frost, there will be frost.
- If the sparrows sit quietly, there will be snowfall, and if they chirp, there will be a thaw. Crows and jackdaws hover in the air - in front of snow, sit on the snow - for thaw, sit on the tops of trees - for frost, on the lower branches - for clear weather.
– If the wood burns in the stove with a crackling sound, and the flame is red, there will be frost, and if it hisses, smokes, and the flame is white, wait for a thaw.
– If the clouds go against the wind, there will be snowfall.
February
1. Attach strips of foil to the branches of fruit trees and bushes - this will scare away birds pecking at the fruit buds. Birds are instinctively wary of snares, so they never land on the net. You can use ready-made nets and throw them on trees.
2. Check dahlia tubers and gladioli bulbs. If rot appears, wash the tubers and bulbs in a bright pink solution of potassium permanganate, cut out the rotten parts with a knife, fill the wounds with a crushed tablet of any anti-infective drug, for example chloramphenicol, streptocide, sulfadimezine.
3. Check the onions and garlic: plant those bulbs that have started to grow tightly together in seedling boxes with a small layer of soil and place the boxes on the window - after two weeks, harvest a small harvest of green onions, and later garlic.
4. At the end of the month, you can sow peppers and eggplants for seedlings.
5. You can start sowing seeds, of course, not on a garden bed, but on paper. Toilet paper or napkins are most suitable for this; you can also use other paper. Flour paste is applied to strips of paper and seeds are glued, spreading them out with tweezers or a wooden stick. The paper with the seeds glued is dried, the name of the crop is written on it, rolled up and stored in a dry place. When the time for sowing comes, the roll is rolled out on the garden bed and sprinkled with a 1 cm layer of soil. In this way, you can plant parsley, carrots, lettuce (according to the 5x5 cm pattern), spring onions, leeks (according to the 4x4 cm pattern) , dill, watercress, cilantro, cumin, marjoram, tarragon, mint, lemon balm (2×2 cm pattern), radish (4×4 cm pattern), turnip, celery, parsnip (7×7 cm pattern) .
6. Mice may appear in the garden house. Mice usually run along walls, so scatter blackroot seeds or burdock on the floor along their passages. Clinging to the skin, they cause nervous stress in rodents, and soon the mice will leave your home. The smell of anise will also repel rodents; It is enough to spray the mouse passages with ammonia-anise drops. You can prepare fertilizer: take one part cement and two parts flour to one part sugar, mix and add a few drops of vegetable oil, the smell of which will attract mice. This treat will cement the intestines and the rodents will die of starvation. If such mice are eaten by owls or cats, the latter will remain alive. If the mice were poisoned, owls and cats will also die.
7. Check your seed supply and replenish it if necessary. There is no need to buy seeds from random people. They are expensive nowadays, and it is not at all necessary to sow your six acres with unknown things. Surely there are companies in your region whose quality of seeds you trust.
Folk weather signs in February
– If the first three days of February are fine, then expect a fine spring.
- The wind is blowing, but there is no frost - to a snowstorm.
– If there is a dim circle around the moon, then there will be frost.
Weather for tomorrow
- The wind is blowing, but there is no frost - there will be a snowstorm.
- The fire in the stove is red - for frost, white - for thaw.
- Smoke from the chimney spreads along the ground - there will be snowfall.
– If crows sit on the tops of trees, there will be frost, if on the lower branches there will be wind, and if on the ground there will be thaw.
– If dogs are lying in the snow, there will be a blizzard.
March
First half of the month
1. Perform sanitary pruning of trees and bushes, except raspberries, cutting out broken branches that thicken the crown; cut out branches growing inside the crown, and tops - vertically growing branches on apple and pear trees. At the same time, collect carrion and leaves from trees, dried berries and remaining leaves from bushes and be sure to burn them - pests hibernate in them. The blackened, deformed ends of the branches of currants and gooseberries should be cut off and burned - they have powdery mildew.
2. If the trim on the trees is dark in color, then remove it, otherwise during the day in sunny weather it will get very hot; the nights are still cold, and sharp fluctuations in temperature from day to night are detrimental to the cambium of fruit trees. Bark diseases generally begin with spring sunburn. They usually appear as pinkish spots on the bark. To avoid this, you need to whiten the trunks not in the spring, but in the fall, so that they are protected from the bright March sun reflected by the snow. If the whitewash has faded by spring, touch it up as early as possible, at a temperature not lower than 6 °C. Instead of whitewashing, you can tie the trunks with strips of torn sugar sacks. They are made of fiberglass and are too tough for mice.
3. On the site, you can sow winter (instead of autumn) early vegetables and herbs, if vegetable beds have been prepared for sowing in the fall. Sweep the snow from the beds, water the furrows prepared in the fall well with hot water, lightly sprinkle with wood ash (except for carrot crops) or powder fraction of AVA
and sow dry seeds of carrots, turnips, radishes, lettuce, spinach, parsley, dill, onions, sorrel, and white cabbage. Fill the furrows with seeds on top with a layer of dry soil or peat harvested indoors in the fall, 2–3 cm high, and then throw snow on top.
4. Rake snow onto strawberries and raspberries.
5. Sow dry seeds of peppers, tall tomatoes, eggplants, physalis in moist soil prepared for seedlings at home and sprinkle them with a layer of soil 2 cm thick (and pepper seeds - 3-4 cm), compact the soil with a spoon, cover with film and place on the radiator. The most suitable time in the North-Western and Central regions is March 8–10. Make sure the soil temperature is 25–30 °C. Do not water until shoots appear. As soon as the first light loops of seedlings appear, without waiting for the rest, place the boxes with seedlings on the window and keep them there for 10 days at a temperature of 10–12 °C at night, +14–16 °C during the day, otherwise the seedlings will stretch out greatly. In the future, open the window, maintaining the temperature: at night +12–14 °C, during the day +18–20 °C.
If you are not sure about the quality of the seeds, before sowing, warm them up for 20 minutes at a temperature of +53 °C - the pathogens located on the surface of the seeds will die. Then wrap the seeds in a damp cloth and place on a saucer in the freezer of the refrigerator for a day.
6. Prepare early potatoes intended for seedlings for vernalization. To do this, select 5–6 large, beautiful tubers (if you are growing potatoes from sprouts) or 25–30 (if you are planting tubers), put them in hot water (+50 °C). After 20 minutes, when the water has cooled slightly, add a little potassium permanganate (the solution should be bright pink) and keep the potatoes in this solution for another 20 minutes. Drain the solution and rinse the tubers with water. When the water has drained, place the tubers in the light on a windowsill or on a cabinet (you can put the tubers in three- or five-liter jars and place them on the windowsill for 20-30 days).
Your potato planting material can only be used as long as it produces good yields. And then you need to either improve it by growing your own seedlings from sprouts, or replace the planting material, which must be purchased not on the market, but again from seed potato producers or through reliable intermediary companies.
Second half of the month
1. Drain excess water from the area through the grooves, especially from the beds occupied by strawberries and raspberries.
2. Collect thick, swollen, round-shaped buds on black currants and burn them - they contain bud mite larvae.
3. Using a knife, scrape scale insects from the branches (in the form of beige commas, they are clearly visible on the brown bark of the branches) onto the litter and destroy them.
4. Cover the soil under the bushes with dark film or cardboard to prevent the first pests from leaving their wintering areas.
5. If the trees have light-colored or coniferous trim, remove it. Damaged bark on trees should be sanded with a rough mitten, frost holes and wounds should be cleaned with a knife until healthy wood is removed, then washed with a solution of raspberry-colored potassium permanganate, or even better with brilliant green, and painted over with oil paint. Whiten the trunks at an air temperature of at least +6 °C, if the autumn whitening has faded. It is best to use water-based paint for exterior use.
6. Before the start of sap flow, it is necessary to carry out the first spraying of the garden against pests. A concentrated solution of any mineral fertilizer is best suited for this. The cheapest and easiest way is to use urea (700 g of urea per 10 liters of water); in extreme cases, you can use 1 kg of table salt per 10 liters of water. Strain the solution and spray it over the entire garden, starting from the tips of the branches where the aphid eggs are laid, then along the branches and forks where the pests overwinter, all the trunks and the soil under the plantings, in the upper part of which the pests also overwinter under the foliage. A spray solution can also be prepared from ash. To do this, pour 4 cups of ash into 1 liter of boiling water and after a day add 9 liters of cold water to the solution, then strain the solution and spray the garden.
7. If there is still snow on the vegetable beds, sprinkle it with ash or peat; cover the beds with transparent old film and press the film with stones or poles so that it does not blow away with the wind. Under the film, the blackened snow will quickly melt and weeds will sprout. As soon as their shoots appear, remove the film, loosen the soil with a rake and leave for a day without the film - the weed seedlings will die. After a day, lay the film on the beds and repeat everything again. This way, you will get rid of weeds in vegetable beds for the entire first half of summer, when they are especially harmful to young vegetable seedlings. Digging a bed freed from weeds can only be done to a depth of 5–7 cm, otherwise you will remove weed seeds from the deeper layers and they will sprout again.
8. At home, sow seeds of marigolds and annual asters for seedlings.
9. As soon as the cotyledon leaves of seedlings of tomatoes, eggplants and peppers open, the plants will switch to their own root nutrition from the soil, since the supply of nutrients in the seed has run out. This is one of the most critical moments in the development of a plant, so it must be provided with nitrogen and phosphorus (phosphorus is especially important at this moment for tomatoes). You can water the plant with a weak solution of azofoska. But it is better to use a complete mineral fertilizer, which also contains microelements. From this moment on, plants need good lighting, since at their growth point a program for their further development is laid, and in insufficient light they will lay the rudiments of leaves instead of laying the rudiments of flowers in a timely manner.
If you did not have time to sow tomatoes, this can be done as early as the twentieth of March. At the same time, low-growing early-fruiting varieties and hybrids of tomatoes are sown. You can also still have time to grow good seedlings of ultra-early ripening hybrids and pepper varieties.
Folk weather signs in March
– Frequent fogs in March foreshadow a rainy summer.
– Dry March means fertility, rainy March means crop failure.
– If during March snowstorms the snow on the fields falls unevenly, wavy, in mounds, then garden vegetables and spring grains will grow well.
– Water has appeared on the ice of rivers and lakes – it will soon be warm.
Weather for tomorrow
– Clouds float quickly and high - good weather.
- The crane flew to the warmth. Finches - to the cold.
– The rooks arrived and started repairing the nests - in a couple of days the weather will be warm, if the nests are not repaired - the cold will last for several days.
- The crow hides its beak under its wing - wait for frost.
Principle #3: DO NOT water!
As evening approaches, buckets rattle in summer cottages and pumps start up. Water gurgles everywhere. It's like a generally accepted, undeniable ritual. But watering work is one of the most labor-intensive! Even if you use a pump.
Let's think about whether plants really need that much water? And if anyone needs it, how can they do it in such a way as to make their work easier and simpler?
Let's remember one simple point: it is better to keep water in the soil than to pour it there endlessly. Is it possible to do this? It’s easy if you don’t allow moisture to evaporate from the surface of the earth.
From here one should immediately draw a conclusion, which, by the way, is well known to everyone, the soil must be protected from moisture evaporation from its surface. To do this, the soil surface should be covered. This is called mulching.
There are many things you can use for mulching. For example, sawdust . Let them sit for a year or two and mulch. If there is a coniferous forest nearby, collect needles. But do not forget to add ash, or dolomite, or lime, or chalk to them. Because needles strongly acidify the soil.
It is good to mulch with high-moor peat . But it also acidifies the soil, so you will have to add deoxidizers. You can mulch with non-woven covering materials (spunbond, lutrasil) , but only if the material is black.
You can use cardboard and even simple newspapers , folded in several layers and glued together into a panel with ordinary tape. In a greenhouse, the soil can be mulched with crumpled newspapers .
In the first, hottest weeks of spring, fallen leaves in autumn . So don’t remove them in the spring for the sake of beauty and cleanliness. The awakened worms themselves will drag them into their holes and process them into humus with the help of overwintered microorganisms.
So how do you mulch your beds? So what, you can’t water them at all? Well, not watering at all won’t work, but there are some considerations for saving energy on watering.
The fact is that not all cultures are as helpless as we imagine. They can be divided into four groups:
- The first group includes those inhabitants of the beds who do not know how to obtain moisture and spend it uneconomically. These are cabbage, cucumber, lettuce, radishes.
- The second group includes those plants that do not obtain water well, but spend it sparingly. This group contains onions and garlic.
- The third group of plants produces water well, but spends it uneconomically. These plants include beets and rutabaga.
- And the last, largest and most adapted group knows how to get water well and spend it economically. These are peppers, tomatoes, carrots, parsley, zucchini, pumpkin, melon, watermelon.
Hence the watering norms. Plants that belong to the first and third groups need regular watering the most. And those in the last group need moisture least of all. Generally speaking, you don't have to water them at all all summer if you do a few things when planting them in place.
For example, tomatoes . Into the hole made before planting the seedlings, add a third of a teaspoon of the dust fraction of the AVA fertilizer and a dessert spoon of double granulated superphosphate. Gradually pour 4-5 liters of water into the hole. After this, plant the seedlings, water them, lightly hill them and mulch them well. That's all. No fertilizing or watering will be required all summer long. Except during prolonged cold weather.
At temperatures below twelve degrees Celsius for a week, the plant begins to experience severe starvation because the root system does not work. In this case, you should feed the plants by leaves. It is best to use a solution of one of the following drugs: “Florist”, “Aquadon-micro”, “Uniflor-rost” or “Uniflor-bud”.
Pepper. Pour a third of a teaspoon of AVA fertilizer powder into the planting hole, add a dessert spoon of any chlorine-free potassium fertilizer, then add half a glass of gel made from Aquadon or hydrogel into the planting hole. Plant the seedlings. Water, crimp and mulch. That's all for now.
It will only require watering once every three weeks in hot weather. There is no need to water in wet or cool weather. But foliar feeding, like tomatoes, will be required. Otherwise, the pepper will even shed its leaves.
Carrot. Before sowing, water the furrows well with water from a kettle. If the spring is dry and there is not enough moisture in the soil, then the evening before sowing, thoroughly water the bed and immediately cover it with film. The moisture under the film will remain and saturate the bed to its entire depth.
After sowing, compact the furrow with a board. Cover the bed with film to retain heat and moisture in the soil. After emergence of shoots, replace the film with lutrasil or spunbond, remove which only for weeding or thinning.
There will be enough food for the entire season. Water only in dry weather directly with lutrasil in the evening. And only until a bunch of 4-5 leaves appears. From this moment on, the carrots form a root crop, and they no longer need a lot of moisture. Its central root goes deep into the soil, and there moisture will be found.
So, in order to get rid of problems with watering and fertilizing in the garden, you need to show some ingenuity. The simplest thing is to prevent moisture from evaporating from the soil. To do this, the soil should be loosened, or even better, mulched.
The advice that Galina Aleksandrovna Kizima generously shares has proven itself in her personal experience, as well as in the practice of her many followers and students. And Galina Alexandrovna had accumulated so much knowledge that she decided to put it together and capture her experience using video. The result was a visual, very informative guide for gardeners, a video course “Gardening without the hassle.”
These materials have helped more than a dozen people to make their work in the garden easier and simpler, saving their time and energy. Get to know the content of this unique author's course. To do this, you need to follow the link: https://ogorod-net-hlopot.ru. After all, it’s better to see everything with your own eyes.
Methods to reduce the labor intensity of gardening
Any owner of dacha acres knows how difficult it is to dig the ground, and if there is no central water supply, to water it throughout the entire planting season. Not to mention the daily weeding of the beds.
An amateur gardener, Kizima has been involved in plant growing for several decades. She experimentally created the garden of her dreams. Galina Kizima's worry-free gardening method is now widely used around the world. She found out that to organize a miracle garden there is no need to dig the ground, weed the beds and water the plantings.
Elimination of digging
The hardest part of gardening is digging up the beds. According to Galina Alexandrovna's method , this completely disappears . There are five reasons for this:
- When digging to the depth of a spade bayonet, the soil layer is turned over, which means that microorganisms, which by their nature can exist at a certain depth, change places. Some need oxygen to live, others need carbon dioxide. When the formation turns over, both die. The soil is deprived of natural microorganisms and loses fertility, its structure is destroyed.
- When digging, the natural microchannels through which moisture and air circulate are disrupted, thereby deteriorating plant nutrition. Soil deprived of structure cakes, dries out and makes it even more difficult to deliver the necessary elements to the roots of plants. Microchannels are formed after dead roots are eaten by underground microorganisms. They are densely branched and evenly distributed throughout the entire depth of the soil. When the formation is turned over, all this is disrupted and it takes a lot of time to restore. And the plants suffer.
- During autumn digging, weed seeds are transferred from the surface to the depths, where they overwinter well. When the formation is turned over in the spring, they are brought to the surface and germinate together.
- After digging, the soil, left without grass cover, quickly dries out in the sun. Moisture is lost. Weeds quickly begin to grow on unprotected land.
- The soil should not be deprived of its natural shelter in the form of dry leaves and grass. This organic matter is designed to protect and nourish the earth.
The fertile layer - humus, covering the soil, when digging, is sprayed throughout the entire thickness of the layer, thereby depriving the planting of nutrition. Of course, it will rise later, but the plants need it right now.
To get around all these “don’ts”, you just need to loosen the ground. To do this, you can use a Fokin flat cutter, a rake, a sharpened hoe or a weeder. Only the tool must always be well sharpened. The loosening height is no more than 5 centimeters. Well, a manual cultivator simultaneously loosens the soil and cuts off weeds.
Cultivating a vegetable garden without weeding
You just need to cut the weeds at the root. It is important not to let them outgrow, otherwise they will crowd out cultivated plants. The permissible height of weeds is 5-15 centimeters. They should be shaved using already familiar tools. The grass clippings remain in place as additional mulch. This is the result:
- Without photosynthesis of cut stems, weed roots die. If something has sprouted from root buds, it is shaved off in the same way over time. With 3-4 cuttings throughout the summer, you can say goodbye to weeds forever.
- Cut grass mulches the beds.
- Rotting, cut grass serves as additional nutrition for the plantings.
- There is no need to carry cut grass into the compost pit.
- Naturally rotted compost covers all our plants in an even layer. There is no need to carry it in buckets from the compost pit and distribute it around the site.
- The roots of weeds remaining underground rot and serve as a source of nutrition for the roots of cultivated plants.
Reduce watering
You can do without this hard work. You just need to preserve the moisture that is in the soil. To do this, it should be protected from evaporation by mulching, that is, covering the soil surface. Both organic and inorganic material can be used as mulch. This can be sawdust, pine needles, peat, dry grass, dark-colored covering materials, paper.
Depending on the crop and weather conditions, watering can be adjusted. For example, not all garden crops use water equally. They are divided into four groups:
- Vegetables that do not know how to draw water, but waste a lot. These are cabbage, cucumber, lettuce, radishes.
- Plants that produce water poorly but consume little of it. These are onions and garlic.
- Beetroot and rutabaga produce enough water, but consume it without measure.
- Peppers, tomatoes, carrots, parsley, zucchini, pumpkin, melon, watermelon - well done! They draw water well and consume it sparingly.
Based on this information, you can determine the volume of water needed for irrigation.
The fourth group does not need to be watered at all if you use some techniques when planting. To do this, you need to add a sufficient amount of supporting fertilizer to the hole, fill in at least five liters of water, plant the seedlings, hill up and mulch very well. And that’s it, you don’t have to water it anymore. The exception is prolonged cold weather or very hot and dry weather. In this case, carry out abundant watering with the addition of fertilizing once every three weeks. The first three groups of vegetables can be greatly limited in water consumption. The main thing is to mulch very well!
LiveInternetLiveInternet
Quote from Galimax
Read in full In your quotation book or community!
How to make your work on the land easier with benefit and benefit for yourself
Today we will talk about the experience and rich developments of Galina Kizima, a well-known gardener and devotee in agricultural and scientific circles, the author of numerous books on gardening.
Recently, many gardeners have listened to her advice and understand that they need to communicate with the earth as with a living organism, and be able to hear it.
Thanks to numerous publications in the press and the Internet, the idea of organic farming is being adopted by an increasing number of workers on earth.
Today we will once again go over the topic “Lazy bed” or Crop rotation on a compost heap.”
The main idea of G. Kizima is this:
“Our summers in the North-West are quite cool, the soil does not warm up enough, and for many plants it is simply cold.
Therefore, it makes sense to grow all garden crops on compost heaps (in fact, on the same warm beds). Such a bed gives the plants additional warmth for three to four years.”
Next, in fact, is a lesson from G. Kizim.
Year one
Next summer, lay a compost heap in place of any vegetable bed or directly on virgin soil, especially if you have clay soil.
She should be in the sun.
The width of the heap is 80-100 cm, the height should also be 80-100 cm by the end of summer, but the length should be what the future bed should be or how much material there will be enough for laying.
It can be covered with decorative plantings so as not to become an eyesore.
You will start filling it from one edge, gradually increasing in length and height.
Next year you will start laying a new compost heap nearby, and plant pumpkins or zucchini on the first one.
You can also use it for cucumbers.
To prevent heat and moisture from leaving the heap, it should be covered with an old film - black or white, but spunbond or lutrasil are not suitable for this purpose.
This must be done before the snow melts, otherwise the heap may dry out by the time of sowing.
Before sowing, remove the film and make holes in the heap about the size of a three-liter jar.
Then you fill them halfway with fertile soil, add a teaspoon of AVA powder fraction to each, water well and sow the seeds.
Then cover the pile again with film.
As soon as the seedlings reach the film, cut holes in it and release them outside.
If there is a danger of frost, then the plants need to be covered with lutrasil on top.
This is where your work ends. No more watering or feeding of the plants is required.
Under the film and powerful foliage of pumpkin crops, the compost will mature in one season.
At the end of summer, cut off the fruiting above-ground part and transfer it to the new compost pile that you created over the summer.
Leave the remains of the root system in place. The worms will eat them.
Year two
Next year, having made additional holes in the film and adding a dessert spoon of calcium nitrate and half a teaspoon of AVA fertilizer into each of them, plant seedlings of any cabbage , except for Chinese cabbage and kohlrabi.
It will be necessary to feed cabbage in the second half of summer only with microelements (unless you add AVA during planting).
It is best to do one or two leaf feedings using any of the preparations: “Florist” or “Uniflor-bud ” (4 teaspoons per 10 liters of water).
You will only need to water if the weather is hot and dry . Water needs to be poured into the holes in the film under the root , and in very hot weather early in the morning you will have to pour cold water from the well directly over the leaves of the cabbage.
In autumn, the covering leaves of cabbage and its roots (if there is no clubroot) should be left in the garden bed.
The film will have to be removed, leaving it only on the sides of the bed.
Year three
Next year, pumpkin crops will move to a new compost heap, cabbage will move to their place, and instead you can plant grown early potato tubers or onions on turnips in the garden bed.
Then you can plant beets , which will have to be watered once with a solution of table salt (1 glass per 1 liter of water) to feed with sodium, when it has 5-6 leaves.
Beets can also be planted along with cabbage along the edge of the garden bed. She loves to grow on the edge and is friends with cabbage crops.
It’s a good idea to plant celery at the ends of the cabbage bed.
And rows of onions can be alternated with rows of carrots. But you can also sow a bed of carrots after onions.
Once again, I draw your attention to the fact that as soon as you have removed the film, only the crop is removed from the bed , and all other parts of the plant are left on the bed and in the soil.
Moreover, in the fall they also throw leaves or weeded weeds on top.
Year four
Another year the bed can be used for lettuce, dill, and parsley. These crops do not need fertilizing or watering.
Next year, in early spring, you can sow radishes there, and after harvesting them, plant strawberry tendrils in early summer.
Strawberries need to be planted thicker than usual, that is, they need to be planted in the middle of the bed in one row at a distance of 15-20 m from each other.
When planting, add one-third of a teaspoon of AVA granular fertilizer to each hole, then you will not need any more fertilizing for three years.
To avoid having to weed, roll out a roll of paper glued together from several layers of newspaper on both sides of the strawberries.
When the strawberries produce tendrils, make holes in the newspaper to allow them to take root and leave them to overwinter.
In the spring, there will be practically no newspapers left, but there will be no room for weeds to grow, since the strawberries will take up all the free space.
Don't do anything to the plantation.
It does not need to be fed or watered except in very hot and dry weather in spring and early summer.
The fertilizer will last her for three years, and under a continuous canopy of her own leaves she will retain moisture in the soil.
I emphasize again, you don’t need to do anything, let the strawberries grow on their own.
After three to four years, the berry harvest will begin to decline.
When you collect it, simply mow the plants themselves with a scythe, or even better with a Fokin flat cutter, going 2-3 cm deep into the soil.
Leave the leaves in the garden bed and start adding compost to this area.
Then the whole cycle will repeat again.
This whole scheme should be used on sand.
Only under the compost you need to lay several layers of roofing felt or old film on the sand so that the nutrients do not escape through the sand.
If you have perfectly acceptable soil, its fertility will gradually be restored or improved over time if you annually sow the vacated bed with white mustard and leave all the plant residues after harvesting on it, rather than dragging them into the compost.
Then in the spring, just slightly dig up the soil to a depth of 5 cm and immediately sow the bed with seeds of cultivated plants.
The crop rotation can be left the same as on the compost heap, but before planting each crop, you should add a little “Bogorodskaya Zemlya” and a third of a teaspoon of the powder fraction of AVA fertilizer into the hole.
What kind of “Bogorodskaya Zemlya” is this? This is soil saturated with beneficial microorganisms.
After all, soil fertility is determined by the number of microorganisms living in it.
Most of them die in winter in the top layer of soil.
Some part, of course, will survive and begin to reproduce, but they will reach the required numbers only by the end of the season.
If you take a bag of such soil in the fall before frost and put it in the cellar, the microorganisms will be perfectly preserved and multiply over the winter.
It is especially good to take such soil from rotted compost.
The soil needs to be populated with beneficial microorganisms, and to feed them, systematically add unrotted organic matter to the surface layer, in particular, the green mass of mown grass or weeds .
The famous gardener Ryabov L.A., whose article More details: how to make warm beds we read this morning, agrees with Kizima G. in everything, except for one point:
“Instead of the mineral fertilizers mentioned by G. Kizima, it is much better to breed soil animals , for example, by watering the bed with solutions of EM preparations “ Siyanie” or other beneficial soil microorganisms
They will give the plants everything they need for growth and abundant fruiting, and will return fertility to the soil.”
The techniques and ideas of organic farming are persistently capturing the minds of advanced farmers.
Series of messages “Organic farming”:
Part 1 – Organic farming (without chemical fertilizers and processing) Part 2 – Igor Lyadov’s amazing vegetable garden Part 3 – Which bed to choose? Part 4 - In detail: how to make warm beds Part 5 - How to make your work on the land easier with benefit and benefit for yourself Part 6 - Growing compost Part 7 - Preparing Compostar compost
Galina Kizima - Vegetable garden in Russian. We plant little, we collect a lot
Galina Aleksandrovna Kizima
Vegetable garden in Russian. We plant little, we collect a lot
Who is this book addressed to?
First of all, those who have little strength or not enough time to work day and even part of the night on their beloved “six hundred square meters” without straightening their backs. Or there is simply no such desire. But I still want to have a harvest. Preferably, not too minuscule. That is, this book makes an attempt to fulfill the long-standing dream of humanity about how to work in such a way as to do nothing, but at the same time receive something. And it is advisable to receive more. I call it Emelya syndrome. Do you remember there was such a hero in one of the Russian folk tales? So I tried to put together the experience accumulated by gardeners obsessed with this syndrome, including my own. I express special gratitude to the wonderful gardeners Valentina Nikolaevna Kovaleva, Lyubov Dmitrievna Bobrovskaya, and the Romanovs, whose invaluable experience I used in this book.
But don't be fooled. No one will be able to do anything at all, but it is quite possible to significantly reduce the most labor-intensive work on the site. How to achieve this and why this is not only possible in principle, but also correct, is exactly what is written in this book. Good luck to you, dear comrades, not only in mastering this book, but also in the practical application of what you have mastered!
And I also want to invite into our reasonably lazy ranks of amateur gardeners, both those who have reached supermiddle age and those who have not yet reached it, since they, this category of gardeners, will still not be able to escape over time. Let's create our database together. To do this, you can all send your own achievements and skills for wise management of the “six hundred square meters” by email:
Galina Aleksandrovna KIZIMA
First season
Planting potatoes in a new way
Before planting potatoes, the tubers must be prepared. This takes approximately one to one and a half months.
They need to be washed, then put in a basin, filled with hot water (+45 °C) and kept in this water until it cools to room temperature. Separately, dilute potassium permanganate (potassium permanganate - potassium permanganate) and gradually add it to the bowl of tubers, stirring until the water turns pink. Let stand for 15 minutes, remove, drain, rinse and dry the tubers. This is done in order to remove pathogens from the surface of the tubers.
Note. Instead of potassium permanganate, you can use a solution of Fitosporin, for which a small amount of the drug is diluted in water to obtain an almost transparent solution. Pour this solution over the tubers for half an hour. Then, without rinsing them with water, dry them.
Place the tubers in the light to green for 15–20 days. This is done so that the plant poison corned beef is formed in the subcutaneous layer. Such green tubers will not be touched by rodents or gnawing insects. The easiest way is to keep dried tubers in glass jars on the windowsill, turning the jars from time to time. Or spread the tubers in one layer on newspapers on cabinets or window sills.
Then the tubers need to be germinated; to do this, they need to be put in a dark and warm place. It is convenient to lay them out in cardboard boxes in one layer, not too close to each other (to give the sprouts room to free themselves), then lay a layer of newspapers and lay out two more layers, interlayering them with newspapers, close the box and place it on a stool near the radiator. It is not advisable to place the box on the floor, since the temperature on the floor is much lower and the tubers will germinate unevenly. It will take about two to three weeks for sprouts 4-5 cm long to form.
You can start planting when bird cherry trees begin to bloom in your region, and even MUCH earlier, as soon as the top layer of soil dries out.
As you know, tubers do not grow on potato roots, but on horizontal shoots growing on the lower part of the stems, called stolons. These shoots don't need soil, they need darkness. They will grow not only in compost, but even under empty hoods made of light-proof material. So don't worry about it.
Mark the bed directly on the virgin soil, regardless of the fact that weeds have begun to grow there. Do not dig the ground under any circumstances!
Place the sprouted tubers directly on undug soil. It is more convenient to make two rows at a distance of 40–50 cm from each other, and lay the tubers in each row 25 cm from each other. You need to leave 20–25 cm from each row to the edge of the bed. Thus, the planting width will be 80-100 cm, you can take any length, but you need to know that for every meter of planting you will need four tubers in one row and four in the other.
It is best to plant tubers the size of a chicken egg (there are about 20 such tubers in one kilogram), because such a tuber contains just as many nutrients as the plant needs to grow to 25–30 cm and have time to develop a good root system.
If you plant tubers that are too small, it is better to put 2-3 tubers in one nest at a time, otherwise there will be too few stems, and, accordingly, the harvest will be small. If you place tubers that are too large, then with a large amount of nutrition, the above-ground part will grow, and the development of roots will be delayed. Therefore, large tubers must be cut in advance along the tuber so that there is approximately the same number of sprouts on each part (there are much more eyes in the top than in the bottom, which is why you need to cut along, not across). Let them sit for two days so that the cuts become suberized, then sprinkle them with ash and only after that plant (otherwise rotting bacteria will penetrate into the tubers through the cuts).
The number of sprouts awakened on each tuber can be increased (naturally, the more stems, the greater the harvest). To do this, on each tuber a week before planting, you need to make a deep cut across the tuber with a sharp knife. Or simply remove the peel in the middle of the tuber with a thin strip around the tuber in the transverse direction. This will cause the dormant reserve buds on the peel at the bottom of the tuber to awaken and, accordingly, to receive additional stems from the tuber.
It is better to plant potatoes of an extra-early variety in one row in order to enjoy young potatoes as early as possible, and in the second row to plant a mid-season variety so that there are enough young potatoes until the end of the season.
The potato bed must be in the sun all day, otherwise the tops will be huge and the tubers small.
Early potato varieties are ready for consumption 60–70 days after emergence (Vesna Rannyaya, Zhavoronok, Snegir, Udacha, Anosta, Prior, Latona, Ostara, Skala). They can be eaten in this region from mid-July. These varieties should be removed at the beginning of August, otherwise they will simply rot in the ground.
Mid-early varieties are ready for consumption in 70–80 days (Nevsky, Sineglazka, Detskoselsky, Elizaveta, Charodey, Skazka, Raduga, Nayada, Sante, Impala) and should be harvested at the end of August.
Mid-season varieties are ready in 80–90 days (Lugovskoy, Petersburgsky, Shaman, Resurs, Granola), they should be harvested in early September.
In the northern regions, it is better to plant potatoes of early varieties (readiness 60–70 days after germination), since they are susceptible to late blight and mid-early varieties are resistant to this disease. There is no prospect of planting late varieties in northern climates.
Now the most important thing is to protect the potatoes from spring frosts.
To do this, rows of potatoes should be covered with dry, breathable material. Hay is best suited for this, but not straw (straw is not suitable because it will immediately attract rodents to the plantings, which will eat the young nodules as soon as they appear, leaving you with your nose). You can use dry leaves or simply rake the top, but always dry, layer from the compost heap.
If you haven’t prepared covering material since the fall, you can use black and white newspapers or wrapping paper. They need to be torn into pieces, crumpled and covered with potatoes. There is no need to fill the row spaces.
To prevent the shelter from being swept away by the wind, cover the bed with old lutrasil (spunbond) or bags. You should not use film (everything will start to rot under it). When the frosts are over, you can remove the lutrasil and start putting everything that you usually put into compost on the planting bed.