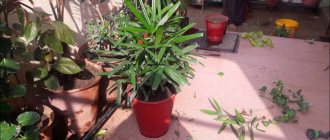
Dieffenbachia is a common perennial houseplant of the araceae family; in nature there are up to 30 species; it is a shrub with a strong, even trunk and large variegated leaves. It is thanks to such spectacular coloring and unpretentiousness that Dieffenbachia has gained such popularity among flower growers.
The Dieffenbachia plant can grow from a small sprout to a large shrub size, and this at home with minimal care. In this article, we will consider in detail the conditions of maintenance, lighting, watering, propagation and plant transplantation technology, as well as problematic issues when growing it.
Dieffenbachia - description
Dieffenbachia is an evergreen plant from the Araceae family. It grows in tropical areas of America.
Dieffenbachia is grown for its decorative leaves. Its leaves are large, mostly variegated green, but there are also white, yellowish or plain green. The trunk is straight and thick.
Dieffenbachia looks great in the interior
There are about 40 varieties of this plant, the leaves of which vary in variegation and pattern color. Most species grow up to two meters in height. Dwarf varieties do not exceed more than 40 cm.
There are many types and varieties of Dieffenbachia
A young plant rarely blooms, but as it ages it begins to bloom more often. The flowers are inconspicuous, in the form of spadixes, with a faint odor. Seeds do not ripen under room conditions.
Dieffenbachia flowers are inconspicuous, but original
The most common variety in home cultivation is Dieffenbachia spotted, which comes in different varieties.
Varieties and varieties of flowers in the photo
Alix
White flame
Vesuvius
Camilla
Lovely
Seguina
Reflector
Bauze
Is Dieffenbachia poisonous?
There are many rumors about the toxicity of this plant. In fact, it is not that poisonous. There was a case in one children's hospital that refutes rumors about the deadly danger of this plant for children.
The children ate all the leaves of the Dieffenbachia that grew there. But not a single child was harmed. No stomach pain, no cramps or anything else. I have never seen all these terrifying stories about severe swelling, blindness and muteness in reality, only on the Internet.
But the milky juice of Dieffenbachia can still irritate the mucous membrane, so it’s better not to do questionable experiments with it! Everyone's body is different, allergic reactions and skin burns are possible.
Safety regulations
- Do not touch the mucous membranes of the body (eyes, mouth) if the milky juice of Dieffenbachia remains on your hands.
- Carry out all operations with this plant with gloves to avoid allergies and burns.
- Animals and birds should not gnaw the stems or chew the leaves.
- Explain to children that the sap of this plant is poisonous and keep it out of the reach of small children and animals.
If these rules are followed, Dieffenbachia is not only a safe, but even a useful plant. Of course, you shouldn’t eat its leaves! They are a good air filter.
Dieffenbachia leaves contain phytoncides that disinfect the air. Wide leaves humidify the air and cleanse it of chemical compounds such as Formaldehyde, Xylene, Benzene.
Dieffenbachia is also a “rain indicator”. Before rainy weather, sticky droplets appear on the leaves.
General characteristics
To find out exactly which soil will be the best for Dieffenbachia, you need to understand other features of the plant. The flower's homeland is the Pacific Islands and southern North America. In nature, the plant can reach six meters in height, but in apartment conditions it rarely grows above two meters. The shape and color of the leaves depend on the variety.
The plant is recommended to be grown in rooms facing highways, factories, factories or railways, since Dieffenbachia perfectly purifies the air. However, the plant is poisonous and can cause swelling of the larynx or irritation of the skin and mucous membranes upon direct contact with the juice. Based on this, in a house where there are small children or animals, the flower should be placed in a fairly protected place.
Methods for propagating Dieffenbachia at home
Propagating Dieffenbachia will not be difficult even for those who are propagating a plant for the first time.
Methods for propagating Dieffenbachia:
- trunk cuttings;
- apex;
- basal shoots (daughter shoots);
- air layering.
Dieffenbachia is propagated by cuttings when there is a long trunk without leaves. This is the easiest way to reproduce. Cuttings are rooted in water or in a substrate.
They generally do not propagate from the top, but rejuvenate the plant if there is only one trunk. If there are several trunks, then one top can be left to grow, and the rest can be cut off for propagation.
Dieffenbachia grows and develops very quickly, and at home, when there is insufficient lighting, it stretches upward. There are new varieties that are compact in size and have a short trunk. But most often they grow ordinary spotted dieffenbachia, which requires frequent rejuvenation and replanting.
If you want to renew your Dieffenbachia, then feel free to cut off the top and cut the remaining parts of the trunk for propagation. If you want a new stem to grow from the root, you need to cut it so that a small stump with buds (3–5 cm) remains. Several new trunks will come from the buds.
Even small stumps will sprout
All parts of cut Dieffenbachia easily take root in water. As a result, instead of one plant, you get several!
It is best to propagate and replant Dieffenbachia in late winter or early spring, after the dormant period has ended. But you can do this in the summer.
Reproduction of Dieffenbachia - video
The influence of moon phases on plants
- The new moon is the worst time for gardening work. Do not plant or replant anything. This unfavorable period lasts three days, the day before the new moon, the new moon and the day after.
- Growing Moon - The Moon grows itself and pulls up the energy and juices of plants. This is the best time to work with plants whose fruits ripen above the ground (greens, herbs, fruits, vegetables, flowers). You can plant, replant, graft, and so on.
- Full moon - during this period it is also not recommended for planting and replanting plants, but it lasts one day. You can do weeding, fertilizing, and treating the garden from pests.
- Waning Moon - juices and energy are directed down to the roots, so try to work with root vegetables, bulbous ones.
What does “first quarter” and “third quarter” mean in the Lunar calendar
After the new moon, the Moon begins to grow, its crescent appears in the sky and gradually increases in size. At some point in the lunar month, it turns out that exactly half of the lunar disk appears illuminated to us, and the other half is not visible. This phase of the synodic lunar month is called the first quarter.
See also: Favorable days for planting garlic in the fall in 2021 according to the lunar calendar
In the third quarter or last quarter, we again see exactly half of the Moon, but this is already a waning, aging Moon. It's like a mirror image of the first quarter.
Is it possible to visually determine what phase the Moon is in, whether it is waxing or waning?
Yes, you can. It's very easy to do.
Look at the Moon and mentally place a pencil near its “horns”. If you get the correct letter “P”, it means the Moon is waxing, but if you get “P” on the contrary, something similar to the letter “U”, it means waning.
There are some more rules and recommendations that should be followed:
- It is best to plant plants at dawn or before lunch.
- When the Moon is waxing, use mineral supplements.
- When decreasing - organic.
What plants can be planted on the waxing Moon?
The waxing moon is a favorable phase for the growth and reproduction of plants, the period of their most intensive growth.
During the waxing Moon phase, it is favorable to plant ground fruits, flowers, as well as medicinal and lawn herbs, fast-growing shrubs, vegetables, leaf crops, including roses.
During this period, it is good to sow the lawn and replant indoor flowers, plant garden flowers, and harvest.
What plants can be planted on the waning moon
During the waning Moon phase, it is recommended to care for plants, fight pests, sow and plant plants whose fruits ripen underground, various fruit bushes and trees.
Good for the waning moon:
- Planting and propagating strawberries
- Plant trees and seedlings
- Cuttings from plants
- Divide perennials
- Trim and shape trees and shrubs
- Harvest for long-term storage
- Collect seeds
What can be planted during the new and full moon?
These days the earth freezes and does not give its energy to plants, so it is better not to plant anything these days.
On full moon days it is good to collect fruits (with the exception of root vegetables).
You can care for plants during a Lunar Eclipse
On the days of lunar eclipses, it is better NOT to carry out any work with plants!!!
How to propagate by air layering
Another way to propagate Dieffenbachia is by air layering.
- An incision is made on the trunk with a sharp sterile knife, fixed with a sliver and wrapped around with damp moss.
The incision is fixed with a sliver - Cellophane is tied on top.
The moss is tied with cellophane on top
- It is necessary to check the moisture status of the moss 1-2 times a week and, if necessary, moisten it with a spray bottle. You can add Kornevin to the water for spraying at the tip of a knife per half liter of water.
It is necessary to check the condition of the moss and the presence of root formation
- When roots appear, the trunk is cut off and planted in the soil according to the usual pattern.
The trunk that has given roots must be cut off
Another method of propagation by air layering has a slightly different scheme. Instead of moss and cellophane, a kind of pot with a light mixture of substrate is attached to the cut. For example, sphagnum + soil + perlite.
The pot is secured to the trunk with sticks.
You can use peat as a pot or cut it out of a plastic bottle.
Method of propagation by air layering with substrate
Transplanting and dividing a bush: how to plant cuttings correctly
The roots of Dieffenbachia grow well and eventually fill the entire pot. If Dieffenbachia has produced several sprouts from the root, they can be separated from the mother plant and planted separately.
You can easily separate the sprout from the mother bush and plant it separately
You need to take out the plant and check whether the daughter bushes can be separated. This is usually easy to do and leaves little damage to the roots. If you can’t separate it with your hands, you can cut it off with a sharp, disinfected knife. Try to cause as little damage to the roots as possible!
This bush can be divided into two
The trunk of spotted dieffenbachia grows quickly and can tilt the plant. In this regard, it is better to plant it in a heavy pot slightly larger than the size of the roots, so that there is somewhere to pour soil. Excess roots can be trimmed.
When planting, there should be a free space of 1.5–2 cm to the top of the pot.
When a transplant is required:
- growth stopped;
- new leaves grow small;
- the soil dries out very quickly;
- The plant has grown too much and needs updating.
Prepare for transplantation:
- new soil;
- disinfected scissors;
- antiseptic (charcoal powder, turmeric or brilliant green);
- drainage to the bottom of the pot.
Dividing a Dieffenbachia bush - video
Instructions for transplanting and dividing the bush
- Place drainage at the bottom of the pot.
- Remove the plant from the pot.
- Inspect the roots and soil.
- Separate the daughter shoots from the main bush.
- If necessary, free the roots of the mother plant from the old soil and remove all dark, dried and rotten roots. If the soil and roots are not sick, then it is better not to release the soil from the roots.
- Treat all sections with an antiseptic.
- Place the roots in a pot and add soil. Holding the Dieffenbachia by the trunk, add soil, compacting it a little. The trunk can be buried.
- Sprinkle a mixture of sand and charcoal on top and lay sphagnum moss on top of the mixture.
- Water the plant a little and spray the leaves with warm water.
- Plant the separated Dieffenbachia sprouts in the same way.
The first month you need to keep the plants in a shaded place, especially if you cut the roots. Next, place the Dieffenbachia in a more illuminated place.
Dieffenbachia transplant - video
Diseases and pests, methods of control
Most often, Dieffenbachia suffers due to improper watering. It may develop root rot. Damaged areas of the roots must be removed, and the cut areas should be treated with activated carbon or a solution of potassium permanganate. Also disinfect the new substrate and replant the plant. In the future, water the flower so that the top substrate in the pot has time to dry.
Pests do not really like to settle on Dieffenbichia because of its toxicity. Sometimes culture is affected by:
- spider mite;
- scale insect;
- mealybug.
It is better to get rid of them with the help of systemic insecticides (Aktara, Karbofos). If the damage is minor, you can first resort to washing the plant with a soapy solution. After some time, bathe him in a warm shower.
Dieffenbachia care
After all the rooted and planted plants have taken root, they need proper care.
Dieffenbachia loves fresh air. In summer it can be taken out onto the loggia, but protected from cold drafts.
Plant care table
| Illumination | Humidity | Watering | Temperature | Transfer | Top dressing |
| For varieties with a pattern - brighter light, for plain ones - moderate. Do not keep in direct sunlight. | Requires high air humidity. Spray the leaves with warm water. Do not place near heating appliances. | The soil should be moistened all the time, but not wet. | Not less than 17oC. In summer +22+28; In winter +18+22. | As the roots grow and fill the pot. | In the period from spring to December, once every two weeks, apply fertilizer for decorative deciduous plants. The dose is reduced by half. To improve the growth of small plants, fertilize or spray once a month with a fertilizer with a predominant nitrogen content. |
Caring for indoor Dieffenbachia - video
Problems during propagation and transplantation - table
| Problem | Causes | Elimination |
| Cuttings do not develop roots in water for a long time. | Low temperature for rooting; the mother plant did not have enough nutrition. | Raise the temperature to 22, 25 degrees. Add a rooting agent (Kornevin, Heteroauxin), a stimulant (Zircon, Epin) and ground charcoal to the water. 5 drops of stimulant, rooting agent on the tip of a knife, half a teaspoon of coal. |
| The tips of the cuttings began to turn black in the water. | Decay. | Cut off the blackened ends and dry for a couple of hours. Add Methylene blue + rooting agent + Fitosporin to the water. Change the water 1-2 times a week. |
| The rooted top began to shed its leaves. | Cold; drafts; poor soil condition; too little light; drought. | The temperature in summer should be at least 20 degrees. In winter, at least 18. Do not overwater the flower, do not dry it, and spray the leaves with warm water. You can add 1 tablet of Succinic acid to the water for stimulation (dissolve in hot water). Spray every morning, with Succinic acid - once a week (the solution is stored for 3 days in the dark). Provide good lighting, but not direct sunlight. |
| The tips and edges of new leaves dry out. | Lack of moisture, dry air. | Spray the leaves, you can have a warm shower. Do not overdry the soil. Place sphagnum moss on top of the soil. |
| The trunk of the planted Dieffenbachia began to fade. | Poured soil or presence of pests. | When flooding, dry the soil until completely dry, at this time spray the leaves (you can add Epin). When the soil dries out, water with the addition of Fitosporin. Carry out the treatment three times every other time to prevent rot. You can also water the soil with such products as Alirin-B, Fitolavin (alternating these products will be useful). Check the soil and leaves for pests. If found, treat with medications. From root gnawers: Grom-2; from leafy ones: Fitoverm. |
| Cuttings rooted in the substrate do not sprout. | Unfavorable conditions, dry substrate, insufficient air humidity. | Check the conditions: Temperature: 25–27°C; wet substrate; light. Make a greenhouse and place it in a warm, well-lit place. The substrate and cuttings can be sprayed with the addition of a stimulant. |
| The cuttings turn yellow. | They didn't change the water for a long time. | Change the water by adding crushed coal. Rinse the cuttings with warm water. |

