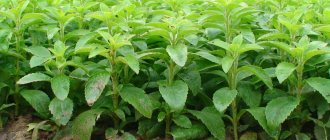
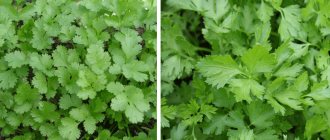
In terms of nutritional value, beans are among the ten most useful crops grown by people. It is 75% digestible, a storehouse of biological building material, and a capacious source of energy. This is a plant with a long history. Nutritious beans store well, they contain a lot of protein and amino acids. In recent years, selective asparagus varieties have become popular; they grow well in open ground in many climatic zones.
Beans are often grown on balconies and loggias for decorative purposes. The heat-loving crop adapts well after transplantation; in the conditions of the Urals and Siberia it is grown as seedlings. Early ripening varieties have time to ripen even in cool summers. The beneficial properties of the culture are recognized by traditional medicine. It is recommended for dietary nutrition for many types of diseases.
How to choose the right bean variety for your home
If you decide to plant beans at home, you first need to decide on the choice of variety. There are several options, the best of which are considered to be asparagus and ornamental species. Bush beans also deserve attention due to their short growing season, rapid maturation and compact size. The characteristics of early bush varieties allow them to be grown in boxes without much hassle. Scuba and Homestead green are popular. For home cultivation, hybrids that are immune to diseases and insect pests are recommended. Decorative species produce large and beautiful multi-colored beans, which are not suitable for food, but are used for further landscaping of balconies.
Early ripening green beans are distinguished by excellent fruiting in the apartment:
- Butter king. Tender, tube-shaped, large pods are removed no earlier than after two months and used fresh for food or as a component of preparations;
- Caramel. A variety with increased resistance to legume diseases. Produces a harvest of sugar pods in two months;
- Saxa 615. A compact variety with small, tube-shaped pods, valued for containing a large amount of useful substances and the absence of coarse fibers.
When preference is given to a climbing species, you should not choose overly climbing varieties that shade the windows as much as possible. I can recommend Speck, Rumba, Violetta. Pinching can stop the growth of the vine, which will bring the start of fruiting closer. Climbing plants are fixed on a trellis or cone-shaped wooden tripod. For bush plants, it is enough to install a low support.
Hulling varieties are planted to obtain dry grains; home conditions are not suitable for this - what is sown is what is harvested.
For those who have decided to plant beans at home for the first time, it is best to purchase several varieties to try and plant 3-4 seeds.
Bean varieties for growing in the country
Beans have several varieties according to the method of bush formation:
- bush - a low-growing plant up to half a meter tall;
- semi-curly up to 2 meters;
- curly - from 2 to 5 meters or more.
It should be noted that in the climatic zones of our country, bean vines rarely have time to grow up to 5 meters.
According to the characteristics of the fruit:
- grain - unripe beans have an unpleasant taste, and ripening is characterized by keratinization of the pod and complete hardening of the beans;
- semi-sugar - can be eaten together with the pod until it becomes keratinized, after which it looks and is used like a grain;
- sugar - also called asparagus or vegetable - the pod is not covered with a hard waxy coating, can be used as food along with beans, frozen and preserved whole.
Bush and climbing shelled beans most often belong to determinate varieties - the pods form on the bush and ripen once per season, then the plant becomes useless.
Sugar and semi-sugar varieties are mostly indeterminate - ovaries are formed on them throughout the entire growing season, and these plants do not know dormant periods.
Grain (shelling) varieties of beans
They are good because they are easily suitable for cultivation throughout almost the entire territory of Russia. Hulled beans can be stored for a very long time.
Chocolate - early ripening, heat-resistant, brown beans, medium-sized.
Yin and Yang is a high-yielding bush variety of medium ripening with small round black and white beans.
Pioneer is a fairly old bush variety with rounded white beans, decorated with scarlet patches, of medium early ripening.
Gribovskaya - medium ripening with pods up to 15 centimeters long and white elongated beans, suitable for cultivation in Siberia and the Urals.
A housewife's dream is also unpretentious and has large white beans.
Varieties of sugar (vegetable, asparagus or green) beans
Crane is a bush up to 50 centimeters high, hardy and unpretentious, the pods are round and tender, good for canning and freezing.
Purple Queen is a semi-climbing variety with purple pods and beans; it is distinguished by high yield and excellent taste.
Golden Nectar - a semi-climbing early variety ripens in 70 days, yellow pods reach 25 centimeters.
Sweet courage is an extra-early bush variety with yellow pods up to 20 centimeters long.
The winner is a very capricious, heat-loving variety, decorative during the flowering period, the pods are flat up to 30 centimeters.
Varieties of semi-sugar beans
Liana is a mid-early semi-climbing bean with green pods 20-25 centimeters long.
Secunda is an early-ripening, semi-climbing variety with golden pods up to 12 centimeters long.
Indiana - mid-early variety is distinguished by medium-sized white and red beans.
Macaretti is an early, unpretentious cowpea variety of semi-climbing bean, pod length up to 35 centimeters.
Rant is also an early ripening variety, with green pods up to 15 centimeters long.
Is it possible to create conditions suitable for beans at home?
The plant requires short daylight hours - no more than 12 hours, this is necessary for the formation of flower buds. If it is possible to provide beans grown on a windowsill with such conditions, the harvest will be early and abundant. The same applies to planting crops on the balcony. This parameter loses its relevance with the onset of fruiting.
To grow beans in an apartment, prepare loamy or sandy loam soil and warm it up to +12 degrees. Growing beans at home will not cause problems, in particular, thanks to the self-pollinating flowers.
Green beans: features of planting and care
Asparagus varieties are one of the most popular. The method of growing them at home is not much different from the standard one. At home it grows much faster than in the garden. You can plant it at the end of December, the first shoots will appear in a couple of days. And in mid-February, flowers already appear.
Reference . Beans are a self-pollinating plant, so the appearance of pods will not take long either. Asparagus varieties are less demanding of light than bush varieties.
The pods of green beans are tender, without coarse fibers. They can be added to soups, salads, and side dishes. The fruits are harvested when the pods have not yet formed and the grains are green. If you grow such beans on the balcony, you can occasionally feed them with manure. About 3 kg of asparagus crop is harvested from one square meter.
Seed preparation and sowing
Seed material should be planted after careful selection and processing. There are criteria for selecting seeds, after which full-bodied specimens remain. The grains should be smooth, with a shiny surface, without signs of pest damage, dark spots, mold, flabbiness, or emptiness. After visual inspection, the beans are filled with salted water.
The floating seeds are discarded. Dry seeds have a hard shell that delays the emergence of seedlings.
The technology for processing bean seeds is as follows: the seed material is soaked for a day in warm water, which needs to be replaced four times. Growth stimulants play a good role. To prevent diseases of seedlings, a weak solution of potassium permanganate, insecticide or fungicide is suitable.
See also
Health benefits and harms of beans for diabetes mellitus, which is healthier Read
After this, the seeds are placed in a damp cloth until germination. The air temperature is maintained within +25 degrees. As soon as the first sprouts hatch, the seeds are planted in the soil, poured into a container with a 5 cm deepening. The soil mixture must be watered and the bean seeds should be placed with the roots down or to the side, at intervals of 15-20 cm.
The length of day required to grow beans occurs from mid-February to mid-March. For planting on a windowsill, seeds are prepared in February. On a glazed balcony, beans are sown in mid-May, on an open balcony - at the end of May.
The heat-loving crop is afraid of frost. As an adult, it can withstand short-term drops in temperature of at least -3 degrees.
Sowing beans
Sowing dates . Beans are sown taking into account their heat-loving properties. It, of course, can swell and wake up already at +10°.
In the soil, next to the seed, so that there is something like this. But these are far from optimal heat conditions for the crop.
At low temperatures, the weather is usually still unstable, and it can suddenly get cold. Such a turn to the cold can not only stop growth, but even destroy the beans, not even on the vine, but just about to germinate.
Sprouted bean seeds are especially sensitive to lack of heat. If you germinate, do so only in such a way that sowing occurs at the time of optimal temperatures.
In the South it’s simpler: the chestnut tree has bloomed, which means the soil is just ready for sowing beans. Its temperature in the landing layer is above 10°. The indicator is correct, the chestnut can’t go wrong.
To the north, you need to take a closer look at the condition of the native plants when the temperature is suitable for sowing beans.
Each region has its own signs. If weather forecasters report that average daily temperatures in the region are 15 degrees or higher, bean planting can begin.
It is good if it is possible to cover the seedlings with a temporary film frame. Frosts are an unpredictable thing even in the South (they happen occasionally in June), and beans cannot withstand such weather.
April - May are the months for sowing beans, only the numbers shift to adjust for the terrain.
How to sow beans . Beans are sown either dry - if there is no confidence that the cold will not return, or you can soak them overnight before sowing.
The second option is when stable heat has established, rainfall occurs and it is possible to keep the soil on the plot moist (water).
There is more here - the desire of the grower plays a role in the choice: to soak or not.
- The seeds of beans are not small; they are not sown superficially. Otherwise, they can ascend, but they are unlikely to stay firmly in the ground. Wind or rain will easily lay down finely planted beans. It is customary to sow to a matchbox depth of 5 cm.
- The planting scheme is chosen according to the capabilities of the site. The minimum for bush forms is 30 by 40 cm (distances in rows and row spacing). There is an opportunity to provide more power supply area - give it, it won’t make things worse. It is good if beans are sowed by arranging the holes in a checkerboard pattern. This will provide better lighting and nutrition. Place two to three seeds in the hole. This is insurance. When they sprout and become strong, thin them out. The best will remain. If everything is good, you can leave two plants (just do not sow them side by side, distribute them over the hole), and carefully transplant the third one, like seedlings. Or transplant two, leaving one in the hole. When there are plenty of seeds, you can sow five at a time. Especially the climbing one - from one hole along the trellis you can shoot branches of two plants at once - in different directions.
- Dry seeds can be planted in moist soil without watering if the humidity is low. In case of high humidity or sowing with paved/sprouted seeds, cover the hole with soil and water it after gently pressing the soil onto the seeds. You can press it with the flat of a hoe or even with your hands. Sprinkle a little unspilled soil on top to protect against crusting.
- Climbing plants are more powerful, they are planted with half-meter row spacing, at the same distance as bush forms of beans - 30 cm. High (two-meter) supports are prepared in advance. Beans can easily wrap around any beans, but it is better to choose wooden ones. They do not heat up from the sun like metal or polymers. Although wood is inferior to them in terms of durability. But it spares the stems of the bean plant.
- If corn or sunflowers are also sown on the site, climbing beans can be planted in the same hole with them. It’s impossible to think of a more environmentally friendly support. These crops are friends and are often grown together. The planting is compact, the harvest is double (seeds and beans), the benefits are obvious. And there is less maintenance: with supports there is no need to work.
Preparing the soil for planting seeds
The rapid growth of beans allows you to grow the plant without picking, in a permanent container. Each plant will need at least 3 liters of soil. Pots should be 20 cm high, due to the poor development of the root system. A tight container will make the beans weak and unproductive.
If it is not possible to equip the containers with drainage holes, a layer of expanded clay is poured onto the bottom. You can purchase a universal ready-made soil or prepare the soil mixture yourself. To do this, take equal amounts of humus and turf soil, to which 200 g of wood ash is added. The use of acidic soil is unacceptable. Deoxidation is carried out with dolomite flour, ash, chalk or lime to a pH of 6 - 6.5.
Choosing a location and preparing the soil for beans
Beans need a fairly bright place; they prefer loose sandy loam soils without stagnant moisture. Drafts are not a problem, but for climbing and semi-climbing varieties tied to supports, the wind can become a problem.
In the south, melon cultivation of shelled beans is often practiced - in open space, poor soil and with poor watering.
But if all the gardener has is six acres of dacha land, then it makes sense to prepare beds for legumes especially:
- In autumn, planting residues are carefully removed;
- the soil is enriched with rotted manure or compost;
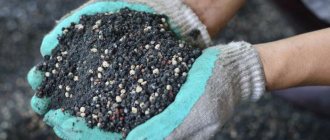
- add dolomite flour at the rate of 50-60 grams per square meter;
- also use kemira, ammophos, or any other complex mineral fertilizer according to the instructions;
- then they dig to the depth of a spade bayonet;
- in the spring, wood ash is added - approximately 200 g per square meter;
- re-dig.
Planting stages
In closed ground - a balcony, a loggia - it is recommended to plant beans at the very beginning of May. The technology for growing in an apartment differs in timing: planting begins in March. A step-by-step scheme for planting this vegetable crop is proposed.
Stage 1
Seeds can be planted in the ground dry or already germinated. If you choose the second option, the seed material is placed in a gauze bag and placed in a container with warm water, which should be added as it evaporates. The first sprouts will indicate the right time to plant the beans.
Stage 2
Let's start choosing a container for planting plants: bush varieties need a volume of soil of at least 3 liters, climbing varieties - 35 liters. Having selected a suitable box, container or pot, we fill it with the soil mixture, the preparation of which was discussed above.
Stage 3: Disembarkation
There are no problems at this stage; it is enough to follow simple rules:
- Before planting dry or soaked seeds, it is recommended to spill the soil with hot water or a manganese solution. The beans are laid out in the holes, maintaining a distance of 10 cm. It is recommended to lay the sprouted seeds on their side, regardless of the location of the sprout, otherwise it is difficult to determine the correct location of the grain. However, nothing terrible will happen if the placement is incorrect, since the seedlings hatch in any case, rushing towards the light.
The optimal planting time is May. Beans germinate within 5-7 days, begin flowering after a month and a half, and the first harvest should be expected a few more weeks later.
Combined cultivation is considered a good option:
- Seedlings grown indoors are taken out to the balcony or loggia when warm weather sets in. Sowing is carried out a month before the threat of night frosts disappears.
- Early ripening varieties sown in February are grown on the windowsill until fruiting. After harvesting, the containers are emptied and placed on the balcony for planting new plants.
See also
Beneficial and harmful properties of black beans for health, description of varietiesRead
Pest and disease control
Beans can be affected by bacterial, fungal and viral diseases . The most common are (Figure 7):
- Fusarium - the first signs are the wilting of the plant and the appearance of root rot. The source of infection is infected seeds. Regardless of the period of infection, fusarium significantly reduces the quality and quantity of the crop. Fusarium especially often affects young seedlings. It is important that without the use of chemical means of protection, the causative agent of the disease persists in beans and soil.
- Anthracnose affects plants during the entire growing season, but most often the disease manifests itself during the formation of beans. Red-brown spots with a light center appear on the cotyledons. The leaves become covered with brown spots with brown edges, and the plant gradually dries out. But the beans themselves suffer the most. Under the influence of the fungus, they become hard and shrink, thereby becoming a source of infection.
- White rot can affect not only leaves and stems, but also fruits. They become soft and gradually rot.
- Gray rot can affect all plants in the garden bed, penetrating through damaged areas of stems and leaves. Wet spots of brown-green color with a characteristic fluffy coating appear on the leaves and beans. Gray rot can not only deteriorate the quality of seeds, but also lead to a decrease in yield.
Figure 7. Diseases of the crop: 1 - fusarium, 2 - anthracnose, 3 - white rot, 4 - gray rot
Bacterial diseases are the most dangerous. They are caused by various types of bacteria and can lead to the loss of entire crops. Plants suffer especially severely after flowering during the period of seed formation.
The first signs of bacteriosis are spots on the cotyledons or deformation of the sprouts. During the period of active growth, bacteria penetrate plants through random mechanical damage on the surface and begin to develop in internal tissues, destroying them.
Often the disease spreads from beans to seeds, which are the main source of infection transmission. Yellow spots appear on the affected white seeds; with severe damage, the entire surface becomes yellow.
The second notable feature of bacteriosis is leaf wilting. The disease is especially severe when there is excessive humidity and moderate temperatures. Bacteria persist in seeds, plant debris, and soil.
The main bacterial diseases of beans are (Figure 8):
- Brown spot - Watery, light green spots and cankers appear on the undersides of leaves of a damaged plant. This disease can easily be confused with anthracnose. A distinctive feature of bacteriosis is the less saturated color of the spots. With severe damage, the entire surface of the seeds becomes yellow (varnished). This type of bacterium persists in seeds for up to 5 years, in dry leaves for up to two.
- Fire blight affects all above-ground parts of the plant. It appears in the form of brown, blurry spots with an oily sheen on varieties with white seeds, or in the form of dry, brown, small spots, similar to warts, on seeds with a colored shell. At first the spots are transparent, but soon they turn brown and dry out. Sometimes the affected seeds do not have characteristic spots, but remain wrinkled, unripe, without a characteristic shine.
- Rust-brown spot most often affects crops in areas with a dry climate or during drought. As a rule, the disease is spread by infected seeds. The infected plant withers, the seedlings die, and adult plants stop developing and do not form beans.
Figure 8. Bacterial diseases of legumes: 1 - brown spot, 2 - fire blight, 3 - rusty brown spot.
Viral diseases include the so-called bean mosaic (Figure 9). Its carrier is aphids. The disease is characterized by variegated coloration of leaves, in which the spots merge with each other, spreading throughout the entire body of the plant. Due to the disease, the bush has a poorly developed root system and produces low yields.
In addition, the crop may be destroyed due to pests. These include bean grains (Figure 9). This is an insect that can develop in soil or granaries. It enters fields along with affected seeds. They begin to appear on crops during the period of bean formation, but the bulk of them can be observed during the ripening of the crop. Females lay eggs inside ripe dry beans, and the larvae eat the grains after hatching.
Figure 9. Bean mosaic (left) and the main pest of the crop - bean weevil
Prevention and control of diseases involves:
- Careful selection of planting material, preferably varieties resistant to fungi and viruses;
- Weed control;
- Thinning of seedlings;
- Destruction of aphids;
- Removing dead parts of the plant;
- Seed treatment before planting;
- Disposal of plant residues after harvesting;
- Compliance with crop rotation rules.
Caring for beans at home
Watering the plants is carried out as the top layer of soil dries. On a loggia or balcony, the frequency of irrigation depends on weather conditions: in the heat, the number of waterings reaches two per day. To avoid the occurrence of fungi, you should try not to get water on the leaves. The optimal time to moisten the soil is in the morning. With the appearance of two pairs of leaves, watering is stopped and resumed with the beginning of flowering.
To get a good harvest on an unglazed loggia, bean plantings must be protected from rain, preventing water from stagnating in containers. For this purpose, the containers are moved under the roof, inside the balcony.
WHERE DID BEANS COME FROM?
Beans have been grown since ancient times in Central and South America, as well as in Egypt, India and China. It was as popular as potatoes in the American Indian diet.
In Ancient Egypt it was considered the main source of vegetable protein. In Ancient Greece, beans were used not only as a nutritious product, but also as a valuable medicine that lowers blood sugar and cures serious diseases of the stomach and pancreas.
The Greeks called it "lobos". And it was from them that she came to the Caucasus. This is evidenced by the name of one of the most popular bean dishes in Georgia – “Lobio”.
Christopher Columbus brought bean seeds to Europe from America. But Europeans were not interested in it as a food product. For almost two centuries, they made cosmetic creams and masks from it, which were very expensive. It was also planted in flower beds as an ornamental plant. But the French and English began preparing the first bean dishes in the middle of the 18th century.
At the same time, it was from France, by order of Empress Elizabeth Petrovna, that beans were brought to Russia under the name “French beans.” Another name of that time, “Turkish beans,” indicates that beans could have been brought to Russia from Turkey.
The beans were enjoyed by both the nobility and ordinary peasants. Residents of the Yaroslavl province came up with the recipe for the first onion soup with beans, which later became very popular.
Optimal light mode
The culture does not tolerate shading, so for planting, select a well-lit place or arrange additional lighting. However, you need to remember that the daylight hours before fruiting begins should be short, no more than 12 hours.
When growing beans on a windowsill during the winter months, the boxes are placed on the south side. If this is not possible, additional lighting is provided using a phytolamp. At the end of spring and summer, the culture feels great on windows facing west and east.
To determine the difference in yield at different lengths of daylight, it is recommended to conduct an experiment. Young plants of the same variety, grown with the same care, are divided into two groups. The first will develop in short day conditions, the second in natural light.
Bean planting dates
Transplanting seedlings into the ground in the garden is carried out around mid-April - May, depending on the climate in a particular region. An indicator of readiness for transplanting seedlings is a stable above-zero temperature throughout the day. If the transplant is carried out ahead of time, in early spring, when the weather is cool and there may be slight frosts at night, there is a risk that the growth of the beans will be stopped.
The right time for planting is the key to successful growth of bean bushes
What and how to feed beans
The first fertilizing must be applied in the phase of appearance of true leaves and repeated twice a month. During the growth period, the plant needs organic fertilizers, but at home it is impossible to use mullein droppings and infusion due to the unpleasant, pungent odor. There is only one way out - regularly adding humus when mixing with soil. The application of such fertilizers ends in the budding phase. Now the beans require potassium and microelements, the role of which will be played by wood ash. The soil is powdered from above, loosened and watered.
For feeding plants cultivated indoors, a natural, odorless fertilizer has been developed - horse manure extract.
WHAT ARE BEANS USEFUL FOR?
The main advantage of beans is their high content of vegetable protein, which can successfully replace animal protein in the human diet.
But in terms of the content of vitamins and nutrients, beans occupy a leading place among other vegetables.
The pods and beans contain almost the entire vitamin alphabet: A, the entire group B, C, E, D, K, PP, carotene. They also contain: potassium, sodium, calcium, phosphorus, magnesium, iron, iodine, selenium, germanium, chromium.
Beans are rich in sucrose, organic and fatty acids, fiber, flavonoids, coumarins, amino acids, including arginine, which lowers blood sugar.
Beans are a valuable vegetable that can be consumed in any diet.
Diseases and pests of beans
Home plantings are not protected from diseases and pests. The greatest danger is the bean weevil. If you have indoor plants, thrips, spider mites, and aphids can spread to bean bushes. Indoors, pest control should be organized using biological preparations, as they are as safe as possible for the human body and domestic animals.
Freezing the dry seeds for two days in the freezer at a temperature not lower than -15 degrees helps get rid of the grains.
Beans are affected by bacteriosis and viral anthracnose. Viral infections are incurable, so take preventive measures in the form of spraying plants with special preparations twice before flowering.
Collection and storage
Collection and storage of shelled beans
The shelled beans ripen more or less smoothly. Signs of maturity are:
- drying out of the pod;
- color change - green varieties turn yellow, purple and red ones become paler, lose their waxy shine;
- the mature pod begins to rattle;
- peels easily and the beans become strong.
The beans are removed from the garden in several stages, collecting the dried pods and leaving the green ones to ripen. The collected pods are dried for some time, spread out in a thin layer in a well-ventilated area. Then they start peeling.
This can be done manually, splitting each pod separately. But well-dried pods can be placed in a bag and crushed or beaten with a rolling pin. This will not cause any harm to the beans. When most of the pods have split, they are poured into a large cup and the beans are separated from the husks.
Beans can be stored for years in tightly closed containers at room temperature.
Unshelled beans cannot be stored - the pods accumulate moisture and serve as a breeding ground for pests and diseases.
Harvesting sugar and semi-sugar varieties
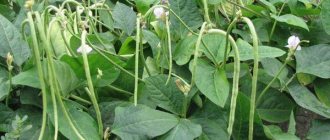
Green pods are considered edible when they are sufficiently plump and shaped. They can be collected for frozen preservation and eaten.
Harvesting green beans should be done every other day. If you do this less often, the pods will overripe and prevent the development of new ones. You need to separate the pod from the stem with scissors without disturbing the plant. If all conditions are met, the bush will bear fruit until the end of the season.
Overripe semi-sugar varieties are collected and stored in the same way as shelled varieties.
First harvest
Mature pods are immediately used for food. When harvesting your own seed material, the fruits are left on the plant until fully ripened. Growing beans at home cannot be called large-scale, but a dozen bushes will provide the owner of the planting with a harvest two months after sowing. Five bushes are enough for climbing beans. Late fruiting occurs due to cool weather.
An unpretentious crop does not require specific skills and experience to grow at home. The development of beans occurs even in cramped conditions and lack of lighting. Creating favorable conditions will provide you with a harvest no less abundant than when planting in open ground. Important agrotechnical practices: sufficient volume of soil, organization of lighting conditions, proper watering and fertilization.
Scheme for planting bean seeds in open ground
So, you have waited for the optimal time for sowing, prepared the site and seed. What to do next? The following step-by-step instructions will help you correctly plant bean seeds in open ground:
- Step 1: Loosen and level the soil in the garden bed with a rake.
- Step 2: Make furrows for sowing (you can make them with a thin lath). The distance between them is 30-40 centimeters. Row depth - 5 cm.
A popular and convenient scheme for planting beans is row .
- Step 3: Place a thin layer of humus at the bottom of the rows, sprinkle it on top with a thin layer of soil.
- Step 4: Water the furrows thoroughly.
- Step 5: Plant the seeds at a distance of 20 centimeters from each other.
- Step 6: Fill the holes with soil and lightly compact them with your hand.
- Step 7: Cover the bed with film or agrofibre (when shoots appear, the material will need to be removed).
Just in case, it is recommended to sow beans more densely (that is, at a shorter distance), and then when shoots appear, thin out the plants. Dense sowing is advisable in case some seeds do not sprout, this way you will protect yourself.
When planting climbing beans, you need to maintain a greater distance, since they have more green mass. The distance between the rows is 50 cm, between the seeds - 25 cm. In this case, there must be a support nearby (this can be a special trellis or just a fence).
You can also plant climbing beans in a nesting manner around a central support pole (about 2 m high).
Description of beans
The common bean is an annual plant from the Legume family, reaching a height of 2 meters. Taproot with several branches. Ripens in August-September. Varieties are divided into asparagus and grain varieties.
Features of the vegetable:
- straight powerful stem 0.3-2 m long;
- leaves stretch towards the light on a sunny day;
- the color of the fruit can be white, red, purple or black;
- varieties are divided into sugar, semi-sugar and shelling.
The plant is heat-loving; seeds can germinate only at temperatures above 10 degrees. Start sowing it at the same time as cucumbers.
Using bean sprouts
Bean grains (beans) are sprouted for two purposes:
- This is planting in the ground to obtain a harvest of juicy pods.
- And growing legume seedlings for use in food in order to obtain a large dose of nutrients. The latter method spread with the popularization of vegetarianism, raw food diet, and veganism.
Beans act as storage containers for nutrients needed by new plants. They contain nutrients (organic compounds, fats, carbohydrates) in dry form. But in this form, the sprout cannot accept them, so it is important to soak it so that complex substances are converted into simple ones, complex carbohydrates become simple sugars, and fats become fatty acids. To do this, the grain is placed in a moist and warm environment.
Sprouted beans are used for food and for growing in the ground.
When bean seeds germinate, the content of minerals, amino acids, organic acids, and other useful and essential nutrients increases. In this lightweight version, these substances are easier to digest, and a person does not experience a feeling of heaviness when consuming sprouts.
Beneficial and harmful properties of beans
Beans are a common product on our table. But not everyone knows how beneficial this vegetable is for the body. I hadn’t thought about this before, but then I decided to investigate this issue. And what can I say: I discovered a lot of new things. Let's start with the positive:
You can watch the video about other beneficial properties of beans that I did not touch on:
Author's note Natalya Papanova Blog author
One glass of beans per day satisfies the body's daily requirement for fiber.
But like any other product, beans also have negative aspects. For example, it is not recommended to use for the following diseases:
- for colitis, gastritis;
- with increased acidity;
- gout;
- stomach ulcer.
It is harmful to eat beans raw: they contain toxic substances that can lead to serious food poisoning.
To get the benefits of eating vegetables all year round, read how to keep fresh cucumbers longer.
After heat treatment or soaking, all toxic substances are released
Preparation of soil and planting material
At home, when planting beans, it is better not to use dry seeds. Their hard shell prevents rapid germination. But right before sowing, the planting material is not soaked so that it does not rot in the cold soil.
One way to solve the problem involves soaking the beans in a warmed, weak solution of potassium permanganate for 3 minutes. Then the seeds are sown immediately, and the soil is watered with the remainder of the solution.
In another case, a warm solution of potassium permanganate is used to water the soil prepared for planting beans. After this, the planting material is immediately planted.
Important! The best time to plant beans at home on a glassed-in balcony is the end of spring. You can grow beans in an apartment, on a windowsill
Then the seeds are sown in the last days of March.
Beans prefer to grow on loose, fertile soil with a high content of useful elements. This crop does not tolerate acidic soil. Therefore, before planting seeds, it is alkalized by adding a little crushed chalk, wood ash or dolomite.
To plant beans, use universal soil for growing vegetables. You can prepare the soil mixture yourself by mixing the following in equal quantities: turf soil and humus. An additional 1 cup of wood ash is added to a bucket of such soil.
FEATURES OF BEANS
Beans are a nitrogen-fixing crop. Its powerful root system contains many nodules with bacteria that absorb nitrogen from the air and accumulate it in the root layer.
It almost completely provides itself with nitrogen fertilizers, which subsequently remain in the garden for subsequent vegetables. Beans are grown in one place for no more than 5 years.
After it, you can sow any vegetables in the garden bed. The best predecessors for beans are tomatoes, eggplants, peppers, carrots, beets, onions, garlic, zucchini, and cucumbers.
Beans are a self-pollinating crop. However, if several varieties are planted nearby, their yields will be higher.
Beans need bright sunlight all day long. Then she will grow and develop well. In the shade, harvests will be very meager. Pods will appear late or may not form at all.
This plant is heat-loving. The optimal temperature for its normal development is +24 degrees, so you should not rush to plant the seeds in the garden. The best planting dates are from June 6 to June 10.
Beans love moisture, but if there is an excess of it, mass falling of flowers and ovaries can begin.
Bean seeds can be stored for a very long time. They remain viable for up to 8 years.
Preparatory work
Despite the fact that indoor conditions create an ideal regime and microclimate for plants, preparations for sowing seeds are taken seriously.
When cultivating beans at home, you must remember that this species, first of all, loves open soil, so even the slightest deviation from the required parameters leads to inhibition of plant growth, as well as their fruiting.
Creating an optimal microclimate
It is not difficult to create the necessary conditions for the growth of homemade beans.
This plant grows and bears fruit most effectively when:
- average daily temperature +20…+25°С;
- humidity about 65%;
- intense lighting for at least 10 hours a day.
To achieve such indicators, artificial lighting and, if necessary, a heating system are installed.
The crop does not need abundant air humidification; relatively dry air is perfect for its growth. You will be interested to know the difference between green beans and green beans.
Preparing the soil for sowing
Only well-fertilized fertile soils are suitable for growing beans; for these purposes, you can use any purchased substrates from flower shops, but it is best to prepare the soil yourself.
It is prepared on the basis of a mixture of humus and turf soil (1:1). For approximately 10–12 liters of such soil, add 200 g of crushed ash as a source of minerals.
Any plant substrate is an ideal environment for the growth of all kinds of microflora, as well as the development of pests. As a result, during the development of a plant, they instantly infect it and often seriously deplete it, even to the point of death.
To avoid this, both purchased and home-prepared mixtures are disinfected:
- freezing - the soil is kept in a freezer at –20…–25°C for 3 days;
- dry heat - the substrate is roasted in the oven for 2 hours, at a temperature of +160...+165°C;
- watering - the soil is well watered with a 1% solution of potassium permanganate.
Important! After disinfection, the soil is left alone at room temperature for 7–10 days. During this time, it restores its structure, as well as beneficial microflora.
Seed preparation
The beans have a rather dense and durable skin; under natural conditions it helps protect the sprout located in the kernel, but in practice it brings a lot of trouble to the gardener. Such seed requires careful preparation, otherwise it will simply rot after it gets into the soil. To avoid this, beans are sprouted.
The procedure is carried out as follows:
- Pour the beans with a 2% solution of potassium permanganate for 20 minutes (for disinfection). You can replace it with a 70% alcohol solution.
- Soak the seed in the growth stimulator for 24 hours. For this purpose, solutions of the drugs “Zircon”, “Epin” or “Energen” are used.
- Wrap the beans in a damp cloth and transfer them to a warm place with a temperature of +22...+26°C.
- As soon as a small sprout about 0.5 cm long appears on the seed, it becomes suitable for moving into the soil.
Read more about how to germinate beans.
Care
Caring for beans involves timely watering and harvesting. It is necessary to moisten the soil in which the plant grows as it dries out. Do not flood the crop with too much water, as the roots may begin to rot, and then the beans will die. It is considered advisable to water the beans once a week if they grow in an apartment, or once every five days if they grow in open ground.
We must not forget about weeds: they need to be removed as they appear, since if they are abundant, the beans will grow weak, and the beans will be very small and dry.
Twice a year - in spring and early autumn - it is necessary to fertilize. Potassium salt or superphosphate is suitable as it. You can also use a mixture of these products in equal proportions. And when the beans just begin to ripen, you can sprinkle the soil around the plants with wood ash.
If the bushes are too tall, they need to be tied up in time. In addition, it is necessary to treat the beans with insect repellents in advance (before starting to tie the beans in the pods). This will protect the crop from pests and save the harvest.
You can learn more about growing beans and caring for them in the video at the end of the article. The main thing is to follow the recommendations, and then every gardener will be able to grow good and healthy beans.
Asparagus beans
These plants have a short growing season, accelerated ripening of beans and small bushes. Early varieties of this type of plant are successfully grown on window sills or balconies in simple boxes or flower pots, without requiring painstaking care. It is preferable to plant seeds of varieties that are resistant to pests and diseases.
These varieties include:
- Butter king is a plant with large tube-shaped pods. The harvest period is 60 days after planting. Can be used fresh, for canning and freezing.
- Caramel - plants are not susceptible to diseases of legumes. The ripening period for large, sweet beans is 2 months.
- Saxa 615 is a compact hybrid plant, excellent for planting indoors. The tube-shaped pods and beans have many advantages in terms of the content of nutrients and useful minerals and the absence of lignified coarse fibers in the pulp.