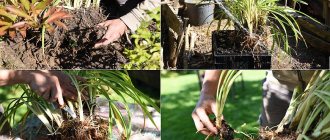
Reproduction by sprouts
To propagate potatoes using shoots, you need to select tubers of medium ripening and germinate them in the light or in a dark room. The room temperature should be 15-18 degrees. When growing potatoes in the light, the sprouts grow green or purple; when grown in a dark room, the sprouts are white.
One tuber can produce shoots as many times as possible.
To prevent the tuber from drying out, it needs to be sprayed with water every three days. The shoots are broken off when they grow from 3 to 5 cm in length. The shoot is separated as follows: hold the shoot at the root with your right hand, carefully turn the tuber with your left hand. The sprout must be held carefully so as not to crush it, as a damaged sprout can rot in the ground. Shadow shoots must be broken off carefully so as not to damage underdeveloped ones.
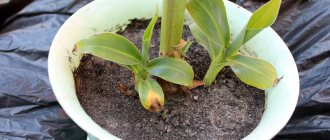
The resulting shoots are planted in a box with fertilized soil at a distance of 5-7 cm in a row. The row spacing must be at least 10 cm. The boxes are installed in the light or in a dark room. The sprouts are buried so that 1/3 of the sprout remains on the surface. The row spaces are watered with warm water and sprinkled with humus. Sprouts are accepted within 5 days. After 20 days they should be planted in the beds. The row between seedlings should be at least 20 cm, and the row spacing should be 65 cm. It is recommended to plant seedlings in gloomy weather.
The first days after planting, seedlings must be protected from direct sunlight!
Potato propagation through seedlings
Many vegetable growers have learned to grow and propagate new varieties through seedlings. In this case, from several valuable super-elite tubers you can get seedlings for an entire seed plot. After all, from one tuber you get 10-12 sprouts, and the plants grown from them will yield a harvest of 40 tubers (6 kg)!
Potato tubers are first germinated in a box with a nutrient soil mixture.
After two to three weeks, sprouts appear, and when they reach a height of 5-6 cm, they are carefully separated from the tuber along with the roots. Then each sprout is planted in a separate cup or pot. By the time it is planted in the ground, the root system has sprouted and completely filled the entire cup. When planting, potato seedlings along with a lump of earth are taken out of the cup and planted in a hole.
And on the tubers, after large sprouts are separated, new ones soon appear, which are then also separated and planted. If the weather is warm, the sprouts are planted immediately in open ground under a film.
Tuber division
It is necessary to germinate the tubers in the light in a warm room for 21 days. In the upper part of the tuber, the shoots from the eyes appear first, followed by the lower ones. In total, from 12 to 15 shoots grow on one tuber. The tuber must be divided into parts so that each of them has a sprout.
The soil for planting should be prepared in advance. The earth is dug up with a bayonet, unbroken lumps are removed, loosened and leveled with a rake. Dig holes at a distance of 35 cm from each other. You need to add a handful of ash to each hole and mix it with the soil. Plant part of the sprouted tuber in the holes, sprouts up, and sprinkle with soil. Disembarkation must be completed by June 19. Subsequent care includes loosening the soil after rain and removing weeds. Hilling must be done twice.
To avoid late blight, it is necessary to carry out preventive treatment of plants with a 3% solution of Bordeaux mixture before the flowering period.
Landing in the ground
It is recommended to plant light shoots with segments from 5 to 12 cm. Planting begins when the soil temperature is not lower than 10 and is sufficiently well moistened.
Disembarkation stages:
- The seedlings must be broken off, after which it is recommended to treat them with growth stimulants in order for the plant to grow upward. For this purpose, the drug Heteroauxin is used.
- Make furrows in the area with row spacing of 60 to 70 cm, and about 15 cm between bushes. Pour a little water into each furrow.
- Each plant should be placed in a furrow to a depth of 6 to 8 cm so that the sprout is directed downward. Some vegetable growers plant shoots pointing upward, but, according to reviews, the first potatoes are dug up much later than those planted with shoots down.
This method of planting will allow you to obtain a large number of potato bushes, which in turn will lead to high yields with a small amount of seed material. If the potato does not have sprouted segments, then it can be used for cooking or planted as seed, but such a tuber will germinate two weeks later than one grown by sprouting.
Reproduction by layering
Sort out the germinated tubers and prepared for planting, select the largest ones and plant them in prepared holes at a distance of 15 cm from each other. Make the row spacing 40 cm wide. In well-fertilized, sun-warmed soil, sprouts will appear in a week. When the tops grow up to 10 cm from the surface of the ground, the bush must be dug up along with the tuber. You need to dig very carefully so as not to damage the roots.
In hot weather, it is necessary to cover the dug up bushes with a wet cloth or water them with water so that the roots do not dry out. Carefully separate strong sprouts with young roots from the tuber. The sprouts should have several leaves. Seedlings are sorted by size and planted.
Before planting, the soil must be dug up and loosened well. On the eve of planting, you need to water abundantly to saturate the soil with moisture. Then use a hand cultivator to loosen the soil between the rows to a depth of 15 cm, then use a hoe to make furrows along the rows 12 cm deep. Plant seedlings in the furrows at an angle, pointing the tops to the north. The distance between seedlings is at least 15 cm. It is necessary to deepen the seedlings so much that 6-8 cm of green mass remains on the surface.
Water should not be poured into the grooves so that a crust does not form, creating inconvenience for the roots. Watering is carried out between rows.
Further care consists of the following activities:
- watering;
- fertilizer;
- loosening the soil;
- hilling;
- weeding;
- hilling.
The tubers from which the sprouts have been separated must be sprayed with a soda solution, diluted in the following proportions:
- water—1 liter;
- baking soda—5 gr.
Treated tubers must be planted back into the soil. After the second germination, the shoots are broken off again and planted, and the tubers are planted a third time. You can continue breeding further, but this will not be advisable.
How potatoes propagate: features and main methods of propagation
It is not for nothing that potatoes are called the second bread, because in our latitudes it is customary to eat them almost every day.
That is why many farmers and gardeners are faced with an important question - how to propagate it correctly, because the future harvest will depend on the quantity and quality of the seed.
Let's look at the different methods of propagating potatoes and find out how they differ from each other.
Botanical characteristics of potatoes
Potato, or tuberous nightshade, is a perennial tuberous herbaceous plant of the Solanaceae family.
Important! The vegetative parts of potatoes contain the alkaloid solanine, which serves to protect against certain bacteria and pests. Greened root vegetables also contain this poison, so it is better not to eat them or cut off the peel to a depth of at least 1 cm and subject them to long-term heat treatment.
Only its tubers are eaten. Like all nightshades, potatoes are self-pollinating. Plant characteristics:
- the average height of the bush is up to 1 m;
- the length of one shoot is 15–50 cm;
- stem - green, smooth, ribbed;
- leaves are dark green, intermittently unpaired, pinnately dissected;
- flowers - white-pink or with a purple tint, sitting on the top of the shoot;
- fruits are dark green, multi-seeded, poisonous berries about 2 cm in size;
- tubers - swollen buds on the underground part of the stem;
- the pulp of the tubers is dense, starchy, white, creamy or yellowish;
- tuber peel - a thin layer of cork tissue;
- The ripening period for tubers is August-September.
Basic methods of reproduction
Potatoes can be propagated in several ways - sprouts, tubers, layering, cuttings, seeds and meristems. Let's look at each method in more detail.
Reproduction by layering
With this method, the sprouts are not cut from the tuber, but remain on it until the seedlings are ready. Reproduction occurs as follows:
- High-quality tubers germinate in a well-lit place for about 20–30 days.
- Place in boxes with light soil or peat at a distance of 2–3 cm from each other, deepen to 4–6 cm and water generously with clean, settled water.
- The boxes are placed in a warm, well-lit room or greenhouse; seedlings appear on the 8th–9th day.
- About a month after planting, sprouts 5–8 cm high are separated from the old tuber along with the soil.
- The parent tubers are again covered with soil to form fresh cuttings.
Some gardeners prefer to use this method directly in the beds, but this results in much less material for planting.
- Advantages of the method:
- use of tubers of any size;
- the possibility of obtaining a significant number of plants.
- Disadvantages of the method:
- high probability of spreading infection by fungi or bacteria;
- labor intensity.
Cuttings
This technology is used for potatoes that were planted in the usual way. Such plants can no longer be divided into sprouts and eyes, so they are propagated after flowering. Potatoes reproduce as follows:
- When all the flowers on the bushes have opened, several side shoots are carefully cut off from them.
- The tops are removed and cut into cuttings, consisting of part of the stem, a leaf and a bud in its axil.
- Cuttings are disinfected in a solution of potassium permanganate or in any antibacterial agent.
- The cuttings are placed in boxes with clean soil so that the stem lies horizontally and the leaf vertically.
- The cuttings are sprinkled with soil 1 cm deep, with the leaves on the surface.
- The boxes are placed in a warm and bright place, the soil is constantly moistened, preventing it from drying out.
- After about a month, small nodules appear, which are stored for storage until the crop is planted.
- Advantages of the method:
- if the technology is followed, bacteria and fungi are not transferred;
- possibility of growing in boxes or pots;
- low labor costs.
- Disadvantages of the method:
- the inability to estimate in advance the yield of the bush chosen for propagation;
- the need to frequently moisten the soil with cuttings;
- the cutting bears one small tuber; good yield is possible only after a year.
One of the types of cuttings is microclonal propagation of root crops. This method allows you to obtain virus-free plants and subsequently grow healthy planting material. It consists of growing potatoes at high temperatures, after which the apical buds (meristems) are placed in a nutrient medium in glass containers (in vitro) in a special laboratory.
After the sprouts appear, they are planted in a greenhouse or in a special area protected from pests. As a result, tubers appear that are smaller than usual. These “microtubers” are stored at low temperatures and after 1.5 months for six months they can be placed in a warm place to activate germination.
Seeds
The method of propagation by seeds is one of the rarest and is mainly used for valuable, elite plant varieties. Moreover, this method guarantees the absence of transmission of infection from last year’s material. Reproduction occurs as follows:
- From an untouched strong bush, the plant collects seeds enclosed in green berries in the fall.
- The seeds are extracted from the berries, dried naturally and stored in a dry and cool place.
- At the end of winter or early spring, the seeds are sown in prepared boxes with clean soil for seedlings.
- The containers are left in a warm and well-lit place, the soil is periodically watered, the plants are planted and fed, and additional lighting is provided if necessary.
- After 1.5–2 weeks, the first shoots appear, after about another 6 weeks they are transplanted into the ground.
The advantages of the method include the possibility of obtaining elite, healthy material for planting.
- Disadvantages of the method:
- insufficient size of root crops in the first year of development;
- high labor costs.
Features of combining reproduction methods
Combining different propagation methods allows you to use their advantages and increase the volume of seed by almost 10 times. Find out how to prepare potatoes for planting. The combination is carried out as follows:
- Tubers are propagated by sprouts, which are then cut and planted.
- The potatoes are divided into parts so that each has one eye, after which the pieces are planted in the prepared soil.
- When the potato bush reaches a height of 15–20 cm, the method of dividing the bush is used.
- At the end of flowering, propagation is carried out by cuttings.
Existing potato propagation methods make it possible to increase the volume of seed material, and some also guarantee the production of clean, uninfected planting tubers. Regardless of the chosen method of propagating potatoes, the key to success is healthy parent plants and compliance with all planting and care rules.
Source: https://fermer.blog/bok/ogorod/kartofel/vyraschivanie-kartofelya/4709-sposoby-razmnozheniya-kartofelya.html
Cuttings
Propagation by cuttings is one of the common methods of propagation. To do this, you need to choose the strongest bush in the garden. It is recommended to do this at the moment when the bush blooms. The bush is marked and after the flowering period has passed, the tops are cut from the bush.
The cut branches are divided into parts of 4 cm, and each part of the cutting should have 1 leaf. The top leaves of shoots going to cuttings need to be cut off.
To disinfect the cut cuttings, soak them for 4 hours in a weak solution of potassium permanganate. The place for planting cuttings should be shaded. The soil for cuttings should be loose and moist at the time of planting. It is better to plant cuttings on a cloudy day. The distance between cuttings is at least 4 cm, row spacing is 20 cm.
The seedlings are planted without tilting, so that the leaves are slightly sprinkled with soil. After this, the cuttings must be watered and mulched with a thin layer of humus or peat.
After 20 days, tubers will begin to form in the soil, which can be dug up with cuttings after 15 days. Dry the resulting potatoes well, put them in cloth bags and store them until the next season.
Varieties
For cultivation on the site, the following potato varieties are recommended that the Colorado potato beetle likes least:
- Pomegranate
- Crystal
- Lasunok
- Ogonyok
- Loshitsky
- Pace
Results after potato propagation
Taste is very important when growing potatoes for your own consumption on a small scale.
From this point of view, you need to pay attention to the varieties:
- Hope
- Red Dawn
- Zhukovsky
- Blue
While watching the video you will learn about planting potatoes.
Choosing a variety and how to propagate it will become much easier after reading this article.
Noticed a mistake? Select it and press Ctrl Enter to let us know.
Growing potatoes by seeds
The method of growing potatoes from seeds is little known and not popular. Gardeners are accustomed to planting tubers the old fashioned way, so no one thinks about collecting seeds. However, from seeds collected after flowering you can obtain high-quality planting material.
After flowering, green balls are removed from the bushes. Outwardly, they resemble unripe cherry tomatoes. The collected fruits are placed in a dark room until they become soft and light. Next, cut, remove the seeds and wash them thoroughly under running water. Then the seeds are well dried and sown in the soil.
Propagation by seeds is the safest, due to the fact that diseases do not accumulate in the tubers!
Seeds
When potatoes are propagated by seeds, diseases do not accumulate in the tubers. Planting material is renewed and can be used for 5–6 years. Seeds can be collected on your site or bought in a store.
Potato seeds can be collected yourself in the fall or purchased at the store.
- Collect the fruits when the lower part of the stem dries, put them in piles and leave until decomposition begins.
- Fill with water, knead and let sit.
- Drain the water, rinse the seeds and place them on paper; excess moisture will be absorbed into the paper.
- Dry at room temperature.
- Around mid-April, soak the seeds for 24 hours, dry and sow in a box. There is no need to bury the seeds. They should be on the surface of the soil. Moisten the soil and cover with glass, the seeds will germinate in 4 days.
- Pick up the seedlings when the second leaf appears. Fill the pots halfway with soil; you can add more soil.
- Seedlings are grown for about a month; during this time, regularly water the seedlings and fertilize them twice.
- Plant the seedlings in rows according to a 60x30 cm pattern.
- After rooting, the plantings are looked after as usual, watered, fertilized, and loosened.
Video: extracting potato seeds and planting them
Combining propagation methods
Using the combined method of accelerated propagation, 100 kg of planting material can be obtained from 1 kg. potatoes.
The combination is performed as follows:
- Propagation is carried out by sprouts. The sprouts are broken off and planted;
- The tuber is divided into parts according to the number of eyes and planted in the soil;
- When the bush grows up to 20 cm, you need to divide the bush;
- After the end of the flowering period, propagate by cuttings.
List of ways to accelerate potato propagation
Accelerated propagation methods are used if there is little seed material. With traditional propagation, one tuber gives one bush; with potato propagation using the accelerated method, you can get up to twenty bushes. There are several methods for accelerated propagation: potatoes can be propagated by seeds collected independently or purchased in a store, by cuttings, by using potato sprouts for propagation, or by dividing a tuber or bush. All these methods can be applied at home.
Methods of accelerated reproduction also include the meristem method. Reproduction by the meristem method is possible only in laboratory conditions, as it requires specialized equipment and qualified personnel. Meristem is plant tissue that retains the ability to form new cells throughout its life. When separating the meristem, sterile conditions are required. The size of the separated material is 100–300 microns. The plant is grown in test tubes, periodically separating shoots from it for propagation. The plant in the test tube grows and forms microtubers, which are then grown into mini-tubers. To produce tubers that are sold, several more seasons of cultivation take place directly in the field.
The table shows methods of accelerated (tuberless) potato propagation and their brief characteristics.
Brief characteristics of types of rapid reproduction - table
| Reproduction method | The essence of the method | Advantages and disadvantages of the method |
| Seeds | Seeds prepared in autumn are sown in April. The seedlings are planted in the garden bed. The resulting small tubers are used for planting next year. | Potatoes are free from viruses and diseases. The method is labor-intensive. |
| Cuttings, rooting of tops | Cut off the tops of the bush with leaves, place it in Kornevin’s solution for a day, and plant it in sand or soil. The resulting small tubers are used for planting next year. | Improves the quality of planting material. |
| With eyes (sprouts) | Sprouts are broken off from sprouted potatoes, placed in boxes for germination, then the seedlings are planted in open ground | Improves the quality of planting material. |
| By dividing the tuber | Well-sprouted tubers up to 12–15 sprouts 3–5 cm long are cut into pieces and planted in the ground. | A simple way to accelerate propagation, without seedlings. |
| By dividing the bush (layering) | A whole tuber with the maximum number of sprouts is sprouted and planted in the ground. When the bush grows 15–20 cm, each layer is removed from the ground and planted in the ground. | Increases the quality of planting material. |
| Meristem method | The method is based on the fact that a new plant can be grown from a plant cell. The tissues are separated from the plant under sterile conditions, and the tissues continue to divide in vitro in a special environment to form small plants. Shoots are separated from plants and used to produce new plants. | A very complicated and expensive method. Only in laboratory conditions. Obtaining a small plant takes from 4 to 8 months. The possibility of potato becoming infected with a viral infection is excluded. |
Potato stimulating cut
A special cut on the tuber helps to increase the yield. It is recommended to make the incision before germination of the eyes begins. The cuts are:
- transverse;
- ring.
With a transverse incision, the eyes on the tuber sprout in all parts - upper, middle and lower. While during normal germination, in most cases, the eyes located in the lower part do not produce sprouts.
The cut is made perpendicularly on the tuber, deep enough, leaving 1 cm of the tuber uncut. Thanks to this cut, growth nutrients are distributed evenly over all eyes, and as a result, a bush grows with a large number of sprouts.
The ring cut stimulates the appearance of a large number of sprouts. It is performed 1cm deep around the entire circumference of the tuber.
There are two types of ring cut:
- transverse;
- longitudinal.
With a transverse incision, the flow of active substances to the upper part is reduced and redirected to the side and lower parts. As a result, the eyes of the lower and middle parts are activated, and their number on the tuber increases.
With a longitudinal cut, the sprouts in the lower part do not develop, but in the upper part they develop more actively.
To obtain the best result, it is recommended to keep the cut tubers in a warm room with a temperature of +15-19 degrees for a month.
Incisions are made only with a tool disinfected in a solution of potassium permanganate.
Germination
Planting potatoes with sprouts has a number of advantages, in contrast to the traditional method. It is necessary to clearly know this technology in order to reap a good harvest.
If initial planting of seedlings is implied, then germination must begin 30-45 days before planting. If you plant sprouted stems directly into the soil, then vernalization is recommended to begin 20-25 days before planting.
Germination stages:
- sort through potato tubers if they are rotten or show signs of disease;
- place the planting material on shelves or in special containers in one layer in a well-lit room with an air temperature of 15 to 18°C and a humidity of about 93%.
It must be remembered that care must be taken to ensure that the sun's rays do not fall on the tubers. It should also be taken into account that the air temperature in the room did not fall below 10 °C, since the germination process will slow down significantly and the planting of plants on the site may be delayed.
Advantages
The advantages of growing this vegetable using the tuberless method include:
- a small amount of planting material is required (3-5 times less than with traditional planting);
- used for quickly growing elite varietal varieties of potatoes (in 1-2 growing seasons);
- the opportunity to update varieties, since a large number of diseases that affect the tuber are not transmitted through the sprout);
- With the right technology and proper care, high yields are observed.
Flaws
Propagating potatoes from sprouts also has some disadvantages. Therefore, such points also need to be taken into account at the preparatory stage.
- high labor costs, which imply almost individual work with each plant in the garden, so only gardeners can grow potato seedlings, since this method is not suitable for industrial farms;
- it is necessary to take into account the special requirements for the soil on the site and adhere to care recommendations, since potatoes from shoots do not have a sufficient amount of micronutrients, the stems are weak and need well-fertilized soil;
- the necessary conditions should be created so that the potatoes from the sprouts germinate in time.
It is also very important to think through and prepare a place for germinating seedlings. The plant sprout must receive sufficient light, moisture and heat.
Five-year breeding scheme
Propagation system based on clones or growing from seeds:
- 1st year: mini-tubers obtained from healthy plants;
- 2nd year: first field variety renewal from mini-tubers;
- 3rd year: super-super elite (second generation potatoes planted in the field);
- 4th year: super elite (generation obtained after the previous one);
- 5th year: elite (updated 4th generation potato variety).
With the help of accelerated propagation, it becomes possible to increase the yield and improve planting material without special material costs.
Reproduction methods
A good variety of potato that suits the gardener in all respects is quite difficult to find. In practice, long searches do not always end in success.
Sprouted potatoes
Any potato variety should not be grown for more than ten years. It needs to be replaced with another, more stable one.
If you have the opportunity to purchase or receive as a gift at least one tuber of a wonderful new variety of potatoes, there is no need to refuse. From one tuber you can get about two buckets of excellent seed material per season.
Potatoes are a plant from the nightshade family. In its homeland in South America, in a warm and humid climate, it grows as a perennial.
If you conduct an experiment and leave the plant in the soil, then under conditions of a warm winter and large snow cover, it will begin to develop again in the spring.
Such winters are quite rare. Even in European countries with a warm climate, the weather has recently presented not very pleasant surprises in the form of snowfall or frost.
As a perennial, potatoes have not become widespread because their modified roots in the form of tubers are used for food. It is precisely for this harvest that it is planted every year. To harvest, the entire bush is dug up and cannot grow further.
Potatoes can be propagated by vegetative or seed methods. Vegetative method - using a part of the plant.
Seed method - with ripened seeds.
The good thing about potatoes is that they can reproduce in all ways. Parts of the plant suitable for this:
- Roots. It is on the roots that tubers form. They are modified roots.
- Pieces of tubers with eyes are an excellent material for growing potato plants.
- Stem. If you cut off the tops of green stems with leaves from a potato bush, they will take root perfectly. In their place, new shoots are formed, which can also be used for propagating potatoes.
Preparing for potato propagation
This procedure can be carried out up to three times per season. Each bush produces several good tubers. They, in turn, are also used to obtain seed material.
Seeds. Ripened potato seeds are collected in the fall. To do this, you need to leave one potato bush untouched. After the main harvest is collected, the seeds are collected, which are enclosed in green berries. They are dried and small seeds are extracted, which are stored in a dry, frost-free place until sowing.
This method is used quite rarely due to its low efficiency and high labor intensity. For experimenters and gardening enthusiasts, growing any plant from seeds is a real challenge.
It is long and painstaking, but it is quite possible to acquire new varieties using seed propagation.
Most often, seed sowing is used by breeders to develop new varieties. They pollinate one variety with another and get a third, which is then tested for resistance to diseases and weather disasters.
You need to try all methods. It is recommended to use them all within one season for effectiveness. This combination will allow you to grow a sufficient amount of seed material.
Tuber sprout
Potato seeds are sown and germinated at home, so you can start the process even in January with additional lighting. After 10-14 days, the first shoots appear. From the moment they appear until the seedlings are planted in the ground, special care must be taken
Shadow and light potato sprouts
Depending on the conditions of keeping potato tubers, you can get 2 types of sprouts: shadow and light. What are their differences? Shadow sprouts (white) appear on tubers that are kept in a dark room, and light sprouts (green), respectively, in the light.
In principle, it makes no difference exactly how you germinate the tubers. The result will be positive in any case. However, shady sprouts are more fragile, they need to be handled carefully, and in bright light and when the air temperature rises, they quickly wither, deteriorate and lose their viability. Light sprouts are stronger and less susceptible to damage during planting than shadow sprouts. Therefore, novice gardeners should pay attention to the light method of obtaining sprouts.

