The topic of this article is quite specific. Yes, it will talk about insulation; but about the insulation of bee colonies wintering in harsh climatic conditions. We will find out how to insulate bees for the winter and what typical mistakes should be avoided.
The source of heat in the hive is the bees themselves. The beekeeper's task is to reduce his losses.
Choosing a wintering site
For wintering bees, you can choose any room that has enough space for several hives. The main thing is to observe the following conditions in the bees’ winter home:
- Low humidity;
- Air temperature inside and outside the hive;
- No noise;
- Lack of light.
In the garage
If you want to leave the apiary in the garage during the winter, take care of sound insulation. Chances are there are neighboring garages nearby. This means that cars will regularly pass near your box. They bother insects. Insects eat more honey and overload the intestines. Families become weak by spring.
Insulate the garage with foam or mineral wool. Thermal insulation must be done inside and outside. Seal the cracks. Install an electric convector and maintain the temperature at 6-8 degrees above zero.
Make a vapor barrier. Cover the room with plastic film.
In the cellar
To winter bees in a basement or cellar, try to choose a deep room. But if it is almost at ground level, then you will have to insulate the ceiling and walls. Don't forget that there is usually high humidity underground.
At high humidity, bee products turn sour and mold forms. The winged workers are dying of hunger. Additionally, mold weakens insect organisms. To reduce the amount of moisture in the cellar, it is necessary to drain it before leaving the apiary in it. Make a vapor barrier and provide air exchange.
In the barn
Cover the inside of the room with fiberboard or chipboard to prevent light from entering. Insulate the floor with sand, dry leaves or dense flooring. Make insulation so that it can be removed at the right time. During frosts, insulate the room additionally, and during a thaw, remove the thermal insulation.
Advice! Enter the bees' winter home as rarely as possible.
On the street
If you leave insects outside during the winter, place the hives close to each other in a row. This way the wind will not blow on their sides. To prevent the houses from being blown in front and behind, place them on one side next to bushes or a fence, and install a barrier opposite the other.
To overwinter bees in the wild, you need to properly insulate the hive. Wintering of bees outside can take place on bees or in multi-hull hives. But read about this in the next section.
In omshanik
There are three types of omshaniks: above-ground, semi-underground and underground. The best option is to use an underground room. The temperature is stable there and light does not penetrate. You just need to make sure there is good ventilation.
General concepts
Why do you need insulation?
It’s worth making a small lyrical digression. Many beekeepers (including domestic ones; in particular, those living in extremely harsh climatic conditions) believe that the best scenario from the point of view of family health is wintering bees without insulation.
By the way: their argument can hardly be called unconvincing. If a hive survives the winter with virtually no loss of bees, this is a strong argument in favor of the beekeeper's position.
However, the vast majority of hive owners still prefer to take care of insulation (Find out also how to insulate an attic).
Several reasons are mentioned:
- Honey output . The lower the temperature inside the hive, the more energy the bees spend on stabilizing the temperature of the club (this is the name given to insects clustered tightly together to save heat). Energy, of course, is not taken out of thin air: bees eat more, thereby reducing the average annual useful yield of the product.
- A stronger family that recovers faster after wintering . As already stated, this argument is often disputed.
- Increasing the life expectancy of bees . The argument is directly related to the previous one and is thus also ambiguous.
If we discard dubious arguments, the only undeniable argument in favor of insulation remains the first: in a warm hive, bees eat less honey.
You can't argue with the numbers.
Problems
When insulating, you need to maintain a delicate balance between several extremes:
- It is believed that some excess carbon dioxide is beneficial for bees during the winter. However, to breathe they need oxygen, which means ventilation.
- In this case, excessive ventilation will create drafts in the hive. And in this case, a situation is possible when the natural thermoregulation mechanism of the hive cannot cope with the excess heat outflow. The family may die.
- Finally, the main thing: the ventilation of the hive and the insulation material must ensure the removal of water vapor. When bees breathe, like any other creatures, they increase the humidity in the air. Excessive moisture increases the thermal conductivity of the environment and again forces the bees to spend more energy on heating; what is much more serious is that dampness can lead to illness and death of a large number of bees or even the entire family.
The best hives for wintering
Comparing the Dadanovsky hive and the sun lounger as a place for wintering insects, beekeepers are more inclined to the second option. Wintering of bees on bees is dry. Such houses have good ventilation. There is never enough death.
If you are going to use wooden hives for wintering, then you will have to insulate them. A convenient option for wintering bees outside without insulation are hives made of polystyrene foam. There is no need to install warm side blocks and pillows in them. The material does not rot.
Polystyrene foam maintains a stable temperature in the houses. The air inside does not heat up or cool down, despite the fact that winter in central Russia is characterized by a large temperature difference.
Furry workers wintering in polystyrene foam houses begin their spring migration 2 weeks earlier. Families approach the honey harvest period in strong condition.
PPS hives require increased ventilation. Otherwise, the temperature in the house will be higher than normal. During wintering, the bees are located tightly in a ball. If the hive is warmer than necessary, then the insects crawl away from each other and become more active. They spend energy faster and eat more honey to replenish it. Firstly, the family will weaken by spring due to heavy loads on the intestines. Secondly, it makes sense to save honey.
The material does not absorb moisture, but all water flows to the bottom. Make a hole in the bottom and leave it open until spring. The entrance should be open 5 cm.
How bees overwinter in a hive in an apiary
During the wintering process of bees of autumn generations, the body accumulates nutrients in the form of proteins, fats, and glycogens. The content of free fluid decreases, the type of metabolism of the body changes.
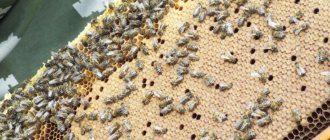
In autumn, with the onset of cold weather, bees form a winter club. At first it is quite loose and can disintegrate under the influence of positive daytime temperatures. Resilience comes with cold weather. The density of the club increases and lasts throughout the cold period.
Wintering bees in a hive involves forming a winter club in order to save food and maintain the required temperature.
Top dressing
For one family in winter it is required to leave 20-25 kg of honey. The amount of honey for wintering depends on the air temperature inside the hive. If it remains normal without fluctuations, then the sweet mass is consumed optimally. When the temperature rises or falls, bees eat food faster.
You should not give honey and honeydew to insects. If they consume such food, substances that cannot be digested will form in the stomach. The insects will die.
Check the quality of honey. Pour a liter of quicklime into a 2-liter jar, fill the rest with water. Let the solution settle. In another container, mix the treat with water, and then pour the mixture with lime into it. If flakes appear, then such honey should not be given to bees.
In addition to honey, insects are given sugar syrup, kandi and potato mixture in winter. To prepare the syrup, boil a liter of water and add 2 kg of sugar. Stir until a viscous mass forms.
We prepare honey kandi from powdered sugar, honey, water and acetic acid. At home, boil 2.5 kg of honey to a temperature of 55 degrees to kill the microbes in it. Cool and mix the bee treat with powdered sugar. Add sugar gradually. In total you need to add 7.5 kg. Pour 200 ml of water and 20 ml of vinegar into the dough.
To make food with potato juice, you first need to prepare sugar syrup. Pass the peeled potatoes through a meat grinder, blender or grater and extract the juice from them. For one liter of sugar syrup, add 60 ml of juice.
Checking the habitat of bees in winter
If the wintering of insects is organized in compliance with all the rules, there is no need to check and disturb the bees. In practice, most beekeepers prefer to periodically visit hibernating insects. This is done in compliance with certain rules:
- To look inside the hive, remove the lid. This work is done with great care, without making unnecessary noise.
- The weather during testing should be warm and without wind. At the same time, it may be cloudy so that the bees do not want to fly around.
This video shows how to inspect bees in winter:
In order not to open the lid of the house, you can determine what sound is coming from the hive. If it is quiet, then everything is fine in the hive, so the bees should not be disturbed.
Activities before wintering
There are a number of necessary measures that are recommended to be carried out before wintering. Assembly, insulation of hives, ventilation design and insect treatment.
Assembling nests
There are 3 ways to assemble a bee nest:
- Double-sided. Insert 8 frames into the hive. Fill the central frames with 2 kg of honey, the outer ones with 3 kg, and the ones between them with 2.5 kg of honey in each frame.
- Unilateral. Add 3 kg of honey to the first frame; in the second – 1.5 kg; in the third, fourth and fifth – 2 kg each; in the 6th – 2.5; at 7 and 8 – 3 each.
- Beard. This method involves economical consumption of honey. Add 2 kg to the central frames. The closer the frames are to the edge, the less honey they should contain.
In multi-hull hives, store food in the upper housing and insects and brood in the lower one.
Warming the hive
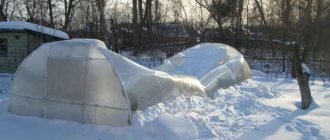
There should be a 50 cm layer of snow on the roof of the hive. It provides thermal insulation.
When insulating, it is necessary to line the bottom, side walls and top of the hive with heat-insulating material. For this purpose, use polystyrene foam, polyurethane foam, dense polyethylene or straw, fiberboard. If you will be the last to insulate, coat the material with drying oil. Do not insulate the hive too much so that the bees do not get excited.
Ventilation
Ventilation is carried out through tapholes. In polystyrene foam hives, air circulation is ensured, in addition to the entrance, by a hole at the bottom. Firstly, it removes water from the hive. Secondly, a house made of PPS needs additional ventilation to maintain the temperature at normal levels.
The entrances must be covered from snow or rain. In frosty weather, the summerhouse becomes covered with frost, and ventilation deteriorates. In this case, open the tapholes wider or make a hole in the roof.
Insect treatment
After collecting the honey, insert the formic acid bags into the frames. In multi-hull hives, one bag weighing 30 grams is stored for a week. This will protect flying workers from ticks.
Insulating the hive with foam plastic
Foamed polystyrene foam is the most affordable material. There are a variety of foam variations on the market, the difference between which lies in the raw material base and the production technologies used. Finnish foam plastic is considered the most suitable option for insulating hives. Its composition does not contain toxic substances, and the slabs are easy to process.
The main advantage of the method is the reduction of additional work on arranging warm blocks for sidewalls, canvases and pillows for nests. However, when choosing material, you should take into account that insects become more active in a warm and humid environment, so they need to increase the bait (up to 30 kg for the winter season).
Installation is the process of creating a frame that matches the parameters of the bee house. Foam boards are subsequently attached to it. It is recommended to seal the seams with sealant or foil tape.
Tips and tricks
Preparing bees for winter begins with checking the brood and queens.
Inspect colonies for fertile queens. The hive must have at least 4 frames completely filled with brood. If this is not enough, take frames with eggs and larvae from other hives.
Replace old honeycombs. If they are dark, filled only with drones, or light cells in which insects have not yet hatched, the combs need to be replaced. If there is brood in such cells, then the frames with them should be placed on the edge.
The furry workers must fly over before the weather turns bad. Until approximately September 25th. If they fly, they will not cleanse the intestines. Then they will defecate in the hive. This will lead to mass death.
Young individuals also fly around before wintering. The queens must lay eggs a month before the last flight. If they have collected enough nectar by this time, they will make brood. If the queens have not taken bribes, then feed them.
If the weather is good in October, allow the flying workers to fly away at this time. You can induce insects to fly by knocking. The later they empty their intestines of feces, the better they will winter.
Move the apiary closer to honey plants. Then the bees will provide themselves with a sufficient amount of food supplies and raise offspring by spring.
To prevent mice from getting into the hive, place glass on the entrances. Rodents' paws will slip when trying to get inside. Cover the top of the hive with a fine mesh net.
Insulating the hive with hay
An excellent and affordable way to insulate bee houses is to use compacted blocks of hay or dry leaves. The formed cinder blocks are placed tightly on all sides of the hives. The surface is covered with a tarpaulin, the corners of which are fixed with guy ropes into pegs previously driven into the ground. The disadvantage of such insulation is the voids that cannot be avoided. In addition, rodents, which pose a danger to bees, do not mind warming up in such a shelter. Cold bridges are easily eliminated by a protective box that covers each piece of evidence. The structure can be made from moisture-resistant thick plywood or OSB sheet.
Omshanik
A popular solution that will allow bees to winter in warmth is to move the hives to the winter hut (omshanik) for the entire cold season. It is an insulated above-ground, semi-underground or completely underground room with ventilation.
Bees overwinter in a specially built shelter with a constant temperature.
It is optimal to build an underground omshan with a backfill roof at ground level. Why? You see, the soil temperature is noticeably below the freezing point, stable all year round and amounts to +8-12 degrees.
Taking into account the inevitable heat losses through the roof and the top of the walls, the actual temperature in the underground garden in the temperate climate zone will be about zero at -30 outside. Agree that without any heating costs this is quite good.
The pit depth is usually approximately 2.5 meters; the size depends on the number of wintering colonies.
Here are approximate instructions for building an underground winter hut with your own hands.
We tear off the pit and level the bottom. There is no need to concrete it; it is enough to simply trample the soil, which will inevitably happen during the construction process. At the same stage, the staircase leading to the underground omshanik comes off.
It is more convenient to immediately remove the soil from the site. Especially if an excavator is used for digging: it can load the excavated soil directly into the body.
- We build formwork from boards or OSB around the perimeter of the pit with a distance of about 20 centimeters from the edges of the pit. Don't have enough material? You can concrete the walls one by one, in sections, moving the formwork after the concrete has hardened. Of course, in this case the time spent will increase significantly.
- Reinforce future walls. Here we don’t need much strength, so we can simply lay old pipes, steel rods and similar debris between the formwork and the wall - just to create a semblance of a rigid frame.
- The next stage is pouring the walls. Concrete is mixed with a sand to cement ratio of 3:1 – 4:1; crushed stone, large stones and bricks can and should be used as filler. They will reduce the consumption of mortar and make the walls more durable.
- The steps of the stairs are concreted. Formwork is assembled for each; Before pouring, the soil is filled with at least 5 centimeters of sand, which is carefully compacted.
- The roof formwork is a solid panel supported on supports and covered with polyethylene. At this stage, vertical sections of pipe are laid into the formwork, which will leave holes in the concrete for ventilation.
Here, reinforcement must be taken seriously: corrugated reinforcement is laid in the form of a grid with a cell of 20x20 centimeters in two layers, in the lower and upper regions of the thickness of the future floor. There must be a distance of at least 15 millimeters between the reinforcement and the surfaces of the slab. The reinforcement is fastened together with binding wire.
The finished formwork with reinforcement is filled with a solution with a cement to sand ratio of 1:3.
- The concrete, which has gained strength within a couple of weeks, is covered with waterproofing (usually ordinary roofing felt) and insulated with any available material - from polystyrene foam to sawdust. Hygroscopic insulation, of course, is covered with a waterproof film to protect against precipitation.
- Doors are hung, lights are installed, and so on. A vestibule is constructed at the exit from the omshanik. Material - any available material, from bricks to boards left over from the formwork. To protect against precipitation, galvanization, ondulin or ordinary roofing felt is used.
Tambour of an underground omshanik.
There is one subtlety associated with transporting hives to the omshanik: when moving, you should not shake or hit the hive. When hit, the club may fall off the frame; he won't sit back. In such cases, the family dies completely.
When wintering in the omshanik, both the upper and lower entrances should be open. Attempting to restrict ventilation when the temperature is high enough will result in increased humidity and, most likely, death of the bees.
Mortality in winter
There are many reasons for the death of bees in winter. They may be:
- feeding insects - if there is a shortage of food, there is a risk of death. Therefore, it is not worth saving on them;
- poor ventilation - when placing individuals in a nest with poor ventilation, mold and dampness form, and this cools the hive. Insects consume more food to stay warm. As a result, the bees' intestines become overfilled with feces, and honey fermentation begins;
- weak family - so that such a family does not die, families are united. This helps keep the temperature stable;
- diseases – a popular disease is varroatosis. Infected insects behave very excitedly. As a result, they eat more, wear out and die.
This is interesting. Is it profitable to engage in beekeeping?
Features of feeding
The well-being of the apiary, as well as future honey production, depends on feeding. Beekeepers themselves determine the amount of food for their bees.
Bees are fed:
- Honey.
- Honey full.
- Kandy.
- Syrup.
- Protein feeds.
Syrup is considered the most economical option. This type of feed is the optimal method to preserve the apiary.
There are no harmful additives in the syrup. It is worth remembering that it also does not contain protein. But such feeding reduces the likelihood of spring death.
Video: wintering bees outside.
Material advantages
Polyurethane foam for the manufacture of hives began to be used not so long ago, only about 30 years ago. But already approximately 50% of all bee houses existing in different countries of the world are made of this material. This is primarily due to the numerous positive characteristics of polyurethane foam, such as:
- Unlike wood, this synthetic material does not rot;
- Mold and other types of fungi do not form on its surface;
- For hives, polyurethane foam provides high thermal insulation characteristics, which gives the bee colony a better chance of surviving adverse weather conditions and sudden temperature changes;
- The mechanical properties of the material are quite high, which ensures long-term operation of the hive without its destruction or changes in design parameters;
- Bee houses made of polyurethane foam are environmentally friendly, but only if the material is of high quality, which the beekeeper must ensure when purchasing such a product;
- High sound insulation will allow the family to quietly conduct their activities without the formation of irritating factors;
- Easy to care for;
- The low weight of the structure makes it easy to move polyurethane hives when moving the apiary to another place;
- The spacious volume of hives made of polyurethane foam allows you to accommodate large families;
- During honey collection, such a structure is quite easy to dismantle, which makes the beekeeper’s work easier;
- Thanks to the modular system for organizing the finished product, it is easy to adapt the house to a small or large family. This is done by simply replacing individual elements, which allows you to make a larger or smaller hive.
Naturally, all of the above properties are undeniable advantages of polyurethane foam used as a material for the manufacture of bee houses. But, before purchasing such a product for yourself or making it yourself, it is necessary to analyze its possible effect on honey, as well as analyze the shortcomings and features.
